Printing images on CDs is a great way to preserve your memories or create customized gifts. Whether you're a photographer, an artist, or just someone who loves to organize personal photos, printing your images on a CD can be a practical and creative solution. It allows you to keep your photos in a physical form, which is often more reliable than digital storage options. Plus, printed CDs can make for unique keepsakes or promotional material. In this guide, we’ll walk you through the basics of printing images on CDs and why it might be the right choice for you.
Why Print Images on CDs?

There are several reasons why you might want to print images on CDs. Let’s explore some of the main advantages:
- Long-Term Storage: Unlike digital files, which can be lost due to computer crashes or cloud service issues, CDs provide a tangible backup that can last for years when stored properly.
- Easy to Share: CDs can be easily shared with friends, family, or clients. Just pop it into any computer or CD player, and they can view the images without needing special software or devices.
- Personalized Gifts: A custom-printed CD can make a thoughtful gift. You can design the CD with your photos or artwork, adding a personal touch that is both functional and sentimental.
- Professional Presentation: For photographers or artists, a printed CD with your work can create a polished, professional presentation. It’s an excellent way to present portfolios or promotional materials to potential clients.
Printing images on CDs is a simple process that opens up a variety of possibilities, whether for personal use or professional purposes. It offers convenience, creativity, and reliability all in one package.
Also Read This: Understanding the Correct Dimensions for Your Dailymotion Channel Banner Image
What You Need to Print Images on CDs

Before you start printing images on CDs, there are a few essential items you’ll need to make the process smooth and successful. Here’s a list of everything required:
- CD Printer: Not all printers can print directly onto CDs. You’ll need a special inkjet printer designed for this task. Some popular models are made by Epson, Canon, and HP.
- Printable CDs or DVDs: Regular CDs won’t work for this purpose. You need discs with a special coating that allows ink to adhere properly. Look for "printable" or "hub printable" discs.
- Printing Software: Many printers come with their own software to help you design your CD image. However, you can also use programs like Adobe Photoshop or Canva to design the image you want to print.
- CD Tray or Holder: If your printer doesn’t have a built-in CD tray, you will need a special holder to position the CD correctly for printing.
- High-Quality Ink: The type of ink you use matters. Make sure you have ink that’s compatible with your printer and provides high-quality color reproduction.
With these tools in hand, you're ready to start printing your images onto CDs. The process is fairly straightforward, but having the right equipment will ensure the best results and avoid any frustration along the way.
Also Read This: How to Upload Your Pics onto Depositphotos
Step-by-Step Guide to Printing Images on CDs
Printing images on CDs is a straightforward process, but getting it right involves careful attention to detail. Let’s walk through the steps to ensure your printed CDs turn out just the way you want.
Step 1: Prepare Your Printer and Software
First, ensure your printer is compatible with CD printing and that you have the right software installed. Many printers come with their own printing software, but you can also use third-party options like Photoshop or Canva to design your CD artwork.
Step 2: Design Your Image
Before printing, make sure you design the image to fit the printable area of the CD. We'll cover this step in more detail in the next section, but ensure your design includes any text, logos, or artwork you want on the disc.
Step 3: Load the CD into the Printer
Depending on your printer model, you will need to either place the CD in a special tray or slot. Make sure the CD is positioned correctly to avoid printing outside the printable area.
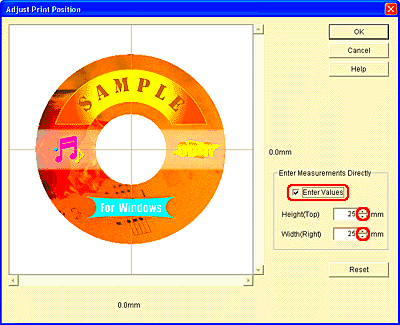
Step 4: Adjust Print Settings
Adjust your print settings to CD printing mode in the printer software. This ensures the printer applies the right amount of ink and aligns the image properly.
Step 5: Print the Image
Once everything is set up, hit the print button. Keep an eye on the process to make sure everything is printing smoothly and without any errors.
Step 6: Let the Ink Dry
After printing, let the CD dry completely to avoid smudging. Allow it to sit for at least 15 minutes before handling it.
And that's it! With just a few easy steps, you can print your images on CDs with professional results. This guide should give you the confidence to start printing your own custom CDs.
Also Read This: Don’t Break the China on Dailymotion Watch Now
Choosing the Right Printer for CD Printing
Choosing the right printer is crucial for achieving high-quality CD prints. Not all printers are equipped to print directly onto CDs, so it’s important to pick one that is designed for the task. Here are a few factors to keep in mind when selecting a printer for CD printing:
- CD Printing Capability: Not all inkjet printers can print onto CDs. Look for printers that specifically mention CD or DVD printing, as these are equipped with a special tray or holder for discs.
- Print Quality: The print resolution of your printer is important for achieving sharp, vibrant images on your CDs. Aim for a printer that offers at least 1200 x 1200 dpi for the best results.
- Ease of Use: Look for printers with user-friendly software. Many models come with CD design software that helps you create and print your designs with ease.
- Ink Type: Choose a printer that uses high-quality, durable ink. Dye-based inks are popular for printing on CDs, as they provide vivid colors and are resistant to fading over time.
- Cost: While you don’t need the most expensive printer on the market, it’s important to invest in a model that offers good print quality and durability without being overly costly.
Some popular printers for CD printing include models from brands like Epson, Canon, and Brother. These printers often come with special trays and software designed specifically for printing onto CDs and DVDs. Do some research on the models that fit your budget and needs, and you’ll be ready to start printing in no time!
Also Read This: Explanation of Adobe Stock’s Symbol
Designing the Image for the CD
The design you create for your CD is just as important as the printing process itself. A well-designed CD can make your project look professional and visually appealing. Let’s break down the steps to design the perfect image for your CD:
Step 1: Choose the Right Dimensions
The printable area of a CD is limited, so it’s essential to use the correct dimensions for your design. Typically, the printable area for a CD is 4.6 inches in diameter. Use software like Adobe Photoshop, Illustrator, or free programs like Canva to create your image with these dimensions in mind.
Step 2: Select the Right Resolution
For the best print quality, your image should be created at a high resolution. Aim for 300 dpi (dots per inch) for crisp, sharp details. Low-resolution images may appear blurry or pixelated when printed.
Step 3: Keep It Simple
Designing a CD is a small canvas, so it’s important not to overcrowd it with too much text or detail. Stick to simple graphics, logos, and a clear title. If you include text, make sure it's legible even when scaled down.
Step 4: Consider the Colors
Since CDs are often viewed under varying light conditions, choose colors that will look good in both bright and dim lighting. Contrast is key for visibility. Dark text on a light background or vice versa often works best.
Step 5: Add Personal Touches
Don’t forget to make your design personal! Whether it’s a photo of your favorite moment, a logo for your business, or a custom graphic, adding your personal touch will make your CD stand out.
Once your design is ready, save it in a high-quality format like PNG or JPEG, and you’re all set to start printing! A well-designed CD can leave a lasting impression and make your project even more special.
Also Read This: Alamy vs Shutterstock: Choosing the Right Platform for Selling Photos
Common Issues and Troubleshooting Tips
Printing on CDs can be a straightforward process, but sometimes things don’t go as planned. Whether you're dealing with poor print quality, misalignment, or ink smudging, don’t worry—most issues have simple solutions. Here are some of the most common problems you might face and how to troubleshoot them:
Issue 1: Poor Print Quality
If your prints appear blurry or pixelated, it’s often due to low resolution or incorrect printer settings. Here’s how to fix it:
- Check the Resolution: Make sure your design has a resolution of at least 300 dpi (dots per inch). Low-resolution images may not print clearly.
- Use the Right Print Settings: Ensure your printer is set to the highest print quality, which can often be adjusted in the printer's software or settings menu.
- Clean Printer Heads: If the print quality still isn’t up to standard, dirty printer heads could be the problem. Run a cleaning cycle from your printer’s maintenance menu.
Issue 2: Misalignment of the Image
If your design isn’t centered correctly on the CD, check the alignment settings in your printer’s software. Some printers require you to manually adjust the tray or CD holder for precise alignment. Make sure your printer supports CD printing and is equipped with the correct tray for optimal positioning.
Issue 3: Ink Smudging
Ink smudging usually happens when the print is still wet. Avoid touching the surface of the CD immediately after printing. Let it dry for at least 15-20 minutes before handling it.
By following these troubleshooting tips, you should be able to resolve most common printing problems and achieve professional-looking CDs every time.
Also Read This: How to Take a High-Quality Still Image from Video
How to Store Printed CDs Properly
Once you’ve printed your images on CDs, it's important to store them properly to ensure their longevity. Improper storage can lead to damage like scratches, fading, or data corruption. Here are some tips to store your printed CDs safely:
1. Keep Them in Jewel Cases or Sleeves
Store your CDs in protective cases, such as jewel cases or soft fabric sleeves. These cases protect the printed surface from dust, dirt, and physical damage like scratches.
2. Avoid Exposure to Direct Sunlight
Keep your CDs away from direct sunlight or heat sources. UV rays and high temperatures can cause the ink to fade and may even damage the CD’s data layer.
3. Store in a Cool, Dry Place
Humidity and moisture can cause discs to warp or become unreadable. Store your CDs in a cool, dry environment, away from any areas with high humidity, like bathrooms or basements.
4. Avoid Stacking CDs Directly on Top of Each Other
Never stack your CDs without a case, as this can lead to scratches. If you need to stack them, make sure each CD is stored in its own protective sleeve or case to avoid pressure on the printed surface.
5. Label Carefully
If you plan on labeling your CDs manually, use a soft, non-abrasive marker. Avoid using adhesive labels, as they can peel off over time and damage the CD.
By following these storage tips, you can preserve the quality of your printed CDs for years to come, ensuring your images stay vibrant and your data remains intact.
Also Read This: Discovering Free Stock Photos on Adobe.com
FAQ
1. Can I print on any CD?
No, you must use printable CDs or DVDs that have a special surface coating designed to absorb ink. Regular CDs will not work for printing.
2. Do I need a special printer to print on CDs?
Yes, you’ll need an inkjet printer that supports CD/DVD printing. These printers come with a special tray or holder to align the CD for proper printing.
3. How long does it take for a printed CD to dry?
It usually takes about 15-20 minutes for the ink to dry completely, depending on the printer and the type of ink used. Avoid handling the CD during this time to prevent smudging.
4. Can I print on both sides of the CD?
It is possible to print on both sides of a CD, but you’ll need to ensure that the disc is dry before printing on the other side to avoid smudging the ink.
5. How do I ensure my CD prints correctly on the first try?
Make sure you design your image with the correct dimensions and resolution (300 dpi) and that the printer is properly aligned. Always do a test print on regular paper to check for any alignment issues before printing on a CD.
6. What’s the best way to store printed CDs?
Store printed CDs in protective cases, away from sunlight, heat, and humidity. This will help protect both the printed surface and the data on the CD.
Conclusion
Printing images on CDs is a simple and effective way to preserve and share your memories, portfolios, or creative projects. By following the right steps, choosing the appropriate printer, and designing your images with care, you can create professional-quality CD prints. Whether for personal use or business purposes, printed CDs offer a reliable, tangible backup that can be shared and enjoyed for years to come. With the proper tools and techniques, you can achieve vibrant, lasting prints that are both functional and visually appealing. So, gather your materials, follow the steps outlined, and start printing your images on CDs with confidence!

 admin
admin


