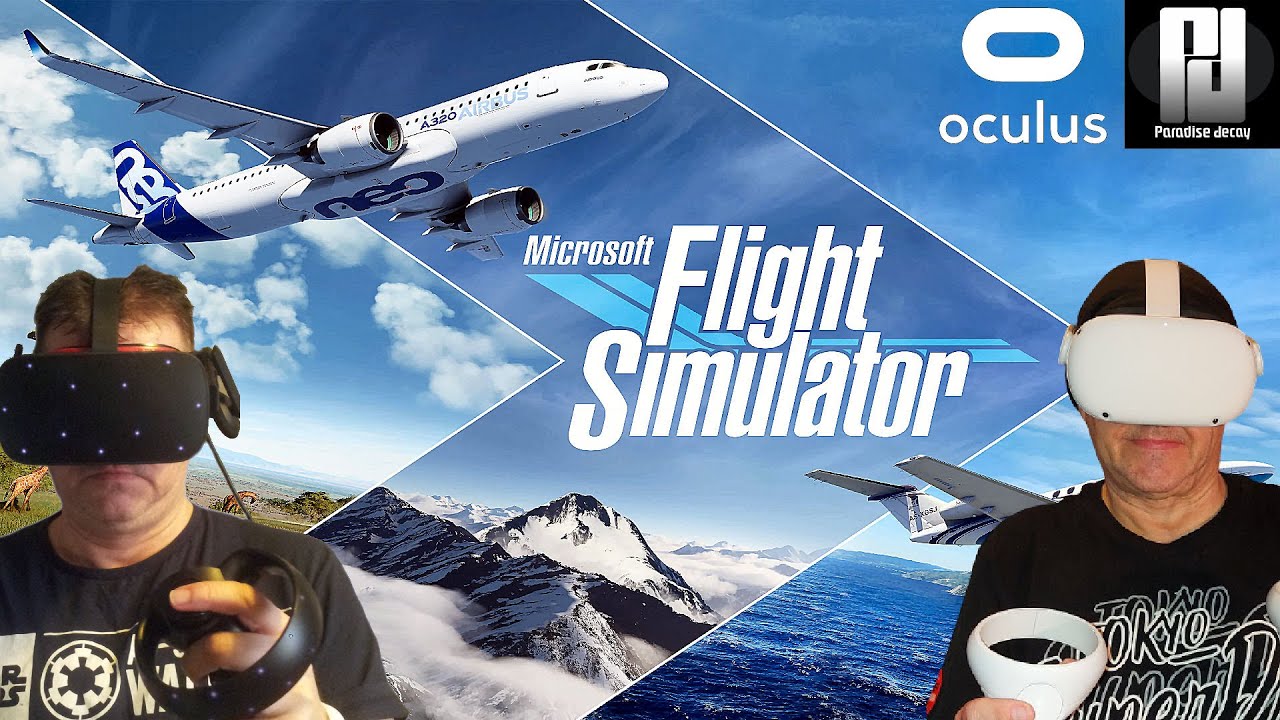
Oculus Odyssey: Playing Microsoft Flight Simulator on Oculus Quest 2
By: HD Stock Images
August 3, 2024
616
Introduction to Oculus Odyssey and Microsoft Flight Simulator
The Oculus Odyssey is a powerful VR headset known for its immersive experiences, and when paired with Microsoft Flight Simulator, it offers a captivating flight simulation experience. Microsoft Flight Simulator is renowned for its realistic graphics, detailed aircraft, and expansive virtual world. This combination of high-quality VR hardware and sophisticated flight simulation software provides a uniquely immersive way to experience the thrill of aviation.
In this blog post, we'll explore how to set up and optimize Microsoft Flight Simulator on your Oculus Quest 2, ensuring you get the most out of your virtual flight experiences. From installation to troubleshooting, we will guide you through the entire process so you can enjoy a seamless and engaging flight simulation adventure.
Why Microsoft Flight Simulator is Ideal for VR
Microsoft Flight Simulator is a prime candidate for virtual reality (VR) due to its stunning graphics, realistic flight dynamics, and expansive virtual world. Here’s why this flight simulator excels in a VR environment:
Realistic Graphics: The simulator offers incredibly detailed landscapes, weather effects, and aircraft interiors, all of which become even more immersive in VR. The level of detail is so high that it provides an authentic flying experience, making you feel as though you are actually in the cockpit.
Immersive Experience: VR technology enhances the sense of presence. When using a VR headset like the Oculus Quest 2, you get a 360-degree view of your surroundings, allowing you to look around the cockpit and outside the aircraft with natural head movements. This immersion is crucial for experiencing the full depth of Microsoft's Flight Simulator.
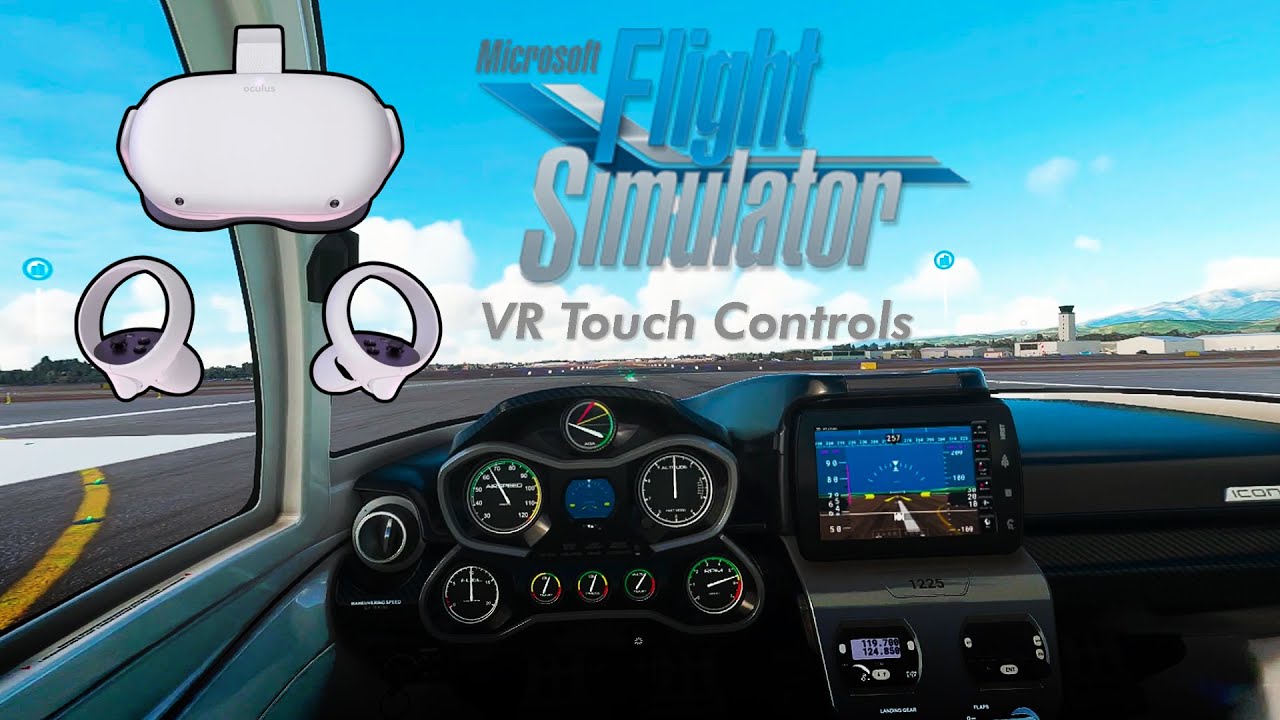
Intuitive Controls: The simulation includes a variety of control options and cockpit instruments that are more intuitive and accessible in VR. The ability to physically reach out and interact with controls as if you were actually in the aircraft greatly enhances the realism of the flying experience.
Expansive Virtual World: Microsoft Flight Simulator features a vast and detailed virtual world with a global flight map. This enormous landscape benefits from VR’s expansive view, allowing you to enjoy the scenery and details from a first-person perspective, which is not possible on traditional monitors.
Key Features Enhancing the VR Experience
Feature
Description
High-Resolution Textures
Offers clear and detailed visuals, enhancing the realism of both the cockpit and the environment.
Dynamic Weather System
Provides real-time weather changes, adding to the immersive experience as you navigate through different weather conditions.
Interactive Cockpit
Allows you to interact with controls and switches directly, mirroring real-life aircraft operations.
Global Flight Map
Enables flights across the globe with real-world geography, making every flight a new adventure.
These features make Microsoft Flight Simulator not just a game, but a comprehensive and immersive flying experience, particularly when experienced through the lens of VR. The combination of detailed graphics, intuitive controls, and an expansive virtual world positions it as one of the best VR applications available today.
Setting Up Your Oculus Quest 2 for Microsoft Flight Simulator
Setting up your Oculus Quest 2 to enjoy Microsoft Flight Simulator involves a few key steps to ensure a seamless VR experience. Below is a detailed guide to help you through the process:
1. Check System Requirements
Before setting up, make sure your PC meets the minimum requirements to run both Microsoft Flight Simulator and VR applications. Generally, you will need:
Processor: Intel i5-4460 or AMD Ryzen 3 1200
Memory: 8 GB RAM
Graphics Card: NVIDIA GTX 970 or AMD Radeon RX 580
Storage: 150 GB free space
2. Install Oculus Software on Your PC
To connect your Oculus Quest 2 to your PC, you need the Oculus app. Follow these steps:
Open the Oculus app and follow the on-screen instructions to set up your Oculus Quest 2.
Ensure your PC and Oculus Quest 2 are connected to the same Wi-Fi network.
3. Connect Oculus Quest 2 to Your PC
For optimal performance, you can use a USB cable or Oculus Link. Here’s how:
Oculus Link Cable: Connect your Oculus Quest 2 to your PC using a high-quality USB-C cable. Make sure your cable supports data transfer.
Wireless Connection: Alternatively, use the Oculus Air Link feature for a wireless connection. Ensure both your PC and Oculus Quest 2 are on the same Wi-Fi network for best results.
4. Configure Oculus Settings for VR
Adjust the settings to enhance your VR experience:
Open the Oculus app on your PC and navigate to Settings > Devices > Quest 2.
Ensure Air Link or Link Cable is enabled, depending on your connection method.
Adjust the Graphics Quality settings to balance performance and visual quality according to your PC’s capabilities.
5. Install Microsoft Flight Simulator
Install the game via the Microsoft Store or Steam:
Microsoft Store: Open the store, search for Microsoft Flight Simulator, and click Install.
Steam: Visit Steam, search for Microsoft Flight Simulator, and follow the installation prompts.
6. Launch and Configure the Game in VR
Once installed, launch Microsoft Flight Simulator and set up the VR mode:
Open the game and go to Options > General > VR Mode.
Enable VR Mode and adjust VR settings for optimal performance.
Follow any additional on-screen instructions to calibrate your VR setup.
With these steps, your Oculus Quest 2 should be ready for a thrilling flight simulation experience in Microsoft Flight Simulator.
Step-by-Step Guide to Installing Microsoft Flight Simulator
Installing Microsoft Flight Simulator is a straightforward process, but it requires careful attention to ensure everything is set up correctly. Follow these steps to install and configure the game for an optimal experience:
1. Purchase and Download the Game
You can purchase Microsoft Flight Simulator from the Microsoft Store or Steam. Here’s how:
Microsoft Store: Go to the Microsoft Store website, search for Microsoft Flight Simulator, and click Buy. Follow the prompts to complete your purchase.
Steam: Visit the Steam website, search for Microsoft Flight Simulator, and click Add to Cart. Complete your purchase through Steam’s checkout process.
2. Install the Microsoft Store Version
If you purchased from the Microsoft Store, follow these steps:
Open the Microsoft Store on your PC.
Navigate to Library and locate Microsoft Flight Simulator in your list of purchased apps.
Click Install and select the desired installation location. The game will begin downloading and installing automatically.
3. Install the Steam Version
If you bought the game on Steam, here’s what to do:
Open the Steam client on your PC.
Go to your Library and find Microsoft Flight Simulator in your list of games.
Click Install, choose your installation directory, and Steam will download and install the game.
4. Set Up Additional Content and Updates
Microsoft Flight Simulator often requires additional content and updates:
Initial Setup: After installation, launch the game to begin downloading additional content such as world updates, aircraft, and scenery packs.
Updates: The game may prompt you to download updates. Ensure you install these to get the latest features and bug fixes.
5. Configure Game Settings
Once installed, configure your game settings to enhance performance and visual quality:
Open the game and go to Options > General > Graphics.
Adjust settings such as Resolution, Texture Quality, and Anti-Aliasing based on your PC’s specifications.
For VR setup, navigate to Options > General > VR Mode and enable VR.
6. Test the Installation
To ensure everything is working correctly:
Start a new flight to test graphics and performance.
Check for any updates or additional downloads required for a smooth experience.
By following these steps, you will have Microsoft Flight Simulator installed and ready to provide an immersive flying experience.
Configuring Your VR Settings for the Best Experience
To get the most out of Microsoft Flight Simulator in virtual reality (VR), it’s crucial to configure your VR settings correctly. Proper setup can significantly enhance your immersion and overall experience. Follow these steps to optimize your VR settings:
1. Adjust Oculus Quest 2 Settings
Before diving into the game settings, ensure your Oculus Quest 2 is configured for optimal performance:
Resolution: Set the resolution to the highest supported by your headset. In the Oculus app on your PC, go to Settings > Devices > Quest 2 and adjust the Resolution slider.
Refresh Rate: Set the refresh rate to match the headset’s capabilities. For Oculus Quest 2, select a refresh rate of 90 Hz or 120 Hz in the same settings menu.
Asynchronous Spacewarp: Ensure Asynchronous Spacewarp is enabled to reduce motion sickness and improve frame rates.
2. Configure Microsoft Flight Simulator VR Settings
Once your Oculus Quest 2 settings are optimized, configure the VR settings within Microsoft Flight Simulator:
Launch the Game: Open Microsoft Flight Simulator and go to the Options menu.
Enable VR Mode: Navigate to General > VR Mode and ensure that VR Mode is enabled.
VR Graphics Settings: Under General > Graphics, adjust the following settings:
Setting
Description
Resolution:
Set the resolution to balance visual clarity and performance. Start with a lower resolution and gradually increase it based on your PC's capabilities.
Field of View (FOV):
Adjust the FOV to your comfort level. A wider FOV enhances immersion but may affect performance.
Render Scaling:
Increase render scaling for better visual quality. However, higher values can impact performance.
Anti-Aliasing:
Enable or adjust anti-aliasing to reduce jagged edges and improve visual smoothness.
3. Test and Fine-Tune Settings
After configuring your settings, test the game:
Start a flight and pay attention to visual quality and performance.
Adjust settings as needed to find a balance between high-quality visuals and smooth performance.
4. Use Third-Party Tools for Optimization
Consider using third-party tools to further enhance your VR experience:
Oculus Debug Tool: Use it to tweak advanced settings like ASW (Asynchronous Spacewarp) and other performance-related options.
MSFS Tweaks: Explore community tools and mods that provide additional settings and optimizations specific to Microsoft Flight Simulator.
By carefully configuring these settings, you will achieve an optimal VR experience in Microsoft Flight Simulator, making your flights as immersive and enjoyable as possible.
Tips for Optimizing Performance and Graphics
To ensure a smooth and visually stunning experience in Microsoft Flight Simulator while using VR, it’s essential to optimize both performance and graphics. Here are some practical tips to help you achieve the best results:
1. Adjust In-Game Graphics Settings
Fine-tuning your graphics settings in Microsoft Flight Simulator can significantly impact performance and visual quality:
Resolution: Set the resolution to match your headset’s native resolution for clear visuals. For better performance, you might need to lower the resolution slightly.
Render Scaling: Adjust the render scaling to balance performance and image quality. Lowering this setting can improve frame rates, while increasing it enhances detail.
Anti-Aliasing: Enable anti-aliasing to smooth out jagged edges, but be mindful that higher levels can affect performance.
Terrain Level of Detail: Reduce the terrain detail to improve performance, especially if you experience stuttering or lag.
Texture Quality: Set texture quality to medium or high based on your GPU’s capabilities to ensure crisp visuals without excessive performance hit.
2. Optimize PC Performance
In addition to in-game settings, optimizing your PC can help boost performance:
Update Drivers: Ensure your graphics card drivers are up-to-date. Visit the manufacturer’s website (NVIDIA or AMD) for the latest drivers.
Close Background Applications: Free up system resources by closing unnecessary background applications while running the simulator.
Adjust Power Settings: Set your PC’s power plan to High Performance to maximize processing power.
Check for Overheating: Ensure your PC is well-ventilated to prevent overheating, which can throttle performance.
3. Use VR-Specific Optimization Techniques
To enhance your VR experience specifically:
Set Refresh Rate: Match the refresh rate of your Oculus Quest 2 with your game’s settings for smoother motion.
Enable ASW: Use the Asynchronous Spacewarp (ASW) feature to reduce motion sickness and maintain smooth performance.
Adjust IPD (Interpupillary Distance): Properly adjust the IPD on your headset to ensure clear and comfortable vision.
4. Use Performance Monitoring Tools
Monitoring tools can help you identify and address performance issues:
FPS Counters: Use FPS counters to monitor frame rates and adjust settings to maintain a steady frame rate.
Performance Overlay: Tools like MSFS Performance Overlay can help you see real-time performance data and make adjustments as needed.
5. Community Tips and Resources
Explore forums and community resources for additional tips:
Third-Party Tools: Consider third-party performance and graphics enhancement tools tailored for Microsoft Flight Simulator.
By following these tips, you can significantly enhance both the performance and visual quality of Microsoft Flight Simulator, ensuring an immersive and enjoyable VR experience.
Common Issues and Troubleshooting
When using Microsoft Flight Simulator in VR with the Oculus Quest 2, you might encounter some common issues. Below are typical problems and their solutions to help you get back to a smooth flying experience:
1. VR Not Activating
If VR mode is not activating in Microsoft Flight Simulator:
Check VR Compatibility: Ensure that VR mode is enabled in the game settings. Go to Options > General > VR Mode and make sure VR is turned on.
Verify Oculus Software: Ensure the Oculus app on your PC is up-to-date and running. Restart the app if necessary.
Reboot Devices: Restart both your PC and Oculus Quest 2. This can resolve connectivity issues.
2. Poor Performance or Low Frame Rates
If you experience lag or low frame rates:
Adjust Graphics Settings: Lower in-game graphics settings such as Render Scaling and Texture Quality to improve performance.
Update Drivers: Ensure your GPU drivers are updated. Visit the manufacturer’s website for the latest drivers.
Optimize PC Performance: Close background applications and set your power plan to High Performance.
3. Motion Sickness or Discomfort
If you experience motion sickness or discomfort:
Adjust IPD: Set the interpupillary distance (IPD) on your Oculus Quest 2 to match your eye distance for clearer vision.
Use ASW: Enable Asynchronous Spacewarp (ASW) in the Oculus app to reduce motion sickness.
Take Breaks: Take regular breaks to avoid discomfort during extended play sessions.
4. Connectivity Issues
If you have trouble connecting your Oculus Quest 2 to your PC:
Check Cable Connection: Ensure the Oculus Link cable is securely connected to both the PC and the headset.
Test USB Ports: Try different USB ports on your PC if you encounter connectivity issues.
Verify Network: For wireless connection, make sure both the PC and Oculus Quest 2 are on the same Wi-Fi network and that the network is stable.
5. Errors and Crashes
If the game crashes or displays errors:
Check for Updates: Ensure Microsoft Flight Simulator and Oculus software are fully updated.
Reinstall the Game: If errors persist, consider reinstalling Microsoft Flight Simulator to resolve any corrupted files.
By following these troubleshooting tips, you can resolve common issues and enjoy a smoother, more immersive experience in Microsoft Flight Simulator.
Exploring Additional VR Features and Enhancements
Microsoft Flight Simulator offers a range of additional VR features and enhancements that can significantly enrich your flying experience. Here’s a guide to exploring and utilizing these advanced VR features:
1. Advanced VR Settings
To fully utilize the capabilities of your VR headset, adjust these advanced settings:
Depth of Field: Adjust the depth of field to enhance the realism of cockpit instruments and external scenery. This setting can create a more lifelike experience by simulating how focus changes with distance.
World Scale: Modify the world scale setting to better match the proportions of your virtual environment with real-world dimensions, ensuring a more accurate spatial experience.
Motion Smoothing: Enable motion smoothing options to reduce motion blur and maintain smooth performance during rapid movements.
2. Customizable Cockpit Controls
Improve your interaction with the cockpit by customizing controls:
Hand Tracking: Use hand tracking features to interact with cockpit controls without the need for external controllers. This feature can enhance realism and immersion.
Voice Commands: Set up voice commands for common cockpit functions. This can streamline your control process and reduce the need to use physical controllers.
Custom Hotkeys: Configure custom hotkeys for frequently used commands and controls, making it easier to access essential functions quickly.
3. Enhanced Scenery and Environmental Effects
To make the most of the virtual environment, explore these enhancements:
Dynamic Weather: Use dynamic weather settings to experience real-time changes in weather conditions, adding realism to your flights.
High-Resolution Textures: Install high-resolution texture packs to improve the visual quality of landscapes, airports, and aircraft interiors.
Real-World Navigation Data: Utilize real-world navigation data and charts to enhance the accuracy of your flight planning and navigation.
4. Community Mods and Add-Ons
Expand your VR experience with community-created mods and add-ons:
Scenery Enhancements: Download mods that improve or add new scenery to your flights, such as detailed airports or specific landmarks.
Aircraft Mods: Explore mods that offer new aircraft models, liveries, and enhanced cockpit details.
Utility Add-Ons: Consider utility add-ons that provide additional functionalities, such as advanced flight planning tools or enhanced VR interactions.
5. Virtual Reality Tools and Utilities
Use these tools to enhance your VR experience:
Oculus Debug Tool: Use the Oculus Debug Tool to tweak advanced settings like ASW (Asynchronous Spacewarp) and adjust performance settings.
Third-Party VR Utilities: Explore third-party utilities that offer performance monitoring, overlay information, and additional VR customization options.
By exploring and utilizing these additional VR features and enhancements, you can significantly enhance your Microsoft Flight Simulator experience, making it more immersive and enjoyable.
FAQ
Here are some frequently asked questions about using Microsoft Flight Simulator with Oculus Quest 2 VR. These answers should help you resolve common queries and enhance your experience:
1. How do I set up Oculus Link with Microsoft Flight Simulator?
To set up Oculus Link, connect your Oculus Quest 2 to your PC using a compatible USB-C cable. Ensure that the Oculus app on your PC is installed and updated. In the Oculus app, go to Settings > Devices and select your Oculus Quest 2. Enable Oculus Link and follow the on-screen instructions to establish the connection. Once connected, launch Microsoft Flight Simulator and enable VR Mode in the game settings.
2. What should I do if Microsoft Flight Simulator is not detecting my Oculus Quest 2?
If your Oculus Quest 2 is not detected, try the following steps:
Check Connections: Ensure that the Oculus Link cable is securely connected to both the PC and the headset.
Restart Devices: Restart your PC and Oculus Quest 2 to resolve temporary connectivity issues.
Update Software: Make sure both the Oculus app and Microsoft Flight Simulator are up-to-date.
Verify VR Mode: Ensure VR mode is enabled in the game settings under Options > General > VR Mode.
3. How can I reduce motion sickness while using VR?
To reduce motion sickness:
Adjust IPD: Set the interpupillary distance (IPD) on your Oculus Quest 2 to match your eye distance.
Enable ASW: Turn on Asynchronous Spacewarp (ASW) in the Oculus app to smooth out motion and reduce discomfort.
Take Breaks: Regularly take short breaks to prevent nausea and eye strain.
Lower Settings: Reducing in-game settings like Motion Smoothing can also help with motion sickness.
4. Why is my VR experience lagging or choppy?
Lag or choppy performance can be caused by:
High Graphics Settings: Lower in-game graphics settings such as Render Scaling and Texture Quality to improve performance.
Outdated Drivers: Update your graphics card drivers to the latest version from the manufacturer’s website.
Background Applications: Close unnecessary applications running in the background to free up system resources.
5. Can I use Oculus Air Link instead of a wired connection?
Yes, Oculus Air Link allows you to connect your Oculus Quest 2 to your PC wirelessly. Ensure both your PC and Oculus Quest 2 are connected to the same high-speed Wi-Fi network. In the Oculus app, go to Settings > Beta Features and enable Air Link. Follow the prompts to establish a wireless connection. Once connected, you can launch Microsoft Flight Simulator and use VR mode as usual.
Conclusion
Integrating Oculus Quest 2 with Microsoft Flight Simulator opens up a whole new world of immersive flying experiences. By following the steps outlined for setting up your VR headset, configuring settings, and optimizing performance, you can enjoy a richly detailed and engaging simulation environment.
From the initial setup to troubleshooting common issues and exploring advanced VR features, each step is crucial for ensuring a smooth and enjoyable flight. Whether you're adjusting in-game graphics settings, fine-tuning your VR setup, or using additional tools and mods, these efforts contribute to a more lifelike and thrilling experience in the virtual skies.
Remember to regularly check for updates and community tips to keep your setup optimized. As technology evolves and new tools become available, staying informed will help you make the most of your Microsoft Flight Simulator and Oculus Quest 2 combination.
By embracing these practices and utilizing the wealth of features available, you’ll be well on your way to mastering the skies in a truly immersive VR environment.
About Author
admin
Making up design and coding is fun. Nothings bring me more pleasure than making something out of nothing. Even when the results are far from my ideal expectations. I find the whole ceremony of creativity completely enthralling. Stock Photography expert.
 Microsoft Flight Simulator is a prime candidate for virtual reality (VR) due to its stunning graphics, realistic flight dynamics, and expansive virtual world. Here’s why this flight simulator excels in a VR environment:
 admin
admin


