When working with Google Slides, organizing your elements efficiently can make a big difference in the overall presentation. Sometimes, images might end up covering text or other important elements, making it hard for your audience to focus on the content. That's where the option to move images to the back comes in handy. By sending images to the back of the slide, you can create a cleaner, more professional layout that enhances your presentation's visual flow. In this guide, we’ll walk you through why this feature matters and how to use it effectively.
Why Move Images to the Back in Google Slides?
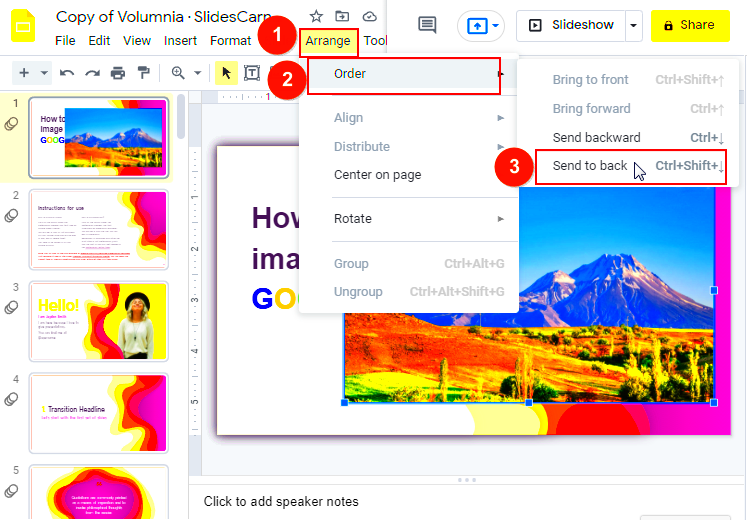
Moving images to the back of a slide is a simple yet effective way to improve the design of your Google Slides presentations. Here’s why it’s important:
- Improved Readability: When images are moved behind text or shapes, the text becomes more visible, making it easier for your audience to read and understand your content.
- Cleaner Layout: By adjusting the layers of different elements, you create a more organized and visually appealing slide, reducing distractions.
- Better Use of Space: If you have a background image, sending it to the back ensures that other elements are displayed clearly without being covered up.
- Professional Aesthetic: A well-structured slide with properly arranged elements looks more polished, reflecting positively on the quality of your work.
In short, moving images to the back in Google Slides helps maintain clarity and improves the overall impact of your presentation. It’s a simple design technique that can make a big difference in how your slides are perceived.
Also Read This: How to Open Licensed Adobe Stock in Illustrator
Steps to Move Images to the Back in Google Slides
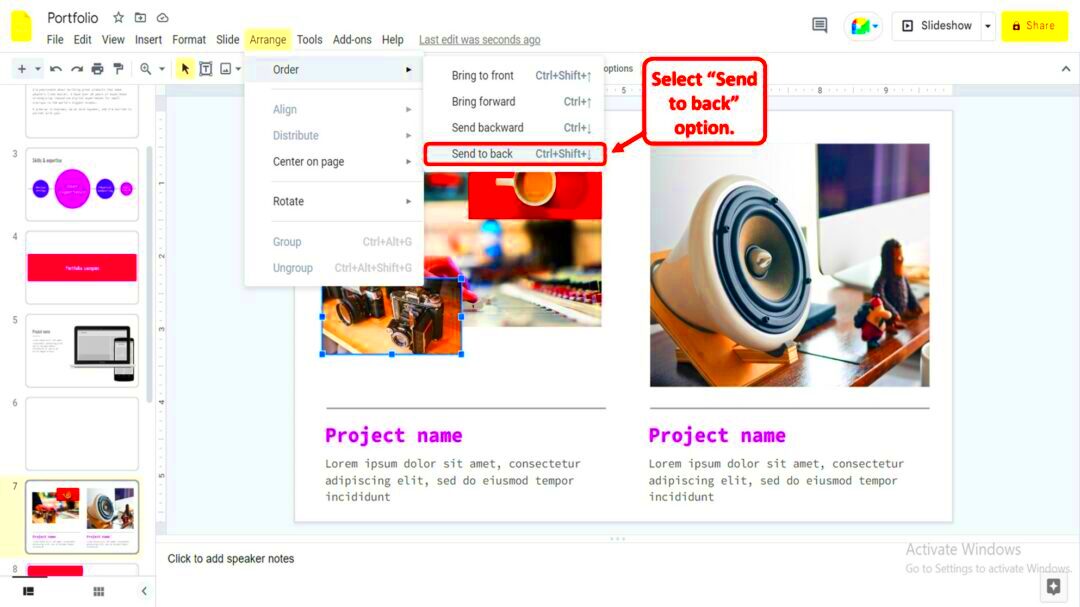
Now that you know why it’s important to move images to the back, let’s go through the steps to do it. Google Slides makes this process quick and easy. Follow these simple instructions:
- Select the Image: Click on the image you want to move to the back. This will highlight it on the slide.
- Open the Arrange Menu: In the top menu bar, click on “Arrange.” This is where you can control the layering of elements in your slide.
- Choose Order: From the Arrange dropdown, hover over the “Order” option. This will show you the options for adjusting the image's position.
- Send to Back: Select “Send to back” from the submenu. This will move the selected image behind all other elements on the slide.
If you only want to move the image one step backward (behind just one layer), you can choose the “Send backward” option instead.
By following these steps, you’ll have your images perfectly positioned behind your text or other important elements, allowing for a more balanced and visually engaging slide.
Also Read This: See How to Sell Vector Art on Shutterstock
Using the Arrange Menu to Move Images
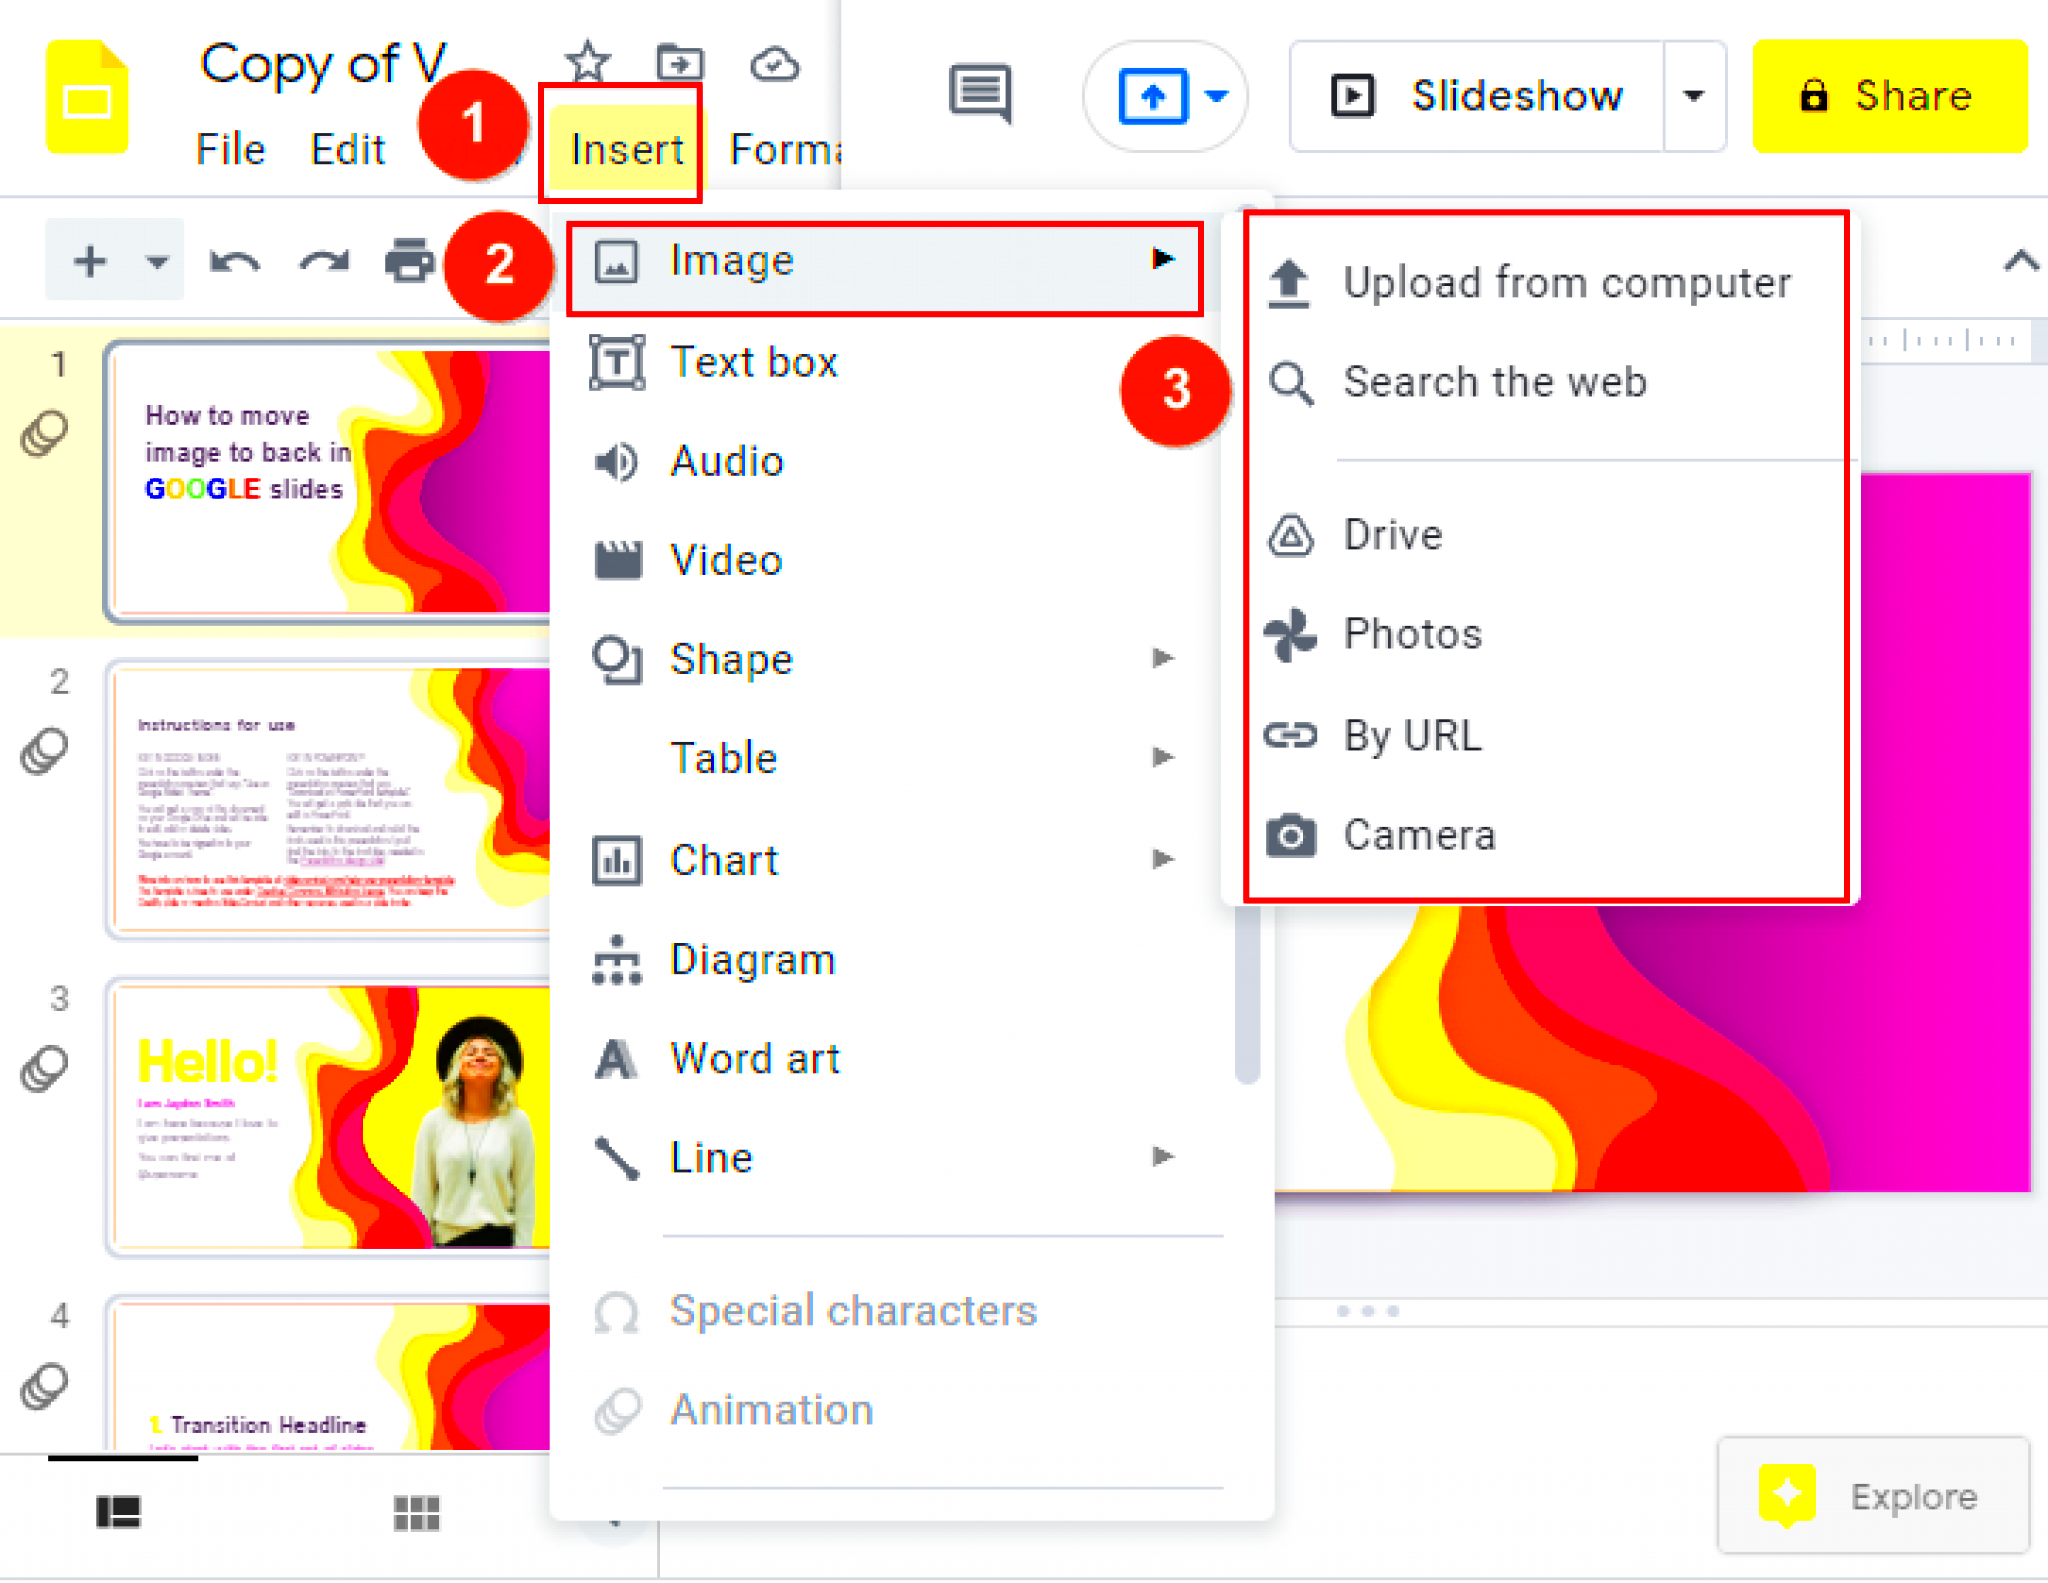
The “Arrange” menu in Google Slides provides an easy way to adjust the positioning of elements on your slide, including images. It’s a simple yet powerful tool that allows you to control the layering of all the objects on your slide. Whether you want to move an image to the back, bring it forward, or adjust its positioning step-by-step, the Arrange menu has got you covered. Let’s take a look at how you can use it to move images.
- Accessing the Arrange Menu: The first step is to select the image you want to adjust. Once the image is selected, click on the “Arrange” option in the top toolbar. This will open a dropdown menu with different options for managing the layers of your slide.
- Order Options: The key options you'll see under “Arrange” are:
- Bring to Front: Moves the image to the top layer, making it the most visible object on the slide.
- Send to Back: Moves the image to the back, hiding it behind other objects on the slide.
- Bring Forward: Moves the image one step forward, layering it above objects that are behind it but not all the way to the front.
- Send Backward: Moves the image one step backward, placing it behind only one other object on the slide.
- Perfect for Layer Management: The Arrange menu is particularly useful when you have several elements stacked on top of each other and need precise control over which elements should be on top or behind others.
By mastering the Arrange menu, you can easily control how your images interact with other slide elements, ensuring your presentation has a clear and professional layout.
Also Read This: How to Create a Powerful Image Using Rhythm
Keyboard Shortcuts for Moving Images in Google Slides
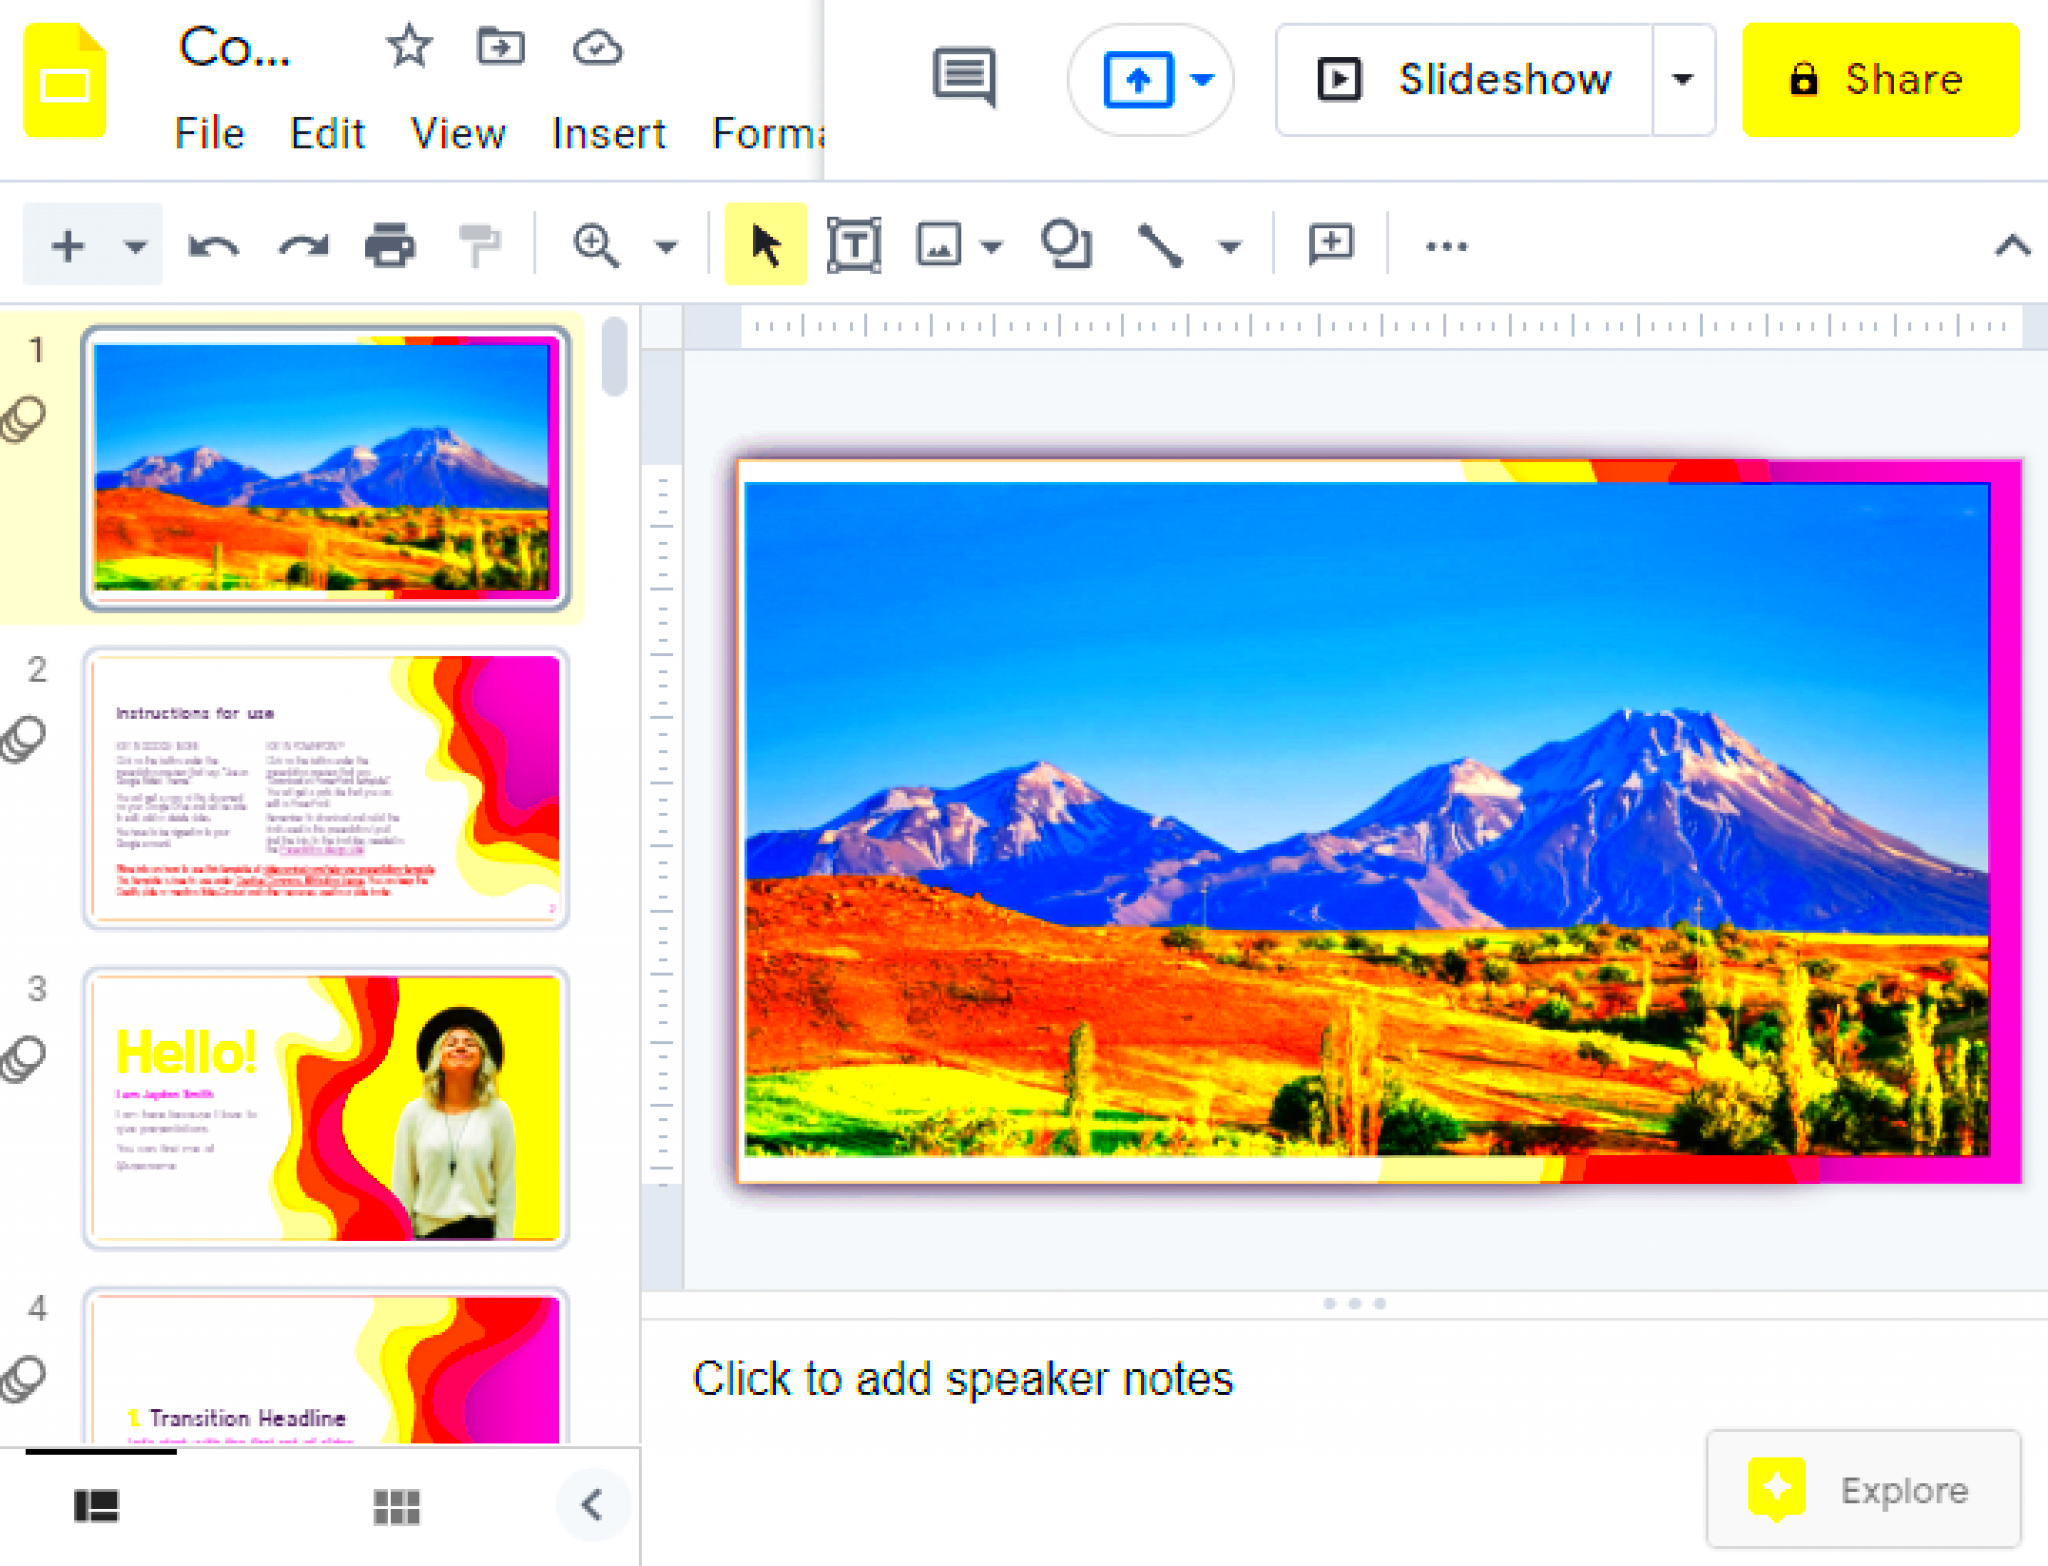
If you want to speed up your workflow, keyboard shortcuts are the way to go! Google Slides offers some quick shortcuts for managing images, so you don’t have to click through menus every time. These shortcuts allow you to adjust the order of elements in your slide with just a few keystrokes, saving you time and effort.
- Send to Back: To move an image all the way to the back, press Ctrl + Shift + Down Arrow (Windows) or Cmd + Shift + Down Arrow (Mac). This instantly sends your image behind all other elements on the slide.
- Bring to Front: If you want to bring an image to the very front, use Ctrl + Shift + Up Arrow (Windows) or Cmd + Shift + Up Arrow (Mac).
- Send Backward: To move an image one layer back, press Ctrl + Down Arrow (Windows) or Cmd + Down Arrow (Mac).
- Bring Forward: To move an image one layer forward, press Ctrl + Up Arrow (Windows) or Cmd + Up Arrow (Mac).
Using these shortcuts can significantly improve your efficiency, especially when working on slides with multiple layers. Once you get used to them, you’ll be able to adjust images in no time, without losing your focus on other aspects of your presentation.
Also Read This: Understanding the Costs of Behance and Its Subscription Plans
Tips for Managing Image Layers in Google Slides
Managing layers in Google Slides is crucial for creating organized and professional presentations. It’s easy to get lost in a cluttered slide, especially when multiple elements overlap. Here are some tips for keeping your image layers in check and making sure your slides look clean and polished:
- Keep Your Layers Organized: When you have many images, shapes, or text boxes on your slide, it’s easy for elements to get mixed up. Always try to keep a clear hierarchy in your layers. For example, use background images, shapes, and designs as the lower layers and keep important elements like text and charts on top.
- Group Related Elements: If you have multiple objects that should stay together, such as a text box and its background image, consider grouping them. Select both elements, right-click, and choose “Group.” This way, you can move and adjust them together as a single unit.
- Lock Your Backgrounds: If you have a background image or design that you don’t want to move while adjusting other elements, you can lock it in place. This prevents accidental shifting and keeps your design intact.
- Use Layers to Enhance Design: Think of layers like a sandwich. The background is the bread, and your content is the filling. Play with the order to make your images and text pop, but avoid overcomplicating things. Too many layers can create visual clutter.
By applying these tips, you'll be able to maintain control over the elements on your slide and ensure that your design looks sharp and clean. Effective layer management will help your slides flow better and make your message clearer to your audience.
Also Read This: A Quick Guide to Canceling Your iStock Subscription Without Stress
Common Mistakes to Avoid When Moving Images
While moving images to the back in Google Slides can be a great way to improve your slide design, it’s easy to make a few common mistakes along the way. These mistakes can lead to a cluttered, unprofessional presentation. Here’s a look at some of the most frequent errors people make, and how to avoid them:
- Overlapping Text and Images: One common mistake is sending an image too far to the back, causing it to overlap with important text. Make sure your text remains legible by checking that no important content is hidden behind images. If you’re using background images, adjust their opacity or use a semi-transparent overlay to keep text visible.
- Not Grouping Related Elements: If you have multiple elements that should stay together, like a caption and an image, failing to group them can cause misalignment when you adjust layers. Always group related items so you can move them together, avoiding issues with spacing and alignment.
- Ignoring the Slide’s Visual Flow: Just moving images to the back isn’t enough. Ensure that the flow of your slide feels natural. A chaotic arrangement of images in the back and front can make your slide look disorganized. Take time to assess the visual hierarchy of your elements.
- Overusing Layering: Having too many layers on a slide can make it difficult for your audience to focus on key points. Limit the use of layers to only what's necessary for the design, and avoid cluttering your slides with unnecessary elements.
- Not Using the Undo Function: Sometimes, the arrangement might not look as expected after sending an image to the back. Don’t hesitate to use the “Undo” function (Ctrl + Z or Cmd + Z) to quickly correct your mistake and try again.
By avoiding these common mistakes, you’ll be able to maintain a clear, professional, and easy-to-follow slide layout that highlights your content effectively.
Also Read This: How to Record Audio from YouTube Using Various Methods
Frequently Asked Questions
Here are answers to some frequently asked questions about moving images to the back in Google Slides. If you’re still unsure about some aspects, these might help clarify things:
- How do I move multiple images at once?
To move multiple images, hold down the Shift key while selecting each image you want to move. Once all the images are selected, you can either use the Arrange menu or keyboard shortcuts to move them to the back or front together.
- Can I move an image to the back without affecting other objects?
Yes! If you only want to move one image backward without affecting other elements, select the image and use the “Send backward” option under the Arrange menu. This will only shift the
- What if my images keep overlapping when I move them?
If your images keep overlapping, it could be a sign that your layers are not well-organized. Try grouping related elements or using the alignment options in Google Slides to make sure everything is in the right place.
- Can I adjust the transparency of an image when moving it to the back?
Yes! You can adjust the transparency of images by selecting the image, clicking on the "Format options" menu, and adjusting the transparency slider. This is especially useful if you're using a background image and want to make sure it doesn’t overpower the text or other elements.
- Is there a way to lock images in place to prevent accidental changes?
While Google Slides doesn’t have a direct option to lock images, you can "lock" them in place by making sure you don’t accidentally select them during editing. Alternatively, grouping them with other elements can help keep their position intact.
Conclusion
Moving images to the back in Google Slides is a simple yet powerful way to improve the organization and design of your slides. By understanding the importance of layer management and using tools like the Arrange menu and keyboard shortcuts, you can create slides that are both visually appealing and easy to follow. Remember to avoid common mistakes such as overlapping text and overusing layers, and always consider the overall flow of your slide. With these tips in mind, you’ll be able to create professional and polished presentations that engage your audience and effectively communicate your message.
 admin
admin


