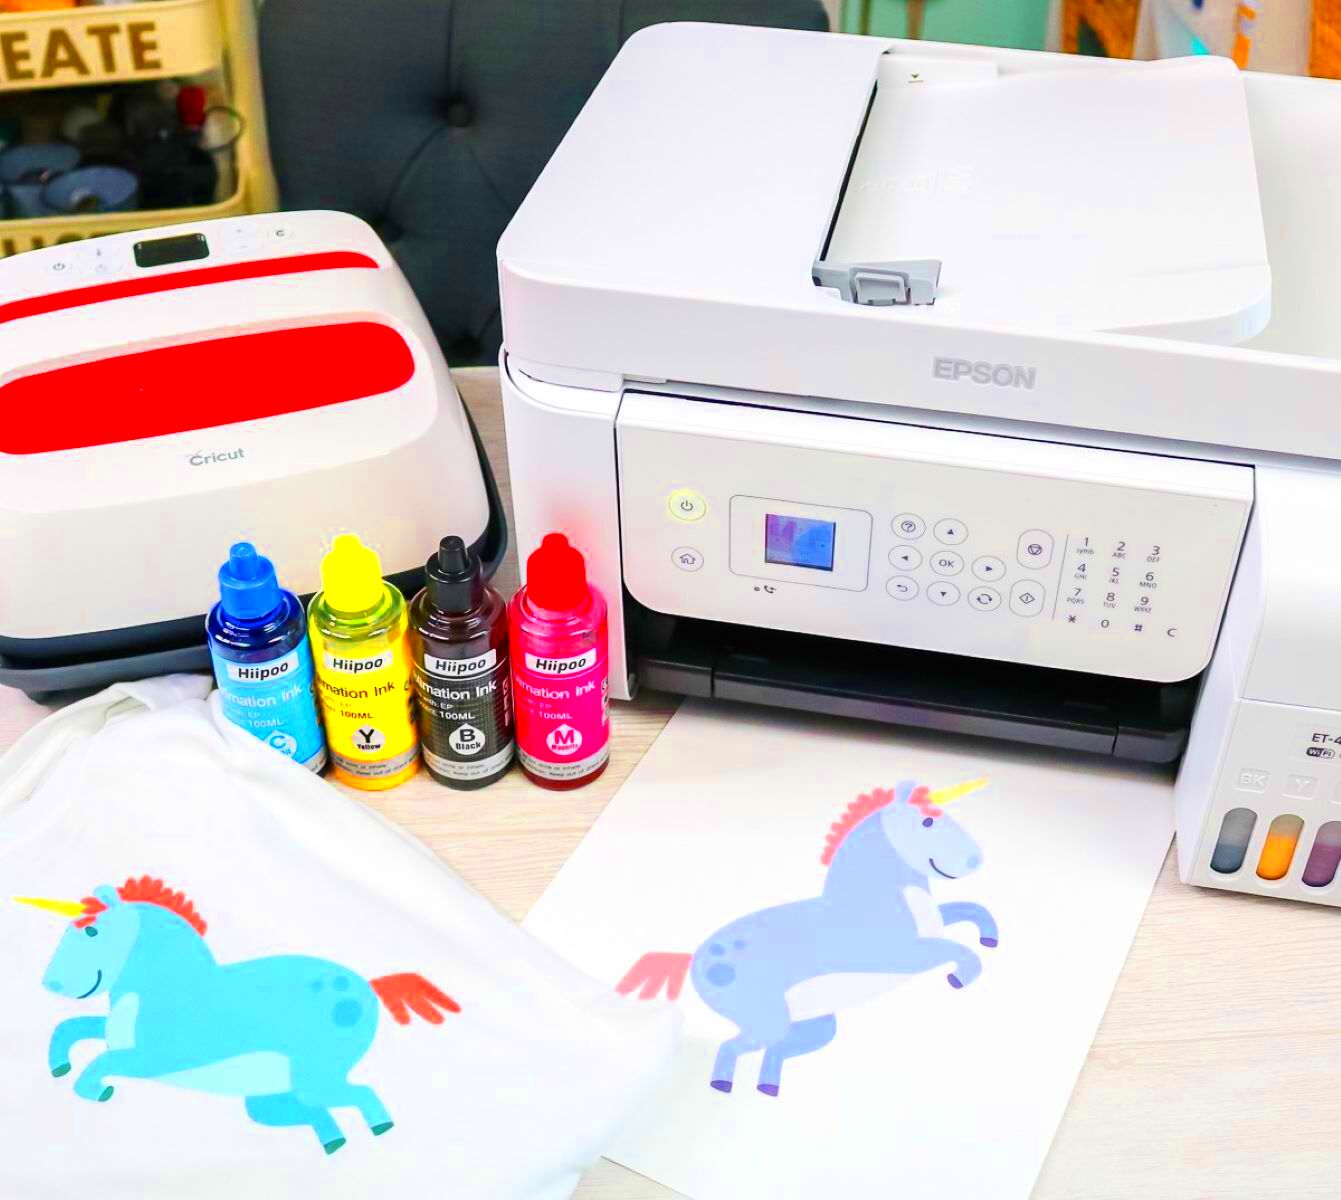
Mirroring an image is a helpful technique for certain print jobs, especially when you're working with materials like transfer paper or fabric. When you mirror an image, it flips the
Step-by-Step Guide to Mirror an Image on Epson Photo+ Printers

Mirroring an image on an Epson Photo+ printer is a straightforward process when you follow these steps:
- Open the Image Editing Software: Begin by opening your image in your preferred editing software (like Photoshop or even Epson’s own software).
- Flip the Image: In your editing software, look for the "Flip Horizontal" or "Mirror" option. This will flip your image left to right, making it ready for printing.
- Choose Printer Settings: When you’re ready to print, go to your printer settings. Make sure you select the correct paper type and print quality for the best results.
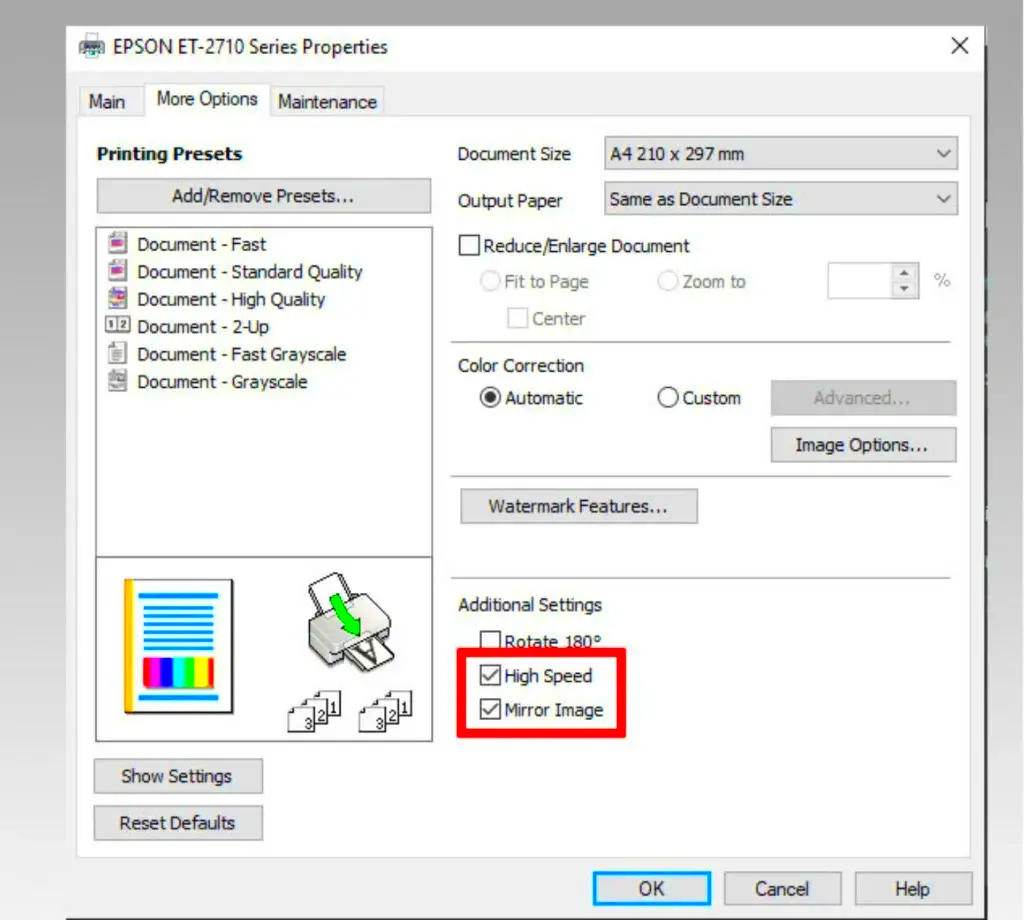
- Enable Image Mirroring in Printer Settings: Some Epson printers may have a specific option in the print settings to mirror the image directly from the printer menu. Be sure to check this box if available.
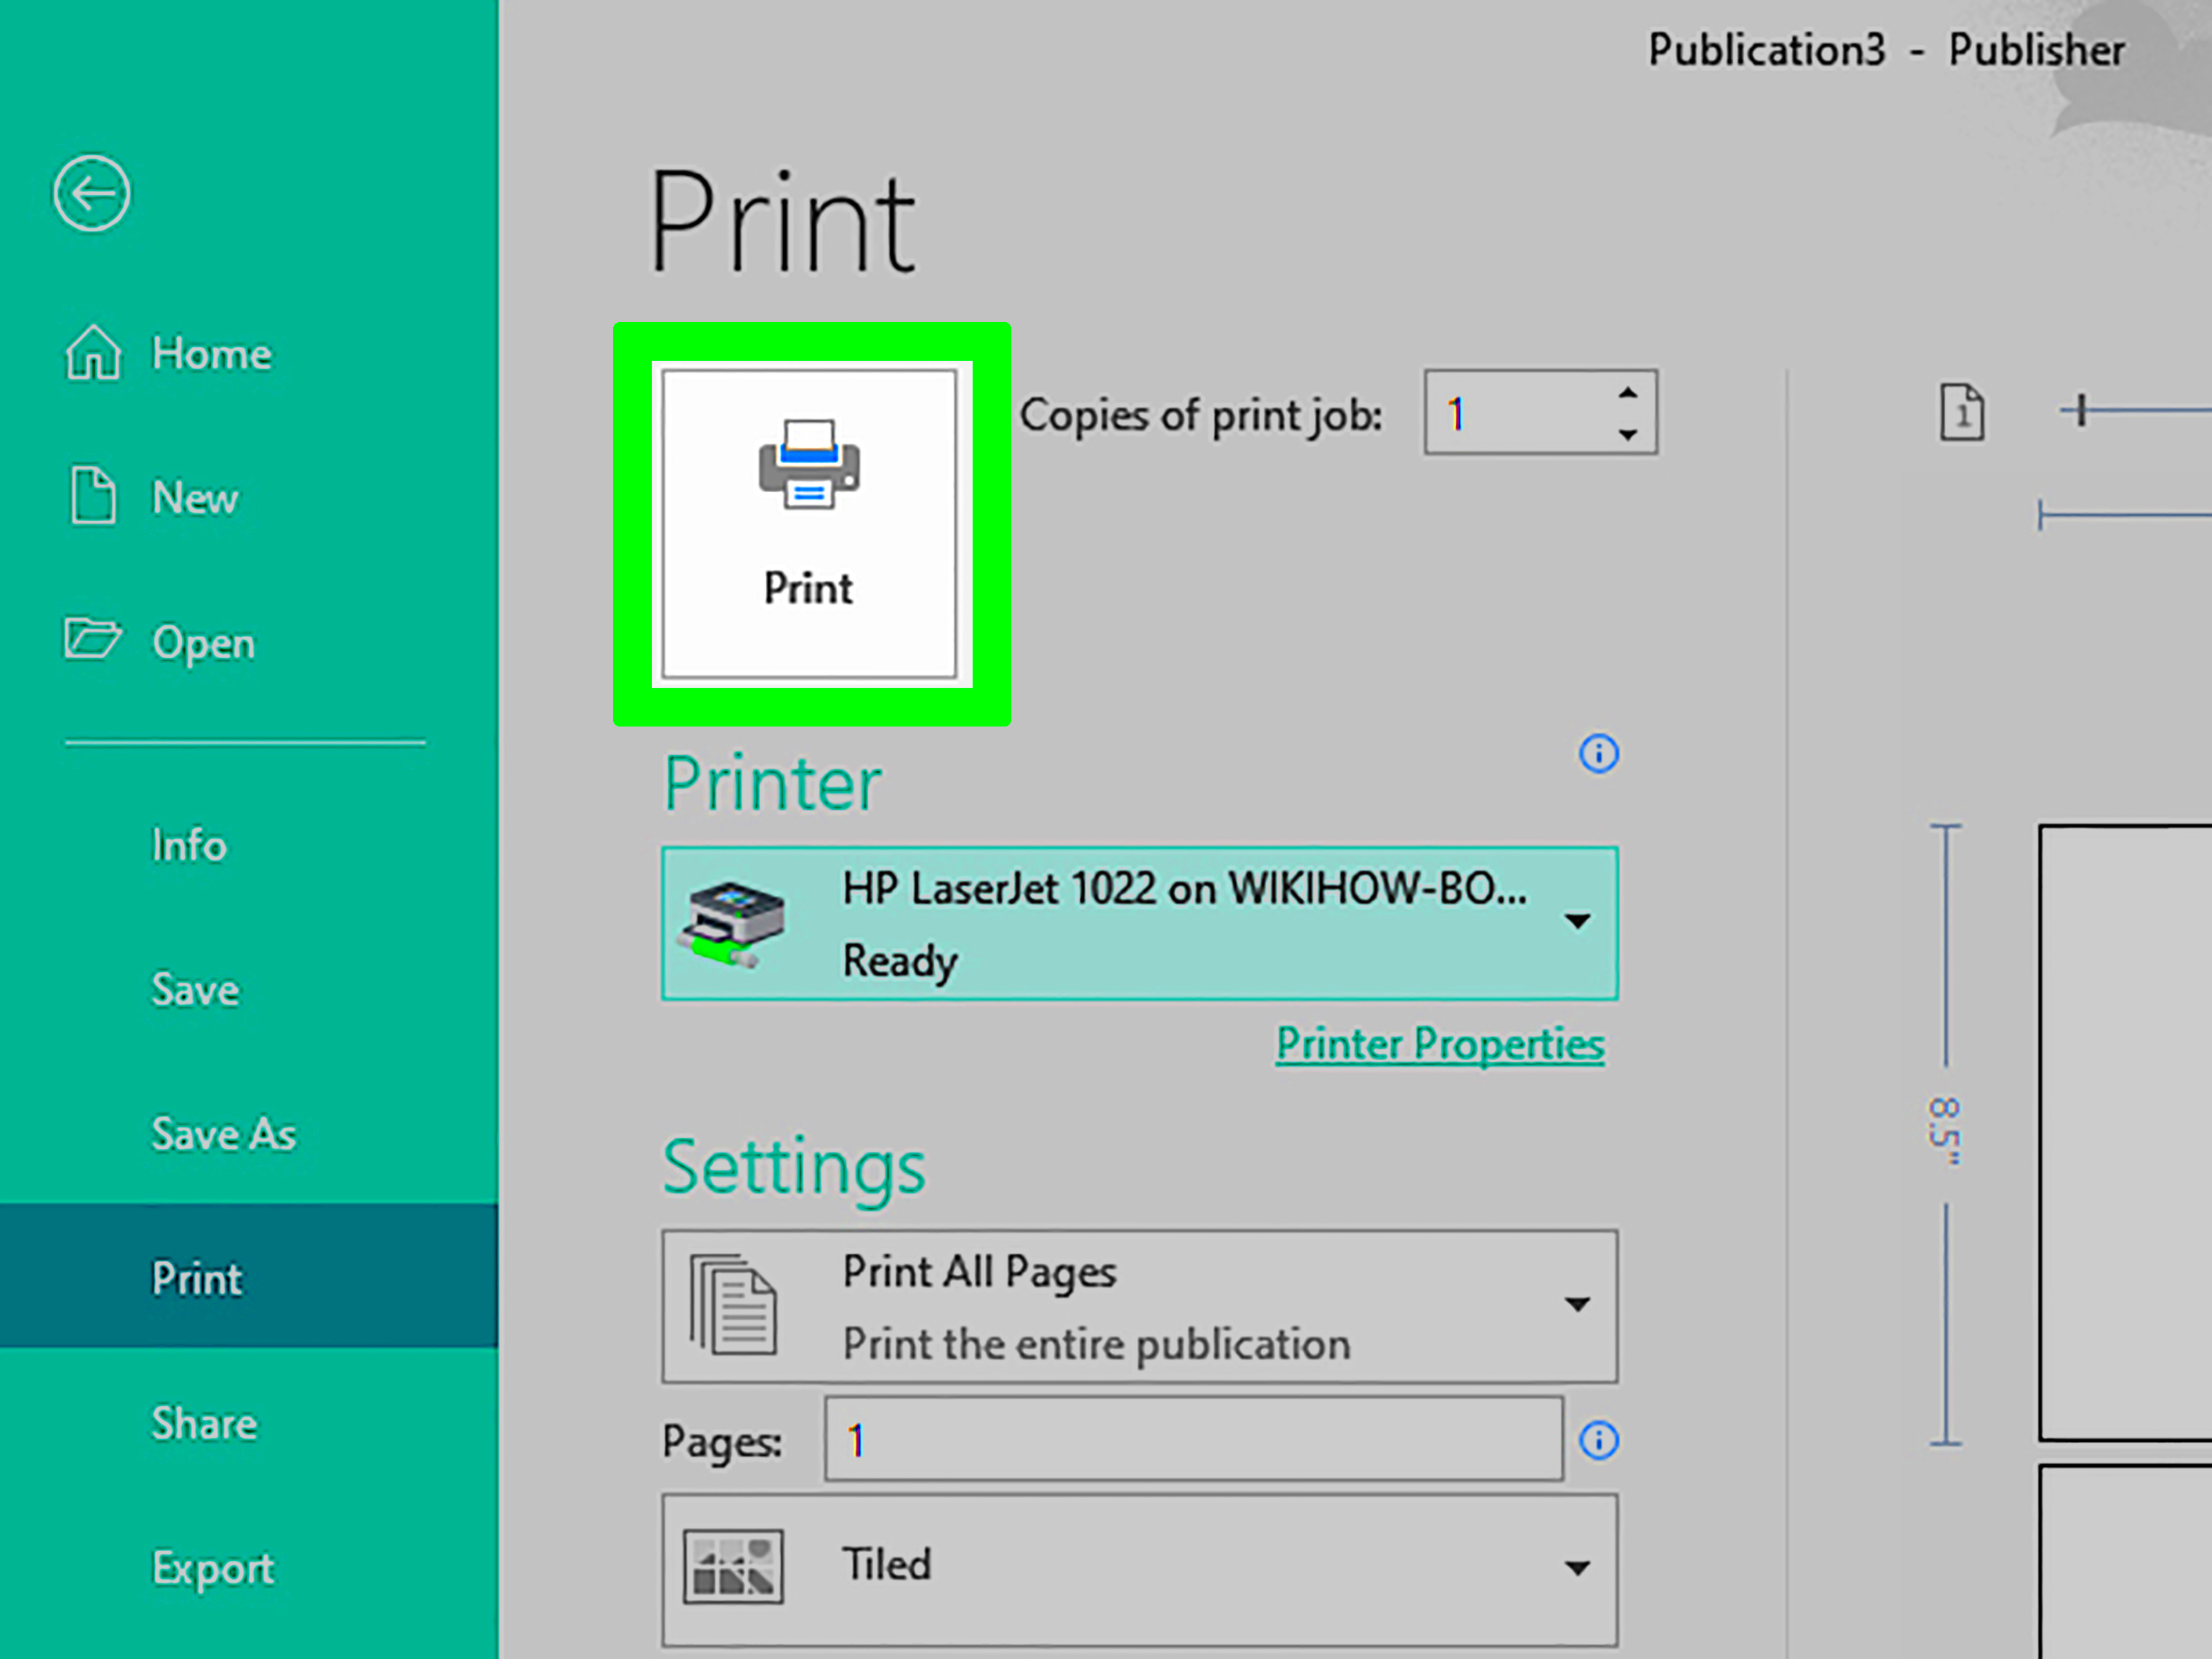
- Print the Image: Once everything is set up, hit "Print" and wait for your Epson Photo+ printer to work its magic. The image will print in its mirrored form, ready for transfer or any other use you have planned.
By following these simple steps, you'll be able to create perfectly mirrored prints every time, ensuring high-quality results with minimal effort.
Also Read This: Why 123RF Is the Go-To Source for Editorial Content
Understanding the Epson Photo+ Printer Settings for Mirroring

The Epson Photo+ printer offers several customizable settings that allow you to mirror your image with precision. These settings play a crucial role in ensuring your mirrored prints come out correctly and look sharp. Here’s what you need to know:
- Paper Type: The type of paper you choose affects how the printer handles the ink and the image. For best results when mirroring, opt for papers specifically designed for transfers, such as transfer paper or glossy photo paper.
- Print Quality: Select the highest print quality setting to ensure your mirrored image has clear details and vibrant colors. Lower quality settings might lead to pixelated or dull prints.
- Orientation and Layout: Check the orientation settings in the print menu. Make sure it’s set to "Landscape" or "Portrait" depending on your original image's layout. Incorrect orientation can distort the mirrored effect.
- Mirror Option in Printer Settings: Some Epson Photo+ printers come with a mirror image setting directly in the print dialog. If available, enable this option to automatically mirror the image before it’s printed, saving you the step of flipping the image in your editing software.
- Advanced Settings: If you want more control over the mirroring process, you can dive into the advanced printer settings. Here, you can fine-tune color management, resolution, and more, allowing for professional-grade mirrored prints.
Understanding these settings is key to optimizing your print job. When you get familiar with these options, you’ll be able to achieve consistently high-quality mirrored images for any project, whether you’re printing photos or making custom transfers.
Also Read This: how do i rotate an image in lightroom
Common Issues When Mirroring an Image on Epson Photo+ Printers
While mirroring images on your Epson Photo+ printer can be an easy task, there are a few common issues that might crop up during the process. These problems are usually easy to fix with the right knowledge and attention to detail. Let’s explore some of the typical challenges and how to overcome them.
- Image Quality Loss: One common issue when mirroring is a noticeable drop in image quality, especially if you’re working with low-resolution images. To avoid this, always use high-quality images, ideally with a resolution of 300 DPI (dots per inch).
- Incorrect Mirroring Orientation: Sometimes the image is mirrored, but the orientation is wrong. This could happen if the print layout or paper settings are not adjusted properly. Double-check the print settings to make sure the orientation is set as needed.
- Ink Smudging or Bleeding: Mirroring an image often involves printing on special surfaces like transfer paper, which may absorb ink differently. To avoid smudging, make sure you're using the correct paper type and print settings, and allow the print to dry thoroughly before handling.
- Printer Not Mirroring Automatically: Not all Epson printers automatically mirror images in the settings. If your printer doesn’t have an option to mirror directly in the print dialog, you may need to flip the image manually in your editing software.
- Paper Jams or Misfeeds: Sometimes, when using thicker media like transfer paper, the printer may struggle to feed the paper correctly. Always use paper designed for your Epson printer model, and check the paper tray for any misalignments.
By being aware of these common issues and taking steps to resolve them, you can ensure a smooth mirroring process and consistently good results.
Also Read This: Effective Ways to Block YouTube on Your Laptop to Minimize Distractions
Why Mirroring is Important for Printing Certain Images
Mirroring an image is essential for various printing projects, especially those that involve transfers to materials like t-shirts, mugs, or other fabrics. When you print on transfer paper, the image must be mirrored so that it appears correctly on the final surface. Without mirroring, the text or design could be flipped backward or out of alignment.
- Transfers to Fabric: When printing on fabric with a heat press, you’ll need to mirror the image so that it looks correct once transferred. The design will be flipped back to its normal orientation once it’s transferred onto the fabric.
- Text on Merchandise: If you're printing logos, text, or other designs on merchandise, mirroring is critical. It ensures that the text appears correctly when you apply it to products like mugs or bags.
- Printing on Clear Materials: When printing on transparent or translucent materials, such as window decals, mirroring ensures that the image displays properly from the outside view. Without mirroring, the image may appear upside down or reversed.
In short, mirroring makes sure your prints are accurate and appear as they should on the intended material. It’s a must for certain applications, especially those requiring a precise transfer.
Also Read This: How to Get Your Images onto Getty with a Beginner’s Guide to Getting Featured
Benefits of Using Epson Photo+ Printers for Image Mirroring
Epson Photo+ printers are designed to provide high-quality results for both regular prints and more specialized tasks, like image mirroring. If you’re using these printers for mirroring, there are several key benefits that set them apart from other options.
- High Print Quality: Epson Photo+ printers are known for their exceptional print quality. This is important when mirroring images, as it ensures that the mirrored design retains its clarity, sharpness, and color accuracy.
- Precise Color Reproduction: The advanced color management features in Epson printers mean that your mirrored images will look vibrant and true to life, without color distortions. This is especially important for printing images that require specific color details.
- Wide Range of Media Compatibility: Epson Photo+ printers can handle various types of media, including specialty transfer papers, glossy photo paper, and textured surfaces. This makes them ideal for different types of printing jobs that require mirrored images.
- Easy-to-Use Settings: Epson’s user-friendly interface and intuitive software make it easy to set up your printer for image mirroring. Whether you're doing this manually through software or using an automatic option in the printer settings, Epson simplifies the process.
- Reliability and Durability: Known for their durability, Epson Photo+ printers provide consistent results. You can rely on them to produce mirrored prints that are precise and long-lasting, even under heavy use.
These features make Epson Photo+ printers a top choice for those needing to print mirrored images, whether for personal or professional projects. Their reliability, print quality, and ease of use ensure a smooth printing experience every time.
Also Read This: Recording Music from YouTube and Understanding Legal and Technical Aspects
How to Prepare Your Image for Mirroring
Preparing your image properly before mirroring is essential for ensuring that the final print looks just how you want it. Whether you’re printing for a transfer project or creating mirrored designs for other uses, following a few key steps can make all the difference. Here’s how you can get your image ready for mirroring:
- Check the Resolution: Make sure your image has a high resolution (300 DPI is ideal). Low-resolution images can become pixelated when printed, which can affect the quality of your mirrored design.
- Choose the Right Image Format: Before mirroring, save your image in a suitable format, such as PNG, TIFF, or JPEG. These formats retain high image quality, making them ideal for printing.
- Flip the Image Horizontally: Using your image editing software, mirror the image by flipping it horizontally. This step is crucial if you're preparing to print on transfer paper or any material that requires the image to appear reversed.
- Adjust Image Size: Ensure your image is sized correctly for your print. Adjust the dimensions to fit the paper or material you're using. If you’re printing on fabric, ensure the image will fit properly on the intended item, like a t-shirt or mug.
- Review Image Quality After Flipping: After flipping the image, zoom in to check the details. Sometimes, flipping an image can distort fine lines or text. If this happens, make corrections before printing.
By following these simple steps, you can ensure that your image is properly prepared for mirroring and that the final print will meet your expectations.
Also Read This: How to Update Your CV on LinkedIn for a Fresh Profile
Conclusion
Mirroring an image on your Epson Photo+ printer is an effective way to achieve high-quality prints for various projects. Whether you're working with transfer paper, fabric, or other materials, the process of mirroring ensures that your designs come out exactly as intended. By understanding the steps involved, preparing your image correctly, and troubleshooting any issues, you can easily create the perfect mirrored prints every time. Epson Photo+ printers, with their exceptional quality and ease of use, make this process even simpler. So, follow the tips and enjoy the benefits of perfectly mirrored prints for all your creative projects.
Frequently Asked Questions
Here are some common questions users often have about mirroring images on Epson Photo+ printers:
- Do I need special software to mirror an image? No, most image editing software (such as Photoshop or even free options like GIMP) has the ability to mirror or flip an image horizontally. Epson printers also offer mirroring options in their print settings.
- Can I mirror an image directly from the printer? Some Epson Photo+ models have an option to mirror images directly through the printer’s settings. Check your printer's manual or the software that comes with it for specific instructions.
- What’s the best resolution for images that I want to mirror? For the best results, aim for 300 DPI (dots per inch) when working with images you plan to print. This resolution ensures that the image maintains clarity and sharpness, even when mirrored.
- Will mirroring affect image quality? Generally, flipping an image horizontally does not impact its quality, but it's important to ensure that the original image is of high resolution. If the resolution is too low, the mirrored image may appear blurry or pixelated.
- Why is mirroring important for certain print jobs? Mirroring is crucial when printing on transfer materials, such as transfer paper or fabric. This ensures that the final image appears correctly after being transferred onto the target surface, especially when working with text or detailed designs.

 admin
admin


