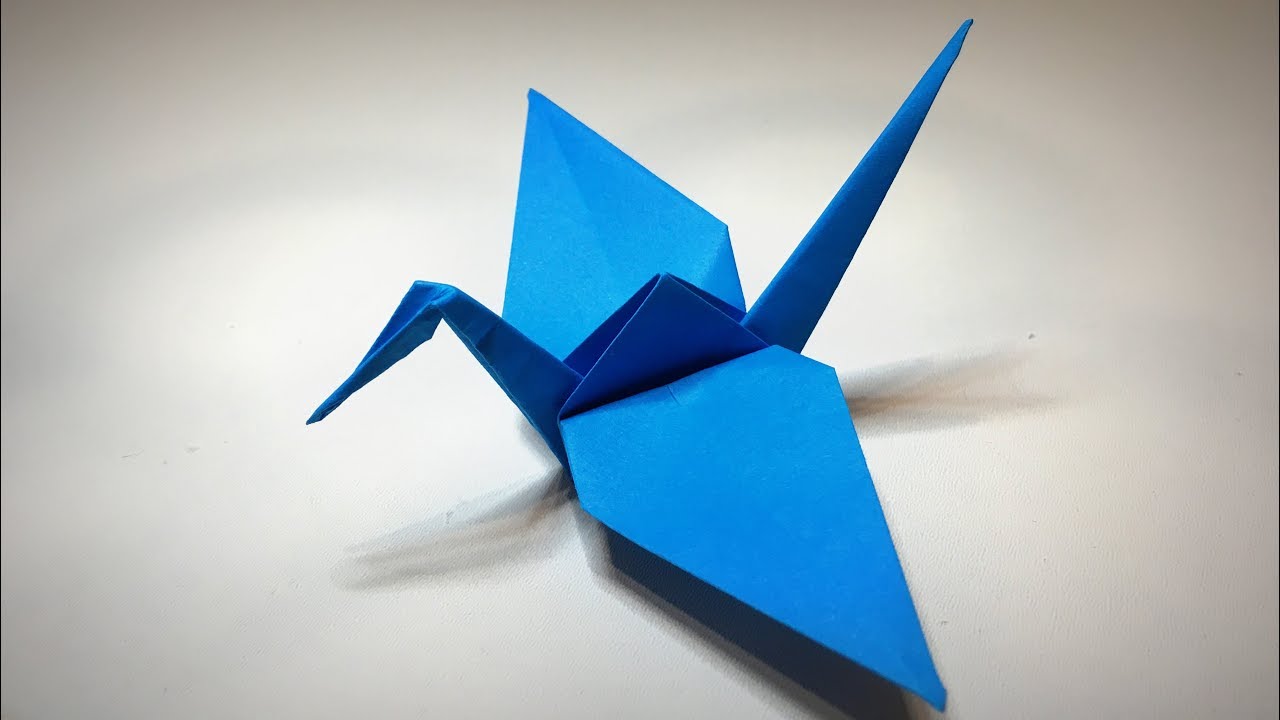
Origami, the delicate art of paper folding, has fascinated people for centuries. It’s not just about creating beautiful designs; it’s about embracing creativity, focus, and, sometimes, a little patience! One of the most iconic creations in this world of paper art is the paper crane. Known for its elegant design and rich symbolism, the paper crane represents hope and peace. In Japanese culture, folding a thousand paper cranes is believed to grant a wish, making it a popular project for anyone looking to channel their creativity and positive intention. In this guide, we will walk you through the delightful journey of mastering the art of paper cranes through a simple, step-by-step process. Whether you’re a beginner or looking to refine your skills, this blog post will provide you with everything you need to know to start folding!
Gathering Your Materials

Before you embark on your origami adventure, it's essential to gather your materials. Fortunately, making paper cranes requires just a few simple items that you likely already have at home. Here’s what you’ll need:
- Origami Paper: The star of our show! Origami paper is lightweight and comes in various colors and patterns. You can purchase it at craft stores or even use standard paper cut into squares. A typical size is 15 cm x 15 cm (6 x 6 inches), but don’t hesitate to experiment!
- A Flat Surface: A clean, flat surface gives you the space to fold accurately. A table or desk works perfectly!
- A Bone Folder (optional): This handy tool helps achieve crisp folds but isn’t necessary. If you don’t have one, your fingers will do just fine!
- Patience and Focus: These aren’t items you can find in a store, but they are just as crucial. Origami requires a bit of practice, so don’t rush the process!
Once you have your materials ready, you’ll be all set to start folding your very first paper crane, step by step. It’s all about enjoying the process, so let’s get started!
Also Read This: How to Craft Stunning Rolled Paper Roses
Understanding the Basic Folds

Before diving into the world of paper cranes, it's crucial to get familiar with the basic folds that form the foundation of origami. These folds are the building blocks for many intricate designs, and mastering them will set you on the path to becoming an origami pro!
Here’s a breakdown of the essential folds:
- Valley Fold: This is simply folding the paper towards you, creating a valley-like crease. It’s the most common fold in origami.
- Mountain Fold: Opposite to the valley fold, this involves folding the paper away from you, resembling a peak.
- Reverse Fold: This fold requires you to push a section of the paper in the opposite direction than the existing crease. It's often used to create sharp edges or change the shape.
- Squash Fold: This fold allows you to flatten a pointed tip of paper outwards. It's perfect for creating wings or flaps.
- Petal Fold: This one looks like opening a flower petal. It’s achieved by lifting the paper and flattening it down.
Understanding these basic folds is like learning the alphabet in origami. Once you’re comfortable with them, you'll find that you can approach more complex designs with ease. Grab a piece of paper, practice these folds, and soon you'll be ready for the next exciting step—folding your very own paper crane!
Also Read This: How to Watch ESPN Plus on YouTube TV – A Complete Guide
Step-by-Step Instructions for Folding a Paper Crane
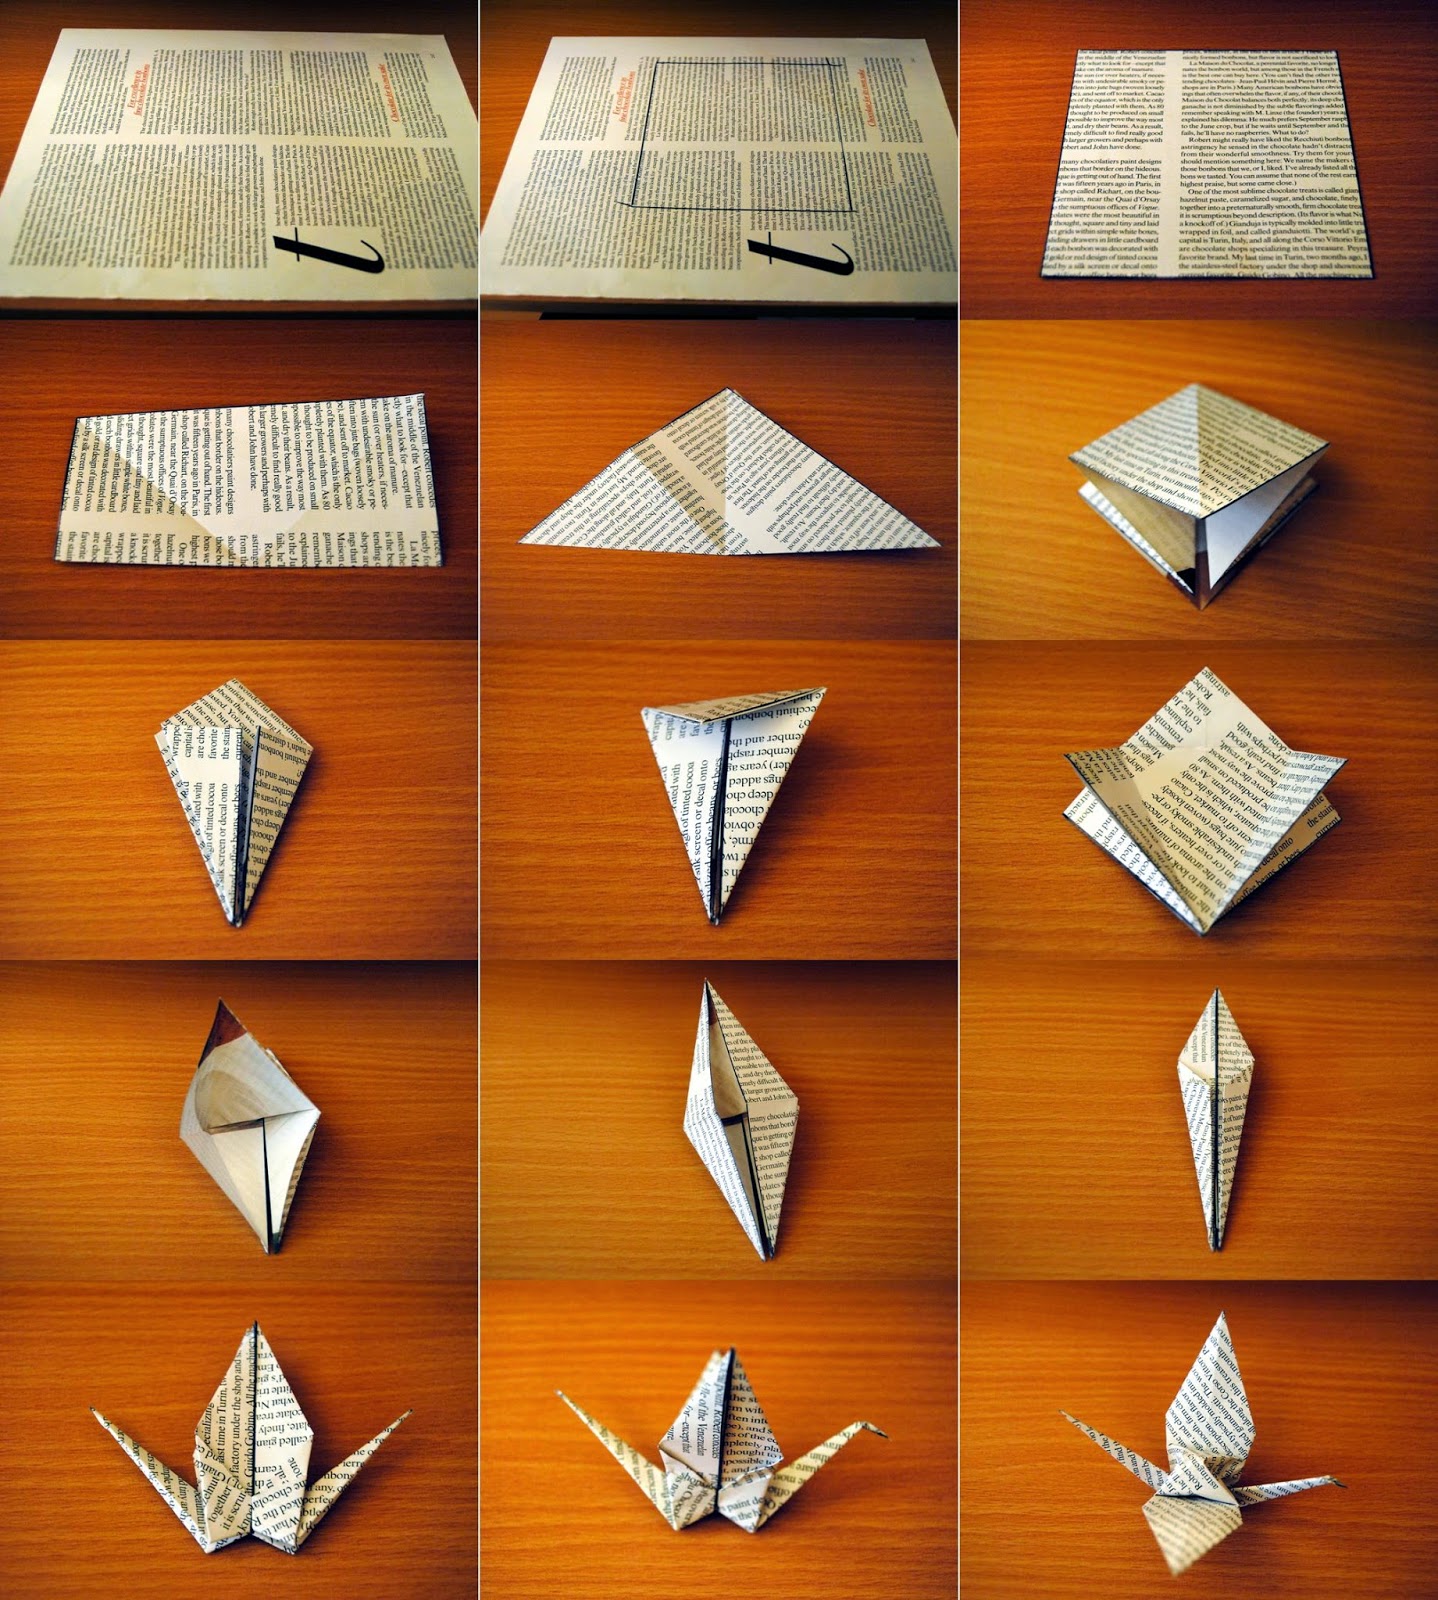
Now that you're familiar with the basic folds, it’s time to put that knowledge to good use! Follow these step-by-step instructions to fold your very own paper crane. Grab a square piece of paper, and let’s get started!
- Begin with a Square Piece of Paper: Place the colored side down on your work surface.
- Make a Valley Fold: Fold the paper in half diagonally to form a triangle. Crease well and then unfold.
- Repeat the Diagonal Fold: Fold the paper diagonally in the opposite direction. Crease and unfold again.
- Form a Square Base: Fold the paper in half horizontally and vertically, creasing well. Now, use the creases to collapse the paper into a square base.
- Perform the Petal Fold: Take the top layer's right corner and fold it to the top point. Repeat on the left side, tucking in the corners.
- Make the Wings: Fold the top triangle downwards and then flip the paper over. Crease well.
- Create the Neck and Tail: Valley fold the top layer's right section towards the center to form the crane’s neck. Repeat on the left side for the tail.
- Finish the Crane: Carefully pull apart the wings to give the crane its final shape. Gently puff out the body for a 3D effect.
And voila! You’ve just folded a beautiful paper crane. Just like that, with a bit of patience and practice, you’ve mastered a timeless origami art form. You can now experiment with different sizes, colors, and patterns, and even try folding multiple cranes for a stunning display.
Also Read This: Simple Steps to Copy Images into Paint
Tips for Perfecting Your Paper Crane
So, you’ve decided to tackle the beloved paper crane! Well, let me tell you, it’s not just about folding paper; it’s about getting those folds just right. Here’s how you can ensure your crane comes out looking like a work of art.
- Use the Right Paper: Choose a paper that’s not too thick. Origami paper is ideal because it’s both lightweight and flexible, making folds crisp and clean.
- Keep Your Folds Sharp: Use a bone folder or the edge of a ruler to press down firmly on your folds. This helps establish clean lines and gives your crane a professional finish.
- Practice Patience: The trick to mastering the crane is patience. Don’t rush through the folds. Take your time to align edges perfectly and ensure your creases are sharp.
- Check Your Angles: Pay close attention to the angles between your creases. A slight misalignment can affect the final shape of your crane.
- Watch Tutorials: Sometimes a visual guide is more helpful than written instructions. Watching tutorials can provide clarity on tricky steps.
- Do a Test Run: If you're using special paper, it might be worth it to do a practice run with an old piece first. It helps you gauge how the paper behaves and makes it easier to work with once you're using your best paper.
By keeping these tips in mind, you’ll be on your way to creating paper cranes that are not only beautiful but also reflective of your dedication. Remember, every fold counts!
Also Read This: How to Share YouTube Videos on Instagram and Other Social Media Platforms
Displaying Your Finished Crane
So you’ve finally crafted that perfect paper crane—congratulations! Now, it’s time to think about how to display your new creation. After all, a beautiful crane deserves a worthy showcase. Here are some creative ways to display it:
- Framing: Consider placing your crane in a shadow box frame. This keeps it protected from dust while adding a touch of elegance to your decor.
- Mobile Creations: If you’ve made several cranes, why not string them together and create a mobile? Hang it in a window or from the ceiling, and as they sway, they’ll look simply stunning.
- Gift or Note: Attach your crane to a greeting card or gift to add a personal touch. It can serve as a heartfelt symbol of good luck.
- Table Centerpieces: Use your cranes as part of a dining table centerpiece. Group a few together with flowers for a charming, artful display.
- Wall Art: Create a cluster of cranes on a canvas or directly on the wall. This adds an artistic flair that can be inspirational and uplifting.
Remember, displaying your crane should reflect your personal style and how you wish to share your art with the world. Get creative and enjoy showing off your hard work!
Mastering the Art of Paper Cranes with This Step-by-Step Origami Guide
Origami is a traditional Japanese art form that transforms a simple piece of paper into a stunning sculpture. Among the myriad of origami designs, the paper crane stands as a symbol of peace, hope, and prosperity. Mastering the art of folding paper cranes can be a rewarding experience, and this guide will walk you through each step necessary to create your very own paper crane.
Materials Needed
- Square piece of paper (15cm x 15cm is ideal)
- Flat surface for folding
- Patience and focus
Step-by-Step Instructions
- Start with a Square: Place your square paper flat on the table, patterned side facing down.
- Diagonal Folds: Fold the paper in half diagonally to form a triangle. Unfold and repeat on the other diagonal.
- Fold into a Square Base: Bring the top corners of the triangle down to meet the base, creating a smaller triangle.
- Form the Bird Base: With the open side of the triangle facing you, fold the top layers downwards, then fold the sides into the centerline.
- Make the Wings: Fold down the top flaps to form the wings, and pull the wings apart slightly.
- Complete the Crane: Gently pull the head up from one side and form the tail on the opposite side.
Tips for Success
| Tip | Description |
|---|---|
| Use Good Quality Paper | Thinner paper folds more easily and neatly. |
| Practice | Don’t be discouraged! Like any art, it takes time to master. |
| Watch Tutorials | Visual aids can greatly enhance your understanding of folds. |
In conclusion, paper cranes are not only a beautiful representation of origami but also a fun and engaging project that enhances your fine motor skills. By following this guide and practicing regularly, you can master the technique and create exquisite paper cranes to share with friends and family.
Additional Resources
- Origami Resource Center - Comprehensive tutorials and resources.
- YouTube Origami Channels - Visual guides and step-by-step video tutorials.
- Origami Books - A collection of books focusing on various origami techniques.
- Origami USA - Community and events for origami enthusiasts.
 admin
admin


