Canva is an incredibly versatile graphic design tool that's taken the design world by storm. If you've ever wanted to create stunning visuals, whether for social media, presentations, or your blog, Canva is your best friend! Its user-friendly interface makes it super accessible for everyone, regardless of their design experience. So, why is Canva such a beloved tool? Let's dive into some of its standout features.
- Drag-and-Drop Functionality: Canva’s intuitive interface allows you to drag and drop elements anywhere on your design. This makes it easy to customize layouts without getting bogged down in complicated design software.
- Templates Galore: With thousands of templates at your fingertips, you can jumpstart your creative process. From social media posts to business cards, Canva has you covered.
- Extensive Image Library: Canva offers a vast range of free and premium images, illustrations, and icons. You can elevate your designs with just a few clicks!
- Collaboration Tools: Work seamlessly with team members by sharing your designs and getting feedback in real-time. Perfect for group projects!
These features, among many others, make Canva a powerhouse tool for both budding and experienced designers. Whether you're brushing up on your design skills or starting from scratch, you'll find that Canva provides a plethora of resources to help you succeed.
Understanding Image Placement in Canva

So, you’ve created an eye-catching design and you're ready to add images—but how you place those images can make all the difference! Image placement in Canva is all about balance and creativity. Properly wrapping text around images is essential to keep your design clean and easy to read. Here’s what you need to know:
- Image Sizing: Always consider the size of the image you’re using. Too large might overshadow your text, while too small can make your design appear unbalanced. Adjust the image size by clicking on it and dragging the corners.
- Resizing Images: If you want to fit text around an image, you might need to resize it. Click on the image, and use the corner handles to modify its dimensions to fit your design schema.
- Text Boxes: Use text boxes strategically around your images. You can create multiple text boxes and adjust their individual placements to achieve a fluid layout that harmonizes with the images.
- Alignment Tools: Canva provides alignment guides that pop up as you move elements around. Utilize these tools for better organization of your text and images. Align text to the left, right, or center depending on the image placement.
Don't be afraid to experiment with the placement and see what feels right for your design. The flexibility of Canva allows you to undo and try again until you find that perfect look. Mastering image placement is key to creating professional-looking designs that effectively convey your message.
Also Read This: Linking Behance to Instagram for Effective Work Showcasing
How to Add Text to Your Canva Project

Adding text to your Canva project is a breeze, and it's one of the key features that can enhance your design considerably. You’ll be amazed at how versatile your text options can be, allowing you to create eye-catching visuals quickly!
Here’s how to get started:
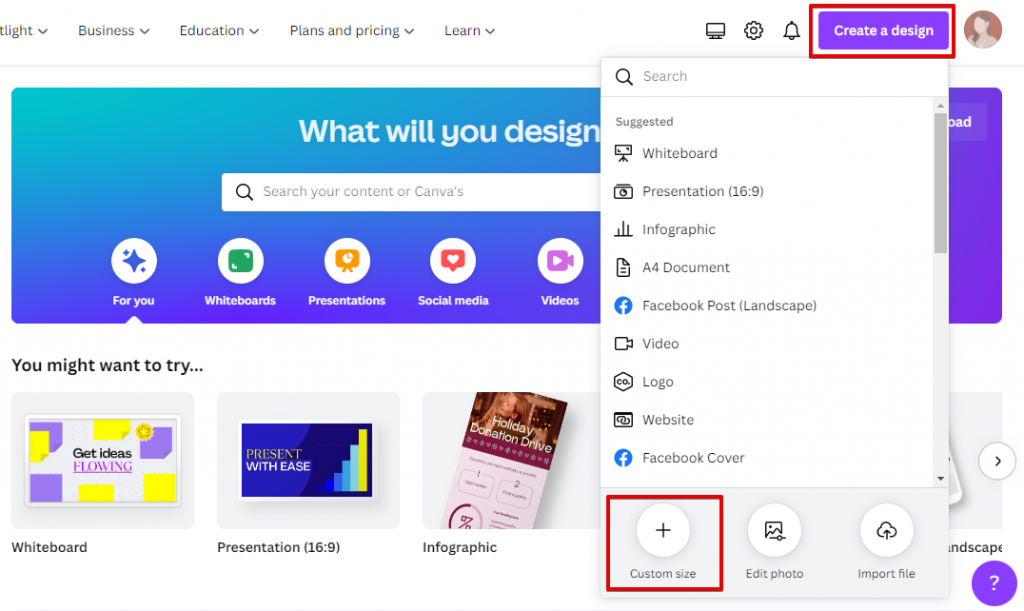
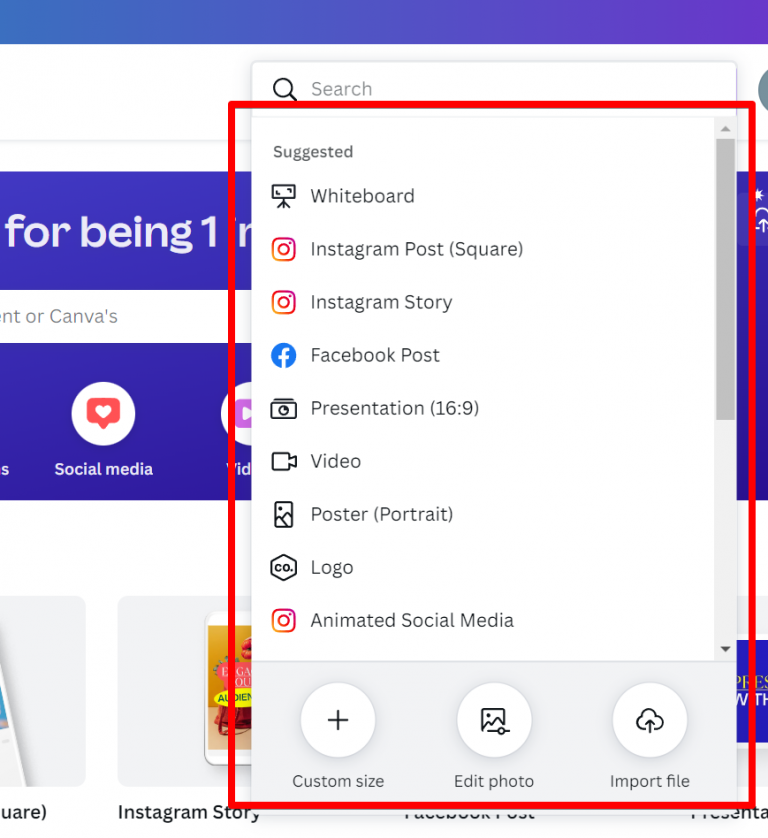
- Open Your Project: Start by opening an existing project or creating a new design. Just click on “Create a design” and choose your preferred template or dimensions.
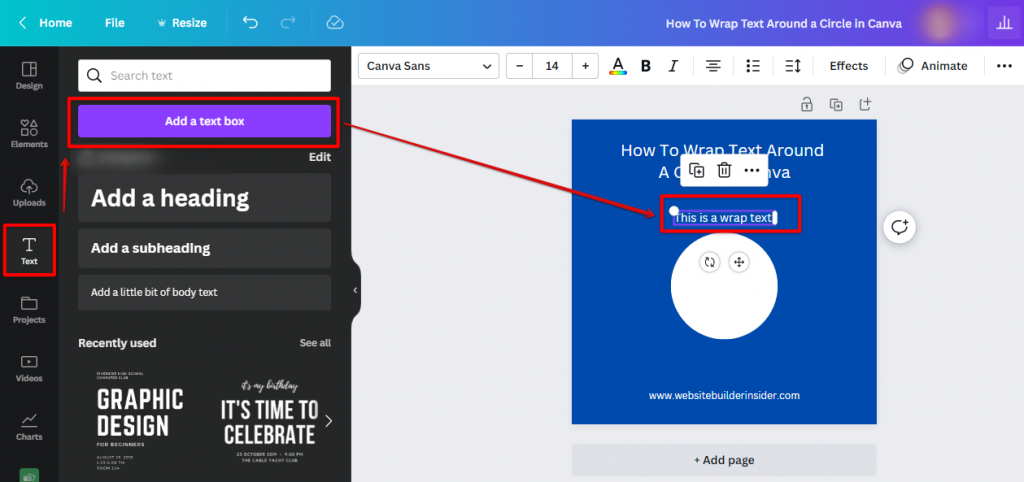
- Select the Text Tool: On the left-hand sidebar, you’ll find a “Text” tab. Click on it to access a range of text options.
- Choose Your Style: Canva offers several pre-designed text combinations, including headers, subheaders, and body text. You can click on any of these to add them directly to your project.
- Edit Your Text: Once your text appears on the canvas, you can click on it to type your content. You can also adjust the font size, style, and color using the menu that appears at the top.
- Move and Resize: Click and drag the text to position it anywhere on the canvas. Resize it by dragging the corners of the text box.
And just like that, your design starts taking shape! Don’t forget to explore different fonts and color combinations to find what complements your images best!
Also Read This: How to Create Stunning Bridal Makeup for Your Special Day
Methods for Wrapping Text Around Images

Text wrapping is an essential technique that creates harmony between your text and images. It can make your designs look more professional and polished. Here are some effective methods to wrap text around images in Canva:
1. Using the Text Box:
When you want your text to flow around an image:
- Place your image: Drag and drop the image into your project.
- Add a text box: Click on the ‘Text’ tool and create your text box.
- Position it: Move your text box next to the image. You may want to adjust the size of the text box to fit better.
2. Text Alignment:
Alignment plays a significant role in text wrapping:
- Adjust Alignment: Use left, center, or right alignment to arrange how your text sits relative to the image.
- Use Line Spacing: Modify line spacing to create a visually appealing distance between text lines and the image.
3. Create a Shape Background:
Another creative method involves using shapes:
- Draw a Shape: Create a rectangle or any shape behind your image.
- Place the Text: Now position the text within this shape, allowing it to wrap around the image for a sleek look.
By experimenting with these methods, you'll master the art of text wrapping and give your Canva designs an extra edge!
Also Read This: Tracking the Most Popular Minecraft YouTubers
5. Using Groups for Better Text and Image Alignment
When working in Canva, one of the most effective ways to achieve a polished look is by using groups for text and image alignment. Grouping elements not only simplifies your design process but also ensures consistency across your layout.
To group items in Canva, simply select all the elements you want to combine—whether it’s text boxes, images, or shapes—by holding down the Shift key and clicking on them. Once selected, look for the "Group" button in the top right corner (or use the shortcut Ctrl + G for Windows and Command + G for Mac). This will combine your selected elements into a single entity, making it easier to move or resize them as a unit while maintaining alignment.
Here are some benefits of using groups in Canva:
- Efficient Movement: Moving multiple elements simultaneously prevents unwanted misalignment.
- Consistent Sizing: Resizing a group allows for proportional changes without adjusting individual components.
- Enhanced Organization: Groups help keep your workspace tidy, especially with complex designs.
- Easy Layer Management: Grouping can also assist in managing layers, particularly when elements overlap.
By mastering grouping in your designs, you'll not only improve your workflow but also enhance the visual appeal of your projects, leading to stunning graphics that capture your audience’s attention.
Also Read This: Tracing an Image in Canva: How-To Guide
6. Best Practices for Text and Image Aesthetics
Creating visually appealing graphics in Canva goes beyond simple placement; it’s about understanding the harmony between text and images. Following some best practices can truly elevate the aesthetics of your designs.
Here are some key tips to consider:
- Contrast is Key: Ensure your text color contrasts sharply with the background image to enhance readability.
- Consistent Typography: Choose one or two fonts that complement each other well. Limit font types to maintain a cohesive look.
- Whitespace Matters: Incorporate adequate whitespace to prevent the design from feeling cluttered. It helps guide the viewer's eye.
- Image Quality: Always use high-resolution images to avoid pixelation, which can detract from the overall appeal.
- Alignment and Spacing: Pay attention to how text aligns with images. Good alignment can create a natural flow, making your design easier to digest.
Additionally, consider using Canva's grid lines and guides to help maintain alignment and balance throughout your design. By following these best practices, you’ll create a professional and attractive design that effectively communicates your message, ensuring that your audience engages with your content. Remember, the aesthetic is just as important as the information being shared.
Mastering Text Wrapping Around Images in Canva
Canva is an intuitive graphic design platform that enables users to create stunning visuals effortlessly. One of the essential skills to enhance your designs is mastering text wrapping around images. This technique can elevate your graphics, making them more aesthetically pleasing and easier to read. Below is a guide on how to effectively wrap text around images in your Canva projects.
*Step-by-Step Guide to Text Wrapping in Canva:
- Open Your Design: Start by launching Canva and choose the design template you want to work on.
- Add an Image: Use the left sidebar to upload an image or select one from the stock photos available within Canva.
- Position the Image: Click on the image and drag it to the desired location on your canvas. You can resize it by clicking and dragging the corner handles.
- Add Text: Click on the "Text" tool in the sidebar and select the type of text box you wish to use. Type your desired text.
- Adjust Text Position: Click and drag your text box around the image to find the perfect position where the text flows around the image harmoniously.
- Fine-tune Formatting: Highlight the text and use the formatting options in the top menu to adjust font size, style, and color for better readability.
Tips for Effective Text Wrapping:*
- Use shorter sentences to enhance clarity.
- Experiment with different text alignments.
- Choose contrasting colors between text and background/image for visibility.
By mastering text wrapping around images in Canva, you can increase the impact of your designs and improve viewer engagement. With practice, you'll find that visual storytelling becomes an easier and more rewarding endeavor.
 admin
admin


