Have you ever wanted to add a touch of creativity to your presentations? Image rounding in Google Slides is a fantastic way to transform standard images into visually appealing elements. This feature allows you to create rounded corners for your images, which can make your slides look more polished and professional. Not only does it enhance aesthetic appeal, but it also helps to create a cohesive design throughout your presentation.
Rounding the edges of images can make a big difference. For example, if you're presenting a project or showcasing a product, rounded images can soften the overall look, making it more inviting. Whether you’re a teacher, marketer, or student, mastering image rounding can elevate your slides to the next level. So, let’s dive into how you can easily access this feature in Google Slides!
Accessing Your Google Slides Presentation
Before you can start rounding your images, you need to know how to access your Google Slides presentation. Here’s a simple step-by-step guide to help you get started:
- Open Your Browser: Launch your preferred web browser—be it Chrome, Firefox, or Safari.
- Go to Google Slides: In the address bar, type slides.google.com and hit Enter. You’ll be directed to the Google Slides homepage.
- Sign In: If you're not already logged in to your Google account, enter your credentials to access your account.
- Select Your Presentation: You’ll see a list of your existing presentations. Click on the one you want to edit. If you’re starting fresh, click on the “Blank” option to create a new presentation.
And that's it! You’re now ready to dive into your presentation and start rounding those images. Keep in mind that Google Slides is user-friendly, so feel free to explore the various features while you're at it. Happy presenting!
Also Read This: Simple Steps to Increase DPI on an Image for Better Quality
Inserting Images into Google Slides

Inserting images into Google Slides is a breeze, and it’s a great way to elevate your presentations. Whether you’re adding a personal touch or showcasing essential data, images can make your slides more engaging. Here’s how to do it:
- Open Your Presentation: Start by launching Google Slides and opening the presentation where you want to insert your image.
- Select the Slide: Click on the slide where you want the image to appear.
- Insert Image: Go to the top menu and click on Insert > Image. You’ll see several options:
- Upload from Computer – Choose an image saved on your device.
- Search the Web – Use Google’s built-in image search.
- Drive – Access images saved in your Google Drive.
- Photos – Insert images from your Google Photos.
- By URL – Add an image using its direct URL.
- Adjust and Position: Once inserted, you can click and drag to reposition the image or resize it by dragging the corners.
Remember, high-quality images can significantly enhance your presentation’s appeal. So, whether it’s a captivating photo or a relevant chart, make sure to choose images that complement your message!
Also Read This: Creating Text-Filled Images for a Unique Effect
Using the Masking Tool to Round Images
Want to give your images a stylish twist in Google Slides? The masking tool is your best friend! It allows you to create shapes and apply them to images, so you can easily round the edges or fit them into cool designs. Here’s how to get started:
- Insert Your Image: First, follow the steps mentioned above to insert your desired image into your slide.
- Select the Image: Click on the image to ensure it's highlighted.
- Access the Masking Tool: Go to the toolbar, click on the small arrow next to the Crop Image icon, and choose Mask Image.
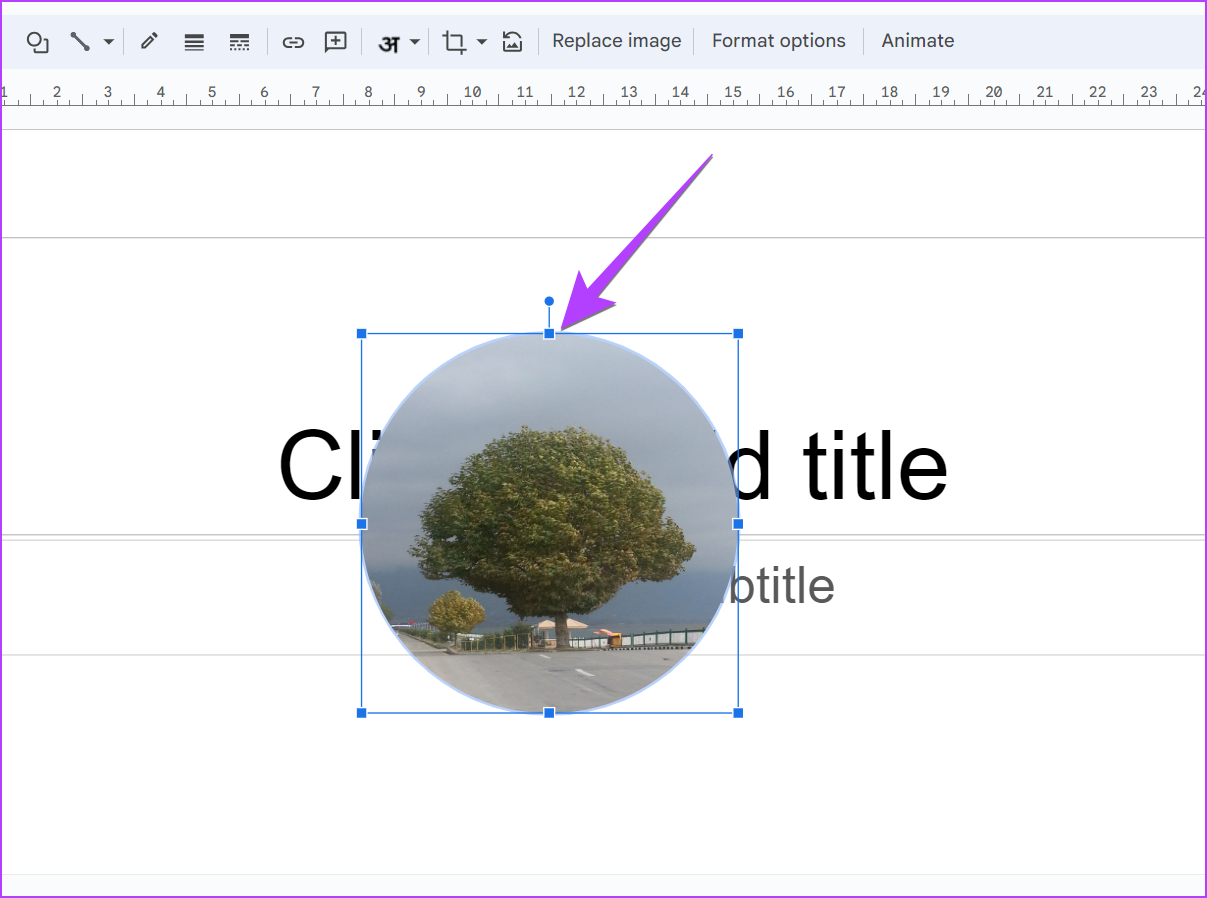
- Choose a Shape: You'll see various shapes, including circles and rounded rectangles. Select the rounded rectangle to achieve that smooth, rounded look.
- Adjust the Mask: Once applied, you can adjust the mask by dragging the corners or edges to fit your image perfectly.
This tool not only makes your images visually appealing but also helps maintain a consistent design language throughout your presentation. So, go ahead and experiment with different shapes to find what best suits your slides!
Also Read This: how to add a image in javascript
5. Adjusting the Rounded Edges
When it comes to creating visually appealing presentations, rounded edges can make your images look sleek and professional. In Google Slides, adjusting the rounded edges of your images is a straightforward process. Here’s how you can master this technique:
- Select Your Image: Click on the image you want to modify. This will highlight the image and activate the formatting options.
- Access the Format Options: Right-click on the image and select “Format options” from the dropdown menu. This opens a panel on the right side of your screen.
- Round the Edges: In the Format options panel, look for the “Adjustments” section. Here, you will find the “Corner radius” slider. You can drag this slider left or right to adjust the rounding of the edges to your liking. A higher value will give you more rounded corners.
- Preview Your Changes: As you adjust the slider, keep an eye on your image to see how the changes affect its appearance. You can always go back and fine-tune it until you achieve the perfect look.
Remember, rounded edges can soften the overall appearance of your images, making them blend seamlessly into your presentation. So don’t hesitate to experiment with different levels of rounding until you find what suits your design best!
Also Read This: How to Download EyeEm Photos: A Step-by-Step Tutorial
6. Additional Tips for Enhancing Images
To truly make your images stand out in Google Slides, consider these additional tips for enhancement:
- Use High-Quality Images: Always start with high-resolution images. This ensures that your visuals look crisp and professional, even when they’re resized.
- Apply Filters: Use the built-in filters available in Google Slides to add a unique touch to your images. You can adjust brightness, contrast, and saturation to make your images pop.
- Incorporate Shadows: Adding drop shadows can give your images depth. Go to the “Format options” and look for the “Drop shadow” feature, where you can customize the angle, distance, and blur of the shadow.
- Group Related Images: If you have multiple images related to a single concept, group them together. This not only keeps your slides organized but also creates a more cohesive look.
By implementing these tips, you'll elevate the overall visual quality of your presentations, making them more engaging for your audience. Always remember, a well-designed image can speak volumes and enhance your message!
Mastering Image Rounding in Google Slides
Google Slides offers a user-friendly platform for creating visually appealing presentations. One of the essential techniques to enhance the aesthetics of your slides is mastering image rounding. This technique helps create smooth, polished visuals that capture your audience's attention.
Here’s a step-by-step guide to help you round images effectively in Google Slides:
- Select Your Image: Click on the image you want to modify.
- Open Format Options: Right-click on the image and select “Format options” from the dropdown menu.
- Choose “Adjustments”: In the Format options sidebar, click on “Adjustments.”
- Enable “Masking:” Under the “Mask” section, click the dropdown and select “Shapes.”
- Select a Shape: Choose a shape that corresponds to the desired roundness, such as a circle or rounded rectangle.
- Adjust the Shape: Resize and reposition the shape as necessary to fit your image.
- Apply Effects: You can further enhance your image by adding shadows or reflections for depth.
Utilizing image rounding not only improves the overall visual appeal but also helps maintain consistency across your slides, making your presentation look more professional.
| Step | Action |
|---|---|
| 1 | Select your image |
| 2 | Open Format Options |
| 3 | Choose Adjustments |
| 4 | Enable Masking |
| 5 | Select a Shape |
| 6 | Adjust the Shape |
| 7 | Apply Effects |
In conclusion, mastering image rounding in Google Slides can greatly enhance your presentation's visual appeal. By following these steps, you can create images that are not only aesthetically pleasing but also contribute to the overall professionalism of your slides. For further resources, consider exploring Google Slides tutorials or design blogs that offer advanced tips and tricks.
 admin
admin


