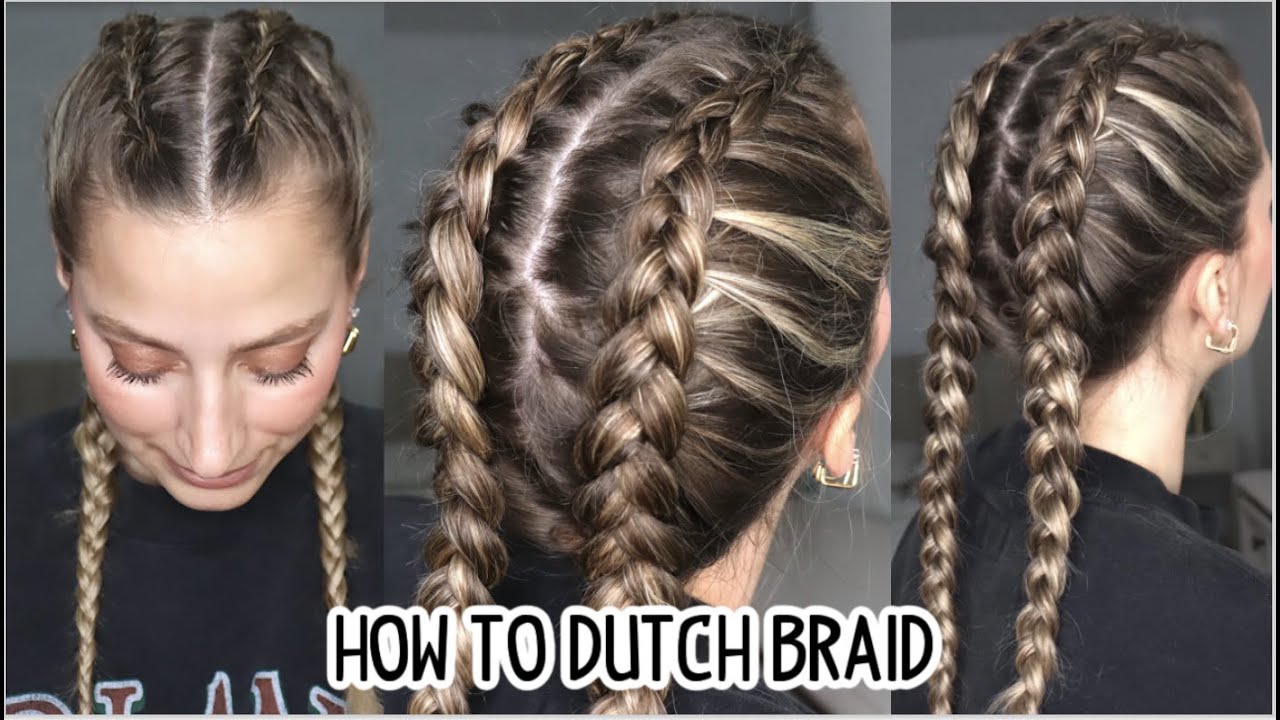
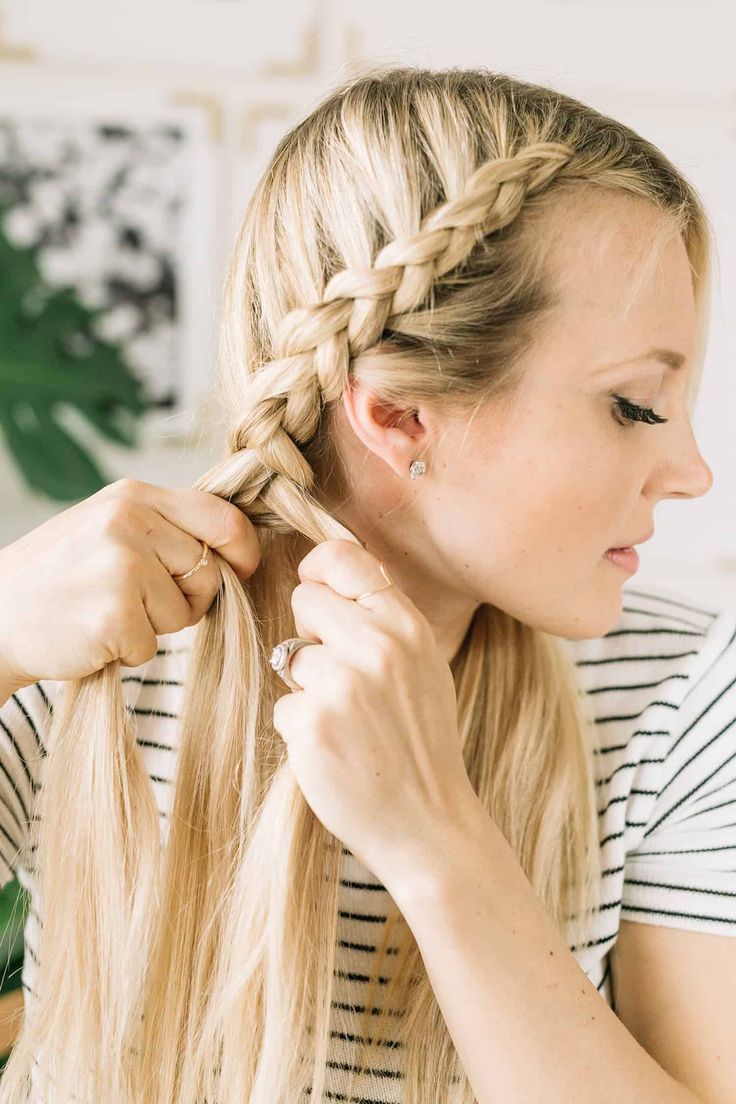
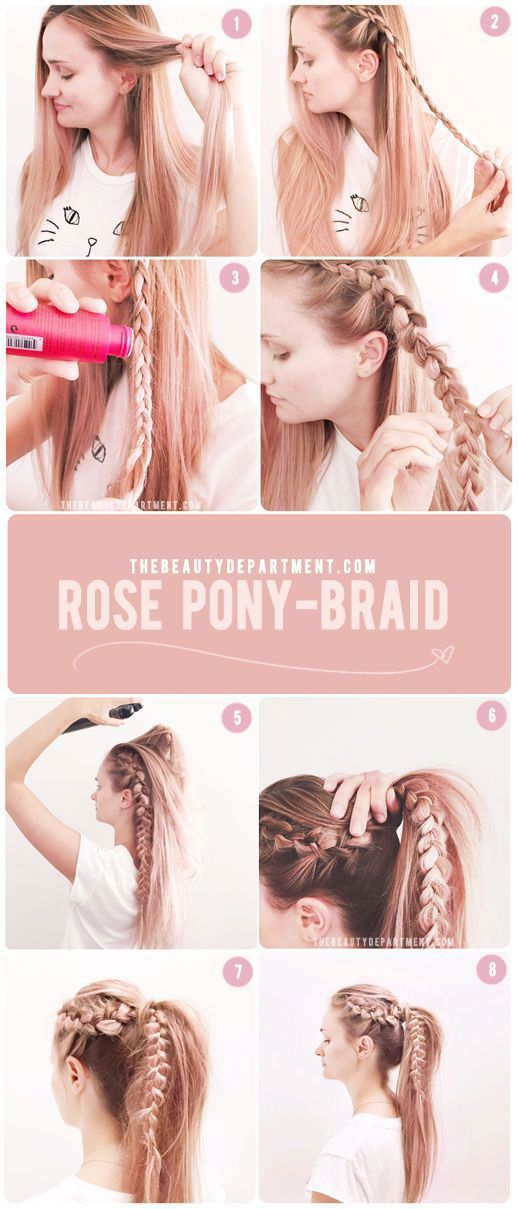
Dive into the charming world of Dutch braiding! If you’ve ever admired a beautifully crafted braid and wondered how it's done, you’re in the right place. Dutch braiding is a stunning, inverted style that pops from the scalp, creating a gorgeous, three-dimensional look. It's not just stylish; it’s also versatile, suitable for casual outings, formal events, or even a workout session. Whether you want a sleek and polished appearance or a relaxed, boho vibe, mastering this technique opens many doors in hairstyling. So, let’s unravel the beauty of Dutch braiding together!
Essential Tools and Products for Dutch Braiding

Before we get started on the braiding technique, let's talk about the essential tools and products that make Dutch braiding a breeze. Having the right items on hand not only simplifies the process but also ensures your style lasts longer. Here’s what you’ll need:
- Hairbrush or Comb: A good quality brush or comb is essential for detangling your hair and creating a smooth foundation.
- Hair Ties: Opt for elastic hair ties that match your hair color to keep things seamless. You might need several for different sections!
- Bobby Pins: These are your friends! Use them to secure any loose strands and keep your braid intact throughout the day.
- Hair Spray: A lightweight hairspray can help hold the braid in place without making it stiff. Look for an anti-frizz formula if you have unruly hair.
- Texturizing Spray: For individuals with fine hair, texturizing spray can add grip and volume, making it easier to create a stable braid.
Having these tools handy can make the entire process smoother and more enjoyable. Once you're all set, you'll feel like a pro when it comes to braiding!
Also Read This: Streaming Wonders: How to Stream BBC America Anywhere
Step-by-Step Guide to Creating a Dutch Braid

Creating a Dutch braid can seem tricky at first, but once you break it down into steps, you’ll find it’s not only achievable but also fun! Here’s a simple guide to help you get started.
- Gather Your Supplies: Before you begin, make sure you have everything you need. You’ll need a brush, hair ties, and a few bobby pins if you’re planning to secure any loose strands.
- Prep Your Hair: Start with clean, dry hair. It can be helpful to add a little styling mousse or gel for extra grip.
- Section Your Hair: Use your brush to part your hair down the middle. For a more bohemian look, you can opt for a side part instead.
- Start the Braid: Take a small section of hair from the front (near your forehead) and divide it into three equal strands.
- Begin Braiding: Cross the right strand under the middle strand and then the left strand under the new middle strand. This time, instead of simply crossing, you’re going to pick up hair as you go.
- Add Hair: As you continue, incorporate more hair from each side into the braid. Make sure to always cross the outer strands under the middle.
- Finish the Braid: Once you've reached the nape of your neck, continue braiding down to the ends until you can no longer add any hair. Secure it with a hair tie.
And there you have it! With a little practice, you’ll be creating stunning Dutch braids that you can wear anywhere.
Also Read This: How to Download Files from Dailymotion Easily
Tips for Perfecting Your Dutch Braid

Mastering a Dutch braid is all about practice, but there are some tips and tricks that can help you get the look just right every time. Here are a few to keep in mind:
- Keep Tension Even: Make sure you're pulling the hair snugly but not too tightly. Maintaining an even tension will give your braid a neat appearance without causing discomfort.
- Use the Right Products: Products like texturizing spray or light-hold hairspray can help keep your braid in place without making it stiff.
- Practice the Basics: Get comfortable with the basic three-strand braid before attempting a Dutch braid. It will make the transition much easier!
- Experiment with Sizing: Play around with the sizes of the sections you use. Thicker sections will create a chunkier braid, and thinner sections will yield a more delicate look.
Incorporating these tips into your routine will elevate your Dutch braiding skills significantly. Before you know it, you'll be able to create beautiful braids with ease. Happy braiding!
Also Read This: How to Kick a Soccer Ball Far and with Precision
5. Variations of the Dutch Braid

So, you’ve got the basic Dutch braid down—congratulations! Now, let's spice things up with some fabulous variations. There’s a whole world of creativity waiting for you beyond the classic two or three-strand braid. Here are some exciting styles to try:
- Dutch Fishtail Braid: This gorgeous style combines the intricate look of a fishtail braid with the depth of a Dutch braid. Instead of taking from the top like a regular Dutch braid, you’ll be grabbing small sections from the sides and crossing them over. The result is a stunning, woven look that’s perfect for special occasions.
- Reverse Dutch Braid: Similar to the traditional Dutch braid, but in reverse! This style gives a unique, cone-like appearance that adds a fun twist to the usual look. Just remember, you’re working against gravity, so keep your sections tight to maintain that fabulous shape.
- Double Dutch Braid: If you can’t choose between one braid or two, why not go for both? This style features two Dutch braids, either placed side-by-side or pulled back into a ponytail. It’s chic yet functional, perfect for workouts or casual outings.
- Dutch Crown Braid: Want to feel like royalty? The Dutch crown braid wraps around your head like a halo. Start by braiding your hair in a Dutch braid, then pin it around your scalp. It’s a stunning and elegant option for weddings or fancy gatherings.
Remember, experimenting with these variations will not only showcase your skill but also your unique style. So grab that comb and some hair ties, and let’s get braiding!
Also Read This: Mastering English at Home with Ease
6. Common Mistakes to Avoid
Even the most seasoned braiders can slip up! But don’t worry; making mistakes is part of learning. Here are some common pitfalls to watch out for when perfecting your Dutch braid:
- Uneven Tension: A common mistake is pulling sections too tightly or too loosely. Aim for a balance! Uneven tension can lead to a lopsided braid, which isn’t what you want. Keep it consistent throughout for that perfect look.
- Ignoring Hair Type: Not all hair types braid the same way. If you have thick or curly hair, your braid may look different than if you have fine, straight strands. Tailor your technique accordingly, perhaps using a little product for hold or volume.
- Not Sectioning Properly: A good Dutch braid starts with well-defined sections. Avoid the mistake of grabbing random chunks of hair. Instead, take the time to create smooth, clean sections for a polished look.
- Skipping the Prep: Going into a braiding session without prepping your hair can lead to tangles and frustration. Make sure to brush your hair thoroughly first, and consider using a heat protectant or styling cream to help tame frizz.
- Forgotten Layers: If you have layers in your hair, they can slip out during the braiding process. To avoid this, secure your layers with a little product or bobby pins before starting.
By being aware of these common mistakes, you’ll save yourself a lot of frustration on your braiding journey. Happy braiding!
Also Read This: Discovering Ancient Britain Through Dailymotion Videos
Master the Art of Dutch Braiding with This Gorgeous Hairstyling Tutorial
Dutch braiding, often referred to as an "inside-out" braid, is a stunning hairstyle that adds texture and dimension to your locks. It's a versatile style that can be worn for casual outings, formal events, or even a day at the office. In this tutorial, we will guide you through the steps and tips necessary for mastering this beautiful braid.
Before you begin, gather the following tools:
- Hairbrush
- Hair ties
- Hair spray (optional)
- Comb (for sectioning hair)
Here’s a step-by-step guide on how to create the perfect Dutch braid:
- Prepare Your Hair: Start with clean, dry hair. Brush through to remove any knots.
- Section Your Hair: Use a comb to create a triangular section at the top of your head.
- Divide the Section: Split this section into three equal parts.
- Begin Braiding: Cross the left strand under the middle strand, then cross the right strand under the new middle strand.
- Add Hair: As you continue braiding, gather small sections of hair from the sides and incorporate them into the braid.
- Finish the Braid: Continue braiding until you reach the nape of your neck, then secure with a hair tie.
- Final Touch: Gently pull on the edges of the braid to make it fuller and more textured.
Dutch braiding is not only a practical hairstyling technique but also a way to express creativity with your hair. Practice makes perfect—don’t be discouraged if your first attempt doesn’t turn out perfectly. With time and practice, you’ll develop the skill to create various styles using the Dutch braid technique.
Also Read This: Discover and Utilize Culturally Inclusive Photos on Imago Images for Your Brand
Conclusion
With this tutorial, mastering the art of Dutch braiding is within your reach. Embrace the versatility and beauty of this hairstyle, and remember that practice will lead to perfection. Happy braiding!
 admin
admin


