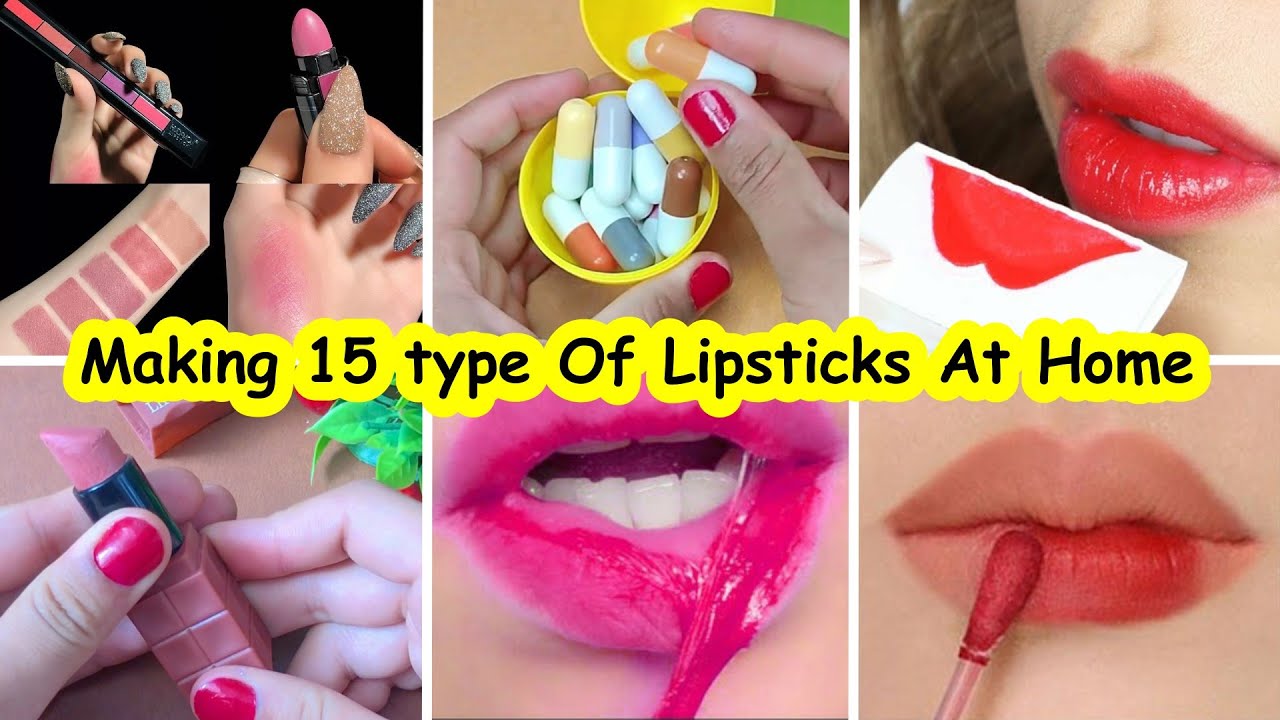
Creating your own lipstick at home is not just a fun DIY project; it's a way to personalize your beauty routine. With the right ingredients, you can craft unique shades that suit your style and preferences. Plus, making lipstick at home allows you to control the quality of the ingredients, ensuring they are safe for your skin. Whether you're looking for a bold red, a subtle pink, or something completely different, the possibilities are endless! In this post, we’ll dive into the benefits of DIY lipstick and guide you through the process with some helpful video links.
Benefits of Making Lipstick at Home
Making lipstick at home comes with a myriad of benefits that go beyond just creativity. Here are some compelling reasons to give it a try:
- Customization: You can create a color and texture that perfectly matches your skin tone and personal style. Want a shimmery peach or a matte berry? The choice is yours!
- Ingredient Control: Store-bought lipsticks often contain synthetic chemicals, preservatives, and artificial colors. By making your own, you can use natural ingredients like beeswax, coconut oil, and plant pigments.
- Cost-Effective: Although the initial investment in ingredients may seem high, homemade lipstick can actually save you money in the long run. A little goes a long way, and you’ll likely make multiple batches for the price of one tube of commercial lipstick.
- Eco-Friendly: By using sustainable ingredients and reusable containers, you can minimize waste and contribute to a healthier planet. You can even use recycled jars or tins for storage.
- Fun and Creative: Crafting your own lipstick is a relaxing and enjoyable activity. You can experiment with different shades, scents, and finishes, turning it into a fun girls’ night or a solo pampering session.
In addition to these benefits, making lipstick at home can also be a fantastic gift idea. Imagine giving a friend a personalized lipstick shade, packaged beautifully in a handmade container. It adds a personal touch that’s sure to be appreciated.
Overall, the experience of creating your own lipstick is rewarding, allowing you to embrace your creativity while prioritizing your health and the environment. So, gather your ingredients and get ready for a fun DIY adventure that you can share with friends or enjoy solo!
Also Read This: Step-by-Step Handmade Birthday Card Tutorials with Dailymotion Videos
3. Essential Ingredients for Homemade Lipstick
Making your own lipstick at home can be a fun and rewarding experience, especially when you know exactly what goes into it! The best part? You can customize the colors and scents just the way you like them. Here’s a breakdown of the essential ingredients you'll need to create your own lovely lip colors:
- Beeswax: This is a must-have! Beeswax helps solidify the lipstick and provides a protective barrier to your lips. Plus, it has natural moisturizing properties.
- Carrier Oils: Oils such as coconut oil, jojoba oil, and sweet almond oil are great choices. They add hydration and smooth application while giving your lipstick a luscious feel.
- Butters: Adding butters like shea butter or cocoa butter gives your lipstick a creamy texture and further nourishes your lips.
- Colorants: You can use natural colorants like beetroot powder, cocoa powder, or even cosmetic-grade micas to achieve that beautiful hue. The advantage of natural colorants is they can be tailored to your desired shade without harmful chemicals.
- Essential Oils: For flavor and fragrance, add essential oils like peppermint, vanilla, or lavender. Make sure to research safe levels for topical use!
- Vitamin E Oil: This is an optional but fantastic addition for its antioxidants, helping to preserve the lipstick and nourish your lips.
Now that you have your ingredients, you’re on the right track. Just remember that the ratios of these ingredients can be adjusted based on the texture and finish you prefer, whether it's matte, glossy, or creamy. The fun is in experimenting to find your perfect mix!
Also Read This: Learn How to Download from Dailymotion on PC with No Hassle Using This Tool
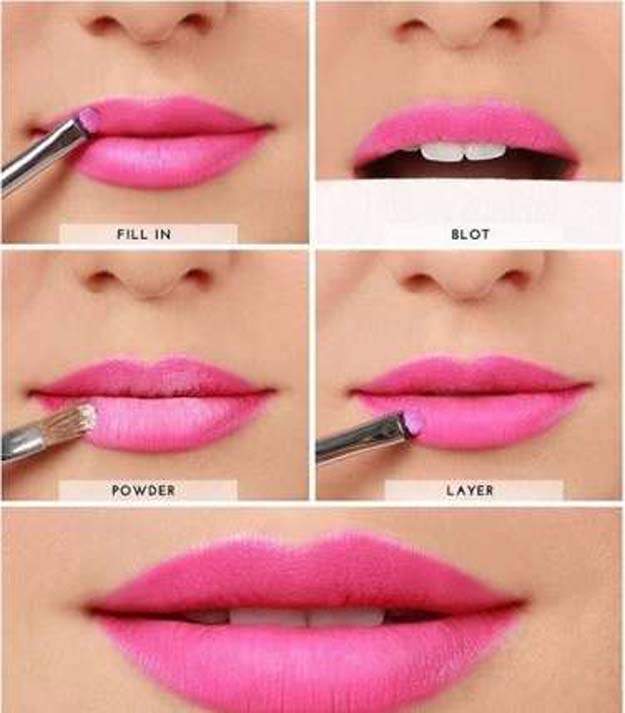
4. Step-by-Step Guide to Making Lipstick
Ready to dive into the world of homemade beauty? Follow this step-by-step guide to whip up your own customized lipstick right in your kitchen. Grab your ingredients and let’s get started!
- Gather Your Tools: Before you begin, make sure you have everything you need: a double boiler (or a microwave-safe bowl), a lip balm container or lipstick tube, and a stirring tool like a spatula.
- Measure Your Base: In your double boiler, combine 2 tablespoons of carrier oil (like coconut oil), 1 tablespoon of beeswax, and 1 tablespoon of shea or cocoa butter. This combination will form the base of your lipstick.
- Heat Gently: Place the double boiler on low heat and let the ingredients melt together. Stir occasionally until fully combined. If using a microwave, heat in increments of 15-20 seconds, stirring in between to avoid overheating.
- Add Color: Once melted, remove the mixture from heat. Add your chosen natural colorant - start with a small amount and mix until you achieve your desired shade. You can always add more for a bolder color!
- Incorporate Scents: Add about 5-10 drops of your favorite essential oil to the mixture. Stir well to make sure everything is combined.
- Pour Into Container: Carefully pour your liquid lipstick into the lip balm container or lipstick mold using a funnel if needed. Be cautious as it can be hot!
- Let It Set: Allow your lipstick to cool completely at room temperature. This may take a couple of hours, but you can speed it up by placing it in the fridge for about 15-20 minutes.
- Enjoy Your Creation: Once solid, your homemade lipstick is ready to be used! Test it out and enjoy the satisfaction of wearing a product you made yourself!
And there you have it – your DIY lipstick is complete! Feel free to experiment with different colors and combinations for endless fun. Happy crafting!
Also Read This: How to Live Stream on Dailymotion
5. Tools and Equipment Needed for Lipstick Making
Before diving into the colorful world of DIY lipstick, it's essential to gather all the required tools and equipment. Having the right supplies on hand can make the process smoother and more enjoyable. Here’s what you’ll need:
- Double Boiler or Microwave: This is crucial for melting your ingredients. A double boiler allows for gentle heating, preventing the mixture from burning.
- Mixing Bowls: Use small, heat-safe mixing bowls to combine your ingredients. Glass or metal bowls work best.
- Measuring Spoons and Cups: Precision is key in lipstick making, so having proper measuring tools will help you get the ratios right.
- Stirring Utensils: A small whisk or spoon is perfect for mixing your ingredients. Make sure it's heat-resistant if you’re using it in a hot mixture.
- Lipstick Molds or Containers: If you're making solid lipstick, you’ll need molds or tubes to shape and store it. You can repurpose old lipstick tubes for this purpose!
- Small Funnel: This is helpful for transferring the liquid lipstick into its container without making a mess.
- Labels and Markers: Once you’ve created your lipstick, labeling your tubes is a fun way to keep track of your creations. Plus, it adds a personal touch!
It’s also a good idea to have some paper towels nearby to clean up any spills. Lipstick making can get a little messy, but that's part of the fun!
Remember that safety comes first. Always work in a well-ventilated space, especially if you’re using essential oils or colorants that may have strong scents or chemicals. Lastly, enjoy the process! Lipstick making can be both therapeutic and creatively satisfying.
Also Read This: Integrating YouTube and Dailymotion with Sync Features
6. Watching Step-by-Step Lipstick Making Videos on Dailymotion
In today’s digital age, learning how to make lipstick at home has never been easier, thanks to a plethora of online resources. One of the best platforms to find step-by-step guides is Dailymotion. With a quick search, you can uncover a treasure trove of videos that visually demonstrate each stage of the lipstick-making process.
Here are a few reasons why Dailymotion is a fantastic resource for this creative endeavor:
- Visual Learning: Seeing someone else make lipstick can make the process clearer and more manageable. Videos often illustrate common pitfalls and tips that are sometimes hard to grasp through written instructions.
- Variety of Styles: You'll find a wide range of lipstick styles, whether you're looking for a glossy finish, matte texture, or even tinted balms. Each video can introduce you to new techniques and ingredients.
- Community Engagement: Many Dailymotion creators encourage viewers to leave comments with questions or tips. This creates a community feel where you can share your experiences and learn from others.
To find the best videos, try searching for phrases like "DIY lipstick tutorial" or "homemade lipstick recipe." You’ll likely find content from beauty enthusiasts and professionals who break down the process into easy-to-follow steps. As you watch, don’t hesitate to pause, rewind, or jot down notes. It’s all part of the learning experience!
And once you’ve got the hang of it, why not create your video? Sharing your journey can inspire others to join in on the fun!
Also Read This: How to Make Crochet Flowers Step by Step: Detailed Tutorial on Dailymotion
7. Tips for Customizing Your Lipstick Shades
Creating your own unique lipstick shades can be one of the most fun aspects of DIY cosmetics. With a little creativity and some basic understanding of color theory, you can easily customize your lipsticks to match your mood, outfit, or even the season! Here are some tips to get you started:
- Understand Color Mixing: Before you dive into mixing your pigments, it helps to have a grasp of how colors work together. Remember that:
- Primary Colors: Red, blue, and yellow.
- Secondary Colors: Created by mixing primary colors (e.g., red + blue = purple).
- Tertiary Colors: Mixing a primary and a secondary color (e.g., red + orange = red-orange).
- Start Small: When experimenting with new colors, start with small batches of your lipstick mixture. This way, you won’t waste materials if the color doesn’t turn out as expected!
- Add a Touch of White or Black: If you want to lighten a shade, try adding a bit of white mica powder. To darken it, a tiny bit of black can work wonders—but be careful, as it can overpower quickly!
- Play with Undertones: Lipsticks can have warm, cool, or neutral undertones. If you want a warm red, add a bit of yellow to your base. For a cool pink, a hint of blue might be just what you need.
- Mix Different Oils: If you’re looking for varied finishes, consider mixing different carrier oils. Jojoba oil can add shine while coconut oil can lend a creamy texture. Experiment with ratios to find your favorite blend!
- Use Natural Dyes: Want to add a pop of color? Think outside the box by incorporating natural options like beet juice for a vibrant red or turmeric for a warm yellow hue. They not only color your lipstick but are also skin-friendly!
- Trial and Error is Key: Don’t be afraid to experiment! The beauty of making your own lipstick is the freedom to test out different combinations until you find your perfect shade.
With these tips in mind, you’ll be on your way to crafting a personalized lipstick collection that truly expresses who you are. Enjoy the process, and remember, practice makes perfect!
Also Read This: Mastering Mascara Application with a Step-by-Step Video Tutorial
8. Common Mistakes to Avoid When Making Lipstick
Making lipstick at home can be a delightful adventure, but like any other creative project, it has its pitfalls. To ensure your DIY lipstick turns out fabulous rather than disastrous, here are some common mistakes to steer clear of:
- Not Measuring Ingredients: It’s tempting to eyeball your ingredients, especially when you’re excited to start. However, precise measurements can make a significant difference in the final product’s texture and color. Use a kitchen scale or measuring spoons for accuracy.
- Ignoring the Safety Aspect: Always conduct a patch test before fully committing to your ingredients. You don’t want to find out the hard way that you’re allergic to a particular oil or colorant!
- Overheating the Mixture: When melting waxes and oils, keep the heat low to avoid scorching them. High temperatures can alter the formula and affect the integrity of your lipstick.
- Skipping Emollients: If your DIY lipstick is too hard or dries your lips, you might have forgotten to add sufficient emollients. Ingredients like shea butter or vitamin E can help keep your lipstick creamy and hydrating.
- Neglecting Container Hygiene: Always ensure your lipstick containers are clean and sanitized. Bacteria can grow in improperly stored lipsticks, leading to potential skin irritations.
- Forgetting About Shelf Life: Homemade lipsticks usually lack preservatives, so keep them in a cool, dark place and be mindful of how long you’ve had them. If you notice any changes in smell or texture, it’s best to toss them.
- Being Overly Ambitious: Finally, start with simple formulas before moving on to more complex creations. Trying to tackle a multi-layered lipstick on your first attempt can lead to frustration. Master the basics first!
By being aware of these common pitfalls, you can enjoy your lipstick-making journey with confidence. Happy crafting!
Conclusion: Enjoying Your Homemade Lipstick
Now that you've successfully created your very own lipstick, it's time to embrace your craftsmanship and enjoy the rewards of your hard work! Homemade lipstick not only offers a personalized touch but also lets you customize ingredients to suit your preferences. Here are some key points to remember as you indulge in your new lip color:
- Test for Allergies: Always perform a patch test before using your lipstick extensively to ensure you’re not allergic to any of the ingredients.
- Storage Matters: Store your lipstick in a cool, dry place to maintain its consistency and prevent melting. Consider using a small container or an empty lipstick tube for convenience.
- Experiment with Colors: Don’t hesitate to create different shades! Play with various pigments and formulations to find your perfect hue.
- Share Your Creations: Show off your handmade lipsticks to friends and family! It could even make for a wonderful gift.
Your homemade lipstick journey can also lead to thrilling new experiments. As you gain confidence, try incorporating different essential oils for fragrance, or add a touch of shimmer with mica powder for a glamorous finish. The beauty of DIY cosmetics is that you are in control!
Enjoy every application, and remember that the compliments you receive will be even sweeter knowing that you crafted them yourself. Homemade lipstick serves as a celebration of creativity and self-expression, paving the way for a bold new beauty routine!
 admin
admin


