Adding a clickable link to an image in Google Slides can make your presentation more interactive. Whether you're linking to an external website, another slide in your presentation, or a document, this simple trick can improve user engagement and help convey your message more effectively. In this guide, we'll walk you through how to turn your images into links with ease.
Step-by-Step Guide to Linking an Image in Google Slides

Turning an image into a clickable link in Google Slides is straightforward. Just follow these steps to add links to your images:
- Insert an Image: First, add the image to your slide. Click on the "Insert" menu at the top and select "Image." You can upload an image from your computer, use a URL, or search for one online.
- Select the Image: Once the image is inserted, click on it to select it. You'll see a blue box around the image, indicating it’s active.
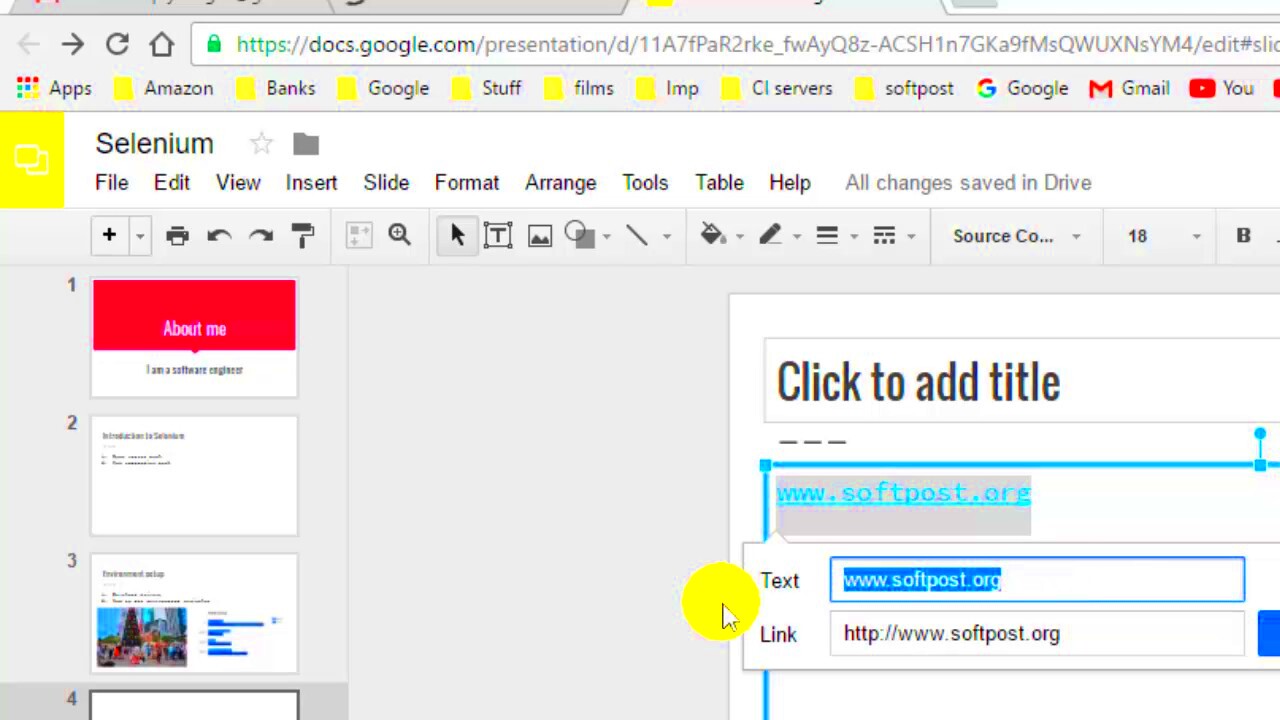
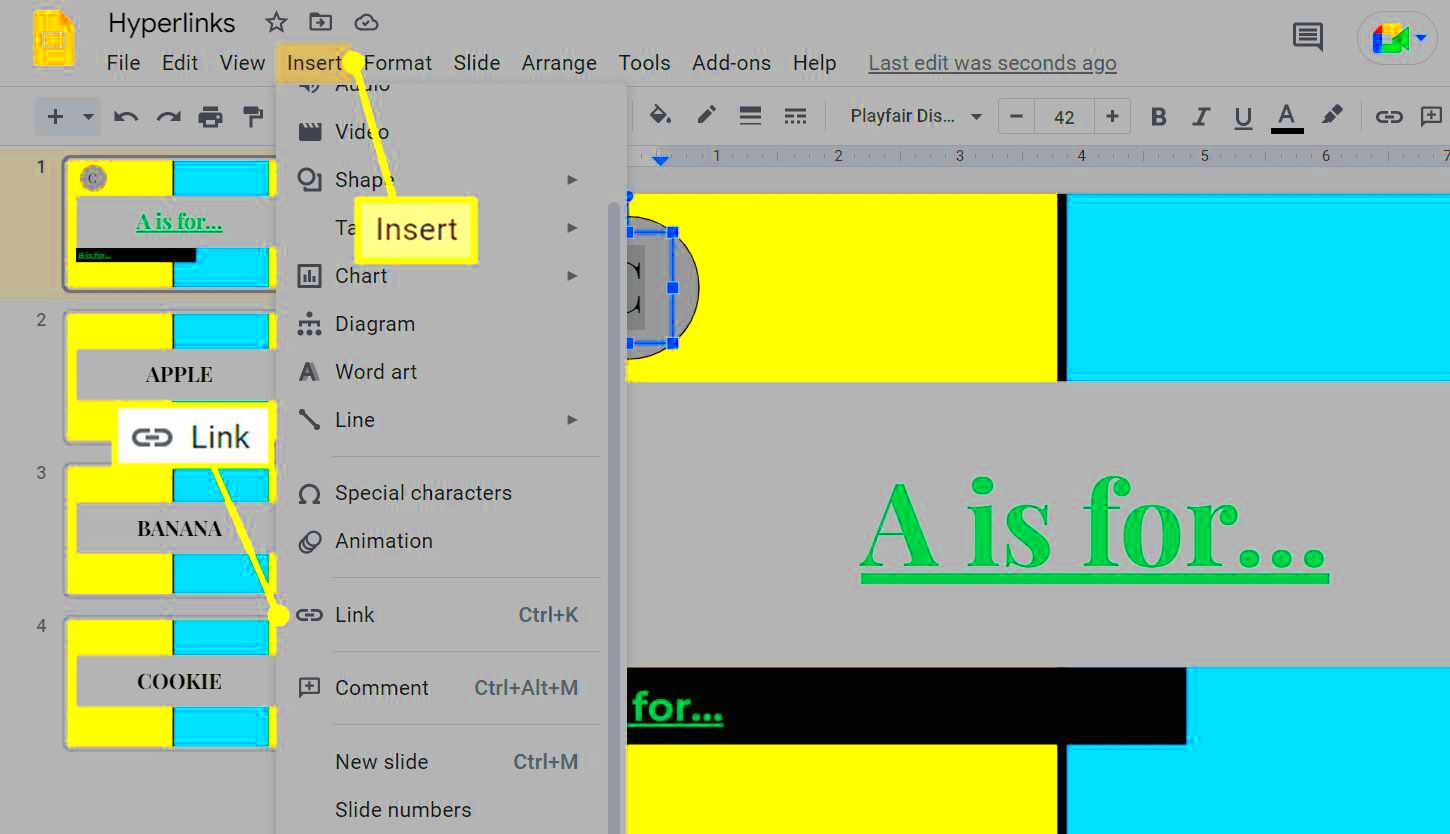
- Insert the Link: Right-click the selected image and choose the "Link" option. Alternatively, you can click the "Insert" menu at the top and select "Link." A box will pop up where you can paste your desired URL or choose a slide within your presentation.
- Apply the Link: After pasting the URL or selecting a slide, click "Apply" to create the link. Your image is now a clickable link!
Once you’ve added the link, test it in presentation mode to make sure it works as expected. You can always edit or remove the link later if needed.
Also Read This: Removing Watermark on Shutterstock: Guidelines and Processes
Selecting the Right Image for Your Link

Choosing the right image for your link is essential for clarity and user experience. Not all images are suitable for linking. Here’s what to consider when selecting an image to turn into a link:
- Relevance: The image should have a clear connection to the link destination. For example, if you're linking to a product page, a product image is a good choice.
- Visual Clarity: Make sure the image is high-quality and clear. A blurry or low-resolution image can confuse your audience and reduce the effectiveness of your link.
- Size and Placement: Choose an image size that fits well within your slide layout. The image should be big enough to grab attention but not so large that it distracts from the content.
- Call-to-Action: If your image is part of a call-to-action (CTA), like a button or icon, it should stand out. You might want to make it visually appealing by adding a border or shadow effect to draw attention to the link.
Ultimately, your image should help convey the message you're trying to share while making the link easy to find and use. A well-chosen image can improve the flow of your presentation and create a seamless experience for your audience.
Also Read This: How to Remove Getty Images Logo from Your Photos and Maintain Rights
How to Insert an Image in Google Slides

Inserting an image into your Google Slides presentation is simple and can be done in just a few clicks. Whether you're adding a picture from your computer, a link, or even from Google Images, the process is the same. Here’s how you can easily insert an image into your slide:
- Open Your Google Slides Presentation: First, make sure you have your presentation open in Google Slides.
- Click on the Slide: Select the slide where you want to insert the image.
- Go to the Insert Menu: At the top of your screen, click on "Insert" and then select "Image" from the drop-down menu. You’ll see different options for where you can upload the image from.
- Choose Your Image Source: You can insert an image in several ways:
- Upload from Computer: Select "Upload from Computer" to choose an image saved on your device.
- Search the Web: Click "Search the Web" to find images directly from Google’s image search.
- Use Google Photos or Drive: If the image is saved in your Google Photos or Drive, you can select it from there.
- By URL: If you have a direct URL to the image, you can paste it in the "By URL" option.
- Resize and Position the Image: Once your image is inserted, you can resize it by clicking and dragging the corners. You can also reposition the image on the slide as needed.
That’s it! You now have an image in your Google Slide. It’s an easy way to add visual content to your presentation that can help explain your message more clearly.
Also Read This: Choosing the Perfect Camera for 123RF: Selecting the Ideal Equipment for Stock Photography
Adding a Hyperlink to an Image
Now that you’ve inserted your image, it’s time to make it interactive by adding a hyperlink. Whether you want to link to an external website, another slide in the presentation, or a document, here's how you do it:
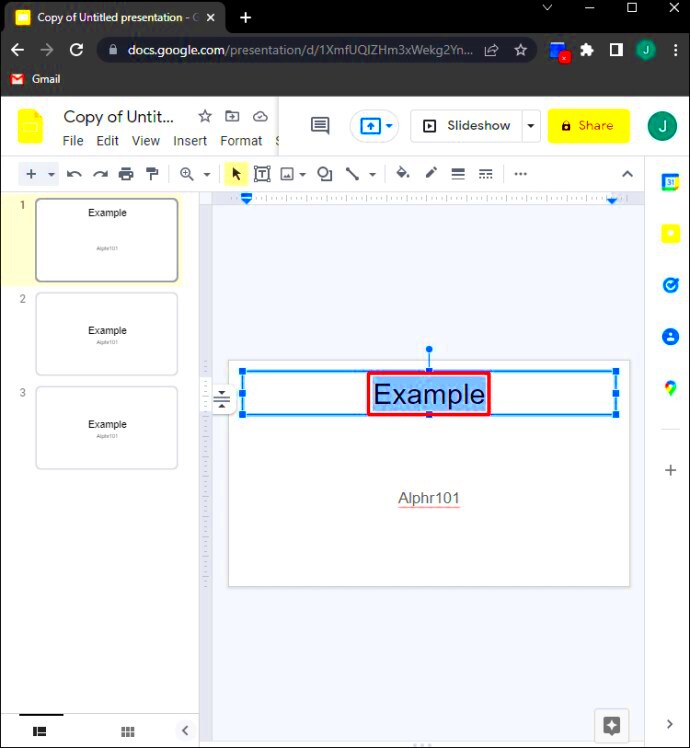
- Select the Image: Click on the image you want to turn into a link. This will highlight the image with a blue box.
- Click on the Link Option: Right-click on the image and choose "Link," or go to the "Insert" menu at the top and select "Link." This will open a box where you can enter your link.
- Insert the Link: Paste the URL you want the image to link to in the box. If you're linking to another slide within your presentation, click on the "Slides in this presentation" option and select the slide you want to link to.
- Apply the Link: Once you've entered your link, click "Apply." Your image is now a clickable link!
Adding a link to an image in Google Slides is a powerful way to make your presentations more interactive. Whether you're linking to external content or navigating within your slides, this method will help keep your audience engaged.
Also Read This: Automatically Tracing Images in Procreate
Testing the Link on Your Image
After adding a hyperlink to an image, it's crucial to test it to ensure it works properly before you present it to an audience. Here’s how to make sure everything is set up correctly:
- Switch to Presentation Mode: Click on the "Present" button at the top-right of the screen. This will open your presentation in full-screen mode, just as your audience would see it.
- Click on the Linked Image: Once you’re in presentation mode, click on the image with the hyperlink. This will test if the link is working as expected.
- Check the Link Destination: Ensure that the link directs you to the right destination. Whether it’s a website, a slide, or a document, make sure the link opens correctly.
- Fix Any Issues: If the link doesn’t work as expected, exit presentation mode, go back to the image, and double-check the link. Make sure the URL is correct, or reselect the slide you want to link to.
Testing the link is a key step to avoid surprises when presenting. It ensures that the flow of your presentation remains smooth and your audience can easily follow any interactive elements.
Also Read This: Simple Guide to Downloading Sound from YouTube on Mac
Common Issues and Troubleshooting Tips
While making an image a clickable link in Google Slides is a simple process, sometimes things don’t go as planned. Here are a few common issues users face and tips on how to troubleshoot them:
- The Link Doesn't Work in Presentation Mode: If the link doesn’t open in presentation mode, first ensure the URL is correct. Double-check that you’ve pasted the complete link, including the "http://" or "https://". Sometimes, Google Slides might miss certain characters when copying and pasting links. If you’re linking to a slide, make sure you’ve chosen the correct slide number.
- Image Link Gets Lost After Editing: Occasionally, when you move or resize an image, the link can become unlinked. If this happens, select the image again, right-click, and reapply the link. It’s a good idea to test the link after any edits to make sure it’s still active.
- The Image Appears Too Small or Too Big: If your image appears out of proportion, resize it by dragging the corners to adjust its size. Be careful not to stretch the image in a way that distorts it. If you're working with multiple images on the slide, ensure they're properly aligned for visual balance.
- Hyperlink Doesn't Work on Mobile: Some users report that hyperlinks on images don’t work well on mobile devices. If this happens, make sure the link is compatible with mobile browsers and that the image size is optimized for mobile view.
If you're still facing issues after troubleshooting, try restarting your Google Slides or checking your internet connection. Google Slides sometimes has temporary glitches that can affect link functionality.
Also Read This: Combining Images into One PDF
FAQ about Making an Image a Link in Google Slides
Here are some frequently asked questions that can help you resolve any doubts about adding links to images in Google Slides:
- Can I link an image to another slide in the same presentation?
- Yes! When adding a link to an image, you can choose to link to another slide within the same presentation. Just click "Slides in this presentation" and select the slide you want to link to.
- What types of links can I add to an image?
- You can link to external websites, other slides in your presentation, or even files from Google Drive. Just paste the appropriate URL or select the desired slide or file from the link options.
- Can I change the link after adding it to the image?
- Yes! If you want to change the link, just select the image again, right-click, and choose "Link" to edit or replace the URL.
- Why can't I click on the image in presentation mode?
- If you can’t click on the image, make sure you’re actually in presentation mode. Also, check if the image was accidentally grouped with other elements, which can sometimes prevent the link from working properly.
- How do I remove a link from an image?
- To remove a link, click on the image, right-click, and select "Remove link." The image will no longer be clickable.
If you have other questions, feel free to search the Google Slides help center or reach out to their support team for more detailed assistance.
Conclusion: Enhancing Your Google Slides with Linked Images
Adding links to images in Google Slides is a simple yet effective way to enhance your presentations. Not only does it make your slides more interactive, but it also helps to create a smooth flow of information, allowing your audience to engage with your content more deeply. By using the right images and ensuring your links work properly, you can make your presentations more engaging and informative.
Remember, the key is to choose images that complement your content, link to relevant resources, and test everything before presenting. This will ensure your audience has the best experience possible. So, go ahead and start experimenting with clickable images in Google Slides to make your presentations stand out!

 admin
admin


