In Google Slides, locking an image helps prevent accidental movement or changes to your design. Although Google Slides doesn’t have a direct “lock” feature like some other software, there are still ways to keep your images secure on the slide. By understanding these techniques, you can keep your visuals exactly where you want them, ensuring your presentation looks polished and professional.
Whether you’re working on a business presentation, an educational slide deck, or a personal project, learning how to “lock” an image will add control and structure to your slides, making it easier to focus on creating your content without constant adjustments.
Ways to Use Image Locking Effectively in Presentations

Locking images in Google Slides is useful in many scenarios. Here are some ways it can improve your presentations:
- Background Images: Set images as backgrounds to prevent accidental movements, making them feel locked in place.
- Consistent Branding: Lock your brand logo on every slide to keep it stable and avoid unintentional changes.
- Layered Designs: For slides with layered images, locking one image lets you edit others without disturbing the layout.
- Focus on Content: Secure your images in position so you can focus on adding text and other elements around them.
Using image locking methods ensures that key visuals remain where they belong, helping maintain a cohesive look across your slides.
Also Read This: how to open multiple images as layers in photoshop
Steps for Locking an Image in Google Slides

While Google Slides doesn’t have a built-in “lock” feature, here are steps you can follow to simulate image locking:
- Set the Image as a Background:
- Select the slide where you want to lock the image.
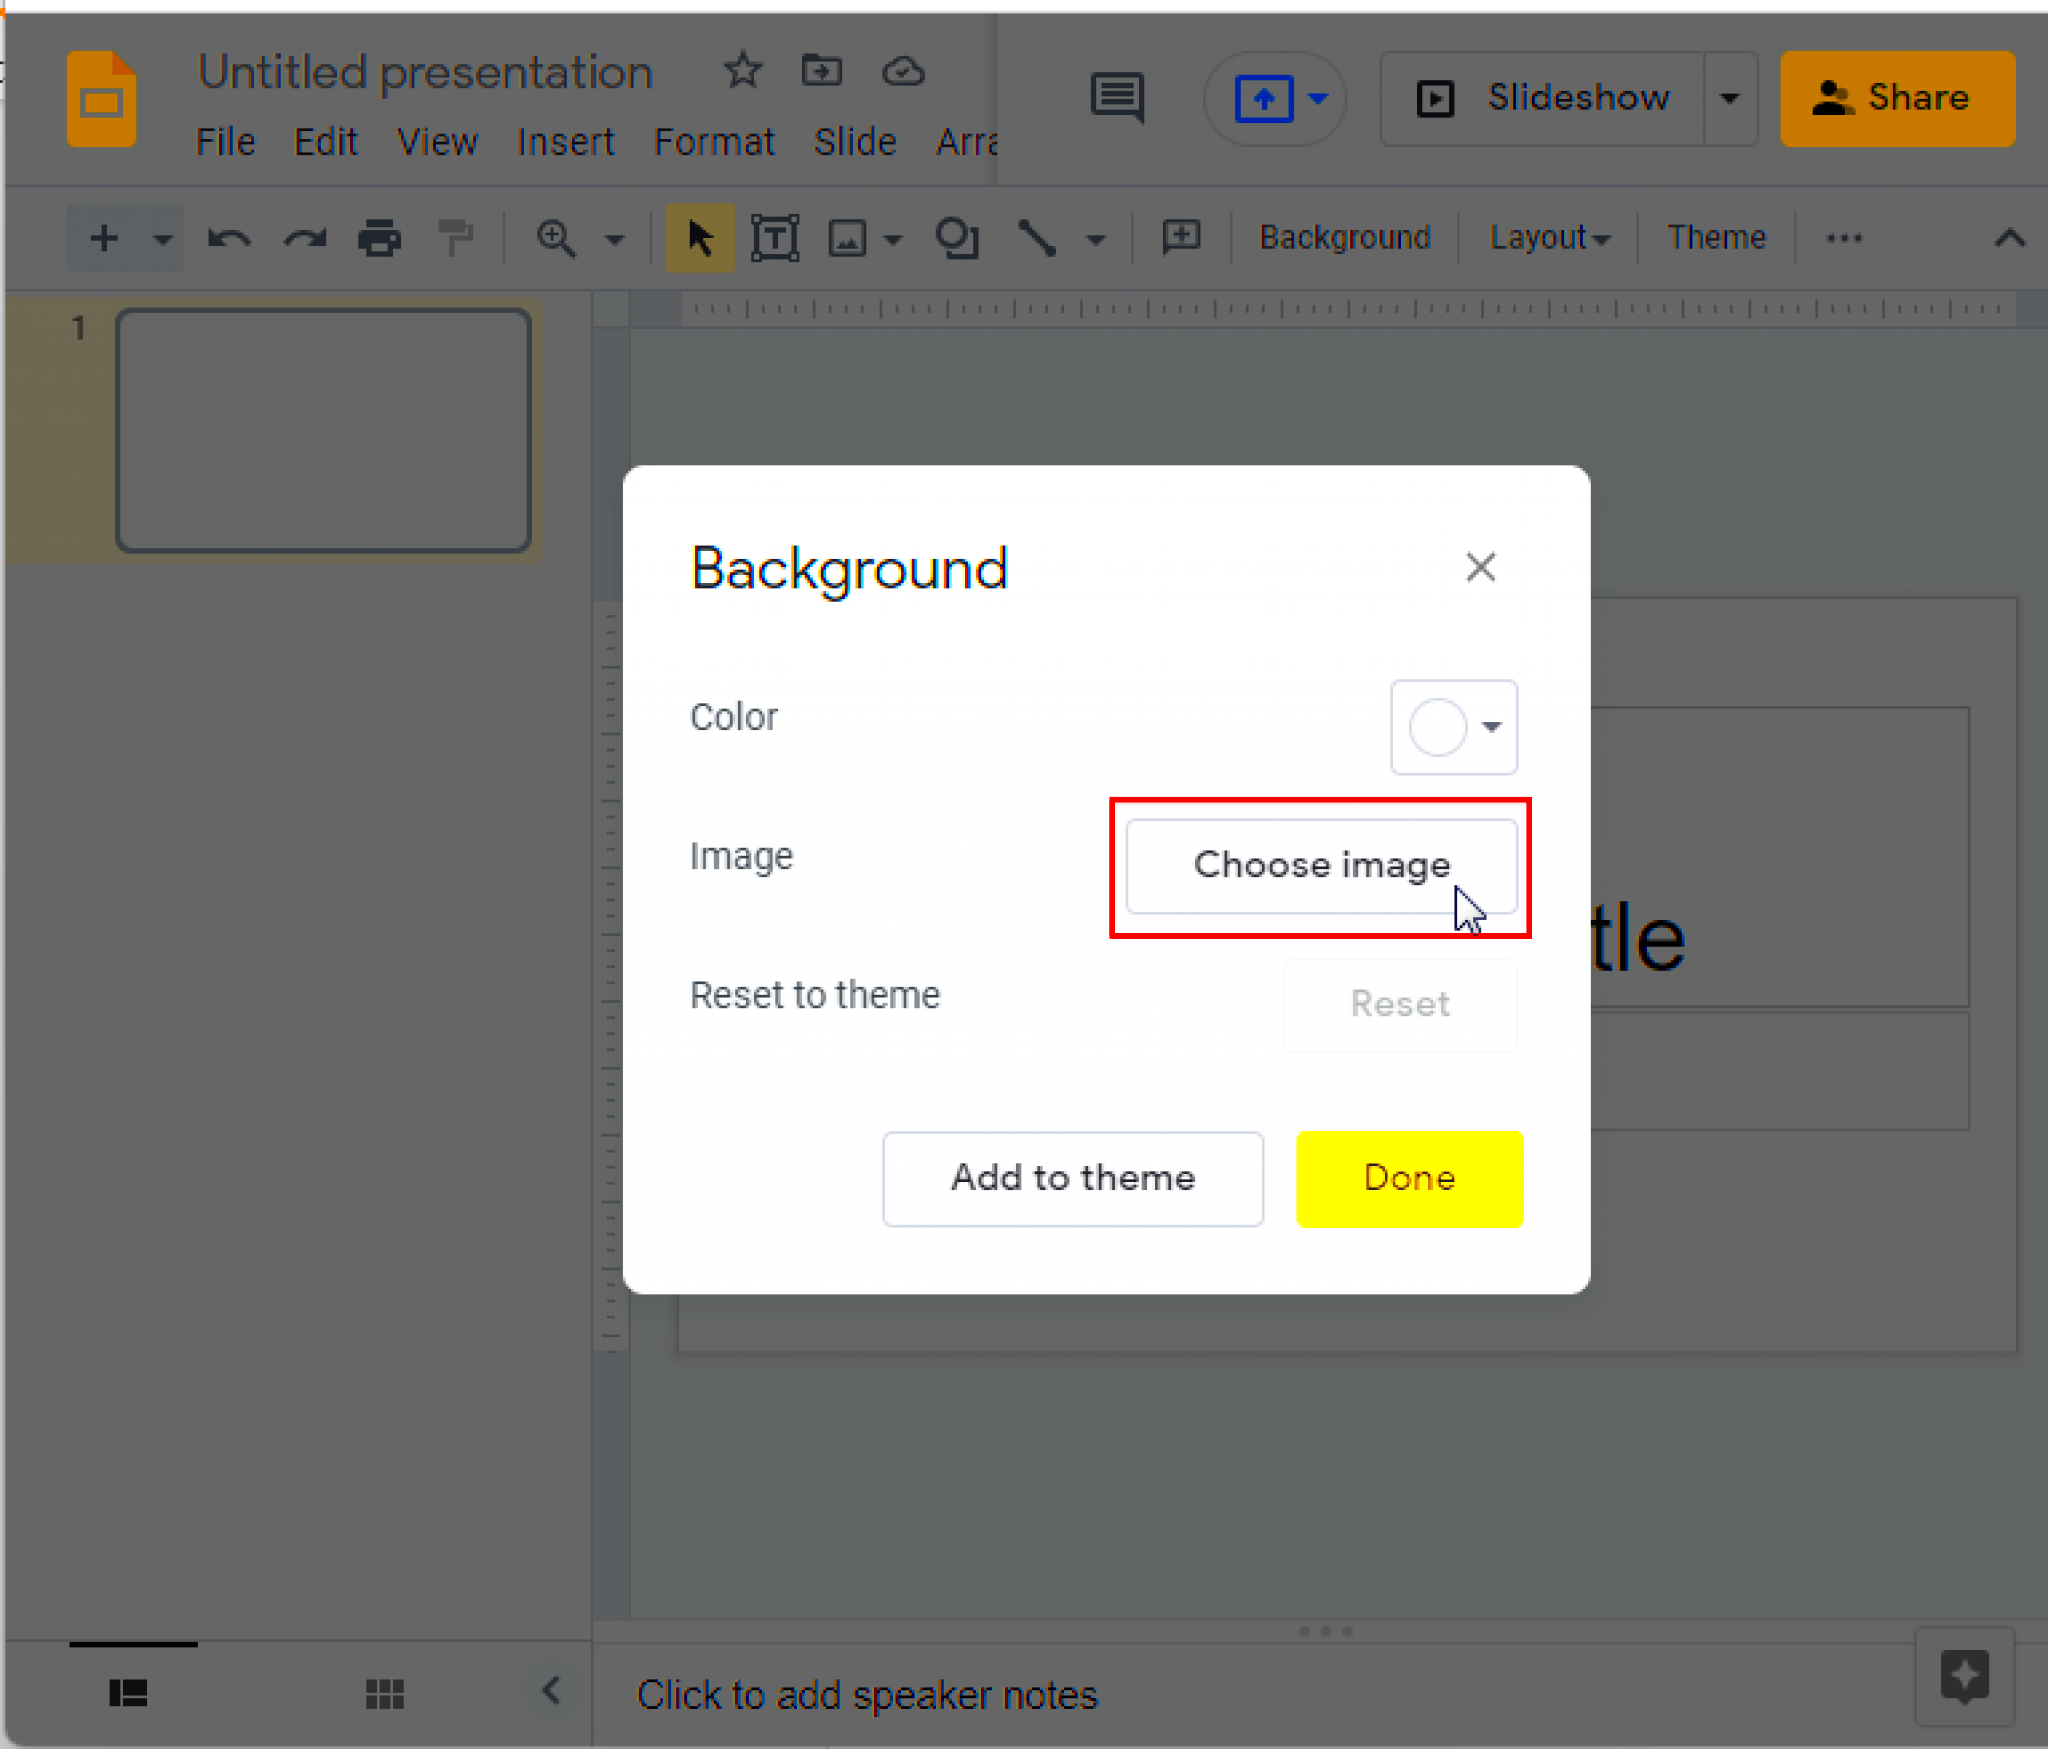
- Click on Background in the toolbar.
- Choose Choose Image and upload your image.
- Once set as the background, the image will no longer move and behaves like it’s locked.
- Overlay with a Transparent Shape:
- Insert a shape that covers the entire image.
- Adjust the transparency of the shape to keep the image visible underneath.
- This prevents accidental clicks on the image while editing the slide.
- Group the Image with Other Elements:
- Select the image and any elements you want to move together.
- Right-click and select Group to keep them as a single, unmovable unit.
These steps give you a simple way to prevent image adjustments in Google Slides, helping you control your design with ease.
Also Read This: Creating ISO Images from Files for Backup
Using Shapes to Lock Images as Backgrounds
One effective way to lock images in Google Slides is by using shapes as backgrounds. This method allows you to keep your images in place while adding flexibility to your slide designs. Although Google Slides doesn’t offer a traditional locking feature, this workaround can help you achieve similar results. By using a shape as a background and adjusting its transparency, you can keep the image in the background while still interacting with other elements on the slide.
Here’s how you can do it:
- Insert a Shape: Choose a shape like a rectangle or square from the “Insert” menu and place it on your slide. Resize it to cover the entire slide.
- Set the Image as the Shape’s Fill: Right-click on the shape and select Format Options, then choose Fill > Image. Upload your image to fill the shape.
- Adjust Transparency: In the “Format Options” panel, adjust the transparency of the shape so that your image is visible but the shape itself does not interfere with text or other elements on top of it.
- Send the Shape to the Back: Right-click the shape and select Order > Send to Back. This will place your image behind the rest of your content.
By using this method, the image stays fixed as the background, preventing it from being accidentally moved or altered while you work on the other elements of your slide.
Also Read This: How to Open an Image Plane in Fusion 360 for 3D Design Projects
Tips for Working with Locked Images
Once your images are locked in place, it’s important to know how to work with them effectively. Here are some useful tips to ensure you get the most out of your locked images:
- Don’t Overcrowd Slides: While locked images are great for maintaining a clean layout, avoid overcrowding the slide with too many images. This will make it harder to focus on key content.
- Use Layers Wisely: When locking images, layering them can help with the design. Ensure important elements stay on top, and background images remain in the back, giving a clear hierarchy.
- Maintain Consistency: If you’re using multiple locked images throughout your presentation, make sure they follow a consistent style. This could mean similar shapes, sizes, or opacity levels across all slides.
- Group Elements Together: When locking multiple images with text or shapes, group them together. This makes it easier to move them around if you need to adjust your layout later.
- Check Alignment: Before locking images, double-check their alignment. Make sure everything looks neat and aligned to maintain a polished look throughout your presentation.
Following these tips will ensure your locked images stay in place while enhancing the overall presentation design.
Common Mistakes to Avoid When Locking Images
While locking images in Google Slides is a helpful tool, it’s easy to make mistakes that can affect the overall look of your presentation. Here are some common errors to avoid when using image locking techniques:
- Forgetting About Image Resizing: One common mistake is not resizing images before locking them. If you lock an image and then realize it’s too large or too small, resizing it later can be difficult and might affect the layout.
- Overusing Transparency: While transparency helps blend the image into the background, using it too much can make it difficult to see the image clearly. Be mindful of the balance between visibility and design.
- Ignoring Slide Dimensions: Locking an image without considering the slide dimensions can lead to awkward cropping or positioning. Always double-check how the image fits within the slide before locking it in place.
- Misplacing Important Content: Locking images can sometimes hide important text or content if you’re not careful with layers. Always ensure that text and other crucial elements are placed above the locked images.
- Not Grouping Elements: Forgetting to group images with text or other elements can lead to issues later on when you need to move multiple items. Grouping everything together will help maintain the layout intact.
Avoiding these common mistakes will help you create smooth, professional presentations without losing control over your design.
The best way to lock an image across multiple slides is by using the Master Slide feature. You can set a background image on the master slide, and it will appear on all slides, remaining fixed in place.
Yes, you can group multiple images or elements together. Once grouped, you can move them as a single unit, preventing accidental changes to any one part of the group.
Locking an image in Google Slides doesn’t prevent others from editing it if they have access to the slide. It only prevents accidental movement or modification of the image while editing.
Yes, using the method of inserting a shape as a background and sending it to the back will lock the image for that specific slide without affecting others.

 admin
admin


