Linking images in Google Slides is a simple yet effective way to make your presentations more dynamic and interactive. By adding links to your images, you can connect your audience to external content, additional slides, or even other resources within your presentation. This feature allows you to make your slides not only visually appealing but also functional and engaging. Whether you're giving a presentation for work, school, or any other purpose, learning how to link images can enhance the overall experience for your viewers.
Why You Should Link Images in Google Slides

Linking images in Google Slides offers several benefits that can improve both the presentation’s flow and audience engagement. Here’s why you should consider linking images:
- Increased Interactivity: Linking images makes your slides interactive, allowing viewers to click on the images for more information or navigate to related content.
- Enhanced Visual Appeal: By integrating links with images, you can create a seamless connection between visuals and additional resources, making your presentation more attractive and informative.
- Easy Navigation: When images are linked to specific slides or external sources, you can guide your audience through a structured and engaging path.
- Time-Saving: Rather than explaining every detail, you can link to relevant sources, letting your images speak for themselves and keeping the presentation concise.
Linking images also allows you to streamline your presentation without losing essential information. It keeps your slides visually neat and organized, while providing additional context when needed.
Steps to Link an Image in Google Slides

Linking an image in Google Slides is quick and straightforward. Follow these steps to get started:
- Step 1: Insert an Image
- Step 2: Select the Image
- Step 3: Add a Link
- Step 4: Test the Link
- Step 5: Adjust and Save
First, add an image to your slide by clicking on the "Insert" menu, then selecting "Image." You can choose to upload from your computer, search the web, or select from other options.
Click on the image to select it. This ensures that the image you want to link is active and ready for the next step.
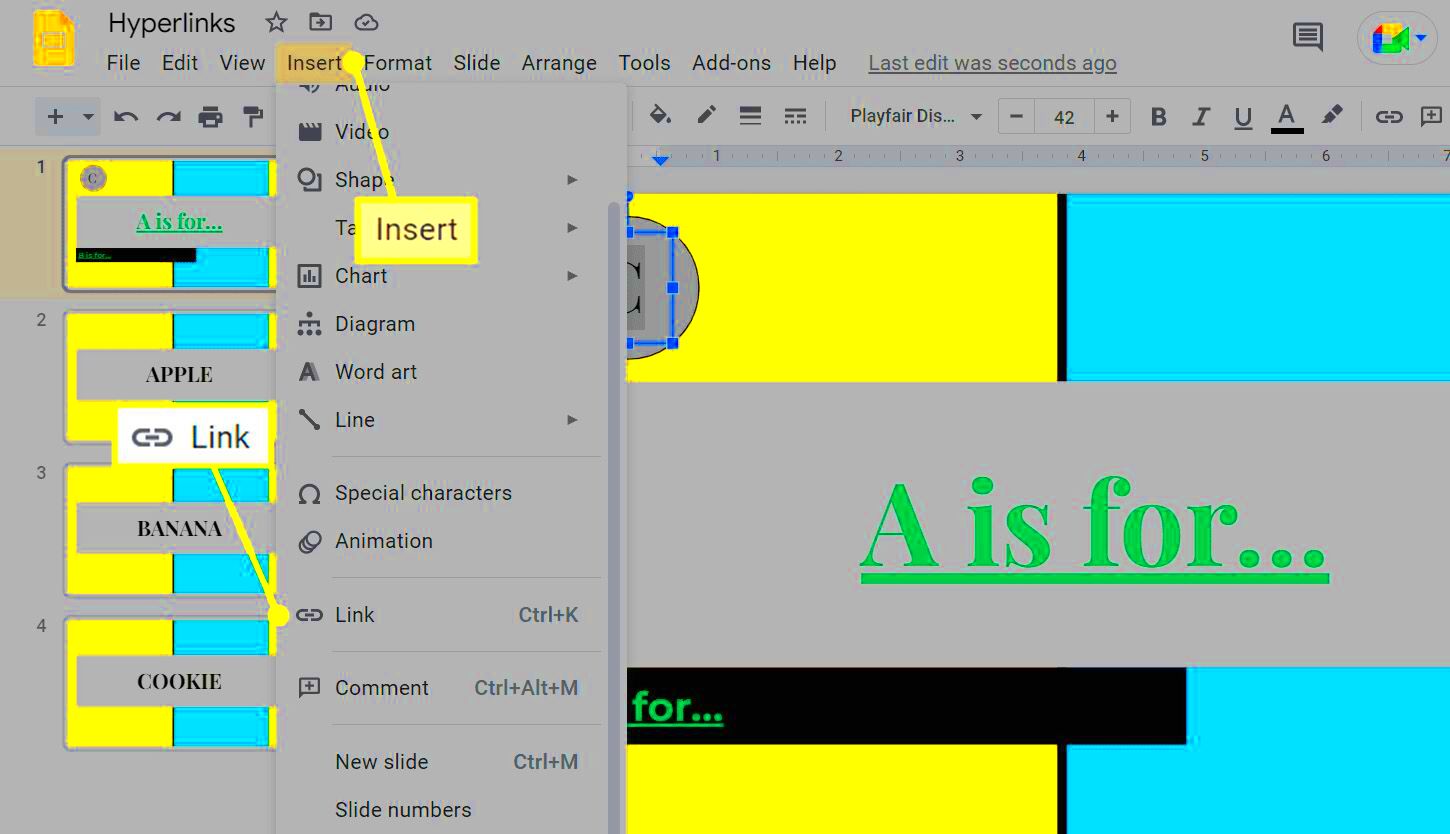
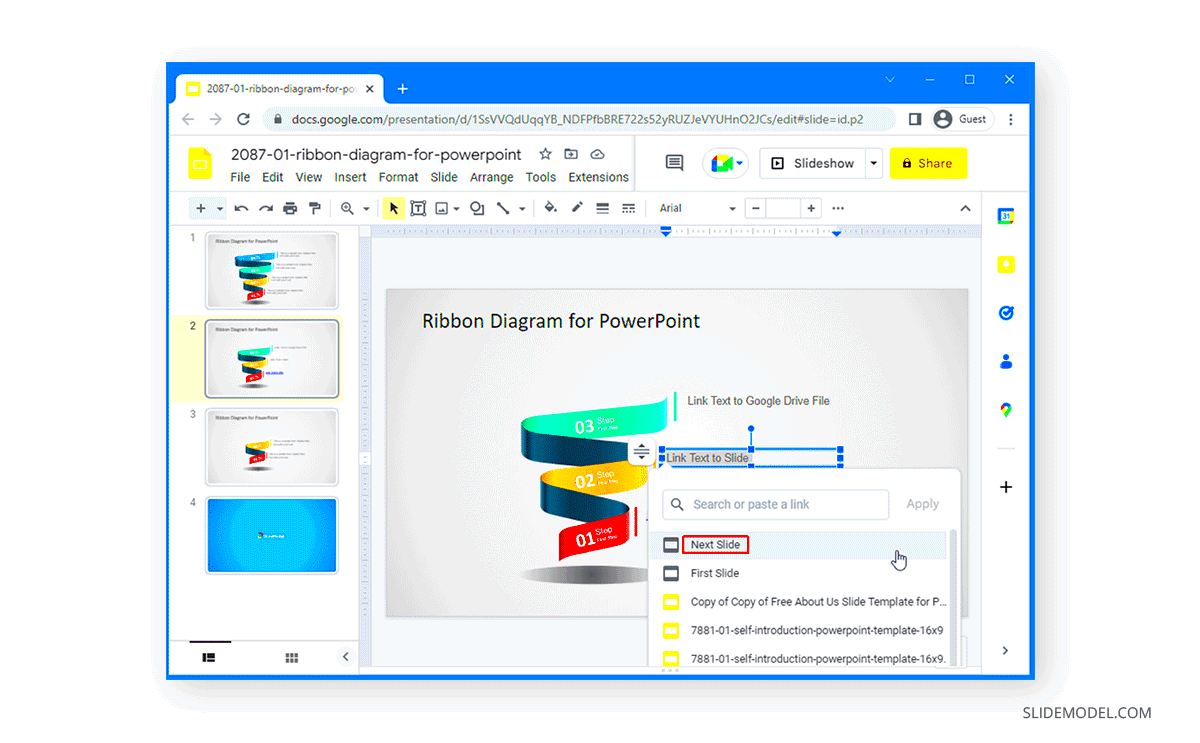
Once the image is selected, click on the "Insert" menu again, then choose "Link," or simply press Ctrl + K (Cmd + K on Mac). A dialog box will appear where you can enter the URL or choose a specific slide link from the same presentation.
After adding the link, it’s important to test it. Click on the image and see if the link works as expected. This ensures that your audience will have a smooth experience during your presentation.
If everything looks good, make any adjustments to the image size or placement as needed. Afterward, save your work to ensure the link remains intact.
By following these simple steps, you can easily link images in Google Slides and take your presentations to the next level. You can link to other slides, external websites, or even documents—making your slides more interactive and engaging for your viewers.
Choosing the Right Image for Linking
When you link an image in Google Slides, the image itself plays a crucial role in the success of the link. It’s important to choose images that not only fit the aesthetic of your presentation but also align with the purpose of the link. Whether you’re linking to additional information, another slide, or an external website, the image should complement the content and provide clarity to your audience. Here are some tips to help you choose the right image:
- Relevance: Make sure the image relates directly to the link’s content. For example, if you’re linking to a product page, use a clear image of the product.
- Quality: Opt for high-quality images that are sharp and clear. Blurry or pixelated images can undermine the professionalism of your presentation.
- Size and Placement: Choose images that are not too large or too small. They should be easy to see and appropriately placed within the slide layout.
- Consistency: Maintain a consistent image style across your slides. This helps to create a cohesive look throughout your presentation.
- Contrast: Select images with good contrast so that the image is visible, even if the background is busy or colorful.
Remember, the image should enhance the link’s purpose and not distract from the message. A well-chosen image can make your link more appealing and engaging to your audience, encouraging them to click and explore further.
Common Mistakes to Avoid When Linking Images
Linking images in Google Slides is a great way to enhance your presentation, but there are some common mistakes that can affect the effectiveness of your links. Avoiding these mistakes will help ensure a smoother experience for both you and your audience:
- Broken Links: Always double-check your links to ensure they are valid and functional. A broken link can frustrate viewers and negatively impact the flow of your presentation.
- Unclear Destinations: The destination of your link should be clear. Don’t link images to unrelated or confusing destinations. Always ensure the link provides value to your audience.
- Overcomplicating Links: Avoid linking images to too many places. Too many links can overwhelm your audience and distract from the main message.
- Lack of Visual Appeal: Don’t choose images that are too busy, poorly designed, or irrelevant. The image should enhance the link, not take away from it.
- Ignoring Mobile Users: Remember that some viewers may access your slides on mobile devices. Make sure your images and links are easy to click on smaller screens.
- Not Testing Links: Always test the links before finalizing your presentation. Make sure that everything works smoothly and that the links lead to the correct destination.
Avoiding these common mistakes will help you maintain a professional and user-friendly presentation, keeping your audience engaged and informed without any distractions.
How to Make Links Stand Out in Google Slides
Making your links stand out in Google Slides is key to ensuring that your audience notices and interacts with them. Here are a few simple but effective ways to make sure your linked images grab attention:
- Use Clear Visual Cues: One of the most effective ways to highlight a linked image is by using visual cues, such as borders, shadows, or subtle animations. This helps your image look clickable and encourages interaction.
- Text with the Image: Adding a short, descriptive text to the image can also help. You can place the text beneath or beside the image with a prompt like “Click here for more details” or “Explore further.” This provides clarity on what the link leads to.
- Contrasting Colors: Ensure that the link or the image’s background contrasts well with the surrounding elements. A contrast in colors makes the image appear more clickable and noticeable to your audience.
- Use Bold and Underlined Text: If your linked image is accompanied by text, make sure the text is bolded or underlined to show that it’s interactive. This helps users recognize the link instantly.
- Hover Effects: You can use Google Slides' hover effects to make the link more obvious when viewers move their cursor over the image. This subtle effect encourages engagement and provides immediate feedback.
- Place Links Strategically: Place your images in areas where the audience is most likely to look. For example, consider positioning them near important content or in places where they naturally fit within the flow of the presentation.
By following these tips, you can ensure that your links stand out and that your audience is more likely to interact with them. Whether it’s for additional information, navigating slides, or external resources, making links noticeable can greatly enhance the overall presentation experience.
Sharing Your Google Slides with Linked Images
Sharing your Google Slides presentation with linked images is an essential part of the collaboration and presentation process. Whether you're sharing it with colleagues, clients, or students, ensuring that the links within your slides work correctly is crucial for a smooth viewing experience. In this section, we’ll explore how to share your presentation while making sure that your linked images function as intended for everyone involved.
- Shareable Links: When you share your presentation, make sure to adjust the sharing settings so that anyone with the link can view or edit the slides, depending on your needs. Go to "File" > "Share" and select the appropriate access level.
- Test Links Before Sharing: Before sending the presentation, always test the links to ensure they direct viewers to the correct destinations. It's best to check all the links one last time to avoid any disruptions during the presentation.
- Ensure Link Permissions: If your images link to external documents or websites, ensure that those resources are publicly accessible or that you've granted permissions to the right people. A link that requires a login or specific access can lead to frustration for your audience.
- Download and Share: If you're sharing your Google Slides offline, download the presentation as a PowerPoint file or PDF. However, keep in mind that external links may not function properly if they aren't supported in the format you choose. It’s best to stick to sharing the Google Slides link for full functionality.
- Monitor the Viewers: Google Slides offers the option to see who has viewed your presentation. This feature can be useful if you want to ensure that the links are being clicked and explored by your audience.
By following these steps, you’ll be able to share your Google Slides presentation with linked images without any issues, ensuring a smooth and professional experience for everyone involved.
Best Practices for Linking Images in Google Slides
When linking images in Google Slides, following best practices ensures that your presentation remains clean, effective, and engaging. Here are some tips to keep in mind when linking images:
- Keep Links Relevant: Always make sure the image you are linking makes sense for the content. A link should provide additional value, whether it’s related to the image, the topic, or the overall presentation.
- Limit the Number of Links: Too many links can overwhelm your audience. Keep the number of linked images to a manageable level and ensure that each link serves a clear purpose.
- Be Consistent with Link Placement: Consistent placement of linked images helps your audience know where to look. For example, placing links in similar locations across your slides can make the presentation easier to navigate.
- Test the Links: It’s critical to test your links before presenting. Ensure that the images lead to the right places, especially when linking to external content such as websites or other presentations.
- Provide Clear Call to Action: If your image is linked to a particular resource, provide a clear call to action. For instance, you can add a caption below the image, such as “Click here to learn more” or “Visit this page for further details.”
- Avoid Overloading the Slide: While linking images can make your presentation interactive, avoid overcrowding your slides with too many clickable elements. Balance the visual appeal with readability.
- Keep Link Text and Visuals Aligned: If you're using text along with the image, ensure the text is clear and complementary to the image’s purpose. For example, if the image is a product, make sure the text explains its relevance or benefits.
By following these best practices, your linked images will enhance your presentation, providing a seamless and professional experience for your viewers.
FAQ
Q: Can I link an image to a slide within the same presentation?
A: Yes, you can link images to specific slides within the same presentation. This is especially useful when you want to provide more detailed information on a particular topic without cluttering your slides.
Q: Will my image links still work when I download the presentation?
A: If you download your Google Slides presentation as a PowerPoint file or PDF, the image links may still work. However, links to external websites and other resources will function properly only when the presentation is accessed through Google Slides. Always test before sharing offline versions.
Q: How do I link an image to a website?
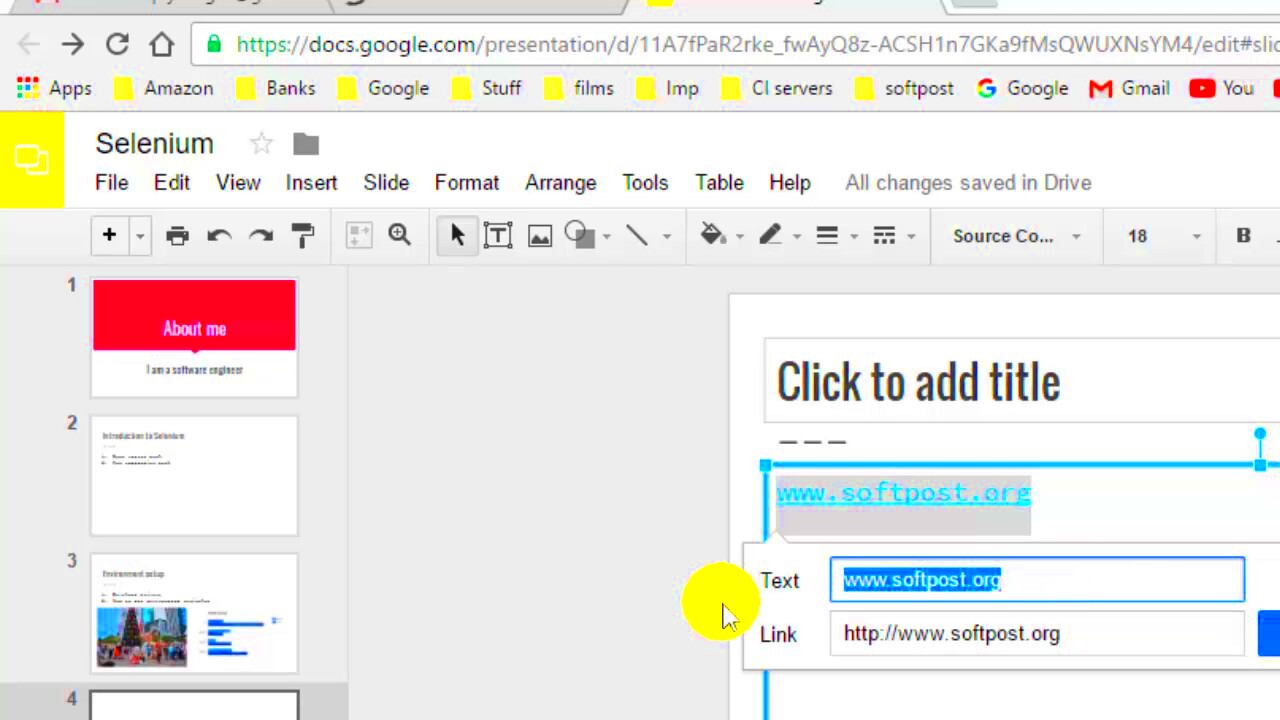
A: To link an image to a website, first select the image in Google Slides, then click on the "Insert" menu and choose "Link." In the dialog box that appears, enter the URL of the website you want to link to, then click "Apply." Your image will now be clickable and redirect viewers to the website.
Q: How can I make sure my links are accessible on mobile devices?
A: Ensure that the images and links are appropriately sized and placed so they are easy to click on smaller screens. You can preview your slides in mobile view to see how they will appear and adjust them accordingly for better accessibility.
Q: What happens if the linked image is moved or deleted?
A: If the image or file that you are linking to is deleted or moved, the link will break. Always double-check the linked content to ensure it’s still available and in the right place before sharing the presentation.
Conclusion
Linking images in Google Slides is an effective way to enhance your presentations by making them more interactive and engaging. By following the steps and best practices discussed, you can ensure that your audience enjoys a smooth, informative experience. From selecting the right images to avoiding common mistakes and ensuring that links work correctly when sharing, each step plays a vital role in creating a professional and polished presentation. Don’t forget to test your links before sharing or presenting to ensure that everything functions as expected. By linking images properly, you not only improve the presentation's aesthetics but also provide more value to your audience with easy access to additional resources and content. Remember to keep your links relevant, clear, and easy to interact with, and your Google Slides presentations will stand out with ease.

 admin
admin


