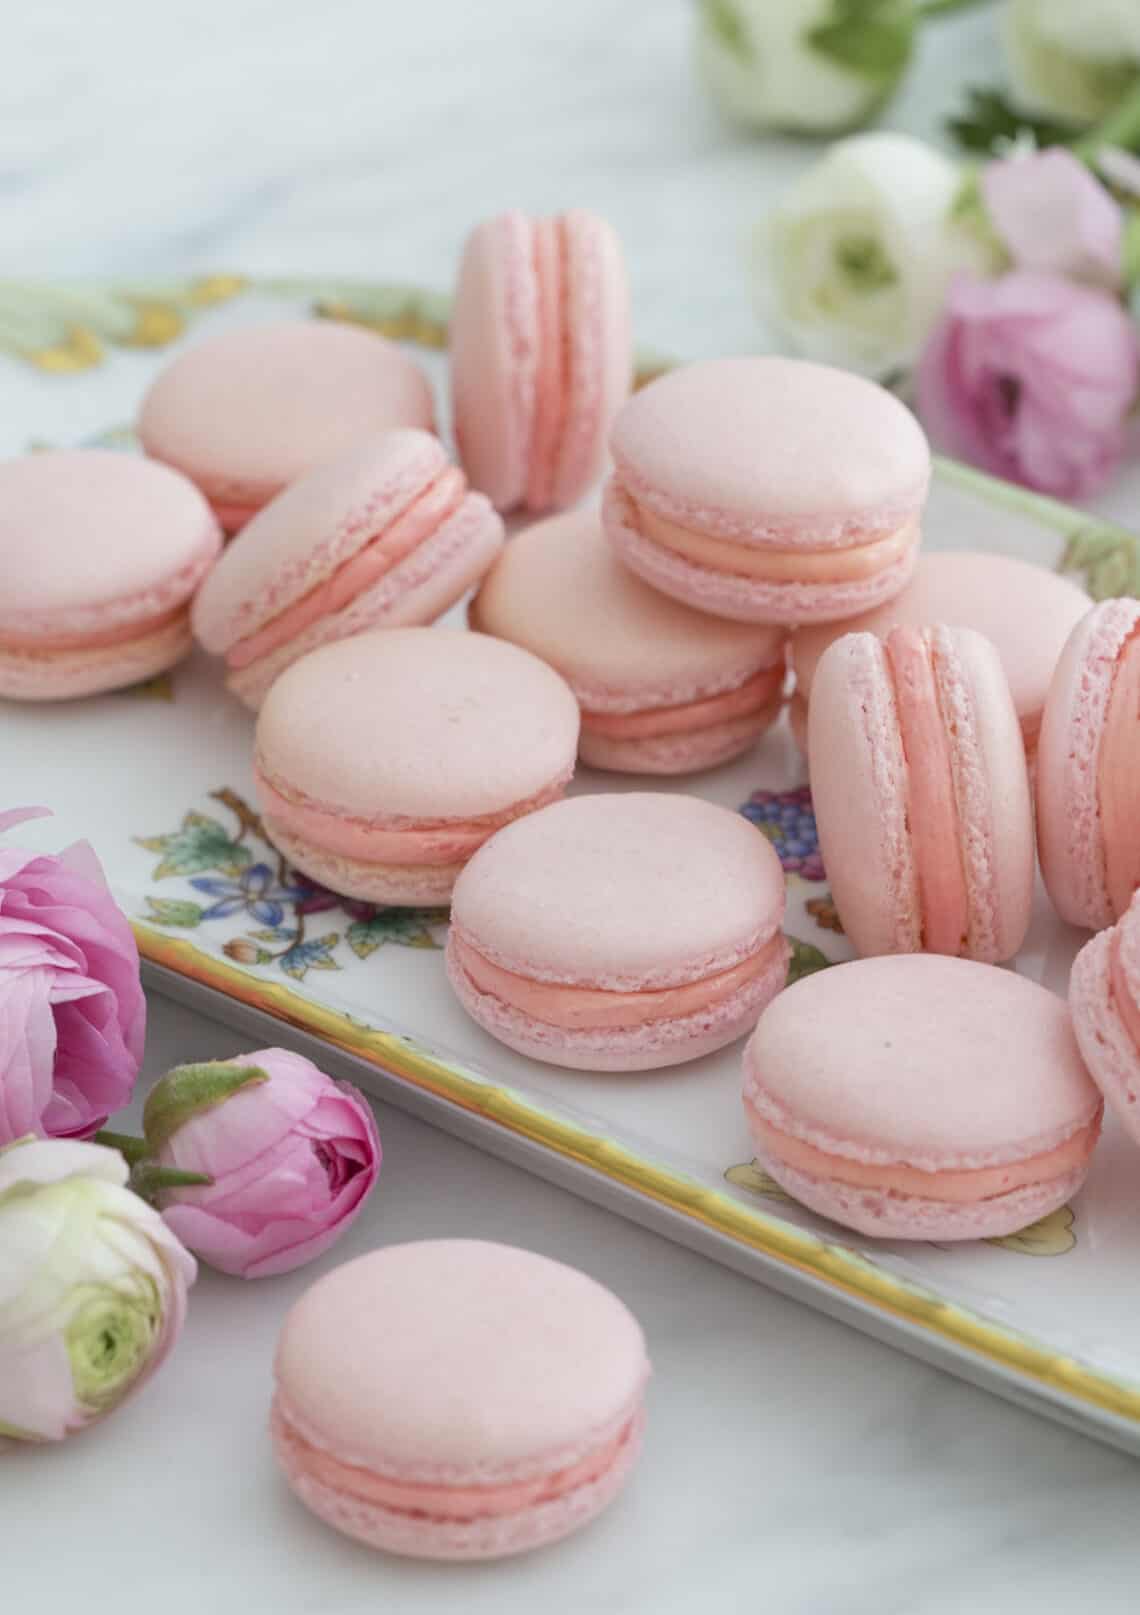
Macarons are delicate French confections that have taken the dessert world by storm. These colorful meringue-based cookies are known for their smooth, shiny shells and chewy interiors, making them a favorite for both pastry chefs and home bakers. With a crisp outer layer and a luscious filling, macarons come in a dizzying array of flavors and colors, transforming a simple treat into a visual delight. Whether you're gearing up for a special occasion or just want to indulge your sweet tooth, learning to make macarons at home can be both challenging and rewarding. By mastering the art of macarons, you can impress your family and friends with beautiful, homemade desserts that are truly a feast for the senses. So, let’s dive into the world of macarons and get you started on your baking adventure!
Understanding the Ingredients

Before you begin whipping up a batch of macarons, it's essential to familiarize yourself with the core ingredients that make up these delightful treats. The quality and proportions of these components can significantly impact the outcome, so let’s break them down:
- Almond Flour: This finely ground flour is the backbone of macarons. It gives the cookies their characteristic texture and nutty flavor. Be sure to choose a high-quality almond flour for the best results.
- Powdered Sugar: Adding sweetness to the mix, powdered sugar also helps create a smooth batter. It’s crucial to use powdered sugar instead of granulated, as it dissolves more easily, leading to a finer texture.
- Egg Whites: The star player in macarons! When whipped, egg whites transform into a fluffy meringue, which gives the cookies their lift and structure. Make sure to age your egg whites (letting them sit at room temperature for at least 24 hours) for optimal results.
- Granulated Sugar: This sugar is typically added to the egg whites as you whip them into meringue. It helps stabilize the meringue, ensuring that it maintains its structure during mixing and baking.
- Flavorings and Colors: From vanilla and pistachio to raspberry and lemon, the sky's the limit when it comes to flavors! You can use extracts, zest, or fruit purees. Food coloring can also be added to make your macarons visually appealing.
Understanding these ingredients and their roles will set you on the right path to creating perfectly delightful macarons. Happy baking!
3. Essential Tools for Making Macarons

Before diving into the world of macarons, it's crucial to gather the right tools to ensure your baking adventure is a success. These delicate French treats require precision, so having the correct equipment can make all the difference!
- Mixing Bowls: You'll need a few, preferably glass or stainless steel. These materials are easy to clean and won't retain odors or colors from previous mixes.
- Electric Mixer: A stand mixer or a handheld mixer will work wonders for whipping egg whites to the perfect stiff peak. A whisk won't cut it for this task!
- Silicone Spatula: This will help you fold your batter without knocking out too much air—essential for that light and airy texture.
- Food Scale: Precision is key! Invest in a good kitchen scale for measuring your ingredients accurately. Baking is all about ratios!
- Fine Mesh Sieve: Sifting almond flour and powdered sugar together ensures there are no clumps, resulting in a smooth macaron shell.
- Piping Bags and Tips: Disposable piping bags are a baker's best friend. Don't forget to grab a round tip for that beautiful, even shape!
- Baking Sheets: Heavy-duty cookie sheets are ideal for even heating. Consider using silicone baking mats or parchment paper for non-stick surfaces.
- Oven Thermometer: An essential tool to make sure your oven temperature is just right since an inaccurately set oven can ruin your macarons.
These tools not only help streamline the macaron-making process but also make it more enjoyable. Once you've got everything ready, it's time to roll up your sleeves and start baking!
4. Step-by-Step Recipe Instructions

Now, let’s get into the nitty-gritty of making macarons. Follow these step-by-step instructions for a foolproof way to create these delightful confections from the comfort of your own kitchen!
- Gather Your Ingredients:
- 1 cup (100g) almond flour
- 1 3/4 cups (200g) powdered sugar
- 3 large egg whites, at room temperature
- 1/4 cup (50g) granulated sugar
- Food coloring (optional)
- Your chosen filling (buttercream, ganache, or jam)
- Prepare Your Baking Sheets:
Line your baking sheets with silicone mats or parchment paper. If you're using parchment, you might want to draw circles as a guide for consistent sizing!
- Sift Dry Ingredients:
In a bowl, sift the almond flour and powdered sugar together. This will help eliminate lumps and create a smooth batter.
- Whip Egg Whites:
In a clean mixing bowl, use your electric mixer to whip the egg whites on medium speed until they become frothy. Gradually add the granulated sugar, and increase the speed to high. Continue until you reach stiff peaks!
- Add Food Coloring:
If you want to incorporate color, now’s the time! Add a few drops of food coloring and gently fold it in until evenly distributed.
- Combine Ingredients:
Pour the sifted almond flour and powdered sugar into the egg whites. Using a spatula, gently fold everything together until you achieve a “lava” consistency. Be careful not to deflate the mixture!
- Pipe the Macarons:
Fill your piping bag and pipe small rounds onto the prepared baking sheets, leaving some space between each one. Tap the baking sheets on the counter to release any air bubbles.
- Rest:
Let the piped macarons sit at room temperature for 30-60 minutes, or until they form a skin (you can gently touch the surface, and it shouldn't stick). This step is essential for achieving the right texture!
- Bake:
Preheat your oven to 300°F (150°C). Bake the macarons for 15-20 minutes, or until they are set and have a nice “foot” formed at the bottom. Let them cool completely on the baking sheets.
- Fill & Assemble:
Once cooled, carefully remove the macarons from the sheets. Pipe your favorite filling onto one shell and sandwich it with another. Voila, your homemade macarons are ready!
And there you have it! With these step-by-step instructions, you're well on your way to impressing friends and family with your incredible macaron skills. Happy baking!
Troubleshooting Common Issues
Making macarons can be a delightful adventure, but sometimes things don't go as planned. Fear not! Here are some common issues you might encounter and how to fix them.
- Cracked Shells: If your macarons are coming out with cracks, it could be due to too much heat in the oven. Make sure your oven is calibrated correctly, and consider lowering the temperature by 10-15 degrees Fahrenheit. Also, ensure that you’re properly drying your macarons before baking.
- Flat Macarons: Flat shells can happen if your meringue isn't whipped enough or if you're overmixing after adding the dry ingredients. Aim for a glossy meringue that forms stiff peaks and fold just until you achieve a "lava-like" consistency when mixing.
- Uneven Feet: If your macarons have uneven or no “feet” (the ruffled base), it could be due to insufficient resting time before they go in the oven. Let your macarons rest for about 30-60 minutes at room temperature until they form a skin.
- Soft or Unstable Macarons: If your macarons are too soft, you might not have baked them long enough or might have used too much moisture in your filling. Make sure to bake them until they are firm and dry on the outside.
- Hollow Shells: Hollow macarons can be a result of under-whipping your egg whites or under-baking them. Ensure that your meringue achieves stiff peaks and that you bake until the macarons are completely set.
With these tips in mind, you're well-prepared to tackle common macaron mishaps. Remember, every great pastry chef has experienced a few disasters along the way—it's all part of the learning process!
Decorating and Storing Your Macarons
Once your macarons are beautifully shaped and baked, it’s time to take them to the next level with decoration and proper storage!
Decorating: Decorating your macarons is where you can really let your personality shine. Here are a few fun ideas to elevate their appearance:
- Use edible glitter or shimmer dust for a sparkling finish.
- Add a sprinkle of finishing salt on top to create a delightful sweet-and-salty contrast.
- Drizzle melted chocolate on top for a touch of elegance.
- Pipe decorative designs or patterns with colored royal icing.
- Dust with cocoa powder or powdered sugar for a refined look.
Storing: Proper storage is key to keeping your macarons fresh:
- Store macarons in an airtight container in the fridge if you're not eating them right away.
- They can also be frozen for up to 3 months; just ensure they are in an airtight container to prevent freezer burn.
- Let frozen macarons thaw in the fridge before serving for the best texture and flavor.
Remember, macarons may look delicate, but with a little care, they can be a delightful treat long after you've made them. Enjoy the sweet journey of macarons, from the mixing bowl to your taste buds!
Conclusion and Final Tips
Making macarons at home is a rewarding and enjoyable experience that can be mastered with practice and patience. Here are some final tips to ensure your macaron-making journey is a sweet success:
- Measure Accurately: Use a digital kitchen scale for precise measurements of ingredients. This is crucial as even small variations can affect the texture and structure of your macarons.
- Age Your Egg Whites: Allow your egg whites to sit at room temperature for at least a day. This helps reduce moisture and improves the stability of the meringue.
- Sift Ingredients: Always sift your almond flour and powdered sugar together to eliminate lumps and achieve a smooth batter.
- Folding Technique: When combining the meringue with the dry ingredients, fold gently to avoid deflating the mixture. The batter should flow like lava when it’s the right consistency.
- Use a Silpat or Parchment Paper: These surfaces provide the right non-stick environment that helps your macarons to bake evenly.
- Let Them Rest: After piping, let your macarons rest for at least 30 minutes before baking. This helps form a skin that contributes to that signature “foot” of the cookie.
- Experiment with Flavors: Don't hesitate to explore various flavor combinations and fillings to make your macarons unique and delightful!
With these tips and the step-by-step recipes in hand, you're well on your way to creating cafe-quality macarons in the comfort of your own kitchen. Enjoy your baking adventure!
 admin
admin


