Have you ever considered monetizing your love for photography? Sharing your photos on
Shutterstock is a great way to showcase your talent and make some extra cash. Regardless of whether you're an experienced photographer or just beginning your journey
Shutterstock provides a platform for your work to be seen by people worldwide. I still remember my initial days in this venture filled with both excitement and a sense of being overwhelmed. However with some support it turns into a fulfilling journey. Let's explore how you can kickstart this process.
Understanding Shutterstock’s Requirements for Image Submission

Before you begin sharing your images its important to grasp what
Shutterstock seeks when it comes to submitting pictures. Doing so will help you save time and boost the likelihood of your photos getting approved. Here are some essential criteria to keep in mind.
- Image Quality: Shutterstock expects high-quality images that are clear and sharp. Avoid using blurry or pixelated images.
- Resolution: Your images should be at least 4 MP (megapixels). Higher resolutions are preferred as they provide more detail.
- Technical Specifications: Images must be in JPEG format and should be saved with the sRGB color profile.
- Content: Shutterstock accepts a variety of content, but make sure it’s original and doesn’t infringe on copyrights.
Based on my personal insights I’ve realized that grasping these criteria beforehand can greatly assist you in getting your pictures ready. It’s similar to preparing a meal with the ingredients – everything blends seamlessly.
Creating and Preparing Your Images for Shutterstock

Making images for
Shutterstock involves more than just taking pictures. Its about getting them set for a worldwide audience. Here’s a step by step to help you prep your visuals.
- Choose the Right Subject: Think about what buyers might be looking for. Images with universal appeal, such as nature, people, and business scenes, often do well.
- Editing: Use photo editing software to enhance your images. Adjust the brightness, contrast, and sharpness as needed. But remember, subtlety is key – over-editing can make your images look unnatural.
- Metadata: Add relevant keywords, titles, and descriptions to your images. This helps in making your photos more discoverable. For example, if you have a photo of a sunset, tags like “sunset,” “sky,” and “evening” can be useful.
- Legal Considerations: Ensure you have model releases if your images feature people, and avoid any trademarks or copyrighted materials in your photos.
Taking the time to get your visuals ready is crucial. I recall dedicating time to fine tuning my photos and enhancing them through editing and it really paid off. When striving for success on a platform such as
Shutterstock every little detail matters.
How to Sign Up and Set Up a Contributor Account

Getting your contributor account ready on
Shutterstock is akin to unlocking a realm filled with possibilities. I can still recall the thrill I felt when I registered for the first time. It was akin to setting out on a journey. Allow me to walk you through the process with a guide:
- Visit Shutterstock’s Contributor Page: Go to the Shutterstock Contributor page on their website. You’ll find an option to sign up or log in.
- Create an Account: If you’re new, click on “Join” and fill out the required details. You’ll need to provide a valid email address and create a password.
- Complete Your Profile: Once your account is created, fill in your profile details. Include information about your photography background and any relevant experience. This helps build credibility.
- Agree to Terms: Read Shutterstock’s terms and conditions carefully. Agree to their terms to proceed. This step ensures you understand the rights and responsibilities of being a contributor.
- Set Up Payment Details: To get paid, you’ll need to enter your payment information. Shutterstock offers various payment methods, so choose one that suits you best.
Getting your account ready is easy, but it’s important to really get to know the platform. I recall going over everything carefully to make sure I didn’t overlook anything. Putting in the effort to begin with is definitely worthwhile.
Uploading Your Images to Shutterstock
Once you’ve got your account ready to go it’s time to start sharing your pictures. This is where the excitement kicks in! Here’s a straightforward step by step to help you get your images up on the web.
- Log In to Your Account: Go to the Shutterstock Contributor page and log in with your credentials.
- Access the Upload Page: Click on the “Upload” button to begin. You’ll be directed to a page where you can add your images.
- Select Your Images: Choose the images you want to upload from your computer. You can upload multiple files at once, which is quite convenient.
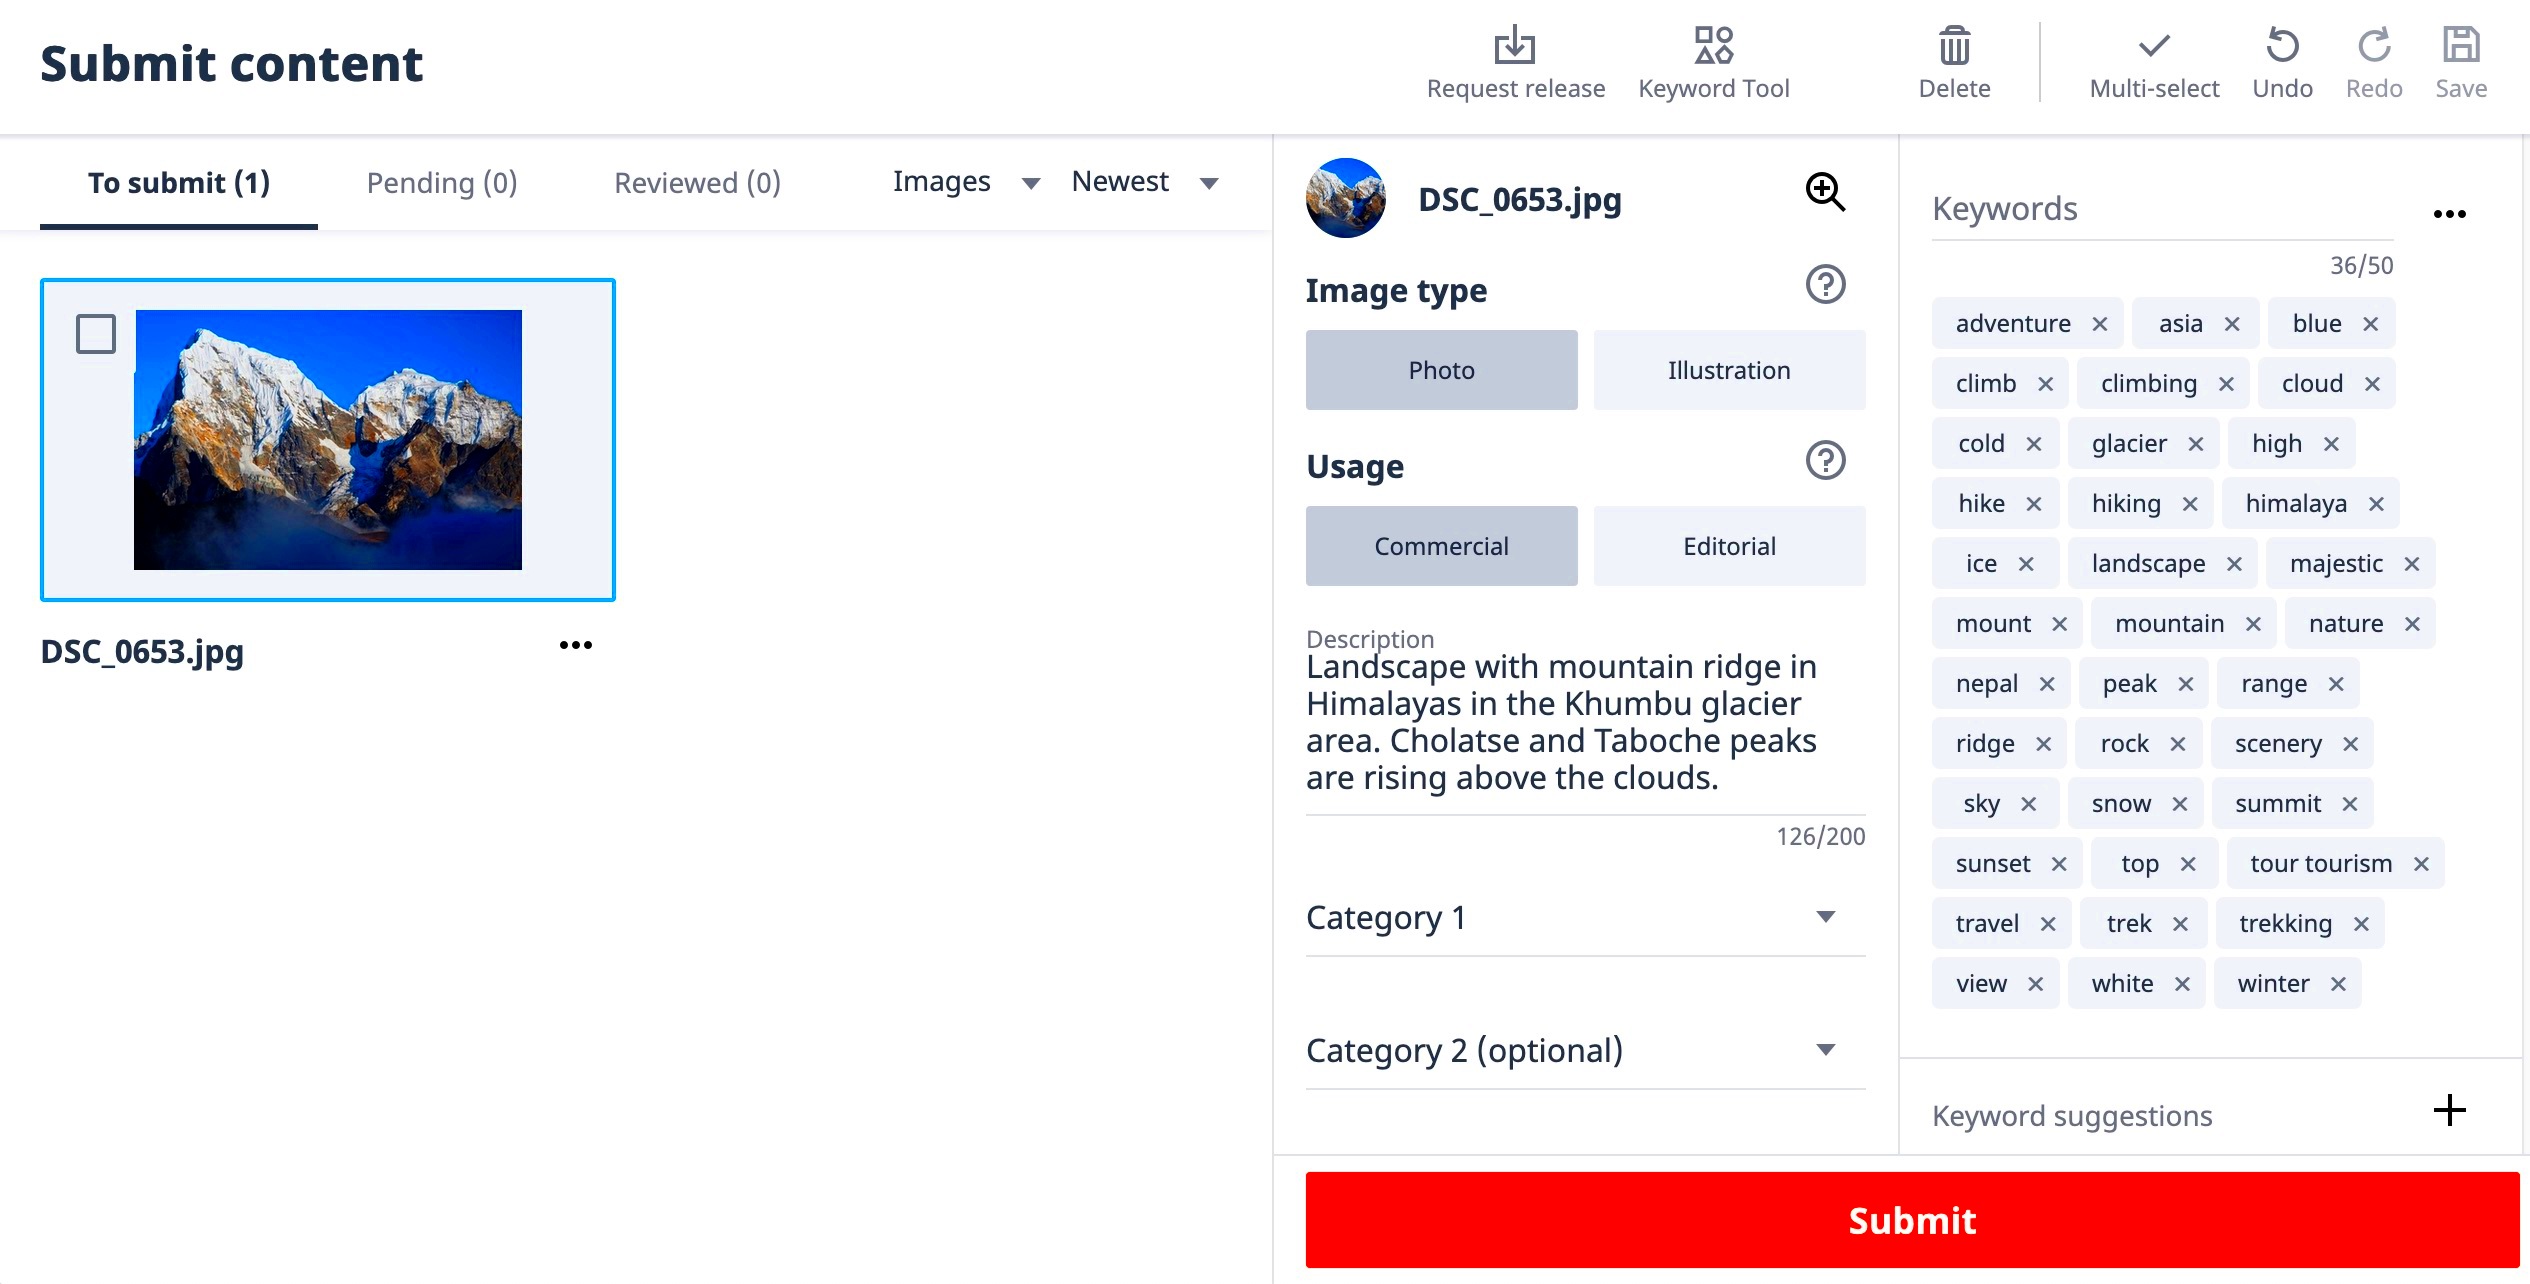
- Add Metadata: While your images upload, you’ll be prompted to add metadata. This includes titles, descriptions, and keywords. It’s important to be as descriptive as possible to help buyers find your images.
- Submit for Review: Once everything is in place, submit your images for Shutterstock’s review. They will check your images for quality and adherence to their guidelines.
At first uploading images may feel overwhelming but as you practice it becomes a seamless experience. I remember my initial uploads took some time, but witnessing my creations showcased online was truly fulfilling.
Tagging and Describing Your Images for Better Visibility
Properly tagging and describing your images can greatly impact their visibility to potential buyers. Here’s a guide on how to do it effectively.
- Use Relevant Keywords: Think about what people might search for when looking for images like yours. Use specific and relevant keywords. For example, if your photo is of a bustling market, tags like “market,” “shopping,” and “crowd” can be useful.
- Write Descriptive Titles: Your title should clearly describe the content of the image. Avoid vague titles and be straightforward. A well-crafted title helps buyers understand what they are looking at at a glance.
- Craft Detailed Descriptions: Provide a detailed description of the image. Explain the context, the subject matter, and any unique aspects of the photo. This adds value and can attract more viewers.
- Be Honest and Accurate: Ensure all tags and descriptions accurately reflect the image. Misleading information can lead to dissatisfaction and might affect your credibility.
From what I’ve seen putting in the effort to carefully label and explain images has resulted in increased exposure and more downloads. It’s a little thing that can make a difference in your success on Shutterstock.
Review Process and Approval of Your Submitted Images
Once you submit your pictures to Shutterstock they dont get published right away. They go through a review process first, to ensure that they meet quality and compliance standards. I recall feeling nervous as I awaited the review of my set of images. It was similar to anxiously waiting for exam results! Let me explain what takes place during this process.
- Initial Review: Shutterstock’s team will first check if your images meet their technical and quality standards. This includes looking at resolution, focus, and overall clarity.
- Content Review: The reviewers will also assess the content of your images. They check for relevance, originality, and adherence to Shutterstock’s guidelines. If your image features people or trademarks, they’ll ensure you have the necessary releases.
- Feedback: If your images don’t meet their standards, you might receive feedback on what needs to be improved. This can be a valuable learning experience. I recall getting constructive feedback that helped me refine my approach.
- Approval and Publishing: Once your images pass the review, they’ll be approved and published on Shutterstock. You’ll receive a notification, and your images will be available for purchase.
Taking your time is crucial in this journey. While it may take a bit for your pictures to go through the review process the wait is definitely worthwhile. Every stage of the review process plays a role in ensuring that only top notch images are featured on the platform.
Tips for Success and Maximizing Earnings on Shutterstock
Succeeding on Shutterstock involves more than simply sharing quality images; it requires a grasp of the platform and maximizing the impact of your submissions. Based on my experiences here are some valuable suggestions that have helped me along the way.
- Stay Consistent: Regularly upload new content to keep your portfolio fresh. Consistency can help you gain visibility and attract more buyers.
- Analyze Trends: Pay attention to current trends and popular themes in stock photography. This can guide you in creating content that’s in demand.
- Optimize Keywords: Use a variety of relevant keywords and tags for each image. Think like a buyer and include terms they might use to search for images.
- Engage with the Community: Participate in Shutterstock’s forums and community discussions. Networking with other contributors can provide valuable insights and support.
- Learn and Adapt: Continuously review your performance and adapt your strategies. Monitor which images are performing well and learn from them.
Achieving success takes time but with commitment and a well thought out plan you can greatly increase your income on Shutterstock. I have witnessed the rewards of my hard work firsthand and it's truly fulfilling to have your creations recognized and valued by others.
FAQ About Uploading Pictures to Shutterstock
Grasping the intricacies of Shutterstock may seem daunting initially, but here are some commonly asked questions that could assist in clarifying things for you.
What types of images are accepted?
- Shutterstock accepts a wide range of images including landscapes, portraits, and abstract photos. However, all images must be original and adhere to their quality guidelines.
Do I need a model release?
- Yes, if your images feature recognizable people, you will need to provide a model release. This legal document ensures that you have permission to use their likeness.
How long does the review process take?
- The review process typically takes a few days. However, this can vary based on the volume of submissions and the complexity of your images.
Can I edit my images after uploading?
- Once your images are uploaded, you cannot edit them directly. If changes are needed, you would need to delete the image and re-upload it with the necessary adjustments.
How do I get paid?
- Shutterstock offers various payment options, including PayPal and bank transfers. Make sure to set up your payment details in your contributor account.
Having these responses readily available can alleviate some doubts and assist you in using the Shutterstock platform more efficiently. I recall having inquiries when I first joined and discovering the solutions greatly enhanced my journey.
Conclusion and Final Thoughts
Starting the process of sharing your photos on Shutterstock can be an exhilarating and fulfilling experience. Each stage from signing up to receiving approval comes with its own hurdles and chances for growth. Having navigated this journey myself I can assure you that patience and determination play a role. Its an evolving journey that gets better as you go along.Continuously hone your skills stay informed about market trends and be open to feedback. The joy of witnessing your work celebrated by a worldwide audience makes all the hard work worthwhile. Keep in mind that every successful contributor began at point just like you and with commitment you too can achieve remarkable outcomes.
 Before you begin sharing your images its important to grasp what Shutterstock seeks when it comes to submitting pictures. Doing so will help you save time and boost the likelihood of your photos getting approved. Here are some essential criteria to keep in mind.
 Making images for Shutterstock involves more than just taking pictures. Its about getting them set for a worldwide audience. Here’s a step by step to help you prep your visuals.
 Getting your contributor account ready on Shutterstock is akin to unlocking a realm filled with possibilities. I can still recall the thrill I felt when I registered for the first time. It was akin to setting out on a journey. Allow me to walk you through the process with a guide:
 admin
admin


