Introduction: Why Getting an Invoice from Flipkart Matters
Imagine this: You’ve just snagged a great deal on
Flipkart, and you’re eagerly waiting to see your new purchase arrive. But then, you need to manage your expenses or handle a return, and you realize—wait a minute, where’s the invoice? Trust me, I've been there. Getting an invoice from
Flipkart isn’t just a formality; it’s your ticket to a smoother shopping experience.It’s crucial for tracking your purchases, claiming warranties, and even for filing taxes. In a way, it’s like having a receipt that keeps everything in check, ensuring your transactions are as seamless as the shopping experience itself.
Step-by-Step Guide to Requesting Your Flipkart Invoice

Now, let’s dive into the nitty-gritty of requesting that all-important invoice. Here’s a straightforward guide to help you through the process:
Finding Your Order History
Start by logging into your
Flipkart account. Navigate to your profile and look for the “Orders” section. Here’s where
Flipkart neatly lists all your past purchases. It’s a bit like rummaging through a well-organized filing cabinet—everything you need is right there.
Locating the Invoice Request Option
Once you’re in your order history, find the specific order you need the invoice for. Click on it to expand the details. You should see an option labeled “Request Invoice” or “Download Invoice.” It’s usually situated near the order summary or payment details.
Flipkart has made it pretty straightforward—just a couple of clicks and you’re on your way.
Submitting Your Invoice Request
Click on the “Request Invoice” button. You might be prompted to verify some details or select the invoice format. Fill in any required information and hit “Submit.” Within a few minutes, you should receive your invoice via email or be able to download it directly from the website.
What to Do If You Don’t Receive Your Invoice

So, what happens if you’ve followed all the steps and still don’t receive your invoice? Don’t worry, it’s not the end of the world. Here’s what you can do:
- Check Your Spam Folder: Sometimes, email filters can be a bit overzealous. Your invoice might have ended up in the spam or junk folder.
- Revisit Your Order History: Sometimes the invoice doesn’t get sent right away. Check your order history again to see if there’s an option to download it directly.
- Contact Flipkart Support: If all else fails, reach out to Flipkart’s customer support. Provide them with your order details and explain the issue. They’re usually quick to help out and can resend the invoice or provide an alternative solution.
In my experience, a quick chat with customer support often clears things up. Don’t hesitate to reach out; after all, it’s all part of ensuring that your shopping journey is as smooth as possible.
Common Issues and How to Resolve Them
We’ve all faced those frustrating moments when things don’t go as planned. Getting your
Flipkart invoice should be straightforward, but sometimes, hiccups can occur. Here are some common issues you might run into and how to tackle them:
- Invoice Not Available: Occasionally, the invoice option might not appear for certain orders. This usually happens if the order was processed in a different way or if there’s a delay. Try refreshing the page or checking back later.
- Incorrect Invoice Details: If the invoice you receive has mistakes, such as incorrect item descriptions or pricing, don’t panic. Double-check the order details and contact Flipkart’s customer service. They’ll be able to issue a corrected invoice.
- Email Delivery Issues: Sometimes, the invoice email might get lost in the shuffle or never arrive. Check your email settings and spam folder. If you still can’t find it, revisit your order history on Flipkart or contact support for assistance.
- Technical Glitches: Technology isn’t always perfect. If the website or app is acting up, try accessing it from a different browser or device. Sometimes, a quick switch can solve the problem.
In my own experience, these issues can be a bit of a hassle, but they’re usually resolvable with a bit of patience and the right approach. Remember,
Flipkart’s support team is there to help—don’t hesitate to reach out if needed!
How to Access Your Invoice Through Flipkart’s Mobile App
In today’s mobile-first world, accessing your Flipkart invoice on your phone is a breeze. Here’s how you can do it through Flipkart’s app:
- Open the Flipkart App: Start by launching the Flipkart app on your smartphone. If you don’t have it installed, download it from your app store.
- Go to Your Account: Tap on your profile icon or account section, usually found at the bottom of the screen.
- Access Your Orders: Navigate to the “Orders” section. This will show you a list of all your past purchases.
- Select the Order: Find and tap on the order for which you need the invoice. You’ll see the order details on the next screen.
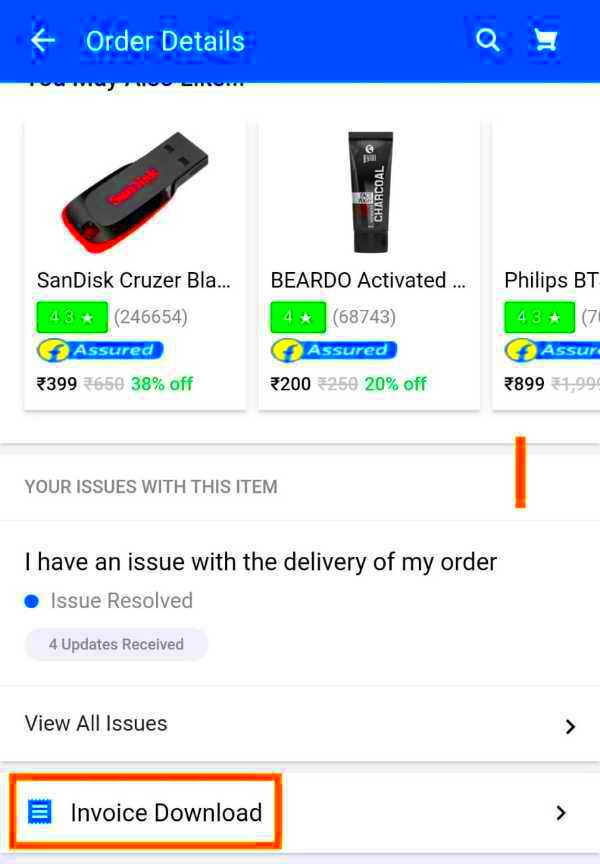
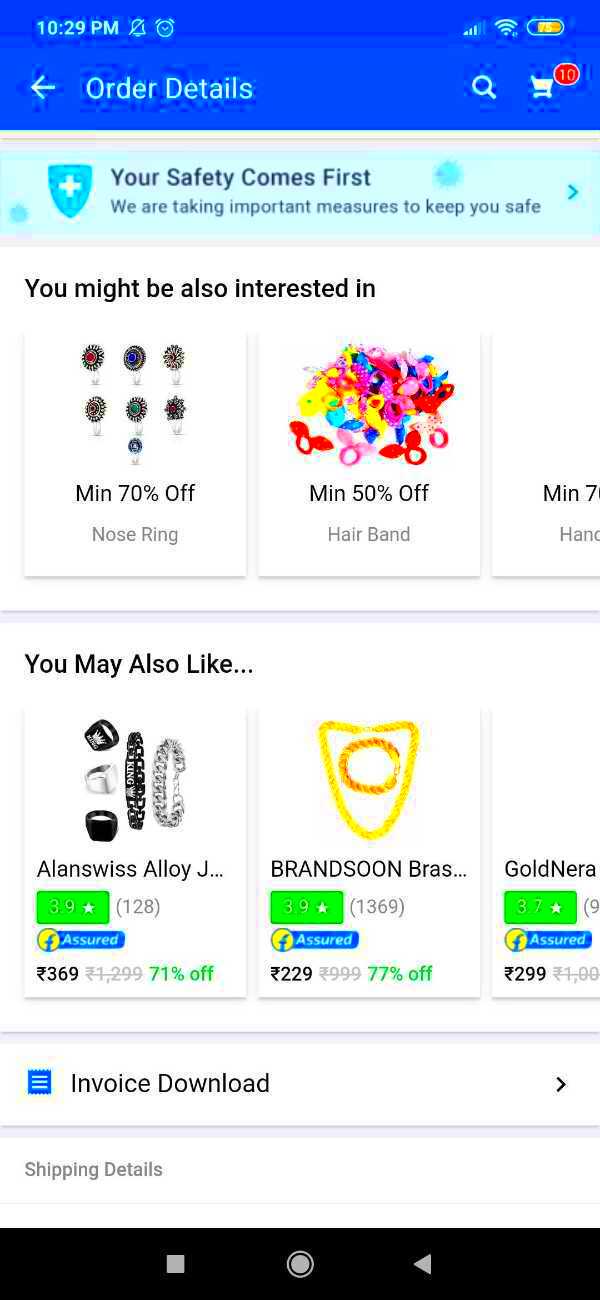
- Request or Download the Invoice: Look for the “Request Invoice” or “Download Invoice” option. Follow the prompts to either request or directly download your invoice.
Having used the app myself, I find it incredibly convenient. It’s like having your purchase history at your fingertips, and getting your invoice is just a few taps away. It’s a great way to manage your orders on the go!
Understanding the Details on Your Flipkart Invoice
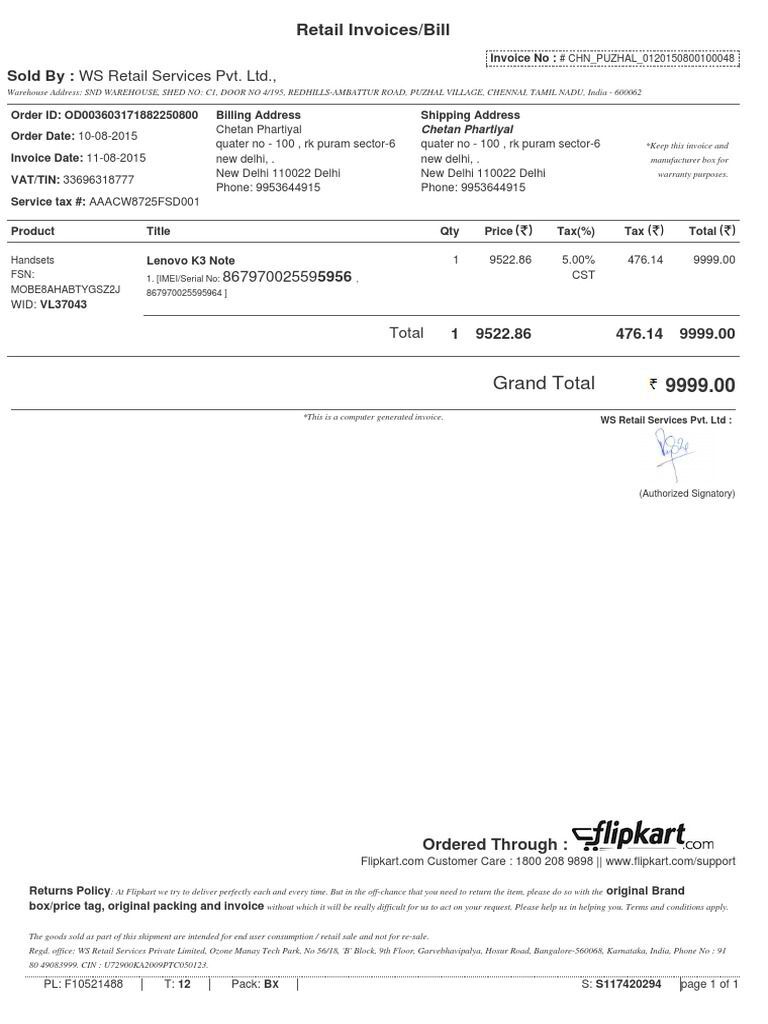
Receiving your invoice is one thing, but understanding it is another. Here’s a breakdown of what you’ll typically find on your Flipkart invoice and why it matters:
| Section | Description |
|---|
| Order Number | The unique identifier for your purchase. It’s useful for tracking your order or resolving any issues. |
| Date of Purchase | The date when the transaction was completed. Helps in managing returns or warranty claims. |
| Item Details | Includes the name, quantity, and price of each item purchased. Ensures that you’re billed correctly. |
| Total Amount | The total cost including taxes and shipping. Verify this against your payment to ensure accuracy. |
| Payment Method | Shows how you paid for your order, whether by card, wallet, or other methods. Useful for your records. |
| Billing and Shipping Address | Your addresses as provided during the order. Important for verifying the delivery and billing information. |
Understanding these details ensures that you’re well-informed about your purchase. From personal experience, double-checking the invoice helps prevent any surprises down the line. It’s a small step that can save a lot of hassle!
Additional Tips for Managing Your Invoices Efficiently
Managing invoices might not sound exciting, but it can make a world of difference in keeping your finances in check. Over the years, I’ve picked up a few tricks that have helped me keep my invoices organized and accessible. Here are some tips that might come in handy:
- Use a Dedicated Folder: Create a dedicated folder on your computer or cloud storage for all your invoices. Label it clearly and keep it organized by year or category. This way, finding a specific invoice later becomes a breeze.
- Utilize Invoice Management Apps: There are several apps available that can help you track and manage invoices. Apps like Expensify or Zoho Invoice can be lifesavers for organizing and accessing your invoices on the go.
- Regular Backups: Don’t rely solely on your computer’s storage. Regularly back up your invoices to an external drive or cloud storage. This ensures that you don’t lose important documents due to unforeseen issues.
- Keep Track of Payment Deadlines: Set reminders for payment deadlines and invoice due dates. This simple step helps you avoid late fees and keeps your accounts in good standing.
- Review Your Invoices: Take a moment to review your invoices as soon as you receive them. Check for any discrepancies or errors right away, and address them before it becomes a bigger issue.
These tips have made a significant difference in my own experience. It’s about making things easier for yourself and ensuring that you’re always in control of your financial records.
FAQ
Got questions about invoices from Flipkart? Here are some frequently asked questions that might help clarify things:
How long does it take to receive an invoice after requesting it?
- Generally, you should receive your invoice within a few minutes. However, it can sometimes take up to 24 hours. If you don’t receive it within that time, check your spam folder or contact customer support.
Can I get an invoice for a canceled order?
- Yes, you can request an invoice for canceled orders. However, make sure that the cancellation is processed completely, and follow up with customer service if needed.
What if my invoice details are incorrect?
- If you notice any discrepancies, contact Flipkart’s customer service immediately. Provide them with the order number and details of the issue, and they will assist you in getting a corrected invoice.
Can I access invoices for orders placed before I joined Flipkart?
- Typically, you can access invoices for orders placed before you joined Flipkart by contacting customer support and providing relevant order details. They should be able to assist you in retrieving them.
Conclusion
In the end, managing your invoices from Flipkart doesn’t have to be a daunting task. With a few simple steps, you can ensure that your records are in order and accessible whenever you need them. From understanding how to request and handle invoices to leveraging helpful tips for organization, it’s all about making the process as smooth as possible. I’ve found that staying proactive and organized makes a big difference. So, embrace these strategies and enjoy a hassle-free shopping experience with Flipkart!
 Now, let’s dive into the nitty-gritty of requesting that all-important invoice. Here’s a straightforward guide to help you through the process:
 So, what happens if you’ve followed all the steps and still don’t receive your invoice? Don’t worry, it’s not the end of the world. Here’s what you can do:
 admin
admin


