Writing a check may seem old-fashioned in the age of digital payments, but it’s still a reliable method for paying bills, sending money, or making donations. While technology has made payment options more convenient, knowing how to properly write a check is an important skill. It helps you manage finances securely and ensures that payments are processed accurately. In this guide, we’ll walk you through each step of writing a check, from the date to your signature, making it easy to understand and follow.
Step One: Start with the Date

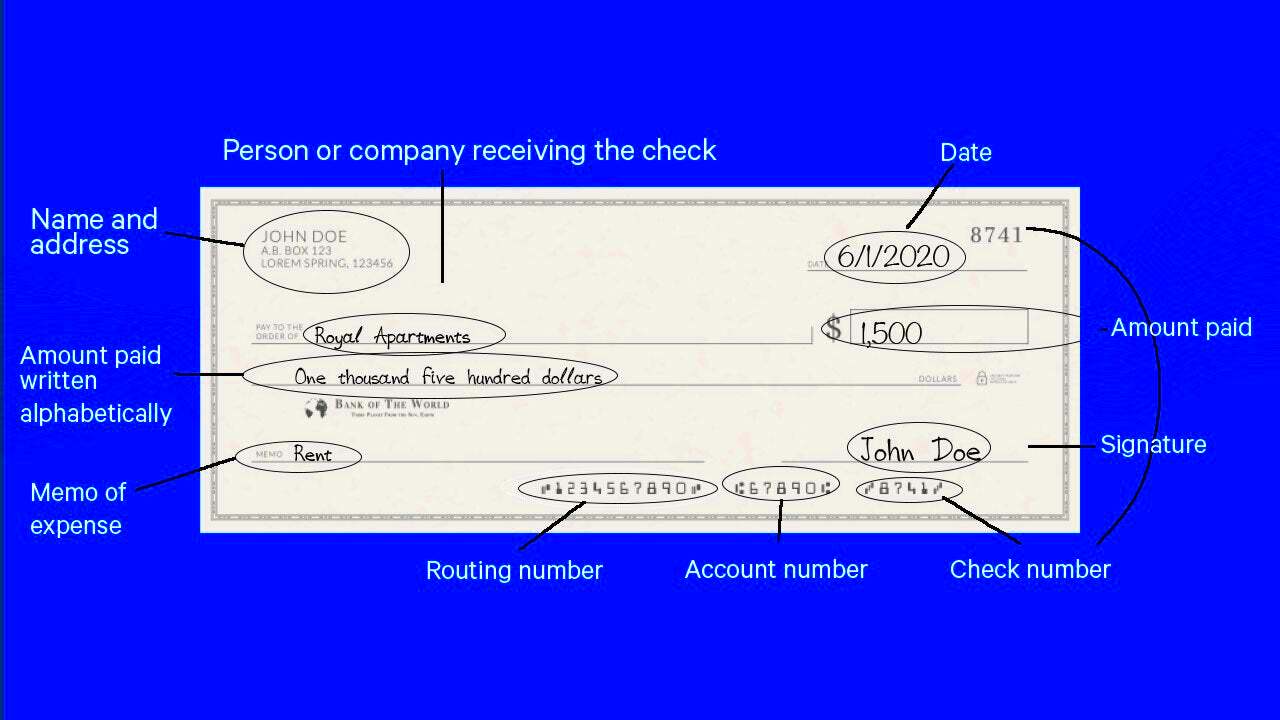
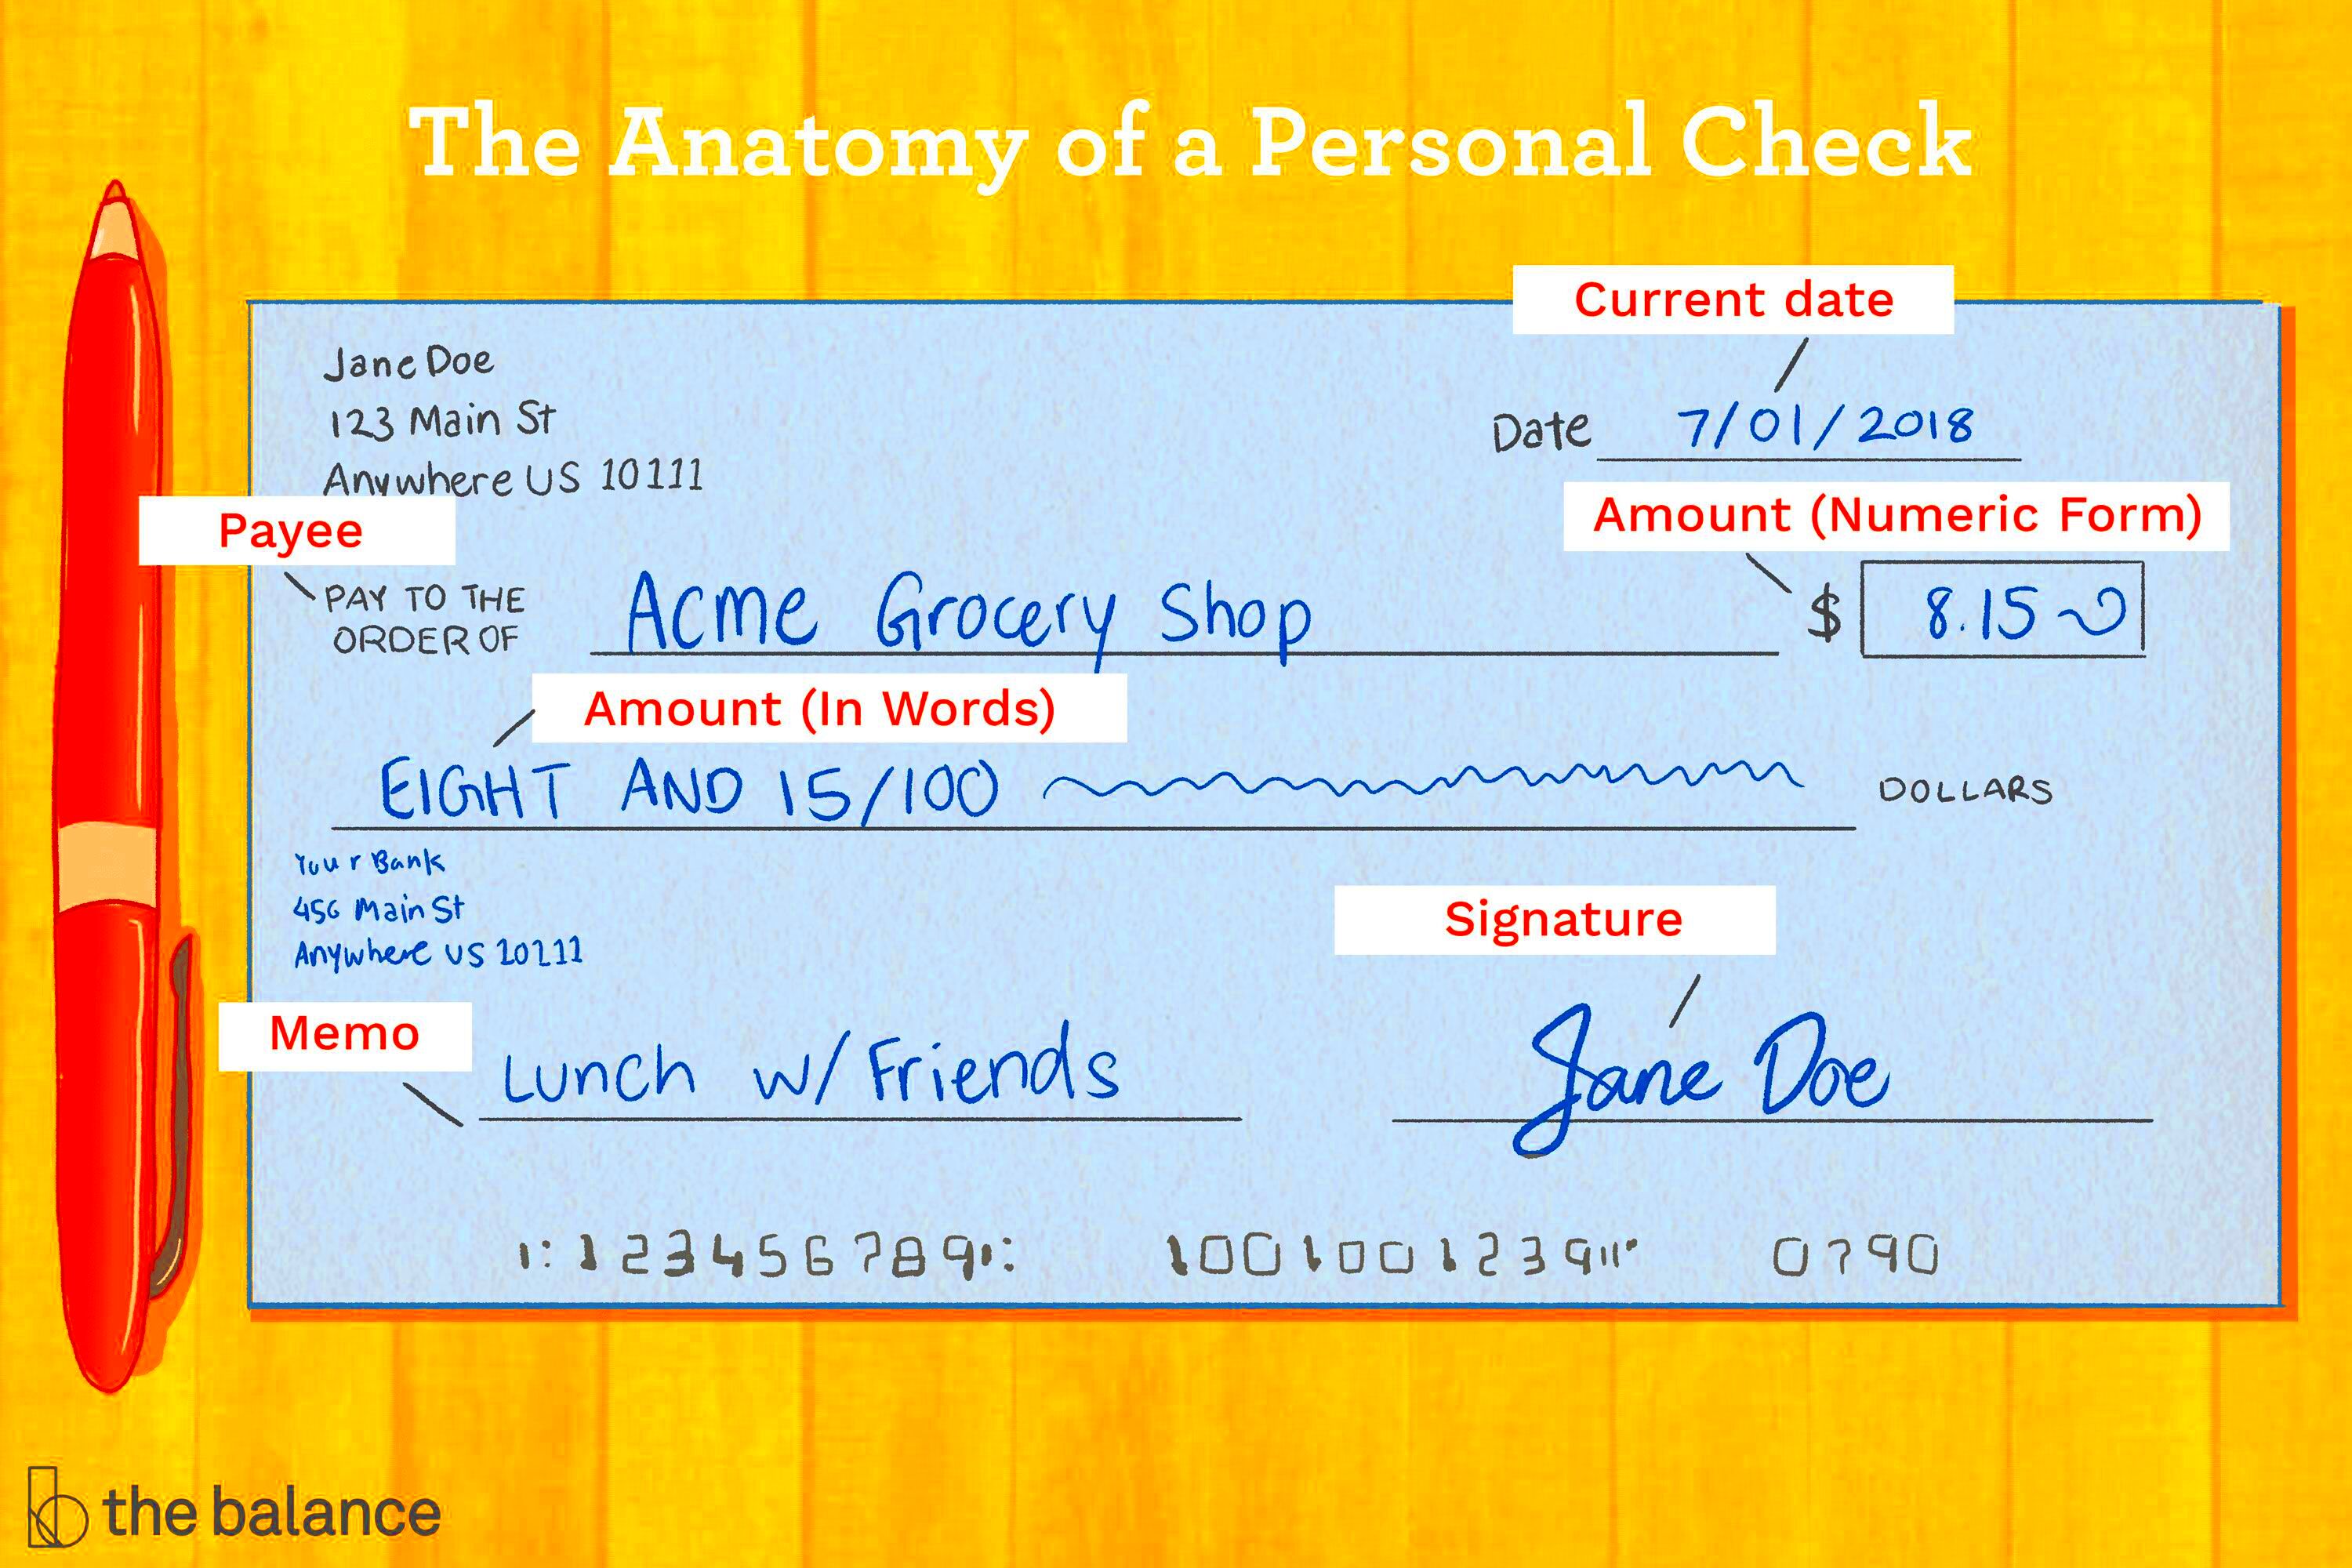
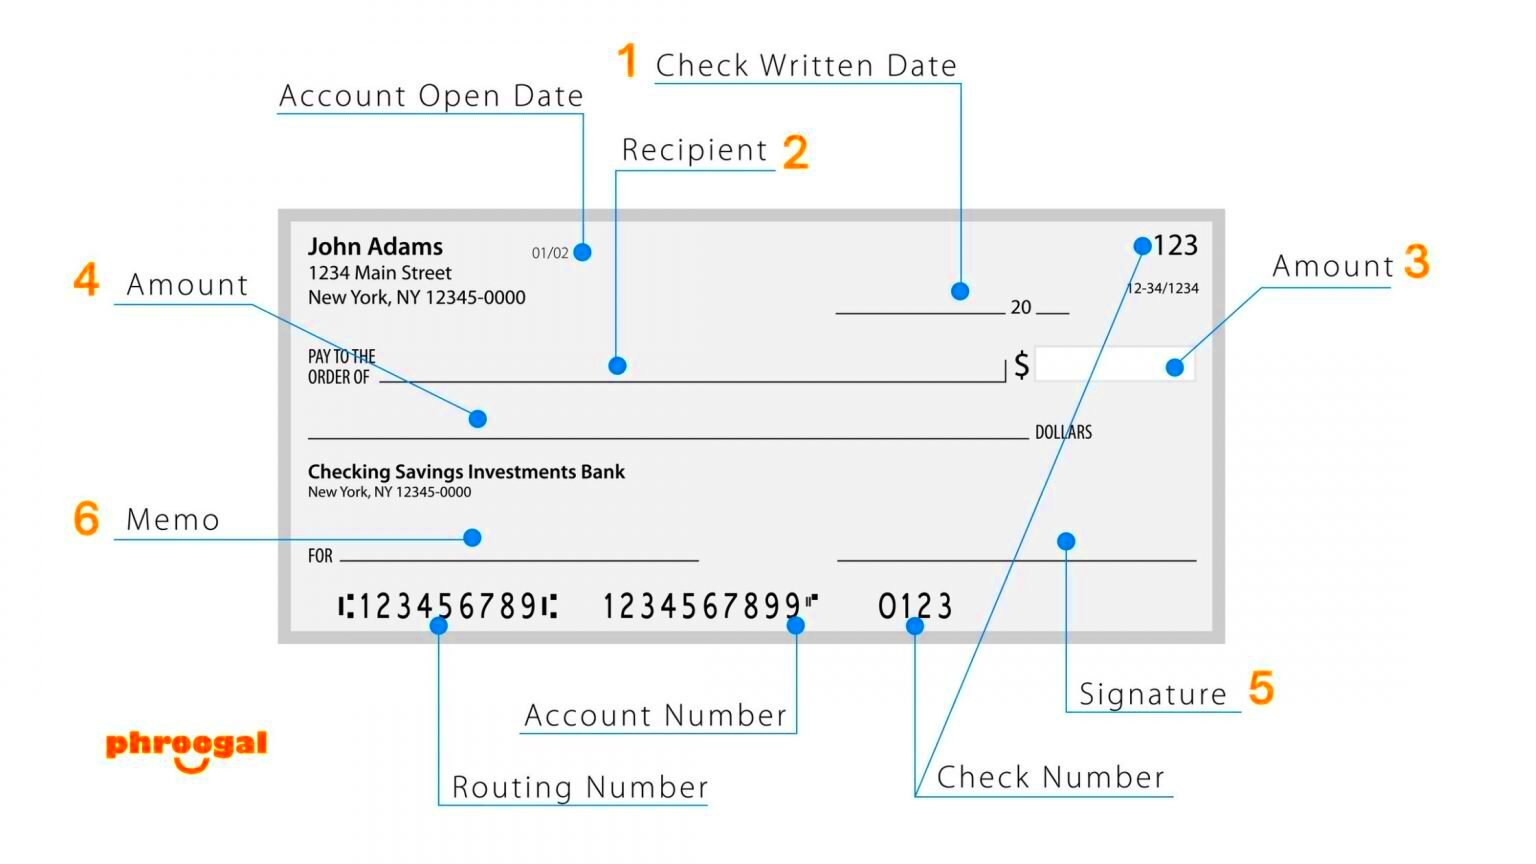
The first thing you should do when writing a check is to add the date. This is important because it marks when the check was written. Without a date, the check could become invalid or cause confusion about when payment is due. Most checks are written with the current date, but in certain cases, you may want to post-date a check, meaning you write a future date. This could be useful when you want to delay the payment until a specific time.
Here’s how to write the date on a check:
- Use the full date (month, day, and year) to avoid confusion.
- Write it in the top right-hand corner of the check, where it says "Date."
- If you're unsure about the format, use "MM/DD/YYYY" or "Month Day, Year" (e.g., November 15, 2024).
Remember, accuracy here is key. If the date is unclear or incorrect, it could lead to issues with cashing or depositing your check. So, always double-check the date before moving on to the next step.
Step Two: Write the Payee’s Name

After writing the date, the next step is to specify who the check is for. This is where you write the name of the person or organization you're paying. This is called the "payee." Be sure to write the name clearly and correctly, as it’s how the recipient will be identified when cashing or depositing the check. A mistake here could prevent the payee from cashing it or cause unnecessary delays.
Here’s how to do it:
- Write the payee's full name on the "Pay to the Order of" line, which is typically located just below the date section.
- If you’re paying a business, use the official business name. If it’s an individual, use their legal name.
- For an organization, make sure the name is written exactly as it appears on their bank account records.
Keep the handwriting neat, and if you're unsure about the spelling, double-check it before writing. This will help ensure that the check is processed without any issues. Once the payee’s name is written correctly, you’re one step closer to completing the check!
Step Three: Add the Amount in Numbers

Now that you've added the date and the payee’s name, it’s time to write the amount of money the check is for. This is a crucial part of writing a check, as it ensures that the correct payment is processed. You’ll need to write the amount in numbers in the box on the right side of the check. The numbers here are what the bank uses to process your payment, so it’s essential to be precise.
Here’s how to write the amount correctly:
- Write the dollar amount in numerical form (e.g., 123.45 for one hundred twenty-three dollars and forty-five cents).
- Make sure the numbers are clear and easy to read, as any unclear digits could cause errors during processing.
- Ensure that you place a decimal point between dollars and cents.
- If the amount doesn’t have cents, make sure to include “.00” to indicate that there are no cents.
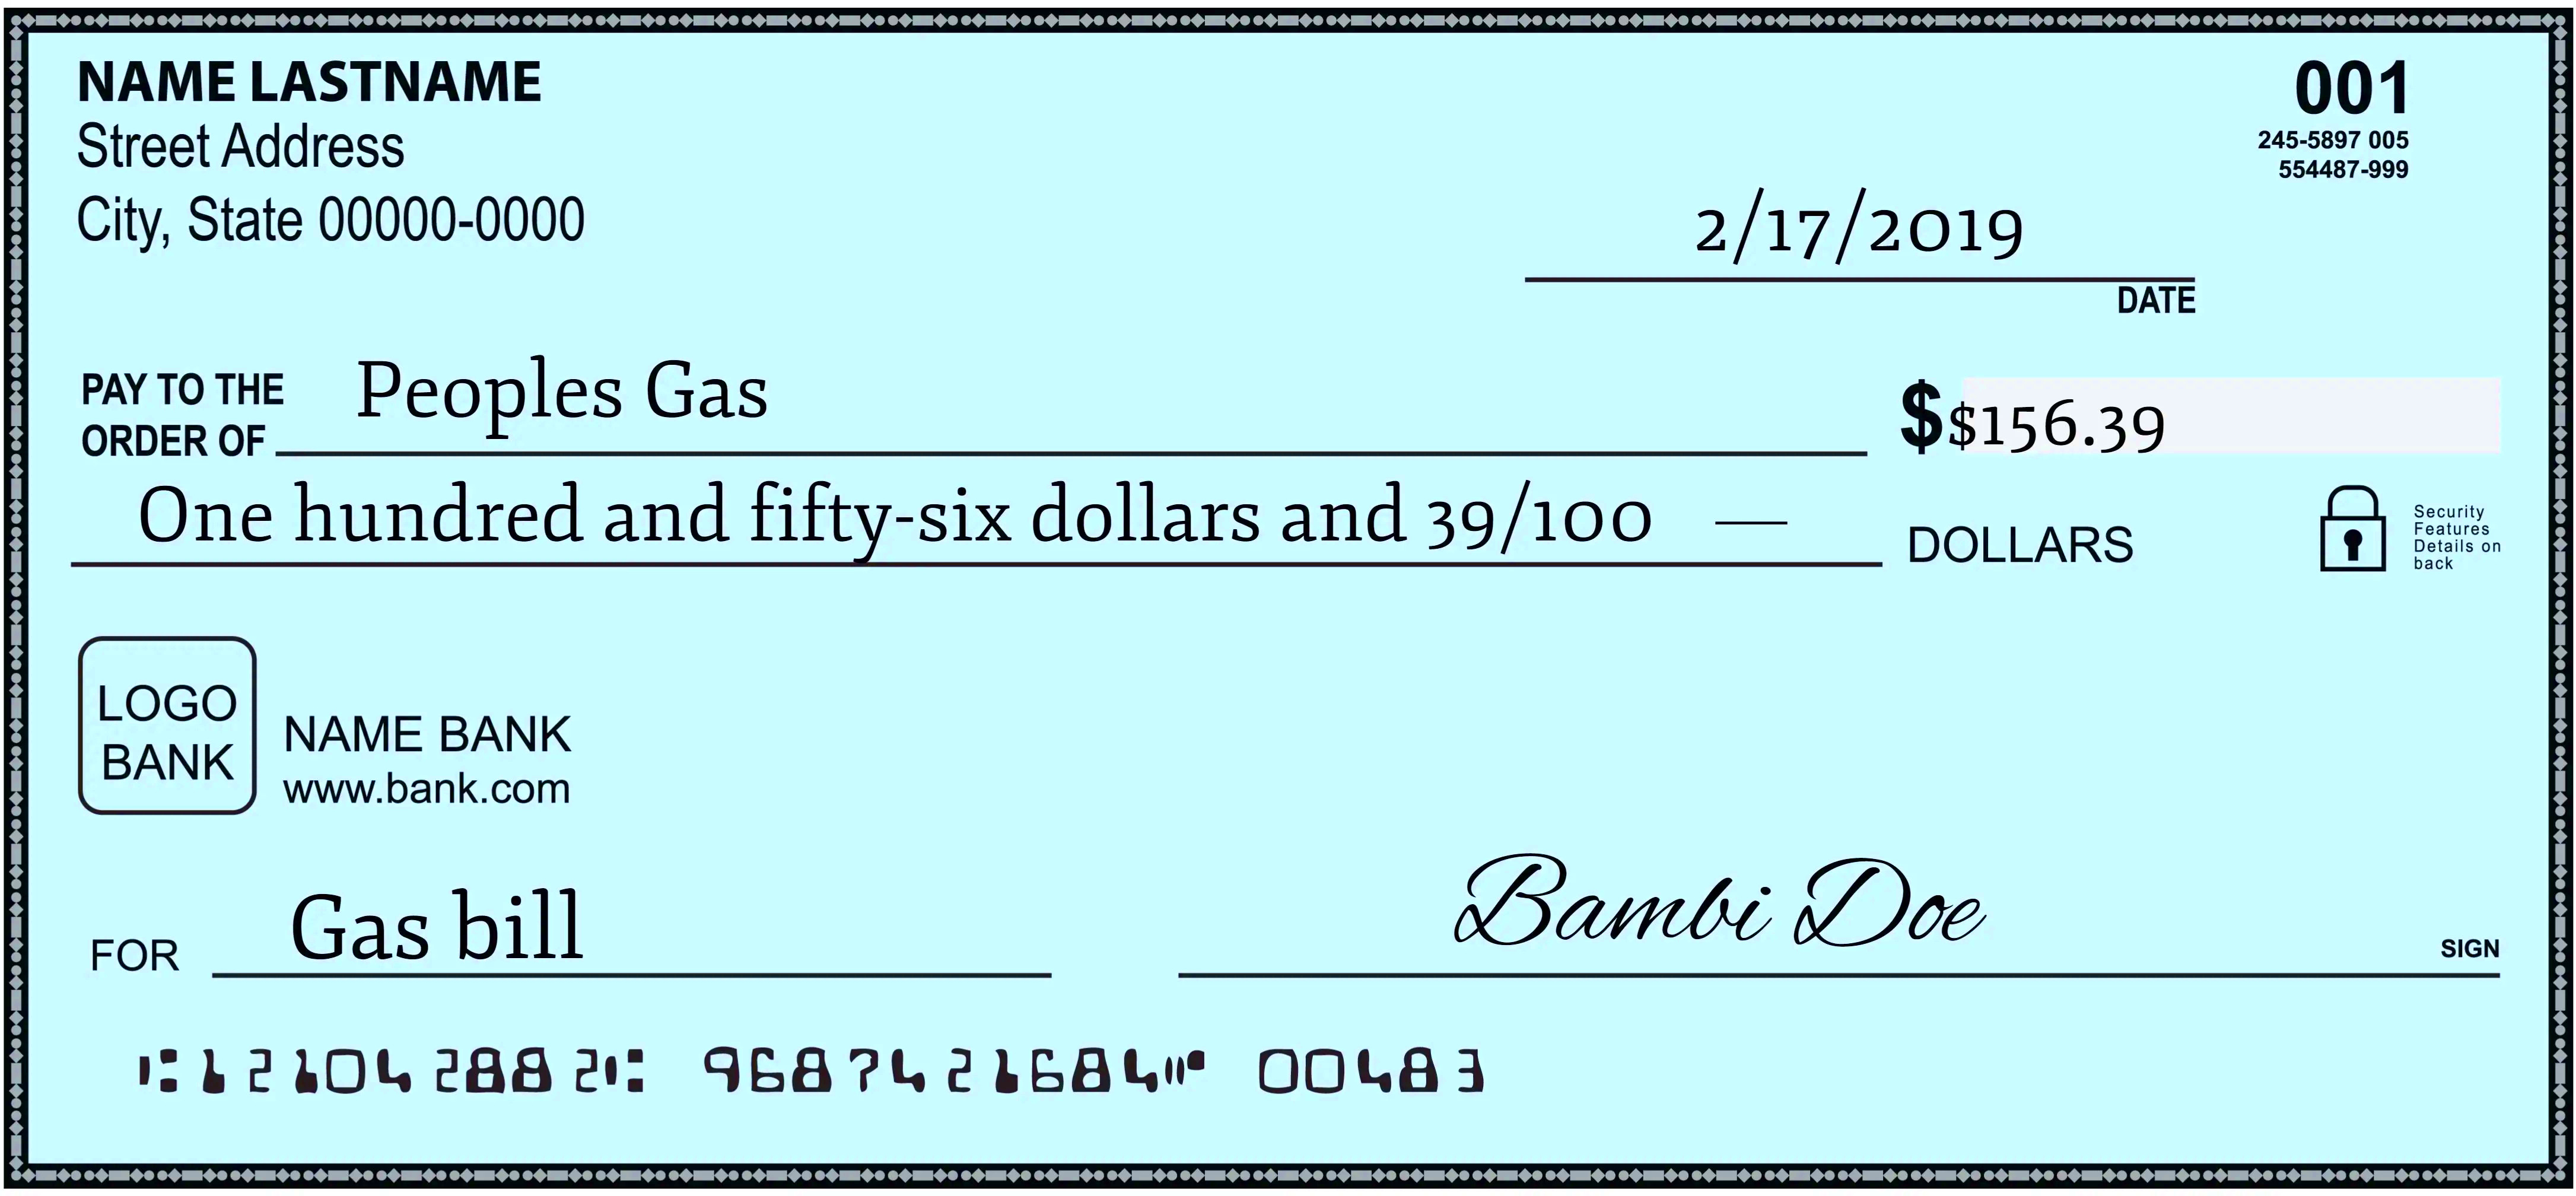
For example, if the check is for $75.50, you should write "75.50" in the box. This step helps prevent any confusion or mistakes when the check is cashed or deposited. Once you’ve written the amount, double-check that the numbers match what you’ve written in words, which will be covered in the next step.
Step Four: Write the Amount in Words
In addition to writing the amount in numbers, you also need to spell it out in words. This serves as a backup for the numerical value in case there’s any confusion or discrepancy. The written amount is the official one used to process the check, so it’s important to get it right. While this may seem a bit more complicated, it’s simply a matter of spelling out the amount carefully.
Here’s how to write the amount in words:
- Start by writing the dollar amount in full words (e.g., "One hundred twenty-three" for $123).
- If there are cents, write them as a fraction of 100 (e.g., "and 45/100" for $123.45).
- For round amounts, simply write "dollars" after the amount (e.g., "$100" would be written as "One hundred dollars").
- Be sure to clearly write the amount to avoid any potential confusion or errors.
For example, for $123.45, you would write “One hundred twenty-three and 45/100 dollars.” It’s also a good idea to draw a line after the written amount to prevent anyone from altering it. This extra step helps ensure that your check is processed correctly without any issues.
Step Five: Write a Memo
The memo section of the check is optional, but it’s a useful part to include. It allows you to note the purpose of the check or any relevant information for your records or the recipient’s reference. Whether it’s for paying a bill, rent, or a gift, the memo section helps both you and the payee stay organized and clear about the payment.
Here’s how to use the memo section:
- Write a brief description of the purpose of the check. For example, “Rent for November” or “Payment for invoice #1234.”
- It’s not mandatory to fill in the memo section, but doing so can help clarify the reason for the payment.
- If you are paying a business, include the account number or invoice number to ensure the payment is properly applied to your account.
- Keep it short and clear – the memo section is typically small, so only a few words are needed.
While the memo doesn’t affect the check’s processing, it can help both parties track payments and avoid confusion. For example, if you’re paying a bill, writing “Electric Bill – November” will help both you and the company identify what the payment is for when reviewing records later. Once you’ve written the memo, you’re almost done with your check!
Step Six: Sign the Check
The final step in writing a check is to sign it. Your signature is essential because it authorizes the payment and confirms that you are the one who wrote the check. Without a signature, your check is not valid, and the bank will not process it. It's important to sign your check exactly as your name appears on the account, as the bank uses this signature to verify your identity when the check is deposited or cashed.
Here’s how to sign your check correctly:
- Sign your name in the bottom right corner of the check, where it says "Signature."
- Make sure your signature is legible and matches the signature the bank has on file for your account.
- If you have a joint account, both account holders must sign the check.
- Be careful not to sign the check too early. Ensure that you’ve filled out the rest of the check properly before signing it to avoid any mistakes.
Your signature is your final approval for the transaction. It’s the last step in ensuring your check is processed smoothly. A clear, accurate signature will help prevent issues with cashing or depositing the check.
Common Mistakes to Avoid When Writing a Check
While writing a check is a straightforward process, there are several common mistakes that can cause problems or delays in processing. Being aware of these mistakes can help ensure your check is valid and quickly processed without any issues.
Here are some common mistakes to avoid:
- Writing an incorrect date: If the date is missing or incorrect, the bank may refuse to process the check. Always double-check the date before writing it.
- Forgetting to sign the check: Without your signature, the check is invalid. Make sure to sign it after filling out all the details.
- Writing an unclear amount: If the numbers or words don’t match or are hard to read, the bank may not process your check. Always ensure clarity in both the numerical and written amounts.
- Leaving blank spaces: Leaving spaces in the payee or amount sections can allow someone to alter the check. Fill out every field completely to avoid fraud.
- Not using the correct account information: Double-check that the routing and account numbers are correct, especially if you’re using a new checkbook or account.
By paying attention to these details and taking your time when writing a check, you can avoid costly mistakes that may delay your payment. Always double-check your work and, if needed, ask someone for a second opinion before completing the check.
Frequently Asked Questions
When it comes to writing checks, many people have questions about the process. To help, we’ve answered some of the most frequently asked questions below:
- What if I make a mistake while writing the check?
If you make a mistake, it's best to void the check and start over. You can also cross out the error and correct it, but make sure it’s clear and legible. If the mistake is on the amount, it’s safer to void the check. - Can I write a check without a memo?
Yes, writing a memo is optional. However, it’s a good practice to include a note about the purpose of the check for your records or the recipient’s reference. - What if I don’t have enough funds in my account to cover the check?
Writing a check for more money than you have in your account can lead to overdraft fees, and the check may bounce. Always ensure you have enough funds before writing a check. - How long is a check valid?
Typically, checks are valid for six months. After this period, the bank may not honor the check, and you’ll need to issue a new one. - Can I write a check to a business or organization?
Yes, you can write checks to businesses, organizations, or individuals. Just be sure to use the correct name and include any relevant account or reference numbers in the memo section.
If you’re ever unsure about any part of the check-writing process, it’s always a good idea to ask your bank for guidance. Understanding these common questions will help make writing checks easier and more efficient.
Conclusion
Writing a check may seem like an old-fashioned method of payment, but it’s still a valuable skill to have. By following the steps outlined—starting with the date, writing the payee’s name, adding the amount in both numbers and words, using the memo section, and finally signing the check—you can ensure that your payment is processed smoothly and without error. Always double-check the details for accuracy to avoid common mistakes, such as leaving blank spaces or writing unclear amounts. With a little attention to detail, writing checks can be quick and hassle-free. Whether you're paying a bill, sending a gift, or handling personal finances, knowing how to write a check properly will help you manage your money securely and efficiently.

 admin
admin


