Wrapping text around images in Google Slides can make your presentations look polished and professional. It’s a simple yet effective way to ensure that your content is organized and visually appealing. Whether you’re adding a picture, a chart, or a logo, knowing how to wrap text correctly will help you create a balanced slide layout. The process itself is straightforward, but mastering it can make a huge difference in how your slides look and feel. In this guide, we’ll walk you through everything you need to know about wrapping text around images in Google Slides.
Understanding Text Wrapping in Google Slides

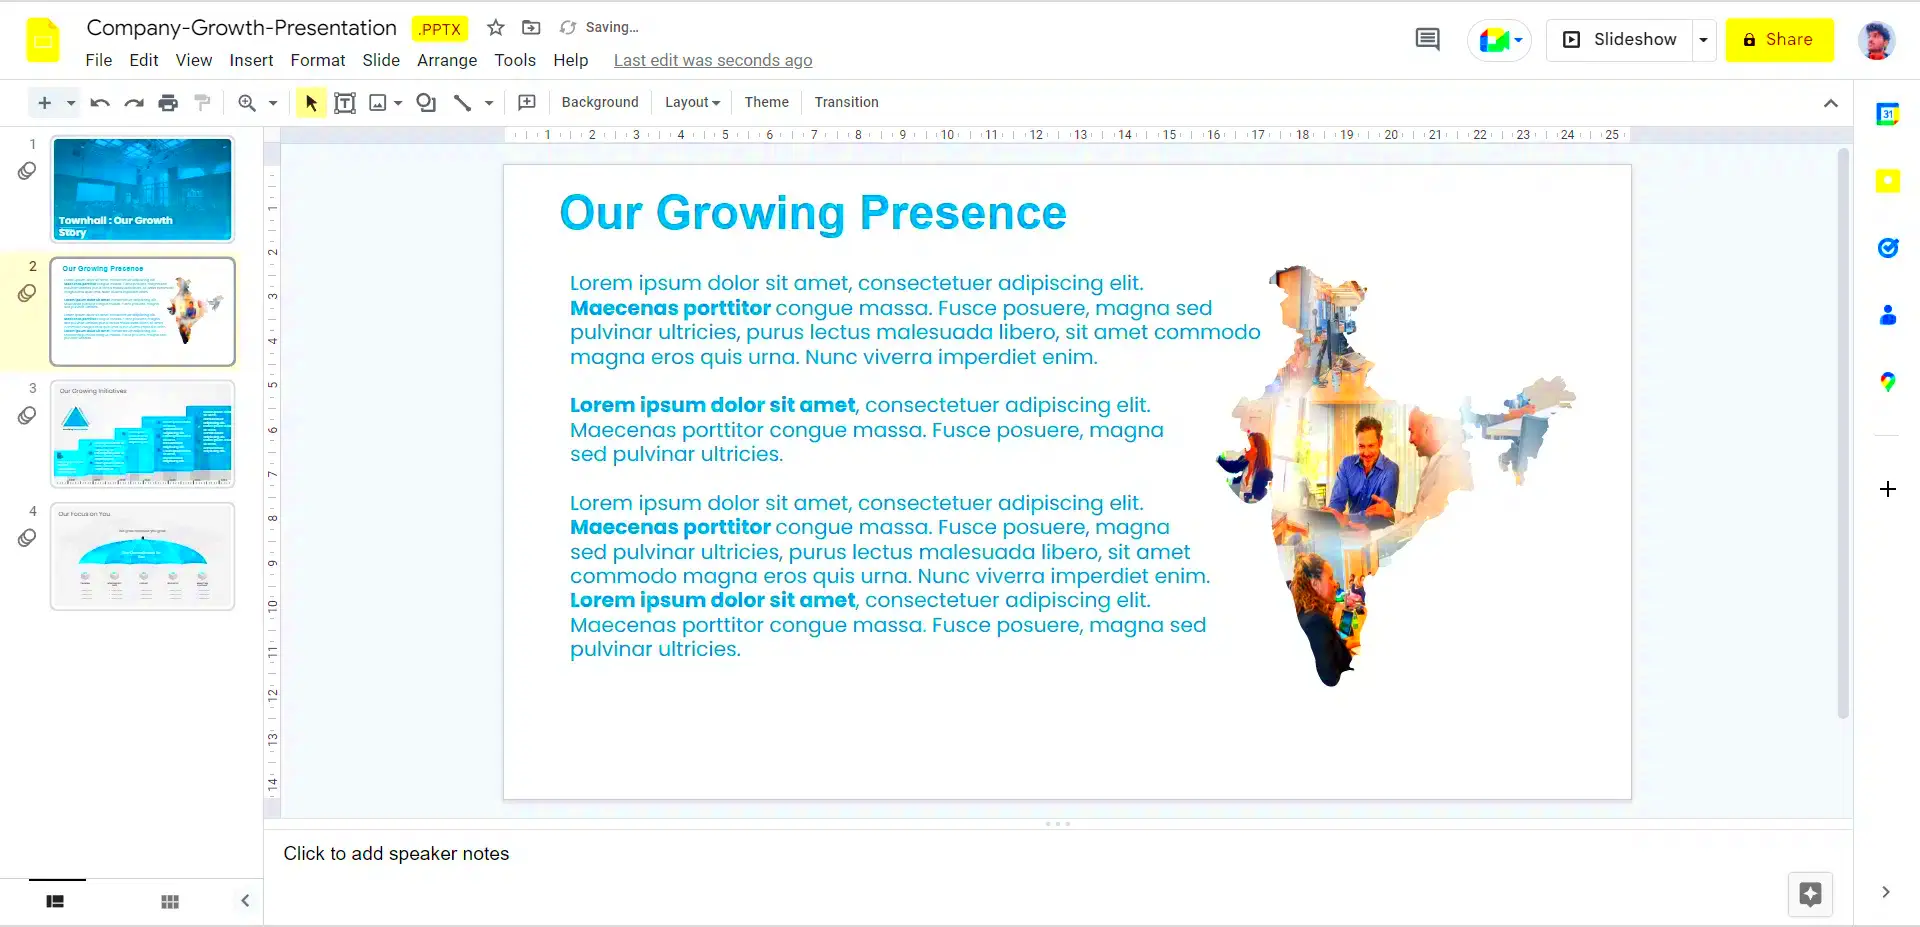
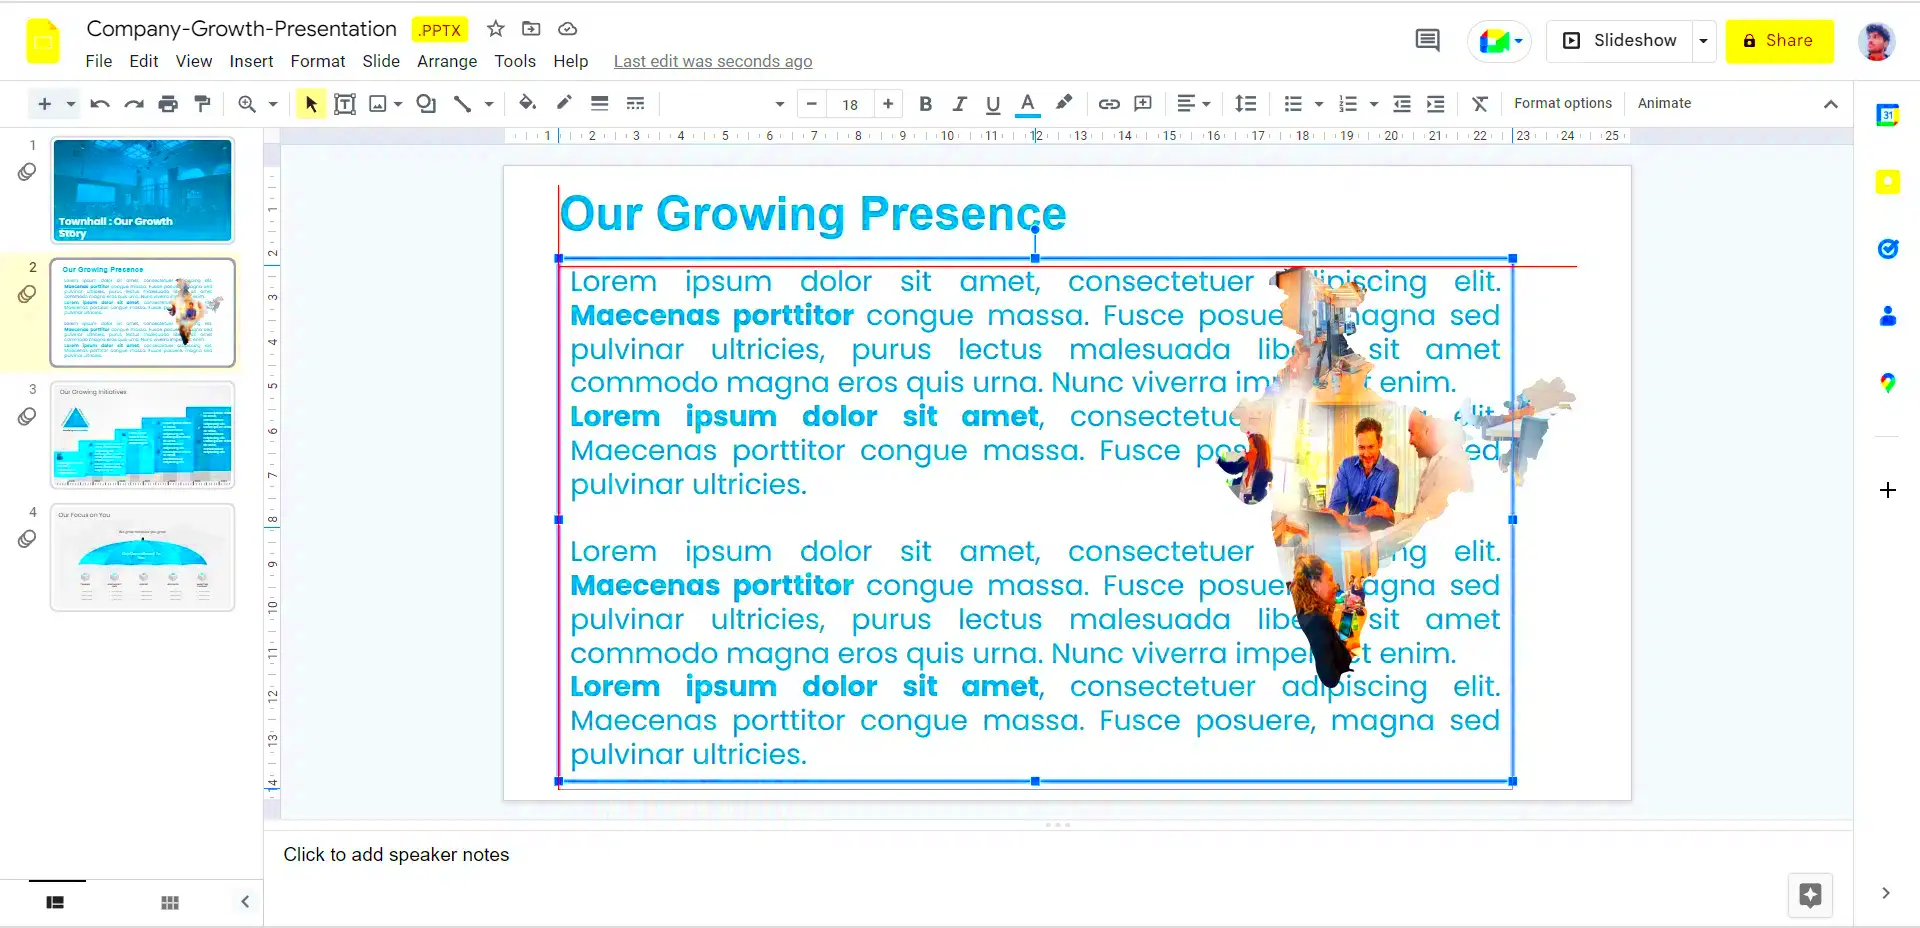
Text wrapping in Google Slides is the method of arranging text around an image in a way that doesn’t interfere with the content of your slide. It allows you to position images and text in a way that both elements complement each other without overlapping or causing clutter. However, Google Slides does not have a specific "wrap text" option like in other programs such as Google Docs. Instead, the workaround involves using text boxes and manually positioning the text around your image.
Here’s what you need to know about the main features of text wrapping in Google Slides:
- Manual text positioning: You can move the text around the image by adjusting text boxes and resizing them.
- Alignment options: You can align the image and text with various tools like “align left,” “center,” and “right” to control their relationship.
- Text box resizing: Adjust the text box size to create space for the image, giving your slide a more organized look.
While not as intuitive as other programs, with a little practice, text wrapping in Google Slides can become second nature. It allows for creative control over how images and text appear together, ensuring you achieve the desired layout.
Also Read This: Navigating Model and Property Releases on Shutterstock: Ensuring Legal Compliance
How to Add an Image in Google Slides

Before you can wrap text around an image, you need to first add an image to your Google Slides presentation. This process is simple and can be done in just a few steps. Google Slides offers multiple ways to insert images, depending on where your
- Insert from your computer: Click on the "Insert" menu at the top of your screen, then select "Image." From there, choose "Upload from computer" and select the file you want to insert.
- Insert from Google Drive: If your image is already stored in Google Drive, you can insert it by choosing "Drive" under the "Image" option and selecting the file from your Drive.
- Insert from URL: For images available online, you can choose "By URL" and paste the link of the image into the provided field.
- Insert from Google Search: You can also directly search for images using the "Search the web" option available in Google Slides. This opens a sidebar where you can find images to insert directly into your slide.
Once the image is added, you can resize it by clicking and dragging its corners. You can also move it to any position on the slide. From here, you can start arranging your text around the image. The goal is to create a visually appealing and balanced layout where both the text and the
Also Read This: Download Video for Whatsapp Status Love from ShareChat with This Epic Tool
Steps to Wrap Text Around an Image in Google Slides
While Google Slides doesn’t offer a direct “wrap text” feature, you can still easily position your text around images with a few simple steps. This process involves manually adjusting the text and images on your slide, which gives you control over how your content is displayed. Let’s walk through the steps to wrap text around an image in Google Slides:
- Step 1: Insert an image. First, follow the process mentioned earlier to add an image to your slide.
- Step 2: Add a text box. Go to the “Insert” menu, select “Text box,” and click anywhere on your slide to add the text.
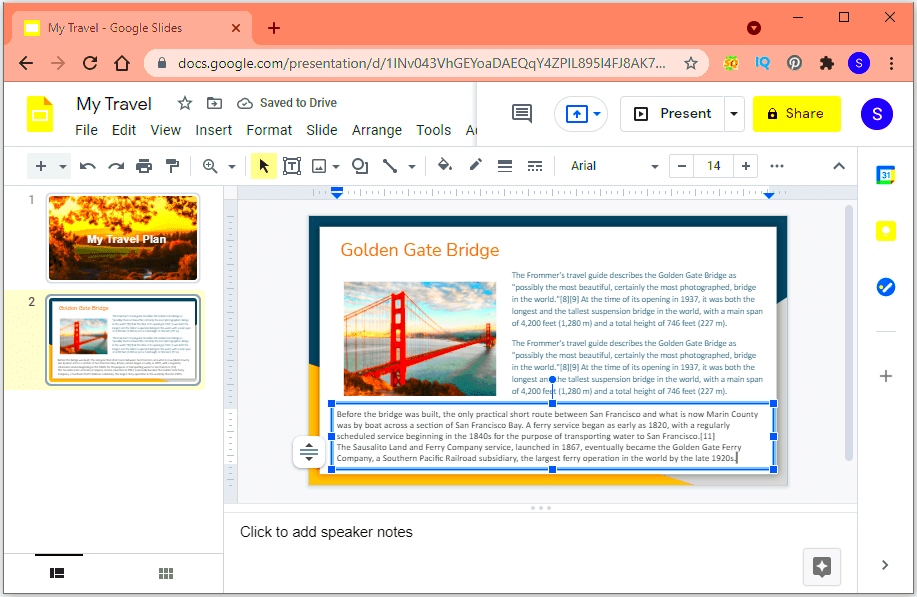
- Step 3: Move and resize the text box. Adjust the size of your text box so that it surrounds the image. You can move the text box around by clicking and dragging it to the desired location.
- Step 4: Adjust the text box settings. Use the “Text fitting” option to make sure the text fits neatly within the box without overlapping the image.
- Step 5: Use alignment tools. Align the image and text for a more organized appearance. You can center or align both the text and the image using Google Slides' alignment tools (found under the “Arrange” menu).
By following these steps, you can position the text exactly where you want it in relation to the image, achieving a clean and professional layout. It might take a little practice to perfect, but once you get the hang of it, you’ll be able to create slides that are both visually appealing and easy to read.
Also Read This: How to Find Image DPI on iPhone for Print Quality
Common Problems When Wrapping Text Around Images
While wrapping text around images in Google Slides is easy, there are a few common issues that many users encounter. These problems usually involve misalignment, text overlapping, or the image not behaving as expected. Here are some common challenges and how to solve them:
- Text overlapping with images: This is a common issue, especially when the text box and image are too close together. Solution: Ensure that your text box has enough padding around the image, and resize the text box to fit around the image properly.
- Image not moving with text: Sometimes when you try to move the image, the text doesn’t adjust accordingly. Solution: Always lock the image in place first, and then adjust the text box around it.
- Text box not resizing correctly: If the text box resizes incorrectly when you add or delete text, it can cause issues with the layout. Solution: Click on the text box and manually adjust its size using the corner handles.
- Alignment issues: Text and images not lining up properly can create a cluttered appearance. Solution: Use the “Align” tools under the “Arrange” menu to ensure both elements are centered or aligned correctly.
- Inconsistent spacing: Inconsistent spacing between the image and text can disrupt the overall design. Solution: Use the "Spacing" options in the text box settings to adjust the line spacing and padding.
By being aware of these common problems, you can avoid frustration and troubleshoot any issues that come up while wrapping text around images in Google Slides. Remember, patience and practice go a long way when perfecting your slide design.
Also Read This: Removing Watermarks from iStock Images – Why Legal Alternatives Are Better
Tips for Better Image and Text Alignment
Aligning images and text in Google Slides can make a huge difference in the overall look of your presentation. Proper alignment ensures that your slides are neat, balanced, and easy to read. Here are some helpful tips to improve the alignment of images and text:
- Use the alignment tools: Google Slides has built-in alignment options that help you easily center or align your images and text. To use these tools, select both the image and text box, then go to the “Arrange” menu and choose one of the alignment options.
- Group text and image: Once you’ve positioned the image and text exactly how you want them, group them together. Select both the image and text box, right-click, and choose “Group.” This way, you can move and resize them together without losing the layout.
- Consider spacing and margins: Keep a consistent amount of space between the image and the text. Use the “Spacing” tool in the text box settings to adjust the padding, and ensure the text is not too close to the image.
- Use guides and rulers: Enable the rulers and guides (found under the “View” menu) to help you align elements more precisely on your slide. This will give you more control over the placement of your image and text.
- Maintain visual balance: Pay attention to how much space each element takes up on the slide. If you have a large image, balance it with a smaller text box, and vice versa. This helps to create a visually pleasing slide without overcrowding.
- Keep text readable: Make sure the text is easy to read by maintaining good contrast between the text color and the background. Avoid using overly decorative fonts or small text that might make reading difficult.
By following these alignment tips, your Google Slides will have a more professional look. Proper alignment not only improves the visual appeal of your slides but also ensures that the audience can focus on the content without distractions.
Also Read This: How to Copy and Paste a Portion of an Image in Pixlr
How to Edit Text Wrapping After Inserting an Image
After you’ve inserted an image and positioned the text around it in Google Slides, you might find that you need to adjust the layout as you refine your slide. Luckily, Google Slides offers flexibility when it comes to editing text wrapping, even after the image and text are already placed. Here's how you can make those changes:
- Move the image: If the text is too close or not wrapping around the image properly, click and drag the image to a new location. Google Slides will adjust the text accordingly.
- Resize the image: If the image is too large or too small for the text box, you can resize it by clicking on the image and dragging its corner handles. The text box will automatically adjust, but you may need to manually fine-tune the spacing.
- Resize or move the text box: You can always resize the text box to create more or less space around the image. Simply click on the text box and drag the edges to adjust the size, or move it to a better position.
- Use the "Arrange" menu: After moving the image, you can use the “Arrange” menu to align both the image and text perfectly. Options like “Center,” “Align left,” or “Align right” will help you organize the layout without disrupting the text flow.
- Adjust line spacing: If the text still feels cramped, try adjusting the line spacing. Highlight the text, go to the toolbar, and click on the “Line spacing” icon to increase the space between lines. This can help make the slide look more balanced.
Editing text wrapping in Google Slides is simple once you know how to adjust the position and size of both your text and image. It’s all about trial and error until you find the perfect balance for your slide design.
Also Read This: how to increase dpi of image in paint
Alternative Methods for Text and Image Layouts in Google Slides
If wrapping text around images isn’t giving you the look you want, there are several alternative methods you can try to create a clean and professional layout. These methods allow you to position images and text in creative ways, ensuring your slide has a unique and polished appearance. Here are some of the most popular alternatives:
- Use text boxes and images as separate elements: Instead of wrapping text around an image, you can place both elements independently on the slide. Position your image on one side and the text on the other. This method works well when you want to avoid clutter.
- Create a table layout: If you want to keep your content organized, you can use a table to align images and text. Insert a 2x1 or 1x2 table, place the image in one cell, and add text to the other. This method ensures perfect alignment and can be resized easily.
- Use background images with text overlay: Another approach is to use an image as the background of your slide and then overlay the text on top. This method is great for creating slides with strong visual impact. You can adjust the transparency of the image to make sure the text stands out.
- Use Shapes for Text and Image Containers: You can use shapes (like rectangles or circles) as containers for your text and images. Insert a shape, add your text inside it, and place the image outside or within the shape. This method provides more control over spacing and alignment.
- Use Smart Guides: Smart guides can help you align your images and text more precisely. When you move the image or text box, Google Slides shows guidelines to help you position them evenly on the slide.
By experimenting with these alternatives, you can find the best method for your presentation. Whether you prefer a more structured layout or a more creative approach, Google Slides gives you plenty of flexibility to create visually appealing slides that communicate your message effectively.
Also Read This: How to Upload Your Pics onto Depositphotos
FAQ
Q1: Can I wrap text around an image like in Google Docs?
A1: Unfortunately, Google Slides doesn’t have the same automatic text wrapping feature as Google Docs. However, you can manually adjust text boxes around the image to create a similar effect.
Q2: Why is my text overlapping with the image?
A2: Text overlapping with an image usually happens when the text box is too small or too close to the image. You can fix this by resizing the text box or moving the image to create more space.
Q3: How can I align the image and text properly?
A3: Use the "Arrange" menu in Google Slides to align your image and text. You can center them, align them left or right, or adjust the spacing manually. Using smart guides also helps to position them accurately.
Q4: Can I wrap text around an image in a table?
A4: Yes, you can use a table to create a layout with text and images. Simply insert a table, place the image in one cell, and add the text in another. This method ensures both elements stay aligned.
Q5: How do I adjust the line spacing in Google Slides?
A5: To adjust line spacing, highlight the text, click on the "Line spacing" icon in the toolbar, and select your preferred spacing. This will help create more room between lines of text and prevent overcrowding around the image.
Conclusion
Wrapping text around images in Google Slides may not be as automatic as it is in other applications, but with a bit of manual effort, it can be done effectively. Whether you’re adjusting the size of the image, repositioning text boxes, or using creative layouts, these methods allow you to craft slides that are both visually appealing and easy to understand. Remember that experimenting with different techniques—such as using tables, aligning images and text manually, or even placing images as backgrounds—can help you find the layout that works best for your presentation. With these tips and tricks, you’ll be able to create professional presentations that stand out and communicate your message clearly.


