Welcome to the exciting world of Java programming! If you're a beginner, you're in for a treat. One of the best tools you can use is NetBeans. It's an integrated development environment (IDE) that makes coding in Java more accessible and enjoyable. In this guide, we'll explore what NetBeans is and how it can simplify your Java programming journey. So grab your favorite beverage, and let’s dive in!
Why Choose NetBeans for Java Development?
When starting your Java programming adventure, choosing the right IDE can make all the difference. Here’s why NetBeans stands out:
- User-Friendly Interface: NetBeans is designed with beginners in mind. Its intuitive interface allows you to focus on coding without getting lost in complicated menus and settings.
- Comprehensive Features: This IDE comes packed with features like code templates, syntax highlighting, and real-time error checking, which can enhance your coding efficiency.
- Integrated Debugger: Debugging is a crucial part of programming, and NetBeans provides a powerful debugger that helps you find and fix issues quickly.
- Built-in Support for Java: NetBeans is specifically tailored for Java, meaning it supports the latest Java standards and technologies, ensuring you’re always up-to-date.
- Support for Multiple Languages: While its core is Java, NetBeans also supports other languages like PHP and C/C++, which may come in handy as you grow as a developer.
Let’s explore some of these features in detail:
User-Friendly Interface
The layout of NetBeans is straightforward. With panels for projects, files, and output all visible at a glance, finding your way around is a breeze. You won’t waste time searching for tools; everything is just a click away!
Comprehensive Features
NetBeans offers an array of features to streamline your coding experience:
- Code Templates: Use shortcuts to quickly insert common code structures, saving you time and keystrokes.
- Syntax Highlighting: This feature makes it easier to read your code by coloring different elements, so you can spot errors faster.
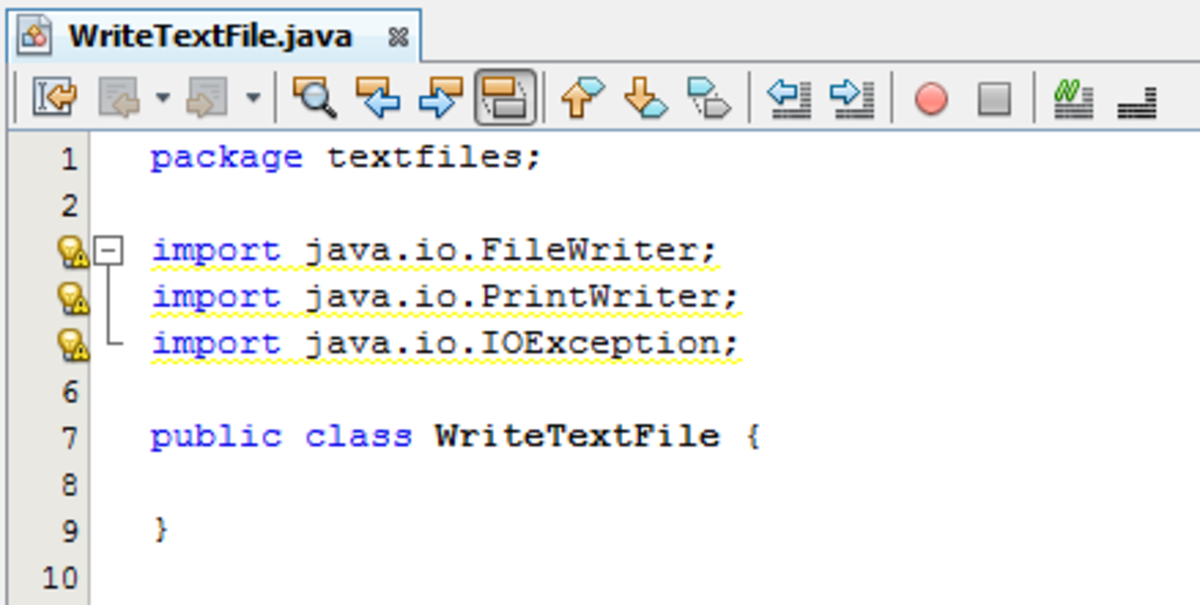
- Real-time Error Checking: As you type, NetBeans will underline potential errors, allowing you to catch mistakes early in the process.
Integrated Debugger
Debugging can be daunting, but not with NetBeans. Its integrated debugger allows you to set breakpoints, step through your code, and inspect variables, giving you a clear view of your program's behavior. This can significantly reduce the time you spend chasing bugs!
Built-in Support for Java
NetBeans keeps you aligned with Java’s evolving standards. Whether you’re working with Java SE, Java EE, or Java ME, you’ll find that everything you need is already integrated, allowing you to start coding right away.
Support for Multiple Languages
If you ever decide to branch out into other programming languages, NetBeans has you covered! It provides support for various languages, making it a versatile choice that can grow with your skills.
In summary, choosing NetBeans for your Java development journey is a smart move. It combines user-friendliness with powerful features, making it ideal for beginners. Now that you know why it’s a great fit, let’s get started with some practical tips on how to set it up!
Also Read This: How to Create a Messy Braid with Dailymotion’s Easy Hairstyling Tips
3. Installing NetBeans and Setting Up Your Environment

Welcome to the exciting world of Java programming! The first step in your journey is installing NetBeans, a robust Integrated Development Environment (IDE) that makes coding a breeze. Don’t worry; I’ll walk you through the entire process!
First, head over to the official NetBeans website. Here’s how to get started:
- Download the Installer: On the website, you’ll find a download button. Click it, and choose the version that suits your operating system—Windows, macOS, or Linux.
- Java Development Kit (JDK): Before installing NetBeans, ensure you have the Java Development Kit installed. You can download it from the Oracle JDK page. Make sure to install the version compatible with your system.
- Run the Installer: Once downloaded, open the installer. Follow the prompts; it’s mostly next, next, finish! The installer will guide you through selecting the JDK you installed earlier.
- Complete the Installation: After installation, open NetBeans. You may be prompted to configure some settings, but the default options usually work just fine.
Now that you’ve installed NetBeans, let’s set up your programming environment!
1. *Configure the IDE Settings: Open NetBeans and go to Tools > Options. Here, you can customize the appearance, set up fonts, and adjust the color scheme. A comfortable working environment can significantly boost your productivity.
2. Set Up Your JDK Path: If you didn’t configure the JDK during installation, you can do it manually. Still in the Options menu, navigate to the Java tab and ensure the correct JDK is selected.
3. Create a Workspace*: Organize your projects by creating a new folder on your computer where all your Java projects will reside. This helps keep everything tidy and easy to navigate!
And there you have it! You’re all set up and ready to dive into coding. The next step is creating your first Java project.
Also Read This: Learn to Style Your Hijab Like a Pro on Dailymotion
4. Creating Your First Java Project in NetBeans
Now that you have NetBeans installed and your environment set up, let’s create your very first Java project! This is where the fun begins, and I promise it’s simpler than it sounds.
Follow these steps to create your first project:
- Start a New Project: Open NetBeans, and go to File > New Project. A wizard will pop up with various project types. Choose Java with Ant and then select Java Application.
- Name Your Project: Give your project a witty name—let’s say “HelloWorld.” You can also choose where to save it by clicking the folder icon. This is the moment when your project starts to come to life!
- Set Up the Main Class: When prompted, ensure the checkbox for creating a main class is selected. This class will contain your main method where the program execution begins.
- Finish and Create: Click Finish, and voila! Your project is created. You’ll see your project in the left sidebar under the Projects tab.
To write your code, double-click on the HelloWorld.java file. This will open the editor where you can start typing your code.
Here’s a quick example of a simple Java program:
public class HelloWorld {
    public static void main(String[] args) {
        System.out.println("Hello, World!");
   code>
Simply copy and paste this code into your editor. Once you’ve written your code, hit the green run button (or press F6) to see the magic happen!
If everything goes smoothly, you’ll see “Hello, World!” printed in the output window at the bottom of the IDE. Congratulations! You’ve just executed your first Java program using NetBeans!
Now that you’ve got the basics down, you can explore more features and start building more complex applications. Happy coding!
Also Read This: How to Change Dailymotion URL in 2017 Tips and Tricks for Easy Customization
5. Understanding the NetBeans User Interface
Welcome to the world of NetBeans! If you're new to this powerful Integrated Development Environment (IDE) for Java, understanding its user interface (UI) is the first step to becoming a proficient programmer. Let’s break down the essential components of the NetBeans UI so you can feel right at home.
When you first open NetBeans, you’ll notice several key areas:
- Projects Window: Located on the left side, this panel displays all your projects in a tree format. You can easily navigate through your project files and folders, making it straightforward to find what you need.
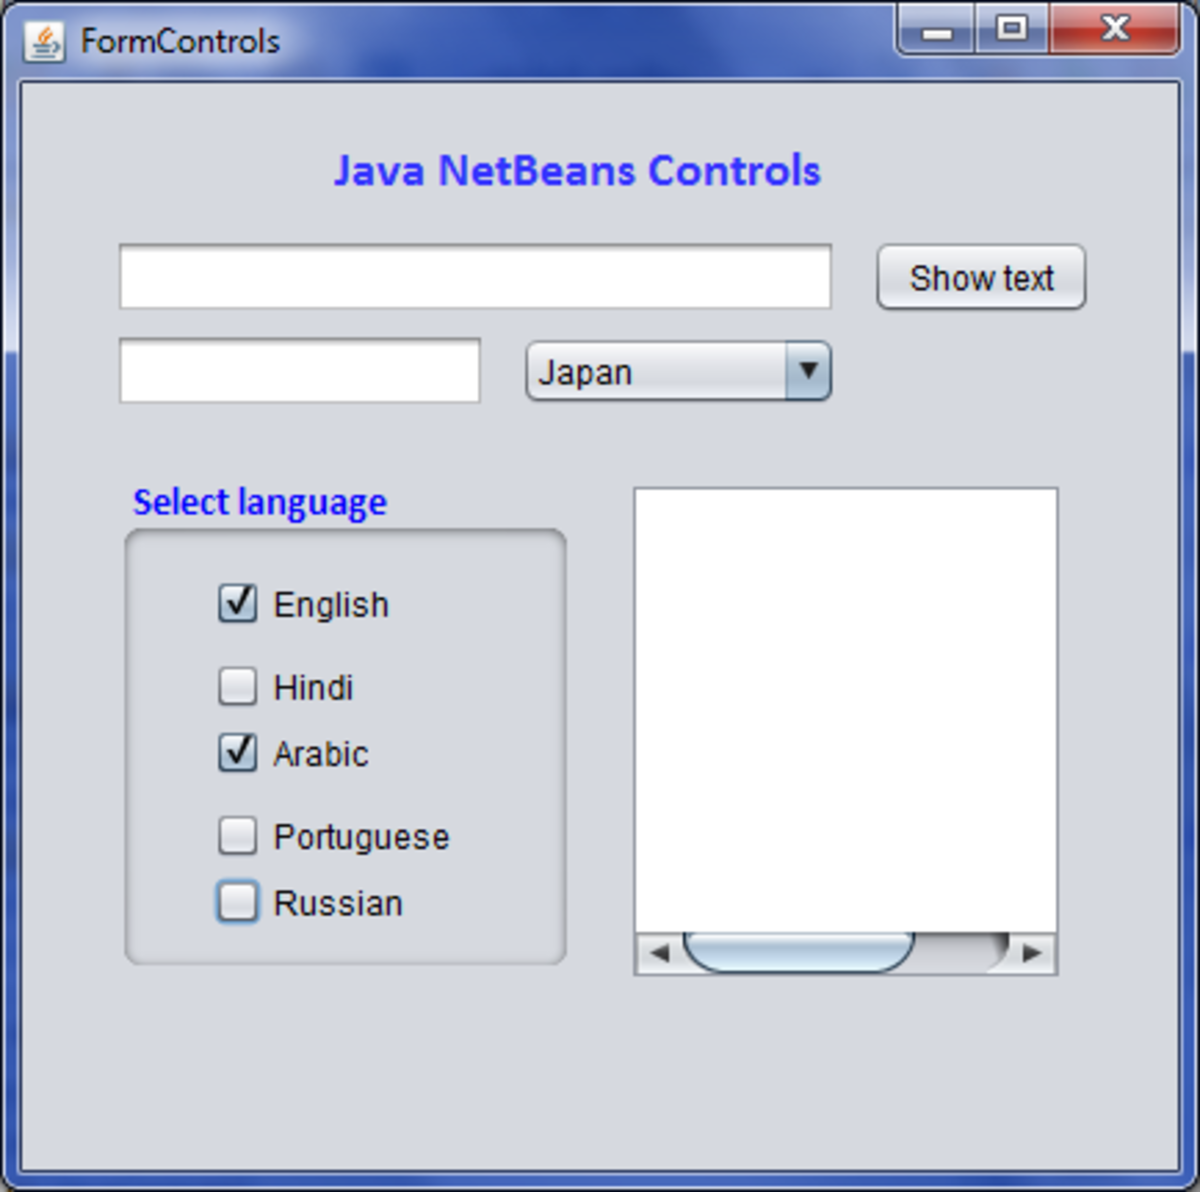
- Editor Window: This is where the magic happens! Here, you’ll write and edit your Java code. The editor provides syntax highlighting, code completion, and other features to help you code efficiently.
- Output Window: At the bottom of the IDE, this window shows the results of your code execution, including any errors or print statements. It's essential for debugging your programs.
- Navigator Window: This area helps you to navigate through the classes, methods, and variables in your open file. It’s a fantastic tool for getting an overview of your code structure.
- Properties Window: When you select a project or file, this window displays its properties, allowing you to make changes without digging through menus.
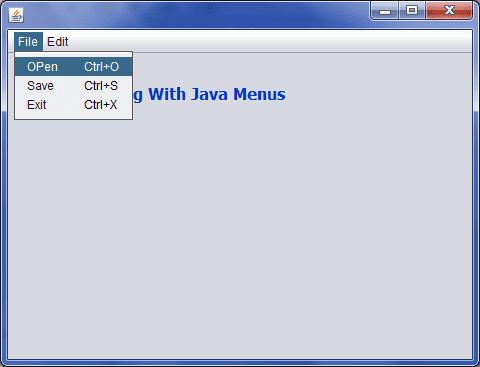
NetBeans also features a menu bar at the top for quick access to various functions, such as file operations, editing tools, and project management. You’ll find options to compile, run, and debug your Java applications here.
As you interact with the UI, feel free to customize it to your liking. You can rearrange panels, change themes, and even adjust font sizes to create a more comfortable coding environment. The goal is to make your experience as smooth and enjoyable as possible!
Overall, getting accustomed to the NetBeans UI is crucial for maximizing your productivity. Spend some time exploring each panel and feature. The more familiar you become, the more efficiently you can write and manage your Java projects!
Also Read This: Haven Consumed on Dailymotion: Understanding the Video
6. Writing and Running Your First Java Program
Now that you’re comfortable with the NetBeans user interface, it’s time to dive into coding! Writing and running your first Java program is an exciting milestone. Let’s go step by step so you can see how simple it truly is.
1. Create a New Project: Start by clicking on File > New Project. Choose Java from the categories and Java Application as the project type. Click Next.
2. Set Project Name: Give your project a name, like HelloWorld. You can also choose to create a main class. This will automatically create a public static void main method for you. Click Finish.
3. Write Your Code: In the editor window, you’ll see a template for your main class. Modify it to look like this:
public class HelloWorld {
    public static void main(String[] args) {
        System.out.println("Hello, World!");
   code>
This simple program prints "Hello, World!" to the console. It's a classic first step in programming!
4. Run Your Program: To execute your program, click on the green play button in the toolbar or right-click on your project in the Projects window and select Run. You should see "Hello, World!" displayed in the Output Window at the bottom.
If you encounter any errors, don’t worry! Debugging is a part of the learning process. Check your code for typos and ensure that everything is set up correctly.
And there you have it! You’ve just written and run your first Java program using NetBeans. Celebrate this achievement—it's the first step on your journey to becoming a Java developer!
Also Read This: How to Cover Your Face with a Scarf Stylish Tips Featured on Dailymotion
7. Debugging Java Code in NetBeans
Debugging is an essential skill for any programmer, and NetBeans makes it easier with its powerful debugging tools. If you’re new to Java programming, don’t worry! We’ll walk through the steps to effectively debug your code in NetBeans.
First, let’s set a breakpoint. A breakpoint is a marker you can set on a specific line of code where you want the execution to pause. To set a breakpoint in NetBeans, simply click in the left margin next to the line number where you want to pause. You’ll see a little blue dot appear, indicating that the breakpoint is active.
Once you’ve set your breakpoints, it’s time to run your program in debug mode. You can do this by right-clicking your project in the Projects tab and selecting Debug. Alternatively, you can use the keyboard shortcut Shift + F5. When your program hits a breakpoint, it will pause execution, allowing you to investigate the current state of your application.
While your program is paused, you can inspect variables and their values. Hover over any variable in the code, and a tooltip will show you its current value. If you want to see more details, you can use the Variables window, usually located at the bottom of the IDE. This window displays all variables in the current scope and their values, making it easier for you to identify issues.
If you want to step through your code line by line, use the following controls:
- Step Over (F8): Executes the current line and moves to the next.
- Step Into (F7): If the current line calls a method, this takes you into that method.
- Step Out (Shift + F7): Completes the current method and returns to the calling method.
These tools make it easier to identify where things might be going wrong. For example, if you notice a variable that has an unexpected value, you can explore how it’s being set in your code. This process helps you trace the flow of your application and identify logical errors.
When you’ve found and fixed the issues, you can continue execution by clicking the Continue (F5) button. This will run the program until the next breakpoint or until it finishes. Debugging can seem daunting at first, but with practice, you’ll become proficient at finding and fixing bugs in your Java programs using NetBeans!
Also Read This: The Return of Are You Being Served Exploring Its Appeal Across Generations on Dailymotion
8. Using Libraries and Frameworks in NetBeans
As you dive deeper into Java programming, you’ll quickly realize the importance of libraries and frameworks. They can save you time and effort by providing pre-written code that you can leverage in your projects. NetBeans makes integrating these resources straightforward, so let’s explore how to do this!
First, you need to know how to add a library to your project. In NetBeans, right-click on your project in the Projects panel and select Properties. From there, navigate to the Libraries category. Here’s where the magic happens!
To add a library, click on Add Library. You’ll see a list of available libraries. For example, you might want to include JUnit for testing or JavaFX for building interactive user interfaces. Just select the library you want and click Add Library. Don’t forget to confirm your changes by clicking OK!
Now, if you’re using external libraries that are not available in the predefined list, you can add them manually. Go back to the same Libraries section and choose Add JAR/Folder. This lets you browse and select the JAR files of the library you want to include. Once added, you can start using the classes and methods from that library in your code.
Frameworks like Spring or Hibernate can also be integrated similarly. These frameworks often come with their own set of dependencies, so make sure to follow the installation guidelines provided in their documentation.
Using libraries and frameworks can significantly reduce your development time. For instance, if you're building a web application, using a framework like Spring can help you manage dependencies and configurations, allowing you to focus on writing business logic instead of boilerplate code.
Finally, always keep your libraries updated. Outdated libraries can lead to security vulnerabilities or compatibility issues. NetBeans provides an easy way to manage your libraries, so make it a habit to check for updates periodically.
In summary, incorporating libraries and frameworks into your Java projects in NetBeans is a breeze and can greatly enhance your programming experience. Happy coding!
Also Read This: How to Download Videos from Dailymotion: All You Need to Know
9. Tips and Best Practices for Beginners
Jumping into Java programming with NetBeans can be both exciting and a bit overwhelming. To help you navigate this journey, here are some tips and best practices that can set you up for success:
- Start Simple: Begin with small projects. Think of creating a simple calculator or a basic “Hello World” application. This will help you get comfortable with the interface and coding in Java.
- Utilize the Built-in Tools: NetBeans offers a plethora of tools such as code completion, syntax highlighting, and debugging. Make sure to leverage these features to enhance your coding efficiency.
- Organize Your Code: Use packages to keep your code organized. This will make it easier to manage larger projects as you progress.
- Comment Your Code: Get into the habit of writing comments. This not only helps you understand your own code later but also aids anyone else who may read it.
- Practice Debugging: Learn how to use the debugging tools in NetBeans. Being able to step through your code and identify errors is a crucial skill for any programmer.
- Stay Updated: Keep your NetBeans IDE updated to take advantage of the latest features and improvements. This will also help you avoid bugs and other issues.
- Engage with the Community: Don’t hesitate to ask questions. Join forums, attend meetups, or participate in online discussions. The programming community is incredibly supportive!
Following these tips will not only make your experience with NetBeans smoother but will also help you build a solid foundation in Java programming. Remember, everyone starts somewhere, so be patient with yourself and enjoy the learning process!
10. Resources for Further Learning
Once you’ve gotten the hang of the basics in NetBeans and Java, you might be wondering where to go next. Here’s a curated list of resources to help you continue your journey:
- Online Courses: Websites like Coursera and Udemy offer courses specifically for Java programming that cater to all levels, often taught by industry professionals.
- Books: Check out titles like “Head First Java” by Kathy Sierra and Bert Bates, or “Effective Java” by Joshua Bloch. These books provide deep insights and best practices in Java.
- YouTube Channels: Channels like TheNewBoston and ProgrammingKnowledge feature tutorials that can visually aid your learning.
- Documentation: Make use of the Java Tutorials from Oracle. This is an invaluable resource for understanding the intricacies of the Java language.
- Practice Websites: Engage with platforms like Codecademy and HackerRank to practice coding challenges and improve your skills.
- Community Forums: Websites like Stack Overflow and Reddit’s Java community are great places to ask questions and learn from others' experiences.
By taking advantage of these resources, you’ll be well on your way to becoming proficient in Java programming. Remember, the key to mastery is continuous learning and practice!
 admin
admin


