Audacity is a powerful, open-source audio editing software that's loved by both beginners and seasoned professionals. If you've ever wanted to record audio from YouTube videos, Audacity is an excellent choice. It's user-friendly, free to download, and packed with features that allow for high-quality audio recording and editing.
One of the best things about Audacity is its versatility. Whether you're looking to create podcasts, record music, or capture audio from videos, it has all the tools you need. Plus, its extensive library of effects and plugins means you can customize your sound to your heart's content. Another significant advantage is that it runs on multiple platforms, including Windows, macOS, and Linux, making it accessible to nearly everyone. With a supportive community and countless tutorials available, you’ll feel right at home using this software in no time!
Setting Up Audacity for Recording
Before you dive into recording, it’s essential to set up Audacity correctly. Here’s a step-by-step guide to get you started:
- Download and Install Audacity: Visit the official Audacity website to download the latest version suitable for your operating system. Follow the installation instructions provided.
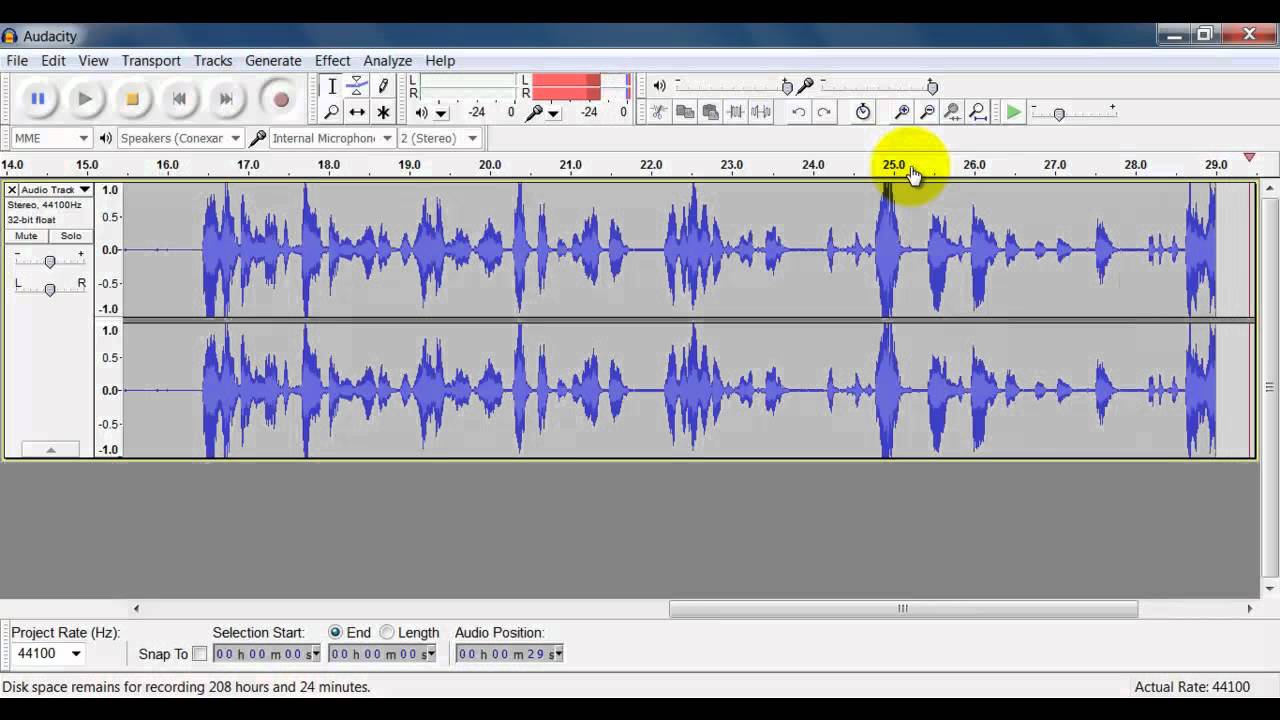
- Open Audacity: Once installed, open the software. You’ll be greeted with a clean interface that’s straightforward and easy to navigate.
- Select Your Input Device: Click on the drop-down menu next to the microphone icon at the top. Here, choose the input source. If you’re recording audio from YouTube, selecting 'Stereo Mix' or your computer’s audio output is ideal. If unavailable, you may need to enable it in your sound settings.
- Adjust Audio Settings: Go to Preferences under the Edit menu. Ensure your sample rate is set to 44100 Hz for optimal sound quality. You can also adjust the recording format here if needed.
- Test Your Setup: Before recording, do a quick test. Click the red record button and make some noise—check if Audacity captures the audio. Adjust the input volume if necessary.
By following these steps, you'll be well on your way to recording high-quality audio from YouTube videos using Audacity!
Also Read This: Get Insights on How to Remove Background from Shutterstock Images
Finding the Right YouTube Video
Before diving into the recording process with Audacity, it’s essential to find the right YouTube video. Not every video is created equal, and some may not have the audio quality or content you’re looking for. Here are some tips to help you choose wisely:
- Content Relevance: Look for videos that align with your interests or the topic you want to explore. Whether it’s music, tutorials, or podcasts, knowing what you want will save you time.
- Video Quality: Opt for videos that are uploaded in high definition (HD). High-quality videos often come with clearer audio, making your final recording sound much better.
- Check the Comments: A quick glance at the comments section can provide insights into the video’s content quality. Look for feedback regarding sound quality or the effectiveness of the information.
- Copyright Considerations: Make sure the video is either copyright-free or falls under fair use if you plan to use the audio for anything other than personal enjoyment. Check the video description or Licensing type.
Once you've identified a suitable video, you can move on to the technical side of things – configuring Audacity. But remember, selecting the right video is the foundation of a great recording!
Also Read This: How to Stretch Images Without Losing Quality
Configuring Audio Settings in Audacity
Now that you’ve found your ideal YouTube video, it’s time to set up Audacity for recording. Proper configuration ensures that your audio captures beautifully without hitches. Here’s a step-by-step guide on what to do:
- Launching Audacity: Open Audacity on your computer. If you haven’t installed it yet, you can easily download it from the official Audacity website.
- Selecting Input Device: In the dropdown menu next to the microphone icon, choose your input device. This is typically your computer’s sound card, which will record the audio playing on your system.
- Setting Output Device: Make sure to select the correct output device, usually your speakers or headphones, so you can hear the audio while recording.
For optimal recording quality, adjust the following settings in Audacity:
| Setting | Recommended Value |
|---|---|
| Sample Rate | 44100 Hz |
| Bit Depth | 16-bit |
These settings help achieve clear and professional-sounding audio. With everything set up, you’re ready to start recording! Just hit the record button and play your chosen YouTube video, and Audacity will take care of the rest.
Also Read This: How to Stop Mirror Image on Samsung
Recording Audio from YouTube
Recording audio from YouTube can seem a bit tricky at first, but with Audacity, it becomes a breeze! First things first, make sure you have the latest version of Audacity installed on your computer. Now, let’s get started!
Here’s a simple step-by-step guide:
- Open Audacity: Launch the Audacity application on your computer.
- Select the Right Input Source: In the dropdown menu next to the microphone icon, select “Stereo Mix” or “What U Hear.” This option allows Audacity to capture audio playing through your computer.
- Adjust Volume Levels: Before you hit record, play a YouTube video to ensure the audio levels are balanced. Adjust the volume on your computer if needed.
- Start Recording: Click the red “Record” button in Audacity, then quickly switch to your YouTube video and start playing it. Audacity will now capture everything!
- Stop Recording: Once you’ve recorded the desired audio, click the brown square “Stop” button in Audacity.
And voila! You’ve successfully recorded audio from a YouTube video. Remember to save your project regularly to avoid losing any progress.
Also Read This: How to Change Your Location on LinkedIn Easy Steps to Follow
Editing Your Recorded Audio
Editing your recorded audio in Audacity is where the fun really begins! Whether you want to trim the audio, remove background noise, or enhance the sound quality, Audacity offers a range of tools to help you achieve your desired results.
Here’s how you can edit your audio:
- Trimming Audio: Highlight the section of the audio you want to keep using your mouse. Then, go to Edit > Remove Special > Split Cut to remove parts you don’t want.
- Removing Background Noise: Select a portion of the audio that contains only the noise, then go to Effect > Noiser Reduction. Click Get Noise Profile, then select your entire track and apply the Noise Reduction effect.
- Enhancing Audio Quality: You can add effects like Equalization or Compression. Just select your audio, go to the Effect menu, and choose the effect you want to apply.
After making your edits, don’t forget to listen to your audio to ensure it sounds just right. Once you’re satisfied, export your audio file by going to File > Export and choosing your desired format. Happy editing!
Also Read This: How to Effectively Publish and Share Your Work on Behance
7. Exporting Your Final Audio File
Once you've finished recording your audio from YouTube videos in Audacity, the next step is exporting your final audio file. This is an exciting moment because it’s where all your hard work comes together!
To export your audio, follow these straightforward steps:
- Go to the File menu at the top left corner of Audacity.
- Select Export. You’ll see several options such as Export as MP3, Export as WAV, and Export as OGG.
- Choose your preferred format. If you're not sure, MP3 is a widely compatible option for most users.
- A dialog box will appear, prompting you to choose the location where you want to save the file. Give your file a descriptive name for easy identification.
- If you're exporting as MP3, you may be asked to set the bit rate. A higher bit rate means better quality but larger file size.
- Click Save and then OK to finalize your export.
Now your audio file is ready to be shared or uploaded! Remember to check the exported file by playing it to ensure everything sounds just as you intended.
8. Conclusion and Best Practices
Congratulations! You’ve successfully recorded and exported audio from YouTube videos using Audacity. Before you dive into your next project, here are some key takeaways and best practices to keep in mind:
- Always check copyright: Ensure you have permission to use the content from YouTube. This not only respects the creators but also protects you legally.
- Regularly save your work: Audacity can sometimes crash. Save your project frequently to avoid losing your progress.
- Experiment with editing: Take advantage of Audacity’s editing features. Play around with effects like noise reduction and equalization to enhance your audio quality.
- Organize your files: Keep your audio files organized in folders. Consider naming them clearly to avoid confusion later on.
- Back up your projects: Utilize cloud storage or an external hard drive to back up important projects.
By following these practices, you’ll not only improve your workflow but also ensure that your audio recordings are of the highest quality. Happy recording, and enjoy your newfound skills!
 admin
admin


