Have you ever felt stuck in a creative rut, staring blankly at your computer screen with no idea where to begin? You're not alone! Adobe Stock templates are here to rescue you. These pre-designed assets give you a fantastic starting point for your projects, allowing you to focus on adding your unique touch. Whether you're designing a social media post, a brochure, or a website layout, Adobe Stock has a treasure trove of templates that cater to all skill levels. Let's dive into how these templates can elevate your design game!
Benefits of Using Templates in Photoshop
Using templates in Photoshop offers several advantages that can streamline your workflow and enhance your creativity. Here are some key benefits:
- Time-Saving: One of the most significant perks is the amount of time you save. Instead of starting from scratch, a template provides a ready-made structure, allowing you to jump right into customizing it. Instead of spending hours designing layouts, you can create stunning graphics in a fraction of the time.
- Professional Quality: Adobe Stock templates are crafted by professional designers. This means you’re working with high-quality, visually appealing designs that can elevate your work to a professional level. Your project will stand out, whether it's for personal use or a client presentation.
- Inspiration Booster: If you're feeling uninspired, browsing through templates can spark new ideas. You might discover a design style or color palette that resonates with you, leading to fresh concepts for your own projects. Sometimes, all it takes is a little inspiration to ignite your creativity!
- Easy Customization: Adobe Stock templates are designed to be easily customizable. You can adjust colors, fonts, and images to fit your unique brand. Whether you want to change a few elements or completely rework the template, you have the freedom to make it your own.
- Cost-Effective: Many templates come at affordable prices, especially when you consider the time and effort you'll save. Instead of hiring a designer for every project, you can invest in a few high-quality templates and adapt them as needed.
In summary, using Adobe Stock templates in Photoshop is a game-changer for creatives. They save time, enhance the quality of your work, and provide a wellspring of inspiration. So why not give them a try? You'll be amazed at how quickly you can produce stunning designs!
Also Read This: how to draw images
3. How to Access Adobe Stock Templates
Getting your hands on Adobe Stock templates is a breeze, especially if you’re already using Photoshop. Here’s a simple guide on how to access these incredible resources:
First, ensure you have an Adobe account. If you don’t have one yet, just hop on over to the Adobe website and sign up—it's free! Once you're set up, follow these steps:
- Open Photoshop: Launch your Photoshop application. You’ll need to be in the program to access the templates directly.
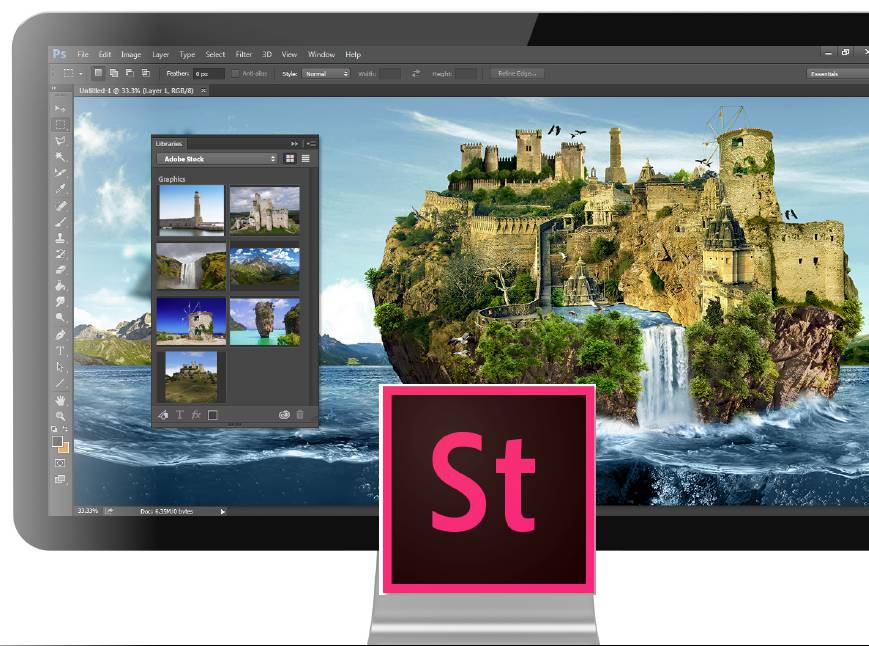
- Access the Libraries panel: Go to the 'Window' menu at the top and select 'Libraries.' This panel is a treasure trove of creative assets, including Adobe Stock templates.
- Search for Templates: In the Libraries panel, you can see a search bar. Type in what you’re looking for. For instance, if you need a flyer, just type “flyer” and hit enter.
- Filter Your Search: You can also refine your results using filters. Look for options like 'Photos,' 'Vectors,' or 'Templates' to get exactly what you need.
- Explore Categories: Alternatively, click on the 'Browse Adobe Stock' link at the bottom of the Libraries panel. This takes you to the Adobe Stock website where you can browse through different categories of templates, from brochures to social media posts.
Now that you know where to find them, let’s move on to how you can download these templates seamlessly!
Also Read This: How to Sell Photos on Getty – A Complete Guide for Aspiring Sellers
4. Step-by-Step Guide to Downloading Templates
Downloading Adobe Stock templates is just as straightforward as accessing them. Here’s your handy guide to help you through the process:
- Find Your Template: After searching, select the template that catches your eye. Click on it to view more details, including size, format, and licensing information.
- Check Licensing Options: Adobe Stock offers both free and paid templates. Make sure to check the licensing options to understand how you can use the template. For commercial purposes, you might need a paid license.
- Add to Cart: If it’s a paid template, click the 'Add to Cart' button. You can continue browsing and add more templates if needed.
- Checkout: When you’re ready, go to your cart and click on 'Checkout.' Follow the prompts to complete your purchase. If it's a free template, you may just hit the 'Download' button.
- Download the File: Once you've completed your purchase or if it’s free, you’ll see a download link. Click on it to download the template file. It usually comes in a ZIP format, so you may need to unzip it after downloading.
- Open in Photoshop: After unzipping, locate the file and double-click it. It should open directly in Photoshop, ready for you to customize!
And there you have it! Just a few simple steps, and you’re all set to start designing with stunning Adobe Stock templates. Dive in and unleash your creativity!
Also Read This: how to download my images from adobe stock
5. Importing Templates into Photoshop
Once you’ve chosen the perfect template from Adobe Stock, it’s time to bring it into Photoshop and start creating. Importing templates is a straightforward process, but a few steps can ensure everything goes smoothly.
Step 1: Download Your Template
After selecting a template, click the Download button on the Adobe Stock website. If you’re using a subscription model, the file will download directly to your computer. If you’re using a pay-per-image model, the download will require a credit transaction.
Step 2: Open Photoshop
Launch Adobe Photoshop. Make sure you’re using the latest version to avoid any compatibility issues with the templates.
Step 3: Locate Your Downloaded Template
Navigate to the location on your computer where the downloaded file is saved. Most often, this will be your Downloads folder. Adobe Stock templates typically come in formats like .PSD or .AI.
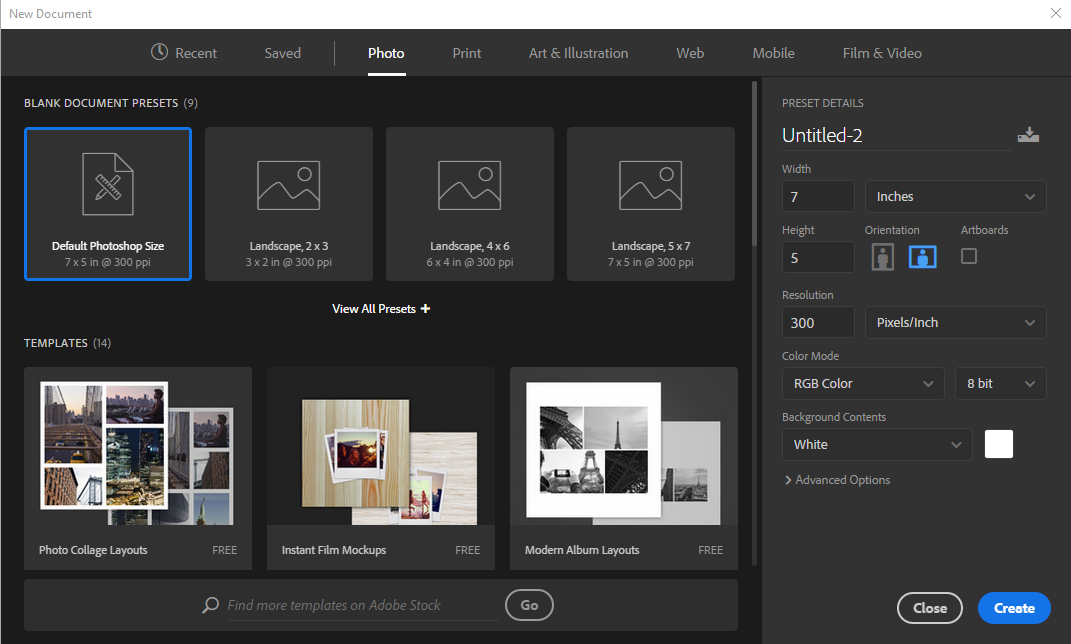
Step 4: Open the Template in Photoshop
Right-click on the file, select Open With, and choose Photoshop. Alternatively, you can open Photoshop first, go to File > Open, and browse for your template.
Step 5: Check Layers and Structure
After opening the template, take a moment to review the layers panel. Templates often have multiple layers for different elements, making it easier to edit specific parts. Familiarize yourself with the structure so you can navigate it effectively.
And there you have it! Importing templates into Photoshop is as easy as pie. Now let’s move on to customizing your new masterpiece!
Also Read This: Guide to Submitting Photos to Adobe Stock
6. Customizing Your Template in Photoshop
With your template imported, it’s time to add your personal touch and make it truly yours. Customizing your template in Photoshop is where the fun begins!
Step 1: Modify Text
Most templates come with placeholder text. Click on the Type Tool (T) from the toolbar and select the text you want to change. Enter your desired text and adjust the font, size, and color from the options bar at the top. Make sure your font choice aligns with the overall aesthetic of your project!
Step 2: Change Colors
To customize the color scheme, select the layer you want to modify in the layers panel. Then, choose the Paint Bucket Tool (G) or use the Color Overlay feature found in the layer styles. This allows you to change the color of shapes, backgrounds, and text effortlessly.
Step 3: Add Images
If your template allows for image placement, simply drag and drop your desired image from your computer into the Photoshop workspace. Use the Free Transform Tool (Ctrl+T or Cmd+T) to resize and position it perfectly within the template.
Step 4: Modify Shapes and Elements
- Move Elements: Use the Move Tool (V) to drag shapes or graphics around to achieve the best layout.
- Add New Elements: Don’t hesitate to create additional layers for new graphics or illustrations to enrich your design.
Step 5: Save Your Work
Once you’re satisfied with your design, save your work! Go to File > Save As and choose a format that suits your needs, whether it’s .PSD for future edits or .JPG for sharing.
Now you’re ready to rock your stunning design! Remember, the key to customizing is playing around with the tools and features Photoshop offers. The more you experiment, the better your designs will become!
Also Read This: Sell on VectorStock: A Comprehensive Guide to Making Money
7. Tips for Enhancing Your Designs with Templates
Using Adobe Stock templates in Photoshop is a fantastic way to kickstart your design projects. However, to truly make your designs stand out, you’ll want to go beyond just dropping in your images and text. Here are some tips to enhance your designs:
- Customize Colors: Don’t be afraid to tweak the color palette. Use the Color Picker tool in Photoshop to adjust the hues, saturation, and brightness. This can dramatically change the mood of your design to better align with your brand or theme.
- Incorporate Your Own Images: While templates come with placeholder images, replacing them with your own photos can add a personal touch. Choose high-quality images that resonate with your message. For instance, if you’re designing a flyer for a local coffee shop, use vibrant photos of their drinks and ambiance.
- Experiment with Fonts: Templates often suggest specific fonts, but feel free to mix and match. Consider using a bold header font paired with a clean body font. Websites like Google Fonts offer a plethora of free options to explore.
- Add Layer Styles: Utilize layer styles in Photoshop to give depth to your text and elements. Adding a subtle drop shadow or a glow can make text pop off the page and draw the viewer’s eye.
- Use Smart Objects: If you’re frequently adjusting images, convert them to Smart Objects. This allows you to resize and transform without losing quality, making your design process smoother.
- Play with Composition: Don’t stick rigidly to the template’s layout. Shift elements around, resize them, or rotate them slightly to create a more dynamic composition that captures attention.
- Leverage Negative Space: Sometimes, less is more. Don’t be afraid to leave some areas of your design blank. This negative space can create a clean look and make your important elements stand out.
By incorporating these tips, you can transform a standard template into a unique masterpiece that reflects your vision and creativity. Experimentation is key, so take your time and have fun with it!
8. Conclusion: Elevate Your Projects with Adobe Stock Templates
In the fast-paced world of design, having the right tools can significantly enhance your workflow and creativity. Adobe Stock templates provide a solid foundation for your projects, whether you’re designing a marketing brochure, social media graphics, or event invitations. They save time, inspire creativity, and allow you to focus on what truly matters: your message.
As we've discussed, the magic happens when you start customizing these templates. By applying your personal touch—be it through colors, images, or typography—you can create stunning designs that are uniquely yours. Remember, the template is just a starting point; your creativity is what will make it shine.
So, whether you’re a seasoned designer or just starting out, don’t overlook the potential of Adobe Stock templates. Dive in, explore the vast library, and let your imagination run wild. Your next stunning design is just a template away!
 admin
admin


