Are you ready to enhance your creative projects with stunning visuals? Adobe Stock is a fantastic resource that provides millions of high-quality images, videos, and templates that you can easily integrate into your designs. When paired with Adobe Photoshop, a powerful image editing tool, you can unlock endless possibilities for your projects. Whether you’re a professional designer or just getting started, using Adobe Stock images in Photoshop can elevate your work to a whole new level!
Setting Up Your Adobe Stock Account
Before diving into the world of Adobe Stock, you’ll need to set up an account. Fortunately, the process is straightforward and user-friendly! Here’s a step-by-step guide to help you get started:
- Visit the Adobe Stock Website: Go to adobe.com/stock and click on the “Sign In” button located at the top right corner of the page.
- Create an Adobe ID: If you don’t have an Adobe account, you’ll be prompted to create one. Fill in the required fields, including your email and password. This account will serve as your gateway to all Adobe products.
- Choose a Subscription Plan: Adobe Stock offers various subscription options, from monthly to annual plans, with credits for images you want to download. You can also opt for a free trial if you’re unsure about making a commitment!
- Payment Information: If you choose a paid plan, you’ll need to enter your payment details. Rest assured, Adobe uses secure payment methods to protect your information.
- Confirm Your Account: After setting up everything, you’ll receive an email to verify your account. Click the link in the email to complete the verification process.
Once your account is set up and verified, you’re ready to explore the vast library of images on Adobe Stock. It’s helpful to take a little time to familiarize yourself with the website’s features:
- Search Function: Use keywords to find specific images, videos, or templates that suit your project.
- Collections: Curate your favorite assets by creating collections. This feature makes it easy to organize everything you want for future projects.
- License Information: Make sure to read the licensing terms for each asset you access, ensuring that you comply with usage rights.
Now that your account is set up, you’re one step closer to incorporating beautiful stock images into your Photoshop projects! In the next sections, we’ll dive into how to search for images effectively and seamlessly integrate them into your work. Get ready to unleash your creativity!
Also Read This: Customize Graphics from 123RF for Your Needs
3. Searching for Images on Adobe Stock
Alright, let’s dive into the exciting part: searching for the perfect images on Adobe Stock! Adobe Stock is a treasure trove of high-quality photos, illustrations, and graphics. With millions of assets at your fingertips, the key is knowing how to find exactly what you need without getting overwhelmed.
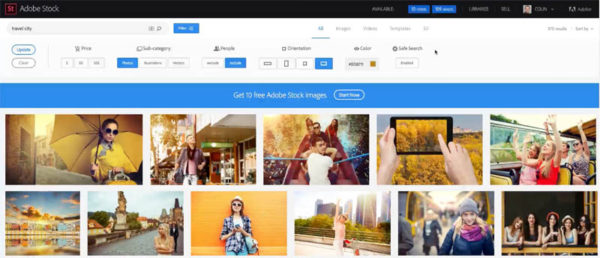
First off, head over to the Adobe Stock website. You’ll notice a search bar prominently displayed—this is where the magic begins! Here are some tips to refine your search:
- Keywords Matter: Use specific and relevant keywords related to the image you’re envisioning. For instance, instead of searching for “flowers,” try “vibrant tulips in a sunny field.”
- Use Filters: After your initial search, utilize the filters available on the left panel to narrow down results. You can filter by image type (photos, vectors, etc.), orientation (horizontal or vertical), and even color to match your design.
- Explore Collections: Adobe Stock features various curated collections. Browsing through these can ignite your creativity and lead you to exactly what you didn’t know you needed!
Once you start scrolling through the results, pay attention to the details—check the licenses and usage rights for each image, especially if it’s for commercial use. And don’t hesitate to use the “meaningful previews” option that Adobe Stock provides; these allow you to see how an image looks in context, which can help in your decision-making.
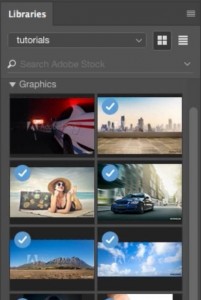
Another nifty feature is the ability to save images to your “lightbox.” This is perfect for comparing options without losing track of your top picks. Simply click on the heart icon to save images, and later you can review them in your lightbox. So, by the end of your search, you’ll have a well-curated selection to choose from!
Now that you have your images ready, let's move forward!
Also Read This: how to get hex color from image
4. Downloading Images for Photoshop
Now that you've found the perfect images, it’s time for the downloading process. It’s super straightforward, but let’s walk through it step-by-step to ensure there are no hiccups!
Once you’ve made your selection, follow these steps to download:
- Choose Your Image: Navigate to your lightbox where you saved your selected images. Click on the image you want to download.
- Select Image Size: Click on the "Download" button. Adobe Stock typically prompts you to choose the resolution. Opt for a larger size if you're incorporating the image into a high-resolution project. This is crucial for ensuring the quality remains crisp and clear!
- Sign In or Create an Account: If you haven’t logged in yet, you’ll need to sign in to your Adobe account. If you don’t have one, now’s a great time to create a free account—this gives you access to both free and premium images!
- Licensing Agreement: Once authenticated, you may need to accept the licensing agreement for the image. Be sure to read it carefully, especially concerning how you can use the image in your projects.
- Download: Finalize your choice and hit that download button! The image will be saved to your device, usually in the downloads folder. From there, you can easily locate it to import into Photoshop.
And there you have it! You’ve successfully downloaded images from Adobe Stock, ready to unleash your creativity in Photoshop. Remember to regularly check back on Adobe Stock for new images; it’s constantly updated and offers fresh inspiration! Happy designing!
Also Read This: How to Make Money on Shutterstock: A Comprehensive Guide
5. Importing Adobe Stock Images into Photoshop
So you've browsed through Adobe Stock and found the perfect image for your project—exciting, right? Now, let's dive into how you can easily import that image into Photoshop. It’s a straightforward process, but let’s break it down step by step.
First things first, ensure that you have a subscription to Adobe Stock or that you've purchased the image you want to use. Once you've got it ready, here’s how you can import it:
- Download the Image: After selecting the image from Adobe Stock, click on the Download button. If you've purchased the image, it will download straight to your computer. If you’re using a preview image instead, keep in mind that it will have a watermark until you license it.
- Open Photoshop: Launch Adobe Photoshop. If you're working on a new project, it's a good idea to open or create a canvas of the size you intend to use for the final product.
- Import the Image: There are several ways to import the image into your project. Here are a couple of the simplest methods:
- Drag and Drop: If you have the folder containing the downloaded image open, you can simply drag the image file into your Photoshop workspace.
- File Menu:** Click on File in the top menu bar, then select Place Embedded... (or Place Linked... if you prefer). Navigate to where your image is saved, select it, and click Place.
And voila! You've successfully imported an Adobe Stock image into Photoshop. Now, let's move on to the fun part: editing the image!
Also Read This: Discover How Much a Photo Costs on Shutterstock
6. Editing Adobe Stock Images in Photoshop
Now that you have your image in Photoshop, let's explore how to make the most of it through editing. Whether you're looking to enhance the image, add effects, or blend it seamlessly with other elements in your project, the possibilities are nearly endless!
Here's a roadmap to some key editing techniques you can try:
- Adjusting Colors and Tone: Go to the Image menu and explore options like Adjustments. Here, you can tweak brightness, contrast, saturation, and more. Using adjustment layers instead of direct adjustments can enhance flexibility, allowing you to fine-tune changes without permanently altering the image.
- Cropping and Resizing: If you want to focus on a specific part of the image, the Crop Tool is your best friend. You can also resize your image here if you want it to fit a specific dimension.
- Using Filters: Want to add a special effect? Navigate to the Filter menu. Be cautious with this, as some filters can drastically change the look and feel of your image. Always keep a backup layer!
- Text and Graphics: Photoshop makes it easy to layer text or additional graphic elements onto your stock image. Use the Text Tool to add titles, captions, or branding to your imagery. Don’t forget to adjust the blending options for a polished look!
- Masking: If you want to remove backgrounds or blend images, mastering layer masks is crucial. This non-destructive editing method allows you to hide part of a layer without deleting it, giving you maximum creative control.
As you edit, always keep in mind the nature of the project and the atmosphere you wish to create. Adobe Stock images can serve as a fantastic base, but the real magic happens when you personalize the images to fit your brand or style. So, don’t hesitate to experiment and let your creativity flow!
With these tools at your disposal, you’re well on your way to creating stunning visuals in Photoshop. Keep practicing, and soon you'll be a master at blending and customizing stock images to suit your artistic vision!
Also Read This: Preparing Your Photos for Adobe Stock in Lightroom
7. Best Practices for Using Stock Images
Using stock images can greatly enhance your projects in Photoshop, but it’s essential to follow some best practices to ensure you get the most out of them. Here are a few tips to keep in mind:
- Choose High-Quality Images: Always opt for high-resolution images. Low-quality images can ruin your designs and make them look unprofessional. Adobe Stock offers a wide range of quality options, so take advantage!
- Stay Consistent: When selecting images, aim for a cohesive look and feel across your project. This means using images that share similar color palettes, tones, and styles.
- Check Licensing: Ensure you understand the licensing agreements associated with the stock images you choose. Adobe Stock typically provides clear licensing terms, so read them carefully to avoid any legal issues.
- Customize Your Images: Don’t just drop a stock image into your project; get creative! Use Photoshop’s features to customize the images to fit your branding. Adjust the colors, add filters, or overlay text to make the image uniquely yours.
- Use Images as Backgrounds: Stock images can serve as fantastic backgrounds for your designs. Choose images that support the content you’re placing on top, ensuring readability and visual appeal.
Implementing these best practices can significantly enhance the impact of your designs. Remember, stock images are powerful tools, but how you use them makes all the difference.
8. Conclusion and Further Resources
In conclusion, using Adobe Stock images in Photoshop can elevate your design projects, making them visually appealing and professional. By following the steps and best practices outlined in this blog, you can seamlessly incorporate stunning images into your work.
To further your understanding and skills, here are some additional resources you might find beneficial:
- Adobe Stock Learning Hub: Dive deeper into using Adobe Stock with tutorials and guides directly from Adobe. A great starting point for beginners and seasoned users alike.
- Photoshop Tutorials on YouTube: There are countless video tutorials available that can help enhance your skills in Photoshop, including using stock images creatively and effectively.
- Online Design Communities: Join forums or groups on platforms like Reddit or Facebook where designers share tips and feedback. Engaging with other creatives can provide new insights and inspiration.
- Books on Graphic Design: Consider reading books focused on graphic design principles to enhance your design skills and knowledge.
- Adobe Blog: Keep up with the latest updates, featured artists, and tips from Adobe itself.
By capitalizing on these resources, you'll continue to grow as a designer and make the most out of your Adobe Stock images. Happy designing!
 admin
admin


