Uploading videos to YouTube can sometimes feel overwhelming, especially if you're in a hurry to share your content with the world. Whether you're a seasoned creator or just dipping your toes into video production, knowing the ins and outs of the upload process can save you precious time. In this post, we’ll cover the essential steps to efficiently upload your videos to YouTube, starting with how to choose the right video format to ensure the best results for your audience.
Choosing the Right Video Format

When it comes to uploading your videos to YouTube, the format you choose can make a significant difference in how your video looks and performs. Let's dive into the best formats and why they matter:
1. Popular Video Formats
- MP4: This is the most recommended format for YouTube. It balances high quality and smaller file sizes, making it easy to upload and stream.
- AVI: While it offers great quality, AVI files tend to be larger, which might slow down the upload process.
- MOV: Commonly used by Mac users, this format also provides high quality but usually at the expense of larger file sizes.
- WMV: This Windows format is good for videos but can be less compatible with various devices and might require additional encoding when uploading.
2. Aspect Ratio and Resolution
The aspect ratio you should use is 16:9, which is the standard for YouTube. As for resolution, aim for:
| Resolution | Recommended Formats |
|---|---|
| 1080p | MP4, MOV |
| 720p | MP4, AVI |
| 4K | MP4 |
Choosing the right video format and resolution can dramatically enhance your upload speed and viewer experience. So, before hitting that upload button, double-check your video specifications to ensure they meet YouTube’s guidelines!
Optimizing Video Size for Faster Uploads

When you're eager to share your creations on YouTube, the last thing you want is a lengthy upload time. One of the key factors in speeding up that process is optimizing your video size. But what does that actually mean?
Essentially, optimizing video size involves compressing your video file without sacrificing too much quality. Here are some effective ways to do that:
- Choose the Right Format: MP4 is generally the best format for YouTube as it balances quality and file size. Other formats like WMV and AVI can result in larger files.
- Adjust Bitrate: The bitrate affects how much data is transferred in a given time frame. Lowering your bitrate can significantly decrease file size. Aim for around 8 Mbps for 1080p video.
- Reduce Resolution: While you may have filmed in 4K, consider if it’s necessary for your audience. A 1080p or 720p upload is often sufficient.
- Edit Unnecessary Parts: If your video has long pauses or unneeded sections, cutting these out can reduce file size and make your upload snappier.
By following these steps, not only will you be able to upload faster, but you’ll also enhance the overall viewing experience for your audience. Nobody likes buffering, right?
Using a Stable Internet Connection

Now that you’ve got your video optimized and ready to roll, let’s talk about something just as crucial: your internet connection. A stable connection can make all the difference in the world when it comes to uploading videos to YouTube quickly.
Here’s why:
- Wired vs. Wireless: If possible, use a wired connection for more stability. Wi-Fi can be prone to fluctuations which might cripple your upload speed.
- Test Your Speed: Before you upload, check your internet speed. Use tools like Speedtest to ensure you have adequate upload speeds. Ideally, you want at least 5 Mbps for decent uploads.
- Avoid Peak Hours: Internet speeds can slow down during peak usage times. Try uploading during off-peak hours when fewer users are online.
- Close Background Apps: Any applications using bandwidth (like video streaming or file downloads) can slow your upload. Close them before you hit “upload”!
By ensuring a stable internet connection, you’ll have a smoother upload experience and can share your videos with the world in no time. Happy uploading!
Uploading Videos via YouTube Studio
If you're looking to upload your videos to YouTube quickly and efficiently, YouTube Studio is your best friend! It’s a powerful tool that allows you to manage your channel and content with ease. Here’s how you can navigate through the uploading process using this handy feature.
First things first, you need to log into your YouTube account and access YouTube Studio. Once you’re in, follow these straightforward steps:
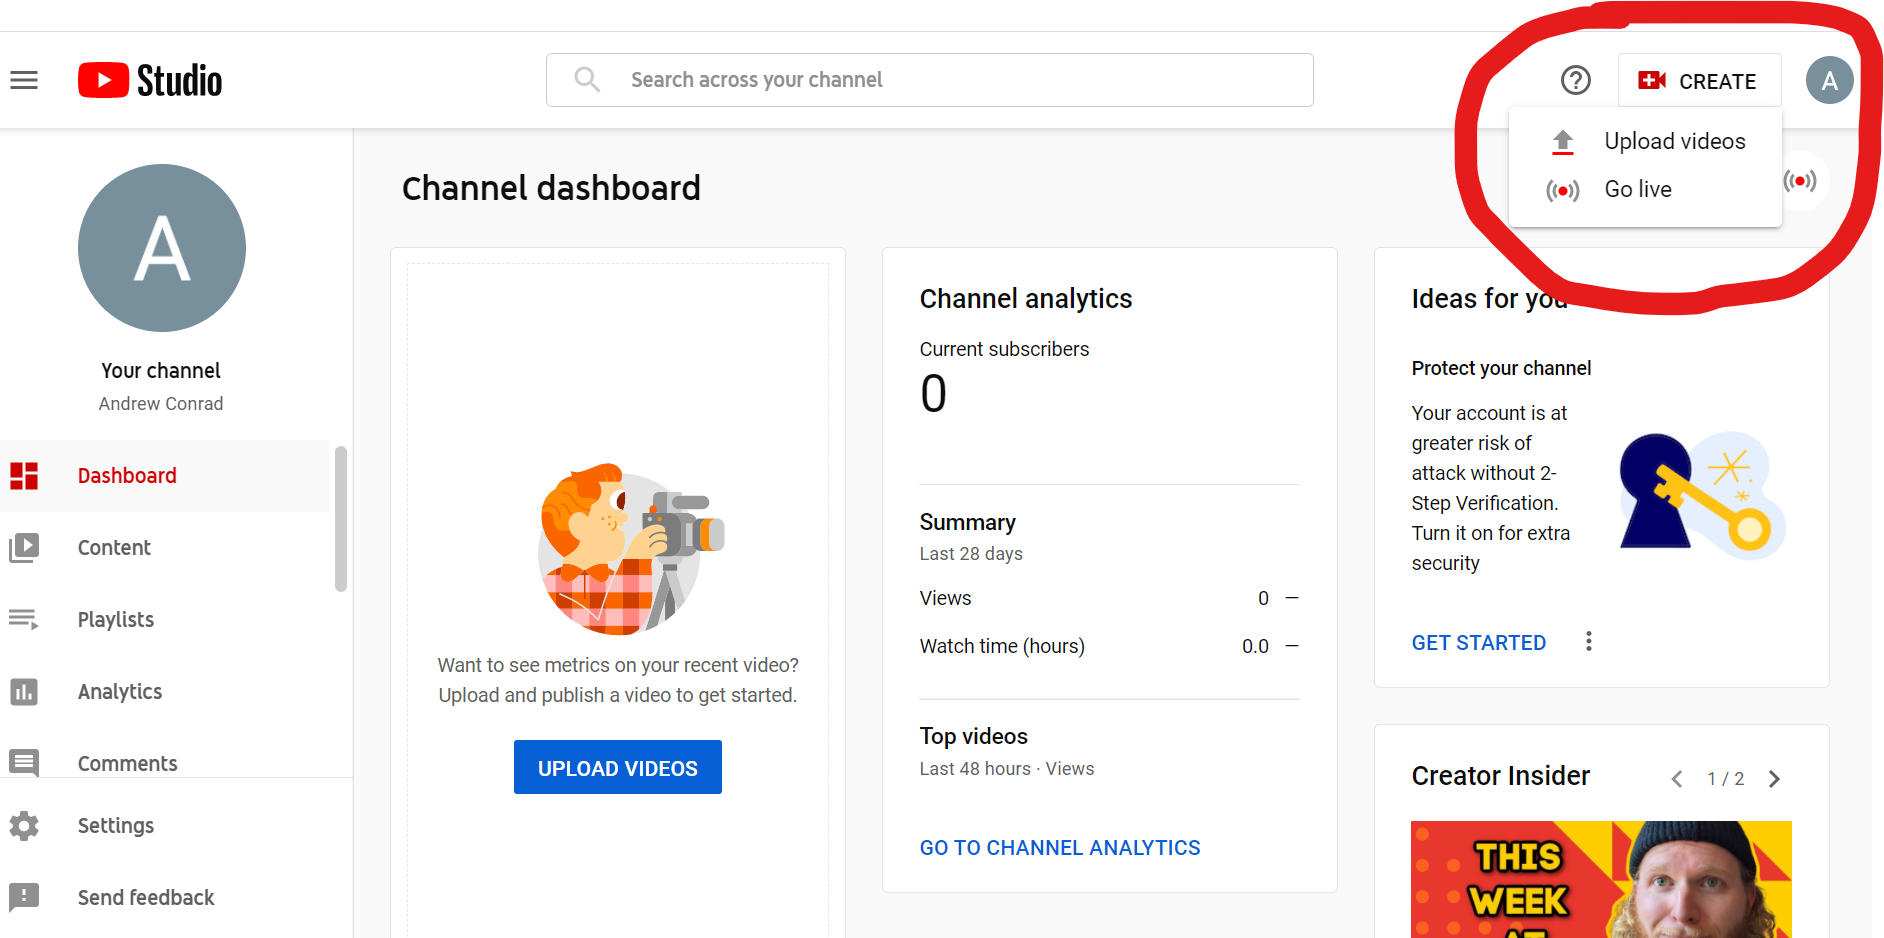
- Click on the “Create” button. This is usually represented by a camera icon with a plus sign. It’s typically found on the upper right corner of the dashboard.
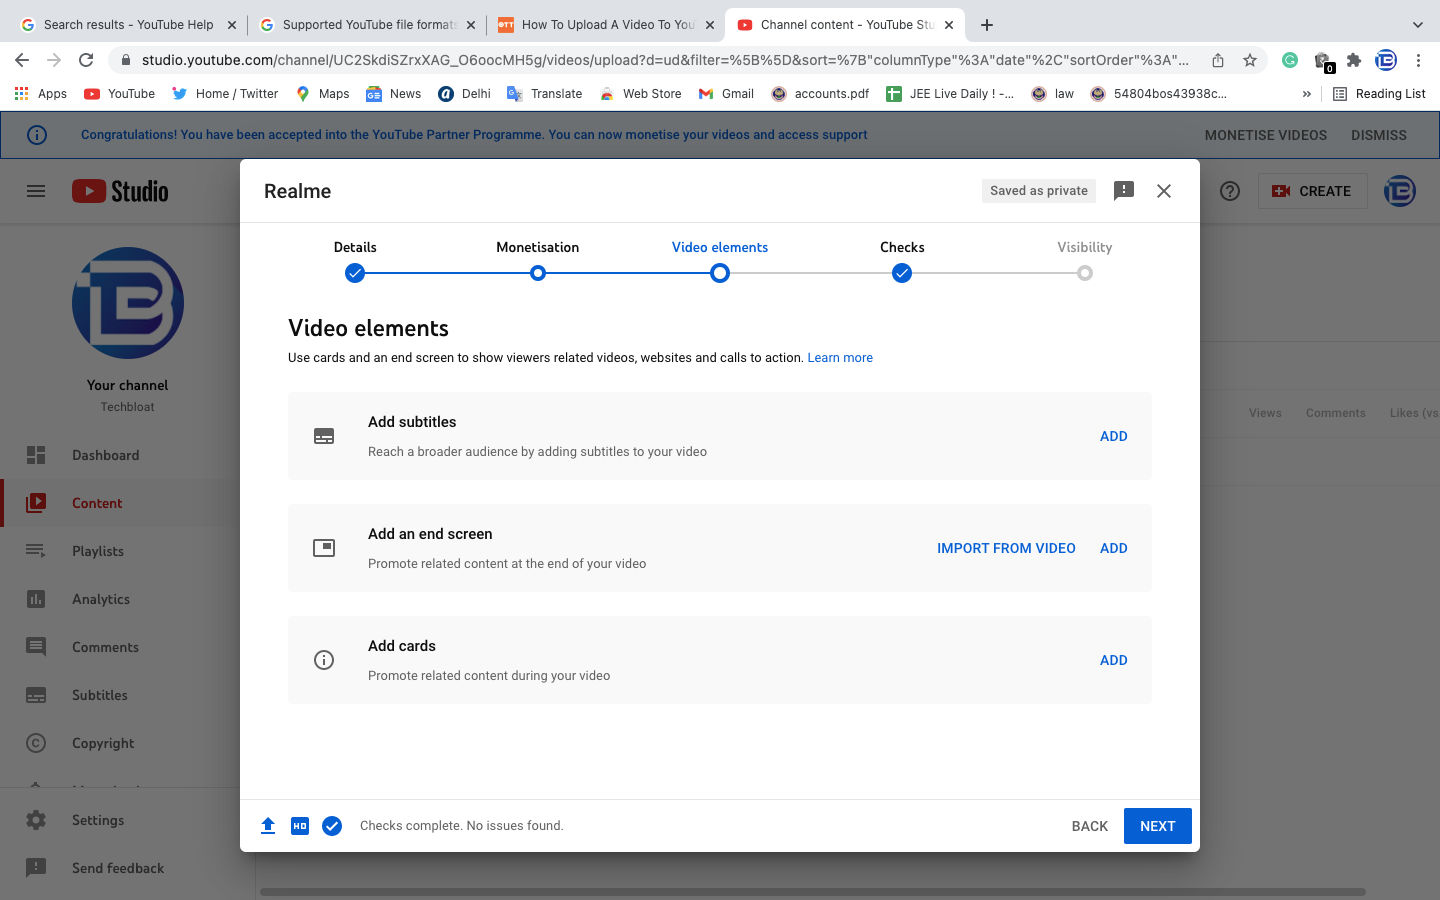
- Select “Upload videos.” You’ll then be directed to the upload interface where you can drag and drop your video files or browse through your computer.
- Fill in the details. Things like the title, description, and tags are crucial for making your video searchable. Aim for a catchy title and a keyword-rich description!
- Choose a thumbnail. You can pick from the auto-generated thumbnails, or better yet, upload a custom thumbnail that reflects your style.
- Set your video’s visibility. You can choose from "Public," "Unlisted," or "Private." If you’re eager to share your content right away, go for Public!
- Click on “Publish.” Once you’re satisfied with everything, hit that button and voila! Your video is now live!
In summary, YouTube Studio simplifies the uploading process, making it easier for you to share your videos with the world. So, why not give it a whirl?
Leveraging YouTube's Premiere Feature
Have you ever thought about creating a buzz around your video before it even goes live? That’s where the Premiere feature comes in! This fantastic tool allows you to schedule your video release and build anticipation among your audience.
Here’s how you can leverage YouTube's Premiere feature step-by-step:
- Upload your video using YouTube Studio. Follow the same steps as outlined previously for uploading videos.
- While setting up the video details, look for the option that says “Set as Premiere.”
- Choose your date and time. This lets your subscribers know exactly when to tune in for the big reveal. Make sure to pick a time that suits your audience.
- Create excitement! Promote the Premiere on your social media and remind your followers about the upcoming launch. You could even create teasers!
- Engage with your audience. During the Premiere, you can interact with viewers in real-time through the live chat feature. It’s a wonderful way to build community and excitement.
Using the Premiere feature can significantly boost engagement and views, making your video a more communal experience. Not only does it give you a chance to connect with your audience, but it also enhances your video’s visibility. So, give it a shot and see how your community reacts! Happy uploading!
How to Upload Videos to YouTube Quickly
Uploading videos to YouTube can be a simple and efficient process if you follow the right steps. With its user-friendly interface, YouTube allows content creators to share their videos with a global audience. Here’s a guide on how to upload videos to YouTube quickly.
Step-by-Step Process
- Prepare Your Video:
Ensure your video is in a compatible format (MP4, AVI, MOV) and meets YouTube's guidelines regarding quality and length.
- Sign into YouTube:
Log into your YouTube account or create a new one if you don't have it already.
- Access the Upload Feature:
Click on the camera icon with a "+" sign located at the top-right corner of the homepage, then select "Upload Video".
- Select Your Video:
Choose the video file you want to upload from your device.
- Add Details:
Fill in the title, description, and tags for better visibility.
- Title: Make it catchy and relevant.
- Description: Summarize the content effectively.
- Tags: Use keywords that reflect your video's content.
- Choose Visibility Settings:
Select whether you want your video to be public, unlisted, or private.
- Publish:
Finally, click on the "Publish" button to share your video with the world.
Tips for Quick Uploads
- Use a strong internet connection.
- Enable the YouTube app for faster uploads on mobile devices.
- Pre-fill video information templates for efficiency.
- Compress video files without losing quality to reduce upload time.
By following these steps and implementing the tips mentioned, you can ensure a smooth and quick upload experience to YouTube, allowing you to share your content with a broader audience effortlessly.
Conclusion
Uploading videos to YouTube efficiently involves preparation, clarity in details, and optimizing for quick uploads; with these strategies, you can streamline your process and maximize your content reach.
 admin
admin


