Are you tired of waiting endlessly for your YouTube videos to upload? You’re not alone! Many content creators face this challenge, especially when trying to maintain a steady flow of new content. In this post, we’ll share some fast tips and tricks to help you speed up your YouTube video upload process, ensuring you spend less time uploading and more time engaging with your audience. Let’s dive in!
Understanding YouTube's Upload Settings
Getting familiar with YouTube’s upload settings can drastically change your upload experience. Think of it as setting the stage for a great performance—if everything is in order, the show goes smoothly! Here are key settings you should pay attention to:
- Video Quality: High-resolution videos (like 4K) take longer to upload. If speed is your priority, consider uploading in 1080p or even 720p. You can always replace the video later with a higher quality version.
- File Format: Ensure your video is in a YouTube-friendly format. The best formats are MP4 and MOV. They not only retain quality but also compress well, making uploads quicker.
- Internet Connection: Your upload speed largely depends on your internet connection. Use a wired connection if possible, as it’s generally more stable than Wi-Fi. Check your upload speed using tools like Speedtest.net. Aim for at least 5 Mbps for HD uploads.
Another important aspect to consider is how you prepare your video before uploading:
| Preparation Steps | Benefits |
|---|---|
| Export at optimal settings | Faster processing and upload |
| Compress the file | Reduces upload time |
| Clear other bandwidth-consuming tasks | Maximizes available upload speed |
Lastly, don’t forget about caching! YouTube uses a caching system to speed up the delivery of your videos. This means that if you upload frequently, your previous uploads may help the next one go faster. So, keep that content coming!
By understanding and optimizing these settings, you’ll not only speed up your uploads but also enhance the overall quality of your video-sharing experience. Stay tuned for more tips!
Also Read This: How Do You Delete a Recording on YouTube TV? Managing Your YouTube TV DVR Recordings
Preparing Your Video for Upload
Getting your video ready for upload is a crucial step that can make a significant difference in the speed of the process. Here are some fast tips to help you prepare your video efficiently:
- Optimize Video Format: Make sure your video is in a format that YouTube supports, such as MP4 or MOV. These formats usually compress video size without losing quality.
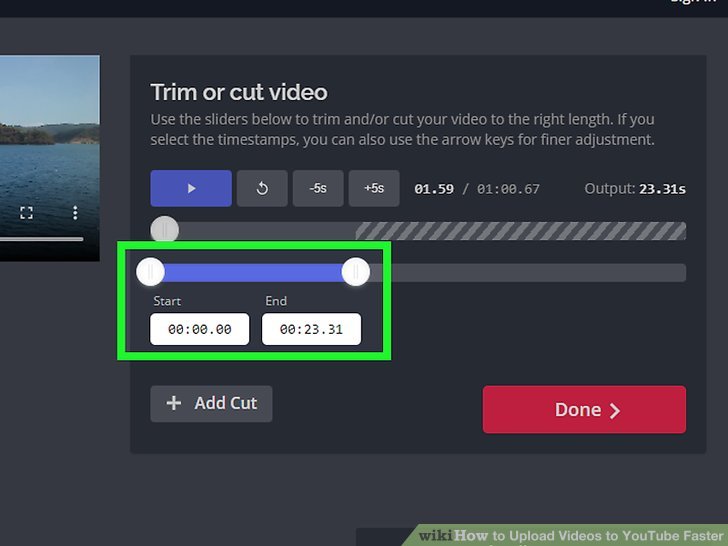
- Reduce File Size: If your video file is too large, it can slow down the upload. Use editing software to trim unnecessary content or compress the video. Tools like HandBrake can help you do this easily.
- Check Video Resolution: While high-resolution videos look great, they can be larger in file size. If you don’t need 4K resolution, consider using 1080p or even 720p for faster uploads.
- Add Metadata Ahead of Time: Prepare your title, description, and tags before uploading. This saves time and helps your video reach a broader audience once it’s live.
By taking these steps, you not only speed up your upload process but also set your video up for better visibility on YouTube. Remember, preparation is key!
Also Read This: How Do You Record Something on YouTube TV? How to Use YouTube TV’s Recording Features
Choosing the Right Internet Connection
Your internet connection plays a fundamental role in how quickly you can upload your video to YouTube. Here are some tips to ensure you have the best connection for a speedy upload:
- Fiber Optic vs. DSL: If available, opt for a fiber optic connection, as it generally provides faster upload speeds compared to DSL or cable. Fiber can significantly reduce your upload time.
- Check Your Upload Speed: Use services like Speedtest.net to check your upload speed. Ideally, you should aim for at least 5 Mbps for decent upload times, but higher is always better.
- Avoid Peak Hours: Try to upload your videos during off-peak hours (early mornings or late evenings), as internet traffic can slow down your speeds significantly during peak usage times.
- Use a Wired Connection: If possible, connect your computer directly to your router with an Ethernet cable. Wired connections are typically more stable and faster than Wi-Fi.
By choosing the right internet connection and optimizing your setup, you can dramatically enhance your video upload efficiency. Remember, a reliable connection is your best friend during the upload process!
Also Read This: Exploring the Earning Potential for 100000 Views on YouTube in 2024
5. Optimizing Video File Size
When it comes to speeding up your YouTube video upload process, one of the most effective strategies is optimizing your video file size. A smaller file size means faster uploads, meaning you can get your content out into the world more quickly. Here are some tips to help you achieve that:
- Choose the Right Format: Use formats like MP4, which provide high quality at a smaller file size. Other formats, like AVI or MOV, might be larger and can slow down uploads.
- Adjust Resolution and Bitrate: While high-definition video is beautiful, it often comes with hefty file sizes. Consider lowering the resolution from 4K to 1080p, or even down to 720p if your content doesn’t require the highest quality. Additionally, reducing the bitrate can significantly decrease file size without a major drop in quality.
- Compress Your Video: Use video editing software or online tools like HandBrake or Clipchamp to compress your video before uploading. These tools can help maintain video quality while reducing the size.
- Trim Unnecessary Footage: Before uploading, review your video and cut out any unnecessary parts. Less footage not only decreases file size but also keeps your audience engaged!
- Optimize Audio Quality: Audio can take up a good chunk of your file size. Consider adjusting the audio bitrate to lower settings or using mono instead of stereo for dialogue-heavy videos.
By following these tips, you can significantly reduce your video file size, leading to much faster uploads. Plus, your viewers will appreciate quicker loading times, increasing their chances of watching your content all the way through!
Also Read This: Can You Log Out of YouTube TV Remotely? Protecting Your Account on the Go
6. Utilizing YouTube's Upload Features
Did you know that YouTube offers a plethora of upload features designed to streamline your uploading experience? By taking advantage of these tools, you can save time and improve your overall workflow. Here are some features worth exploring:
- Video Chapters: If your video is longer, consider adding chapters during the upload process. This not only helps viewers navigate your content but also makes the video more engaging and reduces the need for multiple edits later.
- Custom Thumbnails: Instead of spending extra time creating a thumbnail after the upload, take advantage of YouTube's thumbnail feature. Upload a captivating thumbnail that reflects your video’s content to draw in viewers right away.
- End Screens and Cards: Add end screens and cards during the upload process to promote other videos or encourage subscriptions. This can enhance viewer retention and improve your channel's engagement metrics.
- Batch Uploading: If you have multiple videos ready, consider using the batch upload feature. You can upload several videos at once and schedule them to go live at specific times, keeping your content flowing consistently.
- Scheduled Uploads: Utilize the scheduling feature to set your videos to publish at optimal times. Instead of rushing to get your video live, you can plan your uploads to coincide with when your audience is most active.
By harnessing YouTube's upload features, you can drastically cut down on the time it takes to get your videos online while also enhancing viewer experience. So next time you're preparing to upload, remember to explore these handy tools!
Also Read This: Quick Steps to Remove Songs from Your Playlist on YouTube
7. Tips for Bulk Uploading Videos
Uploading videos can sometimes feel like a daunting task, especially if you're managing multiple uploads at once. But fear not! Here are some nifty tips to help you streamline your bulk uploading process on YouTube.
1. Organize Your Files
Before starting the upload process, make sure all your video files are properly organized. Create a dedicated folder on your computer with subfolders for different categories if needed. This way, you can easily find and select files when it’s time to upload.
2. Use YouTube's Bulk Upload Feature
YouTube has a built-in bulk upload feature that allows you to select multiple videos at once. When you click on the upload button, simply hold down the Ctrl (or Command on Mac) key while selecting your videos. You’ll save time by not having to upload each file individually!
3. Prepare Your Titles and Descriptions
Having a template for your video titles and descriptions can really speed things up. Consider creating a spreadsheet where you can draft titles, descriptions, and tags for each video. Once you start the upload process, you can copy and paste these details, saving precious minutes.
4. Use a Reliable Internet Connection
Your internet speed plays a huge role in how quickly your videos upload. Try to upload during off-peak hours when your network is less congested. If possible, a wired connection is often more stable than Wi-Fi, so consider connecting directly to your router.
5. Optimize Video Settings Before Uploading
Ensure your videos are in the correct format and resolution before you even hit the upload button. YouTube recommends using formats like MP4, MOV, or AVI. Adjusting these settings beforehand can save you from having to re-upload due to errors or quality issues later on.
6. Use YouTube Premiere and Scheduled Uploads
If you have a series of videos ready to go, consider using YouTube's Premiere feature or scheduling your uploads. This way, you can prepare your content in advance, and YouTube will handle the rest. It's a great way to maintain a consistent posting schedule without overwhelming yourself with uploads!
7. Batch Process Your Metadata
If your videos are similar, you can batch process metadata like tags and categories. Use third-party tools like TubeBuddy or VidIQ, which allow you to apply settings across multiple videos. This can significantly reduce the time spent on tweaking each video’s settings individually.
8. Conclusion
In the fast-paced world of content creation, every second counts, especially when it comes to uploading videos on YouTube. By following these tips, you’ll not only speed up your upload process but also enhance your overall efficiency as a creator.
Remember that organization is key. A little preparation can save you a lot of time in the long run. Whether it’s organizing your files, optimizing settings, or leveraging YouTube’s built-in features, these strategies will help you get your content out there quickly and effectively.
So, what are you waiting for? Start implementing these tips today, and watch as your YouTube video upload process transforms from a time-consuming chore into a seamless operation. Happy uploading!
 admin
admin


