Have you ever found yourself wanting to store your favorite YouTube videos for offline viewing or sharing them with friends? Uploading YouTube videos to Google Drive is a fantastic solution for keeping your precious content organized and easily accessible. In this blog post, we will guide you through the simple steps to upload your videos to Google Drive, so you can manage your collection effortlessly.
Why You Might Want to Upload YouTube Videos to Google Drive
There are several compelling reasons for uploading YouTube videos to Google Drive. Let’s explore a few of them!
- Storage Solutions: Google Drive offers a convenient and safe storage option for your videos. Rather than using up precious space on your device, you can store files in the cloud. This frees up space on your phone, tablet, or computer.
- Easy Sharing: If you want to share videos with friends, family, or colleagues, Google Drive makes it incredibly easy. You can share links directly, set permissions, and control who can view or edit the files.
- Backup Your Favorites: Sometimes, your favorite videos on YouTube may be taken down or unlisted. By uploading them to Google Drive, you create a backup. This way, you’ll always have access to your beloved content.
- Organize Your Videos: Google Drive allows you to create folders and organize your videos in a systematic manner. You can categorize videos by genre, theme, or even by the audience you want to share them with.
- Accessibility Across Devices: Access your videos anytime, anywhere! Google Drive syncs across devices, which means you can watch your videos whether you’re on your laptop, phone, or tablet – as long as you have an internet connection.
- Integration with Other Google Services: Google Drive integrates seamlessly with other Google services. This means you can use powerful tools like Google Docs, Sheets, and Slides alongside your video storage.
So whether you’re a content creator looking to save your work, or simply someone who loves to keep a collection of your favorite clips, there are plenty of reasons to consider uploading to Google Drive. It offers a blend of reliability, security, and accessibility that makes video management easy and efficient.
Also Read This: How to Download MP3 Files from a YouTube Playlist on Your Device
3. Prerequisites for Uploading Videos from YouTube to Google Drive
Before diving into the actual process of uploading your favorite YouTube videos to Google Drive, there are a few essential prerequisites you need to consider. Ensuring you have everything set up will make the entire process smoother and hassle-free. Let’s take a look at what you need:
- A Google Account: You must have a Google account to access Google Drive. If you don’t have one already, sign up here—it’s quick and free!
- Enough Storage Space: Check that you have enough space in your Google Drive. You get 15 GB of free storage with your account. To see your current usage, open Drive and look at the bottom left corner.
- YouTube Video URL: Ensure you have the URL of the YouTube video you want to download. It’s essential for the next steps!
- A Video Downloader Tool: Since it’s against YouTube’s terms of service to download videos directly, you'll need a reliable online video downloader. Research and choose a reputable tool or website that allows you to download videos safely and legally.
- Internet Connection: A stable and fast internet connection will speed up both the downloading and uploading processes. If possible, consider using Wi-Fi to avoid data overages.
Once you have these prerequisites sorted out, you’re ready to move on to the next step: downloading YouTube videos. Knowing you have all the necessary tools will give you peace of mind as you proceed with the process!
Also Read This: Password Protect YouTube Videos for Better Privacy Control
4. Step-by-Step Guide to Download YouTube Videos
Alright, let’s get into the juicy part—the step-by-step guide to downloading YouTube videos. Depending on the tool you choose, the process may vary slightly, but this general outline will help you get started. Let’s go!
- Copy the Video URL: First, head over to YouTube and find the video you want to download. Click the Share button beneath the video, and then click on Copy to grab the URL.
- Select a Video Downloader: Open your web browser and search for a reliable video downloader. Some popular options include: Choose one that fits your needs.
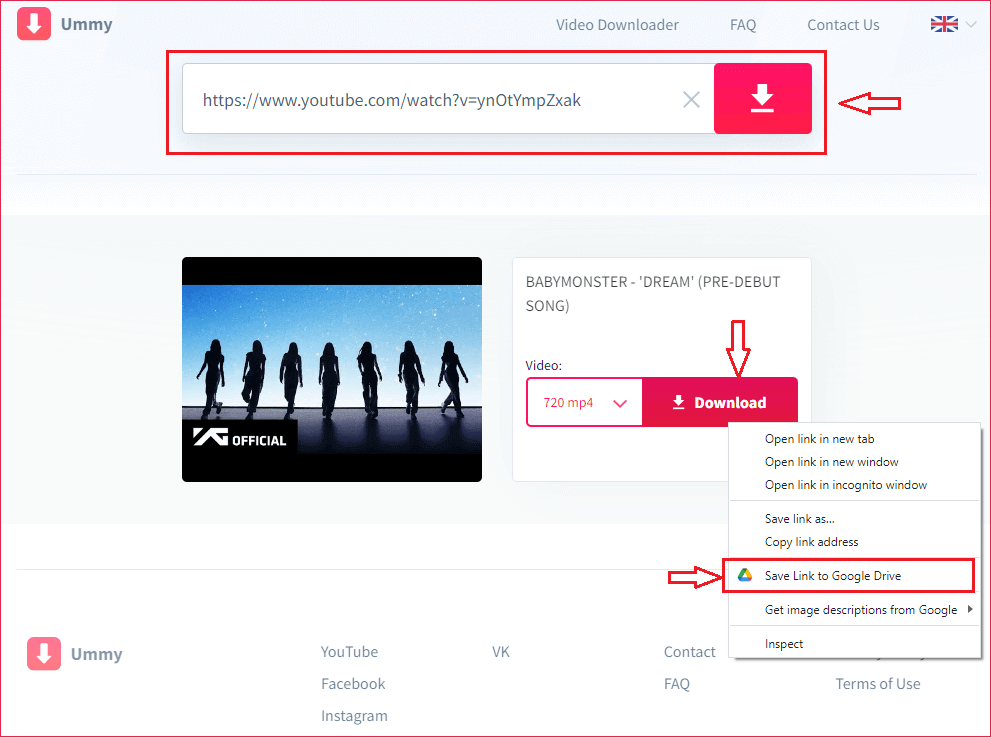
- Paste the Video URL: Once you're on your chosen downloader’s website, look for a text box where you can paste the YouTube URL. Right-click and select Paste, or use Ctrl + V (Windows) or Cmd + V (Mac).
- Select Video Format and Quality: Depending on the downloader, you may have options for selecting the video format (MP4, MKV, etc.) and the quality (720p, 1080p, etc.). Choose what works best for you.
- Download the Video: Click the download button. The site may take a moment to process before providing you with a clickable download link. Click it, and the video will be saved to your device!
- Verify the Download: Once downloaded, locate the file on your device and make sure it plays properly. This way, you can be certain there were no issues during the download.
Now, you’re all set with the downloaded YouTube video! The next step will be to upload it to your Google Drive for easy access and sharing, but before you jump ahead, it’s crucial to make sure the downloaded file is exactly what you expected!
Also Read This: What Happens When You Subscribe on YouTube? Benefits and Features Explained
5. How to Upload Videos to Google Drive
Now that you’re ready to back up your YouTube videos on Google Drive, let’s dive into the actual upload process. It’s super simple, and I promise you won’t need a degree in tech to do it! So, grab your device and follow these easy steps:
- Sign into your Google Drive: First things first, make sure you’re logged into your Google account. Go to the Google Drive website or open the Drive app on your device.
- Locate the 'New' button: Once you’re in Google Drive, look for the big blue 'New' button on the left-hand side. Click on it to open a dropdown menu.
- Select 'File upload': In that menu, you’ll see several options. Click on 'File upload' to choose the video file you wish to upload from your device.
- Choose your video: A file explorer window will pop up. Browse through your files and select the video that you downloaded or saved from YouTube. Once selected, click 'Open' or 'Choose' to begin the upload.
- Watch the upload progress: After a few moments, you’ll see a progress bar indicating that your file is uploading. Depending on your internet speed and the size of the file, this might take a few seconds to a couple of minutes.
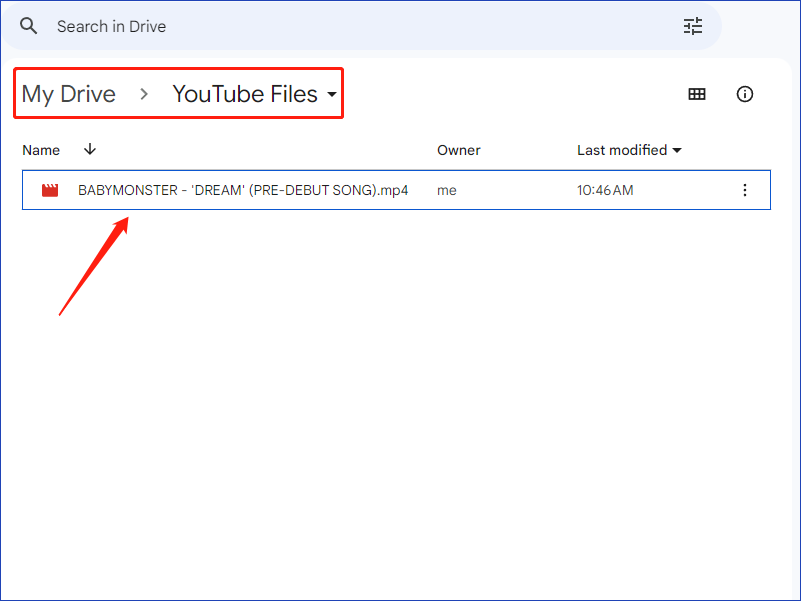
- Check your upload: Once the upload is complete, you’ll see a notification and your video will now be present in your Google Drive. You can click on it to play, share, or organize as you like!
And there you have it! You’ve successfully uploaded your video to Google Drive. It's as easy as pie! Now, let’s discuss how to keep your videos neat and tidy in your Drive.
Also Read This: How to Avoid Copyright Issues on YouTube: Protecting Your Content
6. Organizing Your Videos in Google Drive
Now that your videos are safely stored in Google Drive, it's essential to organize them properly. Trust me, a well-organized Drive makes finding your files a breeze. Here’s how you can effectively manage your YouTube videos:
- Create folders: This is the first step! Click on the 'New' button again, and this time select ‘Folder’. Give it a name, like ‘YouTube Videos’ or ‘Travel Vlogs,’ depending on your content. You can create multiple folders for different genres or series.
- Use descriptive file names: Instead of uploading your videos with generic names like 'video123.mp4', give them meaningful titles that reflect their content. This could be the video title from YouTube, or something like ‘MyTripToItaly_Vlog1.mp4’ to make them easier to find later.
- Utilize color coding: Google Drive allows you to color-code your folders. Right-click on a folder, select 'Change color', and choose a color that resonates with the type of content inside. This can make your organization visually appealing and practical.
- Regularly review and clean: Set a schedule to periodically check your Google Drive. Delete videos you no longer need or duplicate files. Regular maintenance keeps your Drive clutter-free and efficient.
- Share folders for collaboration: If you work with a team or want to share specific videos with friends, consider sharing entire folders. Just right-click on the folder and choose 'Share' to allow access to others.
By implementing these organizing strategies, you'll have a seamless experience when accessing your YouTube videos on Google Drive. Taking the time to keep things in order can save you a significant amount of frustration in the long run. Happy uploading and organizing!
Also Read This: What YouTubers Live in Florida? A Look at Florida's Top Content Creators
7. Sharing Your Videos from Google Drive
Once you've uploaded your YouTube videos to Google Drive, sharing them with friends, family, or colleagues is a breeze! Google Drive offers several convenient ways to share your videos while ensuring that you maintain control over who can view them. Let's dive into how to share your videos effectively.
First things first, navigating the sharing options is straightforward:
- Choose Your Video: Go to your Google Drive, locate the video file you want to share, and click on it.
- Share the Video: Right-click on the video file and select the “Share” option from the dropdown menu.
Now you have several options to consider:
- Share via Email: In the sharing settings, you can enter the email addresses of the people you want to share the video with. They will receive an email notification with a link to the video.
- Create a Shareable Link: If you prefer a more flexible approach, click on “Get link.” Here, you can generate a link that you can share through social media, chat apps, or anywhere else! Just make sure to adjust the *permissions* to control who has access.
- Set Permission Levels: You can choose whether recipients can view, comment, or edit the video. For most sharing purposes, keeping it as "Viewer" suffices.
After you've adjusted your settings, don’t forget to click “Done” to save your changes. And that's it! Sharing your video is as easy as that. Just remember, if your video is private, only those you’ve shared it with will be able to access it.
Also Read This: How to Block YouTube Access on a Fire TV Device
8. Important Considerations and Legal Aspects
Before you share your YouTube videos on Google Drive, it’s essential to consider some important factors, especially regarding legal aspects and content rights. Here’s what you need to keep in mind:
- Copyright Issues: Ensure you have the rights to share the videos. If your content includes copyrighted material (like music, images, or clips from other creators), sharing it without permission could lead to legal woes.
- Privacy Settings: Make sure you're aware of your video's privacy settings. Are you sharing personal moments that shouldn't be public? Always consider who will have access to your shared link and adjust your settings accordingly.
- Storage Limits: Google Drive offers a free tier of storage, but it has limits. If you're planning to upload many HD videos, consider upgrading your storage plan to avoid disruptions.
- Data Security: Remember that while Google Drive is secure, no platform is entirely immune to breaches. Avoid sharing sensitive content that could be used against you or others if exposed.
In conclusion, while Google Drive provides an excellent platform for storing and sharing your YouTube videos, it’s essential to stay informed about copyright laws and data policies. Always think twice about what you share and who you share it with. By being mindful of these considerations, you can enjoy a seamless sharing experience without running into unexpected hurdles!
Conclusion
Uploading your YouTube videos to Google Drive is a simple and effective way to store and share your content while ensuring easy accessibility. By following the steps outlined in this post, you can efficiently manage your video files without worrying about storage limits on YouTube.
To summarize the main steps:
- Download your video from YouTube using reliable tools.
- Access Google Drive and sign in to your account.
- Upload the video file directly to your Drive.
- Organize your videos in folders for better management.
- Share your videos with others using shareable links or access permissions.
By taking these easy steps, you can create a personal library of your YouTube content, making it easier to retrieve and share with friends, family, or colleagues whenever needed. Whether for personal use or professional projects, Google Drive provides a great solution for video storage. Start uploading today and enjoy the convenience of having your videos at your fingertips!
 admin
admin


