Uploading videos to Adobe Stock can be a game-changer for creatives looking to monetize their work. Whether you’re a filmmaker, a social media enthusiast, or simply love capturing moments, Adobe Stock provides an amazing platform to reach a wider audience. In this guide, we’ll walk you through the essential steps to get your videos ready and uploaded seamlessly. Let’s dive in!
Preparing Your Video for Upload
Before you hit that upload button, it’s crucial to ensure that your video meets Adobe Stock’s specifications and is polished for potential buyers. Here’s what you need to consider:
- Resolution: Your video should ideally be in HD (1920x1080) or higher. This ensures clarity and quality that buyers expect.
- File Format: Adobe Stock accepts videos in formats like MP4 (H.264 codec), which is widely recognized and compatible with various devices.
- Length: Keep your videos concise. The maximum length allowed is 60 seconds for stock videos, though shorter clips often perform better.
- Content Quality: Make sure your video is well-lit, in focus, and free from any shaky footage. Using a tripod or stabilizer can greatly enhance the quality.
- Audio: If your video includes sound, ensure it’s clear and free from background noise. Alternatively, you can upload videos without audio.
- Metadata: Prepare a good title and description for your video. Utilize relevant keywords to help potential buyers find your content.
By following these guidelines, you’ll ensure your video is not only ready for upload but also stands out in the Adobe Stock marketplace. So, gather your best clips, and let’s get ready to upload!
Also Read This: Understanding Shutterstock’s License Types: Choosing the Right Usage for Your Needs
Creating an Adobe Stock Account
Getting started with Adobe Stock is a breeze, especially when you're ready to showcase your creative video content. First things first, you need an Adobe Stock account. Here’s how to set it up in just a few easy steps:
- Visit Adobe Stock: Head over to the Adobe Stock website to begin.
- Sign In or Create an Account: If you already have an Adobe ID, simply sign in. If you're new, click on the “Join” button to create a new account. You’ll need to provide your email address, a password, and some basic information.
- Choose Your Plan: Adobe offers several subscription options. You can start with a free trial or choose a paid plan that suits your needs. Remember, selecting a plan is crucial if you intend to sell your videos.
- Verify Your Account: Check your email for a verification link from Adobe and click it to confirm your account. This step ensures that your account is secure and ready for use.
- Complete Your Profile: Once logged in, take a moment to fill out your profile. This includes adding a profile picture and a short bio, which can help potential buyers connect with you.
With your account set up, you’re ready to dive into the exciting world of video content creation and sales!
Also Read This: Removing Watermark on Shutterstock: Guidelines and Processes
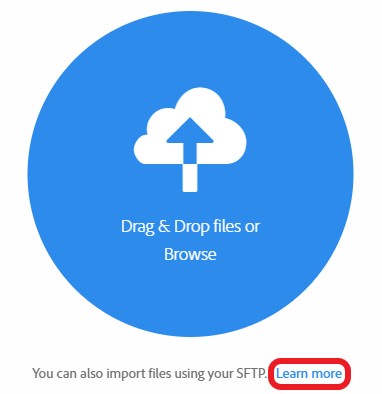
Uploading Your Video
Now that you have your Adobe Stock account, it's time to upload your video. Follow this straightforward guide to get your content out there:
- Log In to Your Account: Start by logging into your Adobe Stock account. This is where all the magic begins!
- Navigate to the Upload Section: On the dashboard, find and click the “Upload” button. It’s usually located at the top right corner of the page.
- Select Your Video Files: You can upload videos in various formats, including MP4 and MOV. Click on “Add Files” and select the videos you want from your computer. You can upload multiple files at once!
- Fill in Metadata: This step is vital for visibility. Add a compelling title, a detailed description, and relevant keywords. For instance, if your video features a sunset over the mountains, use keywords like “sunset,” “mountains,” and “nature.”
- Set Your Pricing: Decide how you want to price your video. Adobe Stock allows you to set competitive prices. Research similar content to ensure your pricing is attractive.
- Submit for Review: Once everything looks good, hit the “Submit” button. Your video will go through a review process to ensure it meets Adobe’s quality standards.
And there you have it! With just a few simple steps, your video is ready to be seen by the world. Happy uploading!
Also Read This: A Comprehensive Guide to Building Your Portfolio on Behance
5. Adding Metadata and Keywords
Once you’ve uploaded your video to Adobe Stock, the next crucial step is adding metadata and keywords. This part is essential because it helps potential buyers find your video amidst the vast library of content available on the platform.
Start with a descriptive title that accurately reflects the content of your video. Think about what someone might search for when looking for a video like yours. For instance, if your video showcases a bustling cityscape, a title like “Vibrant City Life at Night” could attract viewers.
Next, you’ll want to include a detailed description. This is your chance to provide context and highlight the unique aspects of your video. Consider mentioning the location, the mood, or any relevant themes. A well-crafted description can make a significant difference.
Now, let’s talk about keywords. These are critical for searchability. Use relevant keywords that accurately represent the content of your video. Here’s a quick list of tips for selecting effective keywords:
- Use specific terms: Instead of just “city,” use “urban nightlife” or “downtown Los Angeles.”
- Think like a buyer: What words would someone use to search for your video?
- Include synonyms or related terms to broaden your reach.
Remember, Adobe Stock allows you to add multiple keywords—take advantage of this feature! Aim for about 10-15 keywords to maximize your video’s discoverability.
Also Read This: How Behance Generates Revenue Through Its Business Model
6. Reviewing and Submitting Your Video
After adding metadata and keywords, it’s time for the final review before submission. This step is incredibly important! You want to ensure everything is polished and ready for potential buyers.
Start by watching your video one last time. Pay attention to details like video quality, audio clarity, and overall presentation. Ask yourself questions like:
- Is the video engaging and visually appealing?
- Are there any distracting elements that need to be edited out?
Next, double-check your metadata. Make sure your title, description, and keywords accurately represent your video. Typos or inaccuracies can lead to lower visibility and fewer sales.
Once you’re satisfied with your video and the accompanying details, it’s time to submit! Adobe Stock usually has a submission button—click it, and your video will enter the review process. Typically, this process takes a few days, during which Adobe Stock will evaluate your content for quality and adherence to their guidelines.
Finally, keep an eye on your contributor dashboard for updates. If your video is approved, congratulations! You’re one step closer to potential earnings. If it’s not approved, don’t be discouraged; Adobe will provide feedback, so take it as a learning opportunity for your next upload!
How to Upload Video to Adobe Stock
Uploading videos to Adobe Stock is a straightforward process that allows creators to monetize their content efficiently. Whether you're a seasoned videographer or a budding filmmaker, Adobe Stock provides a platform to showcase your work. Here are the steps to ensure your videos are uploaded successfully:
- Create an Adobe Stock Account:
If you don't already have an account, visit the Adobe Stock website and sign up. You'll need to provide your details and agree to their terms.
- Prepare Your Video Files:
Ensure your videos meet Adobe Stock's quality standards. Here are some key specifications:
Aspect Requirements Format MP4, MOV, AVI Resolution Minimum 1920 x 1080 (Full HD) Duration Minimum 10 seconds Frame Rate 24, 25, 30 fps - Log In and Navigate to Upload:
Once logged in, click on the "Upload" button. Choose the "Video" option from the dropdown menu.
- Upload Your Video:
Select the video file from your device. It may take some time to upload depending on your internet speed.
- Fill in Metadata:
Provide a title, keywords, and description to help potential buyers find your video easily.
- Submit for Review:
After filling in the details, submit your video for review. Adobe Stock will evaluate it for quality and compliance.
In conclusion, uploading videos to Adobe Stock is an efficient way to reach a global audience while earning from your creativity. By following the above steps, you'll be well on your way to sharing your work with the world.
 admin
admin