Creating your own ringtones from YouTube videos is an exciting way to personalize your phone! Imagine having your favorite music or funny quotes play every time you get a call or text. The process isn’t as complicated as it sounds! With the right tools and a bit of creativity, you can transform snippets from YouTube videos into eye-catching ringtones that reflect your style. Let's dive into the world of ringtone creation and explore how you can make your device uniquely yours.
Understanding Copyright and Legal Considerations
Before we get into the nitty-gritty of creating ringtones from YouTube videos, it's essential to understand the legal landscape surrounding the use of copyrighted content. Here’s what you need to know:
- Copyright Basics: Most YouTube videos are protected under copyright law, which means the original creators retain the rights to their content. Using someone else's work without permission can lead to legal issues.
- Personal Use vs. Distribution: If you're making a ringtone for personal use, the legal repercussions are generally minimal. However, sharing your creations or distributing them without permission is where you can run into trouble.
- Fair Use Doctrine: In some cases, you might be able to argue fair use, which allows for limited use of copyrighted content without permission. This is a complex legal area that typically considers factors such as purpose, nature, amount used, and effect on the market value.
It's always best to err on the side of caution. If you adore a song or a clip from a YouTube video, consider reaching out to the creator for permission. This not only shows respect for their work but can also enhance your connection to the content.
As a rule of thumb, you can avoid potential copyright issues by:
- Using royalty-free or Creative Commons licensed content: There are many platforms that offer music free of copyright claims, such as Incompetech or Bensound.
- Creating Your Own Sounds: If you're feeling creative, you can make your own sound clips and use them as ringtones without any legal worries.
- Limiting Length: Typically, a brief clip is less likely to attract attention. A 30-second segment is usually considered more acceptable for personal use, but this varies based on specific legal standards in your location.
In conclusion, while turning YouTube videos into ringtones can be a fun and creative process, it’s important to respect copyright and the original creators' rights. By following the guidelines and being mindful of legal considerations, you can enjoy your personalized ringtones without any worries. Now that we’ve cleared that up, you’re ready to create some amazing sounds for your phone!
Also Read This: How Much Does a YouTube Channel with 100k Subscribers Make and What Are the Revenue Expectations?
3. Choosing the Right YouTube Video for Your Ringtone
When it comes to selecting the perfect YouTube video to convert into a ringtone, it's essential to choose something that not only resonates with your musical taste but also fits the purpose of a ringtone. You want a track that grabs attention and stands out without becoming overly annoying. Here are some tips to consider:
- Pace and Length: Aim for clips that are between 15 to 30 seconds long. This is the sweet spot for ringtones. If the video is longer, you can always trim it down, but having a catchy hook or chorus works wonders.
- Catchy Melodies: Look for tunes that are instantly recognizable. Popular songs, movie themes, or sound effects can make your ringtone not just functional but fun!
- Vocal or Instrumental: Decide if you want a vocal track or an instrumental piece. Vocals are great for a personalized touch, while instrumentals can be less distracting in public settings.
- Genre Preference: Choose a genre that you love. Whether it's pop, rock, classical, or even a funny soundbite, your ringtone should make you smile every time your phone rings.
- Avoid Overplayed Songs: Try to steer clear of overused ringtones, like those ubiquitous pop hits everyone has. Finding something unique will add a personal touch and ensure your ringtone is distinctive.
After pondering all these factors, take a moment to think about the specific context where you’ll be using your ringtone. If it's for work, a more mellow instrumental may be fitting. For personal use, go wild with something fun! In the end, the best ringtone is one that reflects your personality and makes you excited when your phone brings up that tune.
Also Read This: How to Effectively Share YouTube Videos on Instagram for Better Interaction
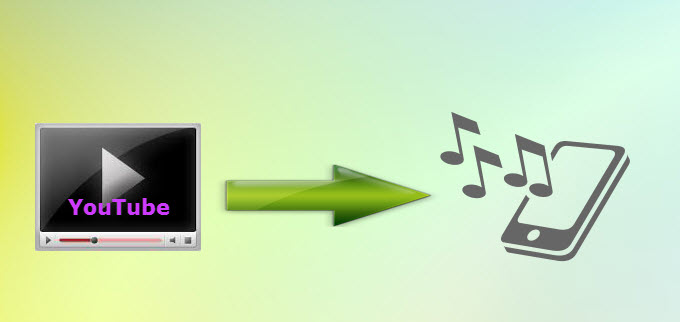
4. Steps to Download Audio from YouTube Videos
Now that you've selected the perfect YouTube video, it’s time to pull that audio from the depths of the internet and into your phone! Here’s a simple step-by-step process to download audio from YouTube videos effortlessly:
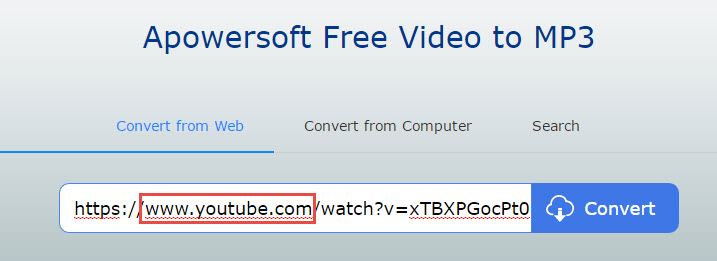
- Find Your Video: Start by navigating to YouTube and locating the video you want to convert. Copy the URL from the address bar.
- Choose a Converter: There are plenty of online converters available for this task. A few popular ones include:
- Paste the URL: Once you’ve chosen a converter, paste the copied YouTube URL into the designated box on the site.
- Select Audio Format: Most converters will allow you to choose your preferred audio format, such as MP3 or M4A. MP3 is widely compatible, making it an excellent choice for ringtones.
- Download the File: After selecting the format, hit the “Convert” button. Once the conversion is complete, a download link will appear. Click it, and your audio file will start downloading.
- Transfer to Your Device: After downloading, you may need to transfer the audio file to your phone. Connect your device to your computer, or use cloud storage services like Google Drive to move the file.
- Set as Ringtone: On your phone, navigate to your settings, find the sound settings, and set the downloaded audio as your new ringtone!
And there you have it! In just a few simple steps, you'll be rocking a brand-new ringtone that's uniquely yours. Enjoy the music, and don't forget to keep your ringtone fresh by switching it up every now and then!
Also Read This: Comparing YouTube TV and DirecTV: Which Is the Better Option?
5. Editing Audio to Create the Perfect Ringtone
Once you've got your favorite YouTube video audio clip selected, it's time to get artistic! Editing audio for a ringtone is all about creating something that captures the essence of the original track while making it perfect for your phone. Here’s how to do it:
- Choose Your Software: First thing’s first, you need a good audio editing software. Plenty of options are out there, both free and paid. Audacity is a popular choice because it’s free and packed with features. Other great options include GarageBand for Mac users or Adobe Audition if you’re looking for something more advanced.
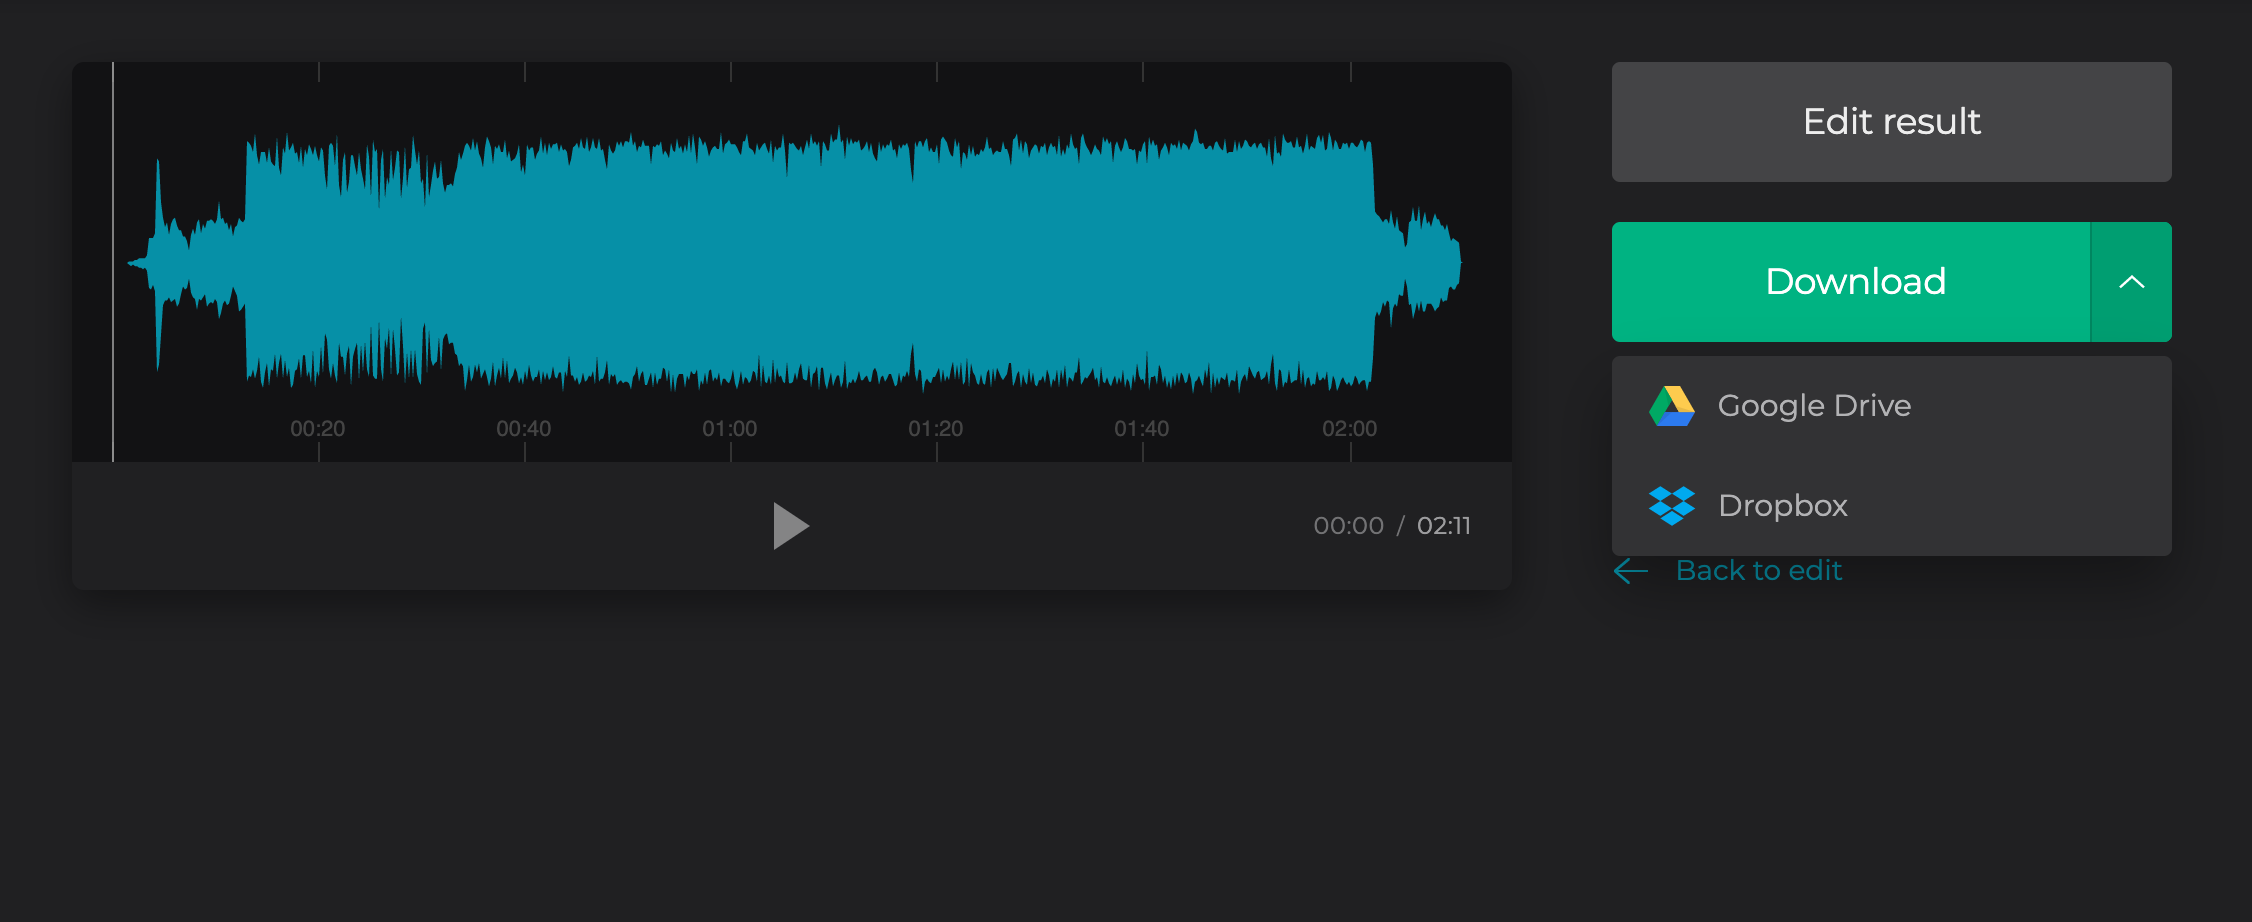
- Import Your Audio: Load your converted audio file into your chosen editing software. Most programs allow you to simply drag-and-drop the file or use the import function.
- Select the Best Snippet: Listen to your audio and decide which part of the clip you want as your ringtone. Ideally, it should be catchy and easily recognizable. Aim for a segment that’s around 30 seconds long since that’s the standard length for ringtones.
- Cut and Trim: Use the cut and trim tools to isolate your selected audio snippet. Make sure to remove any unnecessary portions at the beginning or end. Remember, you can also loop certain parts if you wish to extend the sound.
- Add Fade Effects: To give your ringtone a polished sound, consider adding a fade-in and fade-out effect. This will help your ringtone start and stop smoothly instead of abruptly cutting off.
- Export Your File: Once you're satisfied with the edit, it’s time to export your creation. Make sure you save it in a compatible format, usually MP3 or M4R for iPhones, since these formats work best for ringtones.
Editing your audio can be a fun process, allowing you to infuse your personality into the final ringtone. Take your time and experiment with different effects and adjustments until it feels just right!
Also Read This: How to Report Transphobia on YouTube: A Step-by-Step Guide
6. Transfer Your Ringtone to Your Smartphone
Congratulations on creating your custom ringtone! Now comes the exciting part—getting it on your smartphone. Here’s how to seamlessly transfer your newly created ringtone, whether you’re using an Android device or an iPhone.
For Android Users:
- Using a USB Cable: Connect your Android phone to your computer via USB cable. Make sure to select 'File Transfer' mode if prompted. Open the file explorer on your computer, locate the ringtone file, and drag it into the 'Ringtones' folder on your phone.
- Using Cloud Services: If you prefer a wireless method, upload the ringtone to a cloud service like Google Drive or Dropbox. Access the cloud service app on your phone, download the file, and move it to the Ringtones folder.
To ensure that your phone recognizes the new ringtone, you might need to restart your device once the download is complete. - Using Ringtone Maker Apps: You can also find various apps on the Google Play Store that allow you to import your audio files directly and set them as ringtones without needing a computer.
For iPhone Users:
- Using iTunes (or Finder for macOS Catalina and later): Connect your iPhone to your computer and open iTunes. Drag the edited ringtone file into the 'Tones' section (if you don’t see this, check under 'Settings' > 'Sounds & Haptics'). Sync your device, and your new ringtone should be added to your phone.
- Using GarageBand: You can also import your audio into GarageBand. First, make sure to save it as an M4R file. Open GarageBand, create a new project, and import your ringtone. Then, you can export it as a ringtone directly to your device.
Once transferred, go to your phone’s settings to set your new ringtone. It’s always a thrill to hear your custom sound every time you get a call. Enjoy your uniquely personal touch to your smartphone!
Also Read This: Why Are There So Many Ads on YouTube? Exploring the Reasons
7. Setting Your New Ringtone on Different Devices
Now that you’ve got your favorite YouTube video transformed into a catchy ringtone, it’s time to set it up on your devices. The process can vary slightly depending on whether you're using an Android phone, an iPhone, or even a Windows or Mac computer. But don't worry, I’ll break it down for you!
For Android Users:
- First, make sure your ringtone file is stored in the Ringtones folder on your phone. You can usually do this by connecting your phone to your computer and dragging and dropping the file, or you might need a file manager app.
- Next, go to your phone’s Settings.
- Tap on Sound & vibration, then Ringtone.
- You should see your new ringtone listed. Just select it, and you’re all set!
For iPhone Users:
- First, open iTunes on your computer. If you’ve converted your video to a ringtone using a converter, drag and drop the file into your iTunes library.
- Then, select the audio file and click on File > Convert > Create AAC Version. Right-click on the created version and select Show in Finder (on Mac) or Show in Explorer (on Windows).
- Change the file extension from .m4a to .m4r. This makes it compatible with iPhone ringtones.
- Now, connect your iPhone to your computer, and sync the new ringtone to your device using iTunes. After syncing, go to Settings > Sounds & Haptics and select Ringtone to set your new sound.
For Windows Users:
- Locate the new ringtone file on your computer. Right-click it and select Set as > Ringtone if your Windows version supports this feature.
- If not, you may need to import it into a media player and set it from there.
For Mac Users:
- Similar to iPhone, you’ll want to use iTunes. Just make sure your ringtone file is there and follow the syncing process mentioned earlier.
And that’s it! You’re now ready to rock your unique ringtone across all your devices! Just remember, each phone might be a little different, so these steps might need slight adjustments based on your specific model.
8. Conclusion and Additional Resources
Converting YouTube videos into ringtones is not just a fun project, but it also allows you to personalize your phone and express your taste in music or sound. With a few simple tools and steps, you can have a unique ringtone that no one else has, making your phone stand out in the crowd!
Before I wrap up, here are a few additional resources to help you on your ringtone-making journey:
- YouTube to MP3 Converter Websites: Websites like ytmp3.cc or convert2mp3.net are great for extracting audio quickly and efficiently.
- Audio Editing Tools: Consider using free software like Audacity for advanced audio editing. It’s user-friendly and perfect for trimming and optimizing your new ringtone.
- Ringtone Apps: Explore apps like Zedge (on Android) for a wide range of ringtones and sounds.
Thank you for reading! I hope you enjoyed this guide and now have some new ringtones to show off. If you have any questions or tips of your own, feel free to drop a comment below. Happy ringing!
 admin
admin


