If you're like many music enthusiasts, you’ve probably curated some fantastic playlists on YouTube Music. But what if you want to switch to Spotify for its extensive library or unique features? Transferring your playlists might sound daunting, but fear not! In this post, we’ll explore *easy steps* to transfer your YouTube Music playlists to Spotify seamlessly. Let’s dive right in!
Why Transfer Playlists from YouTube Music to Spotify?
You might be wondering, “Why should I bother transferring my playlists?” Here are some compelling reasons to consider:
- Superior Recommendations: Spotify’s algorithm provides personalized music suggestions based on your listening habits. This can enhance your discovery of new music and artists, making each session on the platform feel fresh and exciting.
- Podcasts and Exclusive Content: Spotify offers a vast selection of podcasts and exclusive content that YouTube Music doesn’t. If you enjoy podcasts as much as your music, transferring your playlists will give you access to a comprehensive entertainment experience in one app.
- User-Friendly Interface: Many users find Spotify's interface cleaner and easier to navigate than YouTube Music's. If you value a streamlined experience while enjoying your playlists, moving to Spotify could enhance your listening journey.
- Social Features: Spotify allows users to easily share music and collaborate on playlists with friends. If you love sharing your music tastes or discovering what your friends are listening to, the platform's social features might be a great fit for you.
- Offline Listening: With Spotify Premium, you can download songs and playlists for offline listening. This is perfect for those times when you want to save on data or are in areas with spotty internet connectivity.
Certainly, there are many advantages to Spotify that may entice you to make the change. However, the real magic lies in your playlists. If you’ve spent countless hours curating the perfect combination of songs to suit your vibe in YouTube Music, transferring them ensures you don’t lose that hard work. Plus, importing your playlists can make the transition feel natural, allowing you to effortlessly continue enjoying your favorite tracks in a new environment.
So, whether you're seeking better recommendations, a user-friendly interface, or simply want to explore Spotify's unique offerings, transitioning your playlists can be a great move. Ready to make the switch? Let’s get those playlists moved over!
Also Read This: How Can ChatGPT Help Transcribe YouTube Videos Automatically?
3. Tools and Apps to Use for Playlist Transfer
If you’re looking to transfer your YouTube Music playlists to Spotify, you’re in luck! There are several fantastic tools and apps designed specifically for this purpose. These tools can simplify the process significantly, saving you time and ensuring that your favorite songs make the jump seamlessly. Let’s dive into some of the most popular options.
- Soundiiz: This online service allows you to transfer playlists between different music platforms effortlessly. It supports YouTube Music and Spotify, among many others. Simply create an account, link your accounts, and start transferring playlists. The interface is user-friendly, which makes it a breeze for anyone to use.
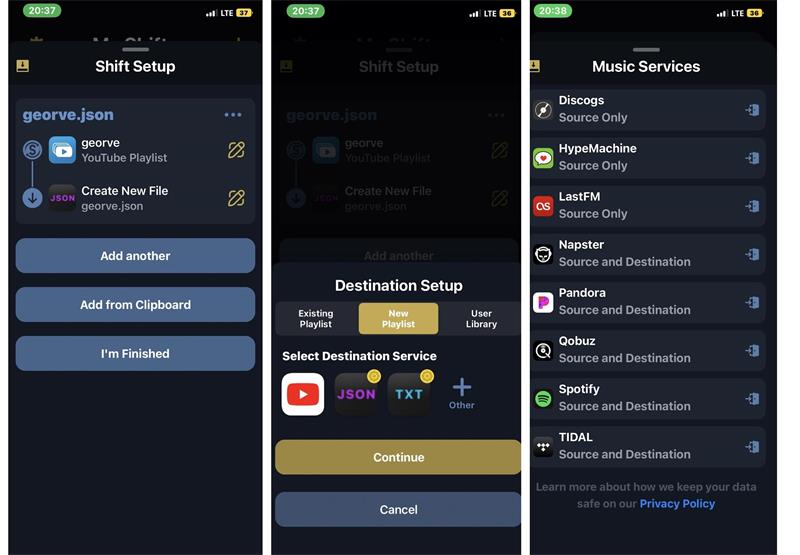
- SongShift: If you’re on iOS, this app is an excellent choice. It provides a straightforward way to migrate playlists with just a few taps. You connect your YouTube Music and Spotify accounts, select the playlists you want to move, and watch SongShift do its magic!
- FreeYourMusic: This app works on multiple platforms, including Windows, Mac, iOS, and Android, making it a versatile option. It offers a robust transfer process that can handle large playlists, ensuring that no songs are left behind. Although it does have a premium version, the free version is quite capable for basic transfers.
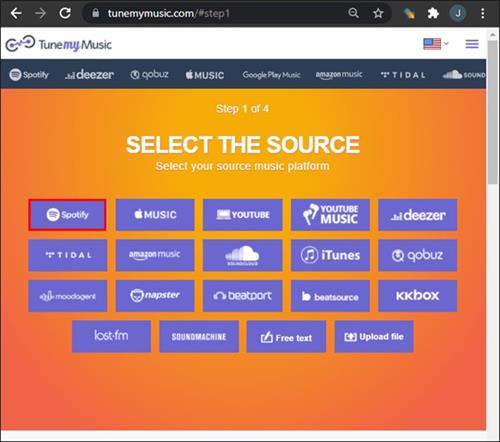
- TuneMyMusic: Another user-friendly tool, TuneMyMusic allows you to transfer your playlists easily. Just paste the YouTube Music link, select the playlists, and then choose Spotify as the destination. It’s a quick and effective way to get your songs where you want them.
- MusConv: If you prefer a desktop application, MusConv could be the answer. It’s available for both Windows and Mac users and supports a wide range of music services. Although it comes with a cost, many users find that the efficiency and range of features justify the investment.
Each of these tools has its strengths, so you might want to try out a couple to see which one works best for you. Whichever option you choose, make sure to check the app’s compatibility with both YouTube Music and Spotify to ensure a smooth transfer experience.
Also Read This: Can You Watch ESPN Plus with YouTube TV? Sports Fans’ Guide to Streaming
4. Step-by-Step Guide for Transferring Playlists

Ready to transfer your beloved playlists from YouTube Music to Spotify? Great! Here’s a simple, step-by-step guide that will lead you through the process. We’ll use Soundiiz as an example, but the general steps are similar across most tools.
Step 1: Create an Account
Start by heading over to the Soundiiz website (or your chosen app) and create a free account. You can sign up using your email or other social media accounts, making it a quick process.
Step 2: Link Your Accounts
Once logged in, you’ll need to link both your YouTube Music and Spotify accounts. Look for the “Connect” option or something similar. You’ll be prompted to authorize the app to access your music libraries—don’t worry, this is standard procedure!
Step 3: Select Your Playlist
Now it’s time to transfer your playlists! You should see a list of your playlists from YouTube Music once your accounts are linked. Select the playlist(s) you wish to transfer. Most tools allow you to preview the songs before moving them, which is a great way to confirm everything is in order.
Step 4: Choose Destination
After selecting your playlists, specify Spotify as your destination. Choose if you want to merge it with an existing playlist or create a new one. This is where you can get creative with how you manage your new Spotify library.
Step 5: Start the Transfer
Once you’re all set, hit the “Transfer” button! The app will handle the heavy lifting, and you’ll usually get a notification once the process is complete. Depending on the size of your playlists, this may take a minute or two.
Step 6: Enjoy Your Music
That’s it! Check your Spotify account to see all your playlists ready to rock. Dive into your favorite tunes, and enjoy the seamless transition!
Transferring your playlists doesn’t have to be a hassle. With these easy steps and handy tools, you’ll be back to jamming out to your favorite tracks in no time!
Also Read This: How to Delete Live Streams on YouTube: Managing Your Channel’s Content
5. Common Issues and Troubleshooting Tips

Transferring your playlists from YouTube Music to Spotify can sometimes feel like a game of whack-a-mole, where issues pop up just when you think you've got it all figured out. But don’t worry! We’ve compiled some common problems you may face during the transfer process and tips on how to overcome them.
1. Missing Songs: It’s not uncommon to find that certain songs from your YouTube Music playlist aren’t available on Spotify. This could be due to licensing agreements that differ between platforms.
- Solution: After the transfer, take a quick scan of your new Spotify playlist to identify any missing tracks. If a song is unavailable, consider searching for its alternative version or a cover. Sometimes you’ll find a version that you actually enjoy more!
2. Transfer Failure: Occasionally, the transfer tool you’re using may fail to transfer your playlist completely or at all.
- Solution: Double-check the internet connection to ensure it’s stable. If the transfer fails, try restarting the tool or your device and reattempting the process. If you're using a specific app or website, confirm that it’s updated to its latest version.
3. Duplicate Songs: If you're using an automated service, you might end up with duplicate tracks in your Spotify playlist.
- Solution: Spotify does not natively support the removal of duplicates in playlists, but you can manually remove them. Alternatively, you could use third-party apps designed to clean your playlists.
4. Failed Authentication: Sometimes the authentication process can be a pain, especially if you have two-factor authentication enabled.
- Solution: Make sure you’re logged into both accounts in a web browser before starting the transfer. If prompted for verification, follow the steps closely to ensure both accounts are linked successfully.
5. Limited Number of Songs: Certain tools may have limitations on how many songs you can transfer at once.
- Solution: If you hit a cap, consider splitting larger playlists into smaller ones for easier transfers. This might take a bit more time, but it'll ensure all your favorite tracks make it over!
Whenever you encounter an issue, remember that a little patience can go a long way. The joy of listening to your playlists on Spotify is right around the corner!
6. Conclusion and Final Thoughts
And there you have it! Transferring your YouTube Music playlists to Spotify doesn’t have to be a daunting task. With a few simple steps and a bit of troubleshooting know-how, you can seamlessly continue enjoying your favorite tunes on a new platform.
Just to recap:
- Choose the right transfer tool that suits your needs.
- Follow the step-by-step guide for the transfer process.
- Keep an eye out for common issues, especially regarding song availability and duplicates.
In today’s digital age, having access to your music across different platforms is essential. Whether you’re traveling, at the gym, or just relaxing at home, Spotify’s interface and features might offer you that added convenience you’re looking for.
If you run into any bumps along the way, don’t hesitate to troubleshoot using the tips we've provided. Music is meant to bring joy and relaxation, so focus on enjoying your playlists instead of getting bogged down by the technical details.
So go ahead and start your music migration. Happy listening!
 admin
admin


