Transferring an image to wood can be a fun and rewarding craft project, offering a unique way to showcase your favorite photos or artwork. This technique adds a personal touch to your home decor or creates one-of-a-kind gifts for loved ones. There are various methods for image transfer, each with its own charm and results. Whether you’re looking to achieve a rustic feel or a more polished look, the right technique can elevate your project.
Some popular methods include the use of gel medium, packing tape, and even printer ink. Each method has its pros and cons, so it’s essential to choose one that best suits your project and the materials at hand. With the right approach, you can transform ordinary wood into a beautiful canvas that tells a story. Ready to dive in? Let’s explore what you’ll need to get started!
Materials Needed for Image Transfer
To successfully transfer an image to wood, you'll need a few essential materials. Gathering these items beforehand will make the process smoother and more enjoyable. Here’s a comprehensive list of what you’ll need:
- Wood Surface: Choose a smooth piece of wood, like pine or birch. Make sure it’s clean and free from splinters.
- Image: You can use a printed image on regular paper or photo paper. Just ensure the image is mirrored (flipped) if it contains text.
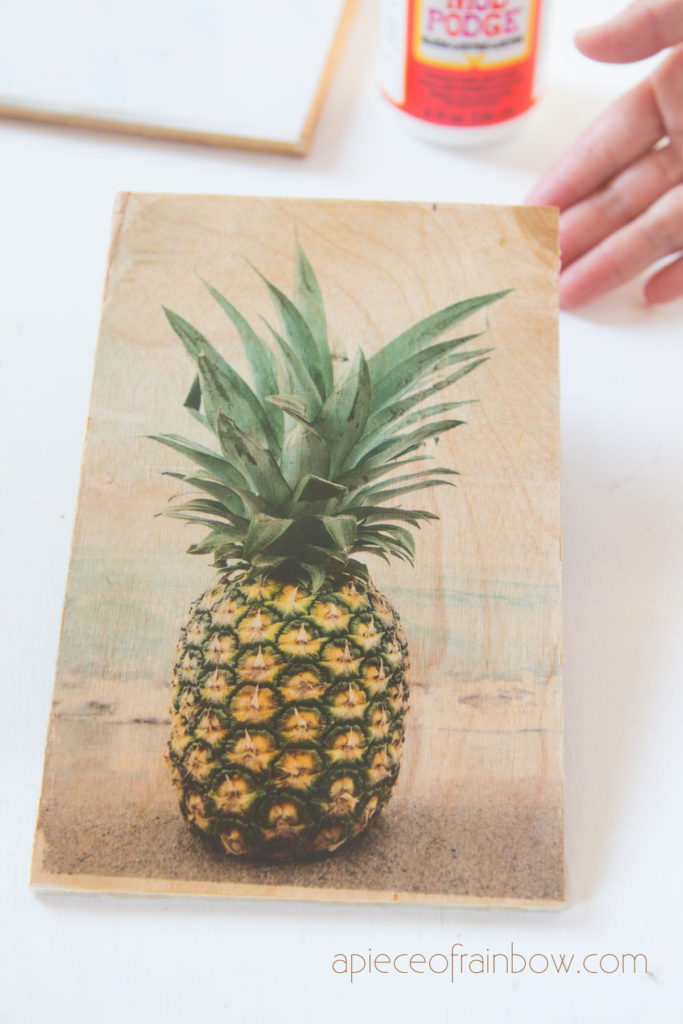
- Gel Medium or Mod Podge: These are crucial for the transfer process. They act as an adhesive and help to transfer the image onto the wood.
- Paintbrush: A soft brush is ideal for applying the gel medium evenly.
- Sponge or Cloth: Useful for gently rubbing the paper away after the transfer.
- Water: You’ll need this for dampening the paper during the removal process.
- Sealer: After the transfer is complete, applying a sealer will protect your artwork. Look for an acrylic spray or Mod Podge for this step.
With these materials in hand, you’re ready to embark on your image transfer adventure!
Also Read This: Visualizing the States Across the USA Through Images
Preparing the Wood Surface
Getting your wood surface ready is crucial for a successful image transfer. A smooth, clean surface will ensure that the image adheres properly and looks great when completed. Follow these steps to prepare your wood:
- Select Your Wood: Choose a piece of wood that’s suitable for your project. Hardwoods like maple or birch are ideal as they provide a smooth finish.
- Sand the Surface: Use sandpaper (around 220 grit) to sand the wood surface gently. This step removes imperfections and creates a texture that helps the transfer adhere better.
- Clean the Surface: After sanding, wipe the wood with a damp cloth or tack cloth to remove any dust and debris. This prevents any particles from interfering with the transfer process.
- Apply a Base Coat: If desired, apply a thin layer of acrylic paint or a clear wood sealer. This can enhance the final appearance of your image once transferred.
- Let it Dry: If you applied paint or sealer, ensure it’s completely dry before proceeding with the transfer.
By taking your time to prepare the wood surface, you’ll set the stage for a stunning image transfer that really pops!
Also Read This: Discover How Much Shutterstock’s Enhanced License Is
Choosing the Right Image for Transfer
The image you choose is just as important as the technique you'll use for transferring it. Selecting the right image can make or break your project. Here are some tips to help you pick wisely:
- High Contrast Images: Opt for images with clear lines and contrasts. Black and white images often work best, as they transfer more distinctly.
- Simple Designs: Complicated images with too many details can get lost in the wood grain. Simple graphics or text tend to yield the best results.
- Consider the Size: Think about the size of the area where you’ll be transferring the image. Make sure your chosen image scales well to fit the wood piece.
- Use Quality Images: Choose high-resolution images to ensure that your transfer looks crisp. Blurry images will result in blurry transfers.
- Personal Touch: For a unique touch, consider using personal photos or meaningful quotes. This adds a sentimental value to your wood piece!
By thoughtfully selecting your image, you’ll enhance the overall impact of your wood transfer project, making it something truly special.
Also Read This: How to Become a Contributor to Getty Images – A Comprehensive Guide for New Photographers
5. Step-by-Step Guide to Transfer the Image
Transferring an image to wood may sound daunting, but it's a fun and creative process! Here’s a simple step-by-step guide to help you achieve stunning results:
- Gather Your Materials: You'll need:
- Wood surface (like a board or slice)
- Image printed on regular paper (preferably in black and white)
- Mod Podge or gel medium
- Paintbrush or sponge
- Sponge or cloth
- Water
Voilà! You’ve successfully transferred your image to wood. Now, let’s move on to making it last.
Also Read This: How to Stop Mirror Image on Samsung
6. Finishing Touches and Sealing the Wood
After transferring your image to wood, it’s essential to protect your artwork so it lasts for years. Here’s how you can add those finishing touches:
- Let It Cure: Allow the image to fully dry for at least 24 hours before applying any sealant. This ensures that everything is set correctly.
- Choose Your Sealant: A clear acrylic sealer or a spray varnish works great. Consider using:
- Matte Finish: For a subtle look
- Glossy Finish: To enhance colors
And there you have it! Your transferred image is beautifully sealed and ready to be displayed. Enjoy your creative masterpiece!
Also Read This: How to Get on Elevator YouTube and Grow Your Channel’s Subscriber Base
Troubleshooting Common Issues
Transferring images to wood can be a fun and rewarding project, but sometimes things don't go as planned. Don't worry; with a little patience and know-how, you can troubleshoot common issues that may arise. Here are some typical problems and their solutions:
- Image Not Transferring Well: If your image isn’t transferring clearly, check the type of paper you used. Make sure it’s suitable for transfers, like laser printer paper. If you used a printer not meant for transfers, consider switching it out.
- Wood Surface Issues: If the wood grain is too rough, it can affect the transfer quality. Sand the surface lightly before starting. A smoother surface provides a better canvas for your image.
- Uneven Transfers: This could happen if the image was not applied evenly or if you rushed the application. Spend time smoothing out air bubbles and ensuring the transfer medium covers the entire image.
- Image Fading: To combat fading, use a sealer after the transfer process. A clear spray sealant can protect your artwork from moisture and UV damage.
- Color Mismatch: If the colors in the transfer don’t match what you see on your screen, try adjusting your image's brightness and contrast before printing. Sometimes a little tweak can make a big difference!
Also Read This: How to Download Adobe Photoshop 7.0 from Dailymotion
Creative Ideas for Image Transfers on Wood
Once you’ve mastered the basics of transferring images to wood, the possibilities are endless! Here are some creative ideas to inspire your next project:
- Personalized Coasters: Create unique coasters featuring your favorite quotes or images. They make great gifts and can be customized for any occasion.
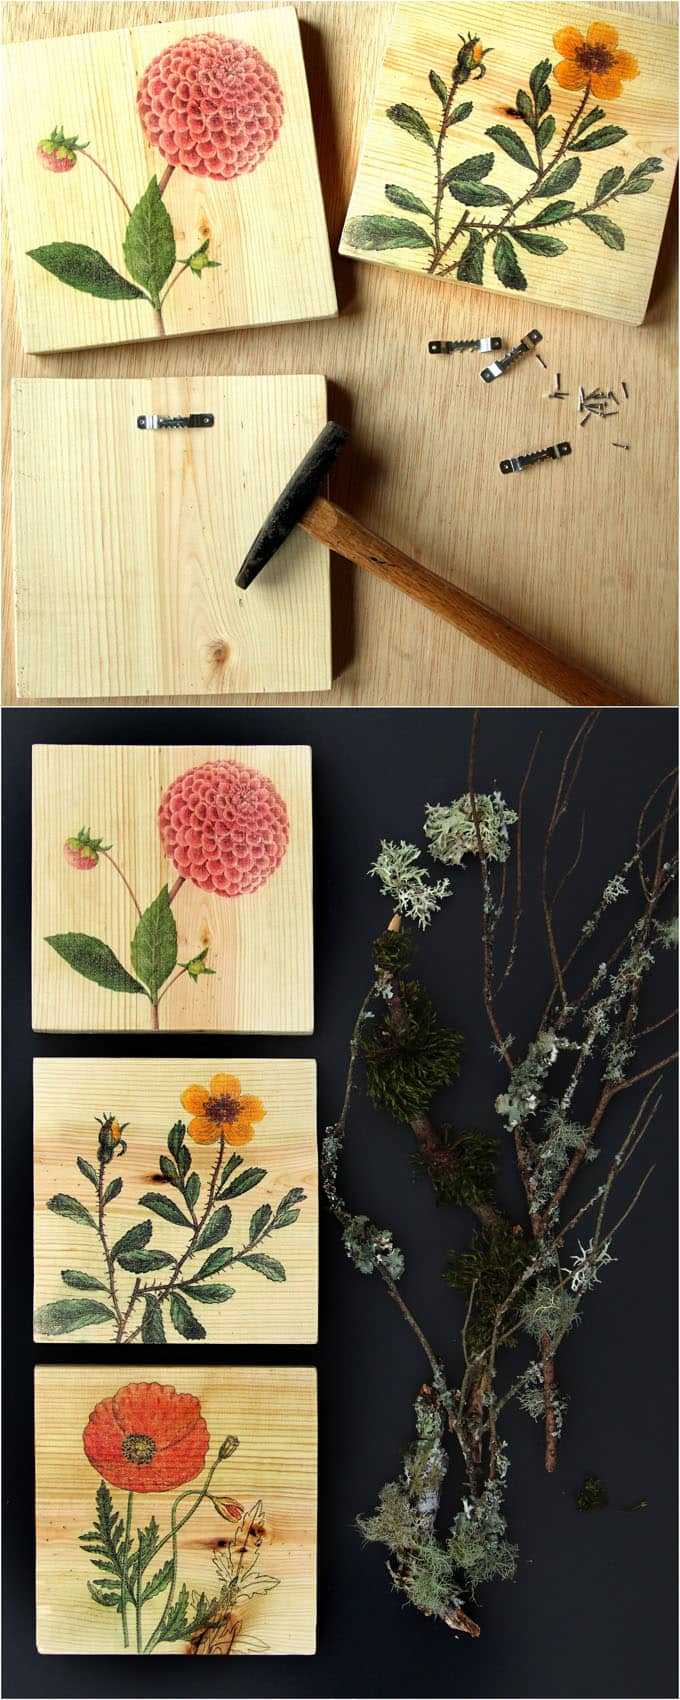
- Wall Art: Use larger pieces of wood to create stunning wall art. Consider transferring a landscape or a family photo to bring warmth to your space.
- Rustic Signs: Transform wood pieces into charming signs for your home or garden. Add a fun saying or your family name for a personal touch.
- Memory Keepsakes: Transfer images from significant life events, like weddings or graduations, onto wood slices. These can serve as beautiful keepsakes to cherish forever.
- Gift Tags: Create one-of-a-kind gift tags by transferring small images onto thin pieces of wood. They add a special touch to any present!
With these ideas and troubleshooting tips, you're all set to dive into your wood image transfer projects!
How to Transfer an Image to Wood
Transferring an image to wood is a fantastic way to create personalized gifts, home decor, or art pieces. This process can be done using various methods, but one of the most popular techniques involves using a gel medium. Here’s a step-by-step guide to help you through the process:
Materials Needed:
- Wood surface (smooth and sanded)
- Printed image (laser print recommended)
- Gel medium (matte or gloss)
- Paintbrush or sponge
- Water
- Cloth or paper towel
Steps to Transfer an Image:
- Prepare the Wood: Ensure the wood surface is clean, smooth, and free of dust.
- Apply Gel Medium: Use a paintbrush to apply a generous layer of gel medium onto the wood surface.
- Position the Image: Place the printed image face down onto the gel medium. Smooth out any bubbles or wrinkles.
- Let it Dry: Allow the gel medium to dry completely, typically 24 hours.
- Remove the Paper: Dampen the paper with water and gently rub it off. The image should transfer to the wood.
- Seal the Image: Once the image is dry, apply another layer of gel medium or a clear sealant to protect it.
| Method | Pros | Cons |
|---|---|---|
| Gel Medium Transfer | High quality, durable | Time-consuming |
| Transfer Paper | Quick and easy | Less detailed |
Transferring an image to wood can seem daunting, but with the right materials and techniques, it’s simple and enjoyable. Experiment with different images and wood types to create unique pieces that reflect your personal style. Happy crafting!
 admin
admin


