Image transfer is a creative technique that allows you to take an image and put it onto another surface, typically paper. This process opens up a world of possibilities for artists and crafters alike, enabling you to create unique art pieces, cards, and personalized gifts. Whether you're looking to make a stunning art piece or simply want to add a personal touch to your projects, understanding how
At its core, image transfer involves taking an image and using a medium to apply it to a new surface. The
Choosing the Right Image for Transfer
When selecting an image for transfer, keep in mind that not all images work equally well. Here are some tips to guide your choice:
- Resolution: High-resolution images yield clearer results. Look for images that are at least 300 DPI (dots per inch).
- Contrast: Images with strong contrasts are easier to transfer. They stand out more on the new surface.
- Colors: Bright, vivid colors tend to translate better than dull or muted ones.
- Subject Matter: Simple designs or bold patterns often work better than intricate details.
Consider your end goal and choose an image that fits well with the overall look you want to achieve. It’s also helpful to think about the emotions you want to evoke with your image choice.
Also Read This: Here’s How to Download Video Memes from iFunny to Your Phone
Gathering the Necessary Materials
Before you start transferring images, it’s essential to gather all the materials you’ll need. Here’s a handy list to help you get started:
- Image: This can be printed or drawn; ensure it’s prepared for transfer.
- Transfer Medium: Options include gel medium, transfer paper, or even Mod Podge.
- Surface: Choose a suitable paper or canvas where you want to transfer the image.
- Brush: A soft brush helps to apply the transfer medium evenly.
- Sponge or Cloth: Useful for smoothing out air bubbles.
- Water: Some methods require water to activate the transfer medium.
- Protective Covering: A spray sealant will help protect your finished piece.
Gathering your materials in advance can save time and ensure a smoother transfer process. Make sure you have everything ready before diving into the fun part—actually transferring your image!
Also Read This: Refund Realms: Delving into AliExpress Refund Duration
Preparing Your Image for Transfer
Before you can successfully transfer an image, it’s important to prepare it properly. This preparation makes a big difference in the final result, so let’s break it down into a few simple steps.
First, consider whether you need to reverse your image. If you’re transferring text or an image with specific orientation, flipping it horizontally will ensure it reads correctly after transfer. You can easily do this using photo editing software or even some online tools.
Next, print your image using a quality printer. Here are a few tips for this step:
- Use the Right Paper: For most transfers, standard printer paper works fine, but using photo paper can enhance clarity.
- Check Your Ink: Make sure you’re using the right ink (inkjet or laser) based on your transfer method.
- Print Multiple Copies: Having extra prints can be helpful if you want to experiment with different techniques.
Finally, allow the ink to dry completely. This prevents smudging during the transfer process. Once dry, your image is ready to be transformed onto paper!
Also Read This: How to Resize an Image Without Stretching It to Maintain Proportions
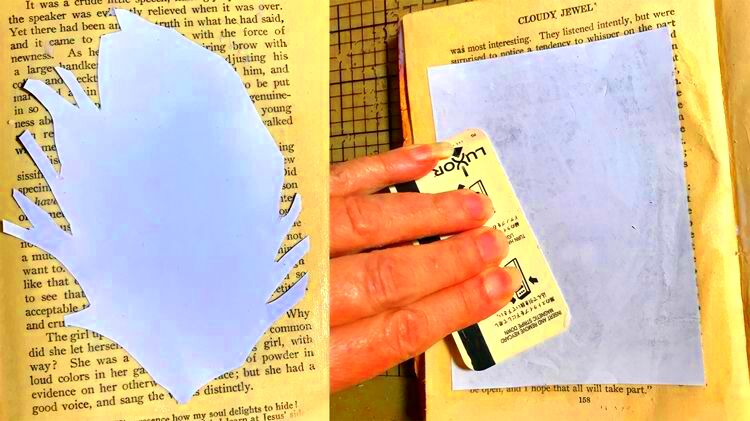
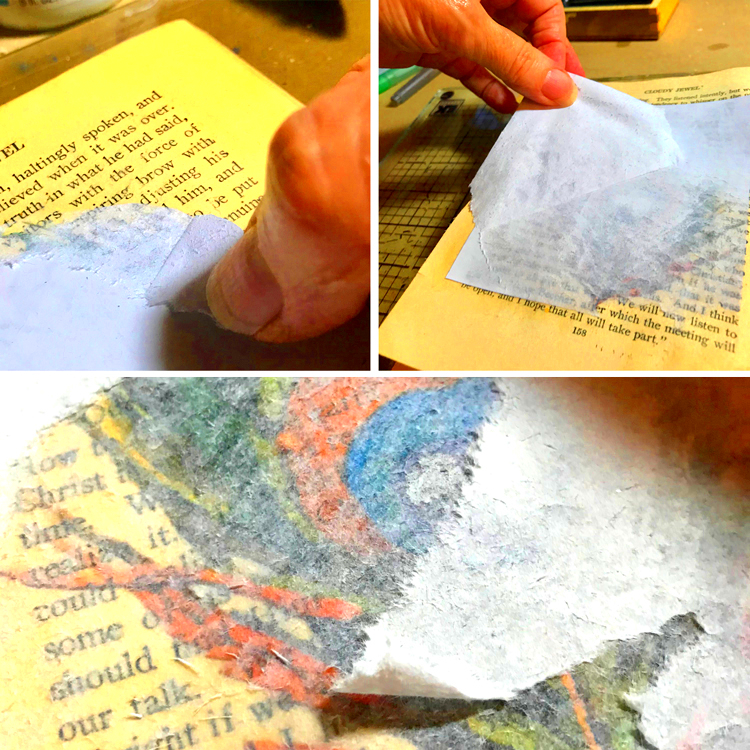
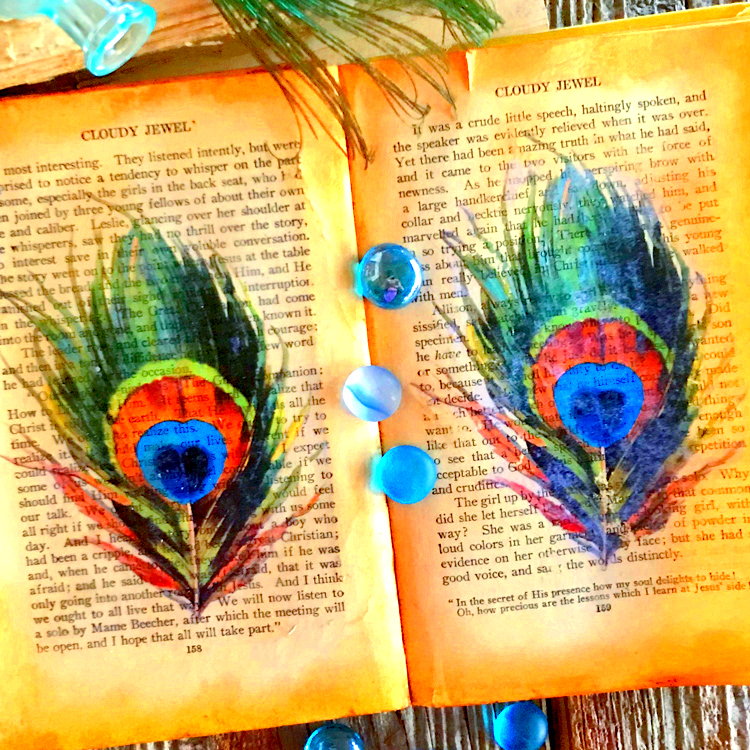
Techniques for Transferring Images onto Paper
There are several effective techniques for transferring images onto paper. Each method has its unique charm and can yield different results, so feel free to experiment! Here are three popular techniques:
- Gel Medium Transfer:
This method uses gel medium to transfer the image. Here’s how to do it:
- Apply a thin layer of gel medium onto your chosen surface.
- Place the printed image face down onto the medium.
- Smooth out any bubbles and let it dry completely.
- Once dry, dampen the paper with water and gently rub it away, leaving the image behind.
- Direct Transfer Paper:
This specialized paper allows you to print directly onto it, making transfer easy:
- Print your image onto the transfer paper.
- Cut out the desired image, leaving a small border.
- Apply the transfer paper to the surface and follow the manufacturer’s instructions.
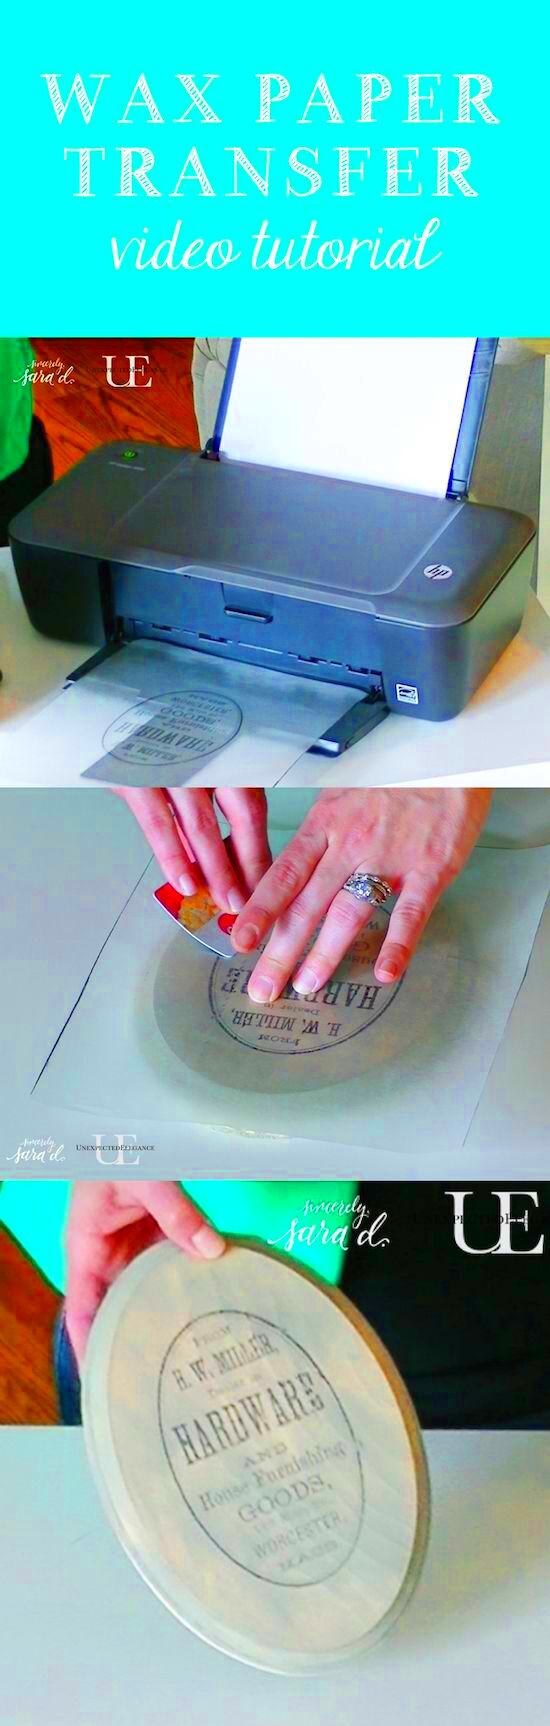
- Freezer Paper Method:
This is a simple and cost-effective method:
- Print your image on the shiny side of freezer paper.
- Place the printed side against your chosen surface and apply heat using an iron.
- The image will transfer onto the paper as the heat activates the wax coating.
Each technique has its advantages, so don’t hesitate to try different ones to see what you like best!
Also Read This: How to Sell Stock Footage to Adobe Stock
Tips for Achieving the Best Results
To ensure your image transfer process goes smoothly and produces great results, consider these helpful tips:
- Practice First: If you’re new to image transfer, practice on scrap paper to get a feel for the technique.
- Take Your Time: Don’t rush the drying process; patience can make a big difference.
- Work in a Well-Lit Area: Good lighting helps you see details and any air bubbles that need smoothing.
- Experiment with Different Surfaces: Different types of paper or canvas can produce unique effects.
- Seal Your Work: Once the transfer is complete, applying a sealant can protect the image and enhance its longevity.
Lastly, have fun with the process! Image transfer is about creativity and exploration, so enjoy experimenting with different techniques and materials.
Also Read This: How to Resize an Image in Your Gmail Signature
Common Mistakes to Avoid
Image transfer can be a bit tricky, especially for beginners. To help you get the best results, let’s look at some common mistakes to avoid during the process.
- Skipping Image Preparation: Not preparing your image can lead to poor transfer quality. Always ensure your image is properly reversed and printed at the right resolution.
- Using Wet Ink: Transferring an image while the ink is still wet can smudge and ruin your work. Always let the ink dry completely before starting.
- Applying Too Much Medium: Using excessive transfer medium can result in a messy finish. A thin, even layer is usually best.
- Not Smoothing Out Bubbles: Failing to remove air bubbles while applying your image can lead to uneven transfers. Take your time to smooth it out carefully.
- Rushing the Drying Process: Patience is key! Allow adequate drying time to avoid complications when you remove the paper.
- Neglecting to Seal: Skipping the sealing step can leave your artwork vulnerable to wear and tear. Always finish with a protective coating to preserve your piece.
Avoiding these mistakes can greatly enhance your image transfer experience and lead to better results. Remember, practice makes perfect!
Also Read This: How to Transfer an Image to a Shirt for Custom Prints and Gifts
Frequently Asked Questions
As you dive into image transfer techniques, you may have some questions. Here are some frequently asked questions to help clear things up:
- Can I use any type of image? Yes, but keep in mind that images with high contrast and clear details work best for transfers.
- What type of paper should I use? The choice depends on the technique. For gel medium transfers, regular printer paper is fine, while transfer paper is great for direct transfer methods.
- Do I need special equipment? While basic tools like brushes and sponges are helpful, most techniques can be done with everyday household items.
- How long will the transfer last? With proper sealing, your transferred images can last for many years. However, avoiding exposure to moisture and direct sunlight can help preserve them even longer.
- Can I use images from the internet? Be cautious about copyright issues. It’s best to use images you own or those that are royalty-free.
If you have more questions, don’t hesitate to ask in the comments or do a bit of research. There’s a lot to learn!
Conclusion on Image Transfer Techniques
Image transfer is an exciting and versatile art form that opens up a world of creativity. Whether you're looking to personalize your home decor, create unique gifts, or simply enjoy a new hobby, understanding the various techniques and best practices can help you succeed.
From preparing your image and choosing the right method to avoiding common mistakes, each step plays a crucial role in achieving beautiful results. Remember to practice patience and experiment with different surfaces and techniques to find what works best for you.
So gather your materials, pick an image, and start creating! With a bit of practice, you’ll find that image transfer can be a rewarding and enjoyable way to express your creativity. Happy transferring!
 admin
admin


