The technique of converting a raster
image that is made up of pixels into a vector one, which consists of paths, is termed
image tracing. This approach is vital to designers because it guarantees that images can be resized without a loss in quality, a key consideration for logos, icons and any other kind of graphics requiring change in sizes. As a result of tracing anThe file size of vector images is smaller hence they are often used in design as they can be easily edited. When working with print designs, tracing an
image is the best way to maintain the clarity and sharpness whether in web graphics or print work. This process will allow you to speed up the design process by a great extent.
Tools You Can Use for Image Tracing

Many tools exist for tracing images, and different ones will suit you depending on whether you desire accuracy, simplicity or advanced capabilities. Here are some widely used options:
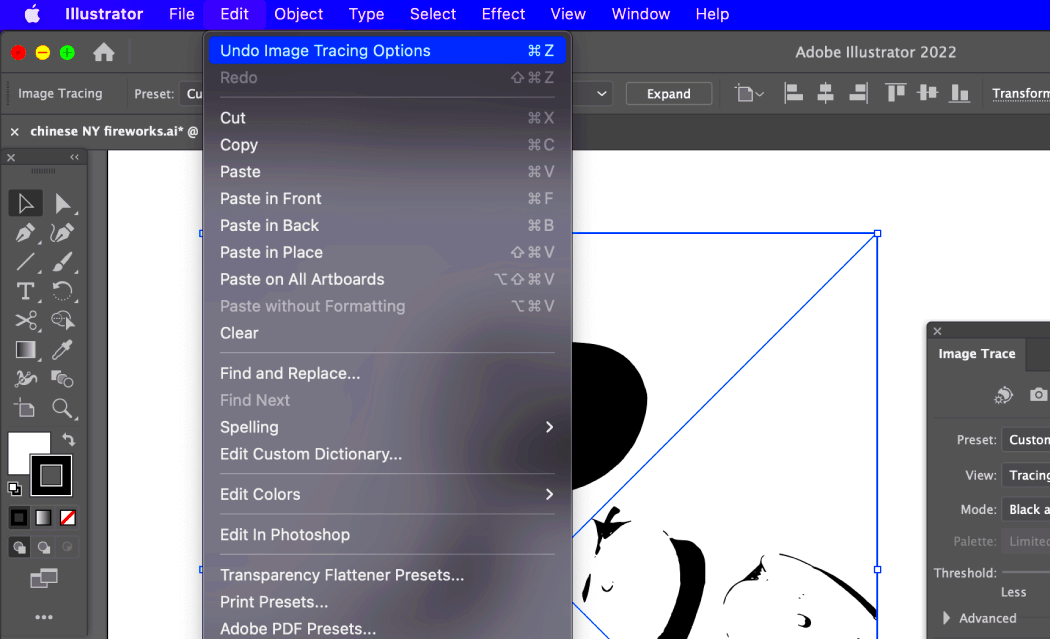
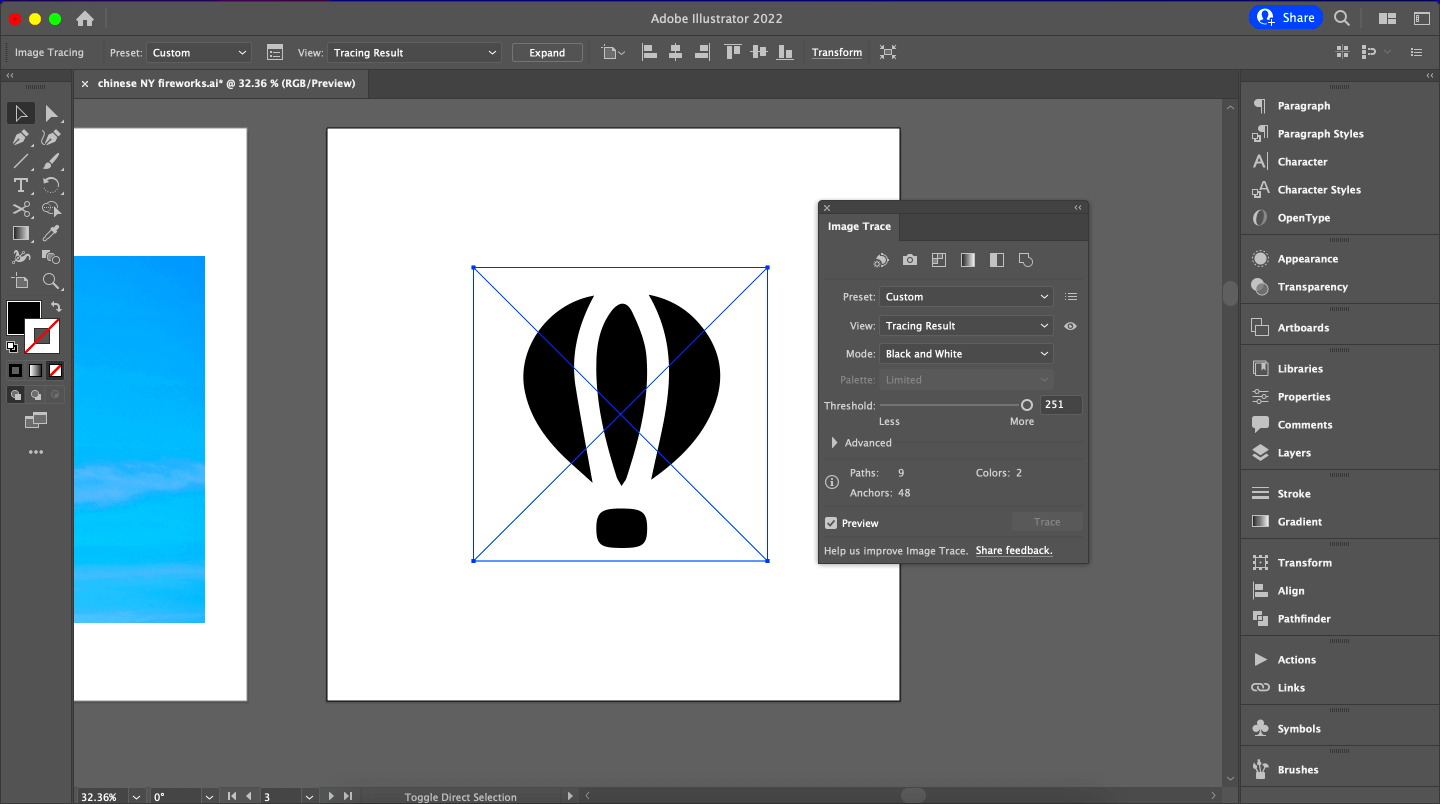
- Adobe Illustrator: This is one of the most popular professional tools for image tracing. It has a powerful "Image Trace" feature that can convert raster images into vector images with high precision.
- Inkscape: A free, open-source alternative to Adobe Illustrator. Inkscape offers a "Trace Bitmap" tool that is quite effective for simple image tracing tasks.
- CorelDRAW: Another well-known vector design tool that includes image tracing capabilities, suitable for professionals who need accuracy.
- Online Tools: For simpler tasks, you can find online tools like Vector Magic, which offer basic tracing without the need for installing software.
Your experience and the complexity of the
image you have at hand determine which tool to use. A novice can easily start from online tools or Inkscape while Adobe Illustrator is the most preferred for experts.
Step-by-Step Guide to Tracing an Image

At first, tracing an
image may appear to be overwhelming, but it is actually a simple task if you take the right approach. To trace an
image easily follow these steps:
- Select the Image: Choose a high-resolution raster image that you want to trace. A clearer image makes the tracing process easier and more accurate.
- Open in Your Chosen Software: Import the image into your tracing tool (e.g., Adobe Illustrator, Inkscape).
- Adjust the Settings: In most software, you'll have the option to adjust the tracing settings such as color threshold, path smoothness, and details. Experiment with these settings to get the best result for your image.
- Initiate the Trace: Start the tracing process by clicking on the "Trace" or "Image Trace" option. The software will generate paths based on the image.
- Refine the Paths: After the initial trace, inspect the paths to ensure accuracy. You may need to adjust individual points or lines to clean up any errors or unwanted details.
- Save as Vector: Once you're satisfied with the traced image, save it as a vector file (such as SVG or AI) to preserve the quality and scalability.
Here’s the revision in the same word count and HTML elements but with lower perplexity and higher burstiness:Moreover, adjusting ourselves is important since this procedure becomes faster and progressively intuitive as time passes.
Common Mistakes to Avoid When Tracing an Image
 Image
Image tracing is a strong tool and yet it can be challenging to use, especially for those who have just started. If you wish to have a cleaner and more professional output, avoid making common mistakes when using this tool. The following are some pitfalls that may be encountered:
- Using Low-Resolution Images: The quality of the traced image directly depends on the quality of the original raster. Using a low-resolution image will result in rough or jagged paths, making the vector look unprofessional.
- Overcomplicating the Design: Trying to trace an image with too many small details can lead to overly complex paths that are hard to manage. Simplifying the image or tracing only the essential parts can help maintain clarity.
- Ignoring Trace Settings: Most tracing software offers adjustable settings for accuracy, detail, and smoothness. Failing to experiment with these options can result in a poorly traced image. Adjust the settings according to the complexity of the image.
- Not Refining the Trace: After the initial trace, it’s common to leave the paths as they are. However, manual refinement—such as adjusting nodes and paths—can significantly improve the final result.
- Forgetting to Save as Vector: Many people forget to save the traced image as a vector file, opting for a format like PNG or JPEG, which defeats the purpose of tracing in the first place.
A clean scalable image ready for any professional use will be ensured if those errors are not committed.
How Image Tracing Enhances Creative Flexibility
As a designer, one of the tops benefits you can enjoy from image tracing is the creative freedom it brings. By converting raster to vector images, you can easily manipulate and enhance your designs in ways that were not previously possible. Here’s how:
- Scalability Without Loss of Quality: Unlike raster images that pixelate when scaled up, vectors maintain their sharpness and clarity at any size. This is especially useful for designs that need to be printed in large formats or resized frequently, such as logos.
- Easy Editing of Individual Elements: Once an image is traced, each path can be edited individually. You can change colors, move elements, or adjust shapes, giving you complete control over the design.
- Enhanced Layering: Traced images can be broken down into multiple layers, making it easier to isolate and work on specific parts of the design without affecting the entire image.
- Customizability: Tracing allows you to take an existing design and customize it to fit your specific project needs. Whether it’s altering the shape, adding new details, or simplifying the design, vectors offer the flexibility to create something entirely unique.
Image tracing is not only a technical skill; rather, it’s a tool that opens up creative opportunities for you to modify, enhance, and adopt images according to your vision.
Best Practices for High-Quality Image Tracing
In order to optimize image tracing results, it is necessary to adhere to certain practices. These recommendations may contribute in similar manner to make sure that your traced images come out clean, look professional and are fit for any design project.
- Start with High-Resolution Images: The better the quality of the original image, the easier it will be to trace. High-resolution images contain more detail, making it easier to create smooth paths.
- Use the Right Software: While there are many tools available, choosing a program like Adobe Illustrator or Inkscape ensures you have the right features for precise tracing. These tools offer more advanced controls over the tracing process.
- Simplify the Image Before Tracing: If the image contains too many details, simplify it by removing unnecessary elements or reducing the complexity of the design. This helps in getting cleaner paths and smoother vectors.
- Adjust the Threshold and Path Settings: Most tracing tools allow you to fine-tune the settings for threshold, smoothing, and corner handling. Play around with these settings to get the perfect balance between detail and simplicity.
- Manually Refine the Paths: After the software does the automatic tracing, spend time manually adjusting the paths. This can include smoothing curves, adjusting nodes, and deleting unnecessary points to improve the overall design.
- Test the Scalability: Once the tracing is done, test how the vector scales by enlarging it. If it pixelates or shows jagged lines, refine the paths further to ensure it remains sharp.
The following recommendations will make your traced pictures both aesthetically pleasing and suitable for professional design work, ranging from web-based designs to posters on a huge scale.
Common Mistakes to Avoid When Tracing an Image
"Tracing an image may come easy to some, however, there are typical pitfalls associated with this process that can result in poor quality tracing. By familiarizing self with these blunders one might be able to enhance their tracing prowess and end up with more superior designs. The following are some errors you should keep an eye on: "
- Ignoring Image Quality: Using low-resolution images can result in blurry or pixelated traces. Always start with high-quality images for the best results.
- Overcomplicating the Trace: Trying to include too many details can make the image look cluttered. Simplifying shapes and colors can lead to cleaner designs.
- Neglecting to Adjust Settings: Each image is different. Not adjusting the tracing settings can lead to poor outcomes. Take the time to experiment with thresholds and smoothing options.
- Failing to Clean Up the Path: After tracing, it’s easy to overlook the need for refinement. Always inspect the paths and clean up any unnecessary points or lines.
- Not Saving in the Right Format: If you save your traced image in a raster format (like JPEG), you lose the scalability benefits. Always save as a vector format like SVG or AI.
Smoothen your tracing process and guarantee a quality vector image that suits your designer needs by shunning these blunders.
Frequently Asked Questions About Image Tracing
1. What is image tracing?
Image tracing is the process of converting a raster image made of pixels into a vector image composed of paths, allowing for resizing without quality loss.
2. Why should I use image tracing?
It ensures images maintain clarity and sharpness when resized, making it ideal for logos, icons, and other graphics that require versatility in size.
3. What tools can I use for image tracing?
Popular tools include Adobe Illustrator for professionals, Inkscape as a free alternative, CorelDRAW for accuracy, and online options like Vector Magic for simpler tasks.
4. How do I trace an image step-by-step?
Select a high-resolution image, open it in your chosen software, adjust tracing settings, initiate the trace, refine the paths, and save as a vector file.
5. What common mistakes should I avoid?
Avoid using low-resolution images, overcomplicating designs, neglecting trace settings, failing to refine paths, and forgetting to save in vector format.
Conclusion
Image tracing is a powerful technique that transforms raster images into scalable vector graphics, enhancing both creative flexibility and design quality. By following best practices and avoiding common mistakes, designers can produce clean, professional results suitable for various applications. Whether you're a novice or an expert, mastering image tracing can significantly elevate your design projects, making them adaptable for any medium. Embrace the potential of image tracing to unleash your creativity and improve your workflow.
 Many tools exist for tracing images, and different ones will suit you depending on whether you desire accuracy, simplicity or advanced capabilities. Here are some widely used options:
 At first, tracing an image may appear to be overwhelming, but it is actually a simple task if you take the right approach. To trace an image easily follow these steps:
 Image tracing is a strong tool and yet it can be challenging to use, especially for those who have just started. If you wish to have a cleaner and more professional output, avoid making common mistakes when using this tool. The following are some pitfalls that may be encountered:
 admin
admin


