Tying a tie might seem like a small detail, but it can make a big difference in your overall appearance. Whether you're dressing up for a wedding, an interview, or just want to look sharp, knowing how to tie a tie is an essential skill. In this guide, we'll walk you through the steps and help you choose the right knot for any occasion. Let’s get started!
Types of Tie Knots
When it comes to tying a tie, there are several knots to choose from, each with its unique look and purpose. Here’s a rundown of some popular tie knots and when to use them:
- Four-in-Hand Knot:
- Most common and easiest to learn.
- Great for casual to semi-formal occasions.
- Asymmetrical shape adds a relaxed feel.
- Windsor Knot:
- Perfect for formal events and business attire.
- Creates a wide, triangular knot that looks polished.
- Best with wide ties and dress shirts with a spread collar.
- Half-Windsor Knot:
- A versatile choice that offers a more moderate size than the Windsor.
- Suitable for most occasions, including interviews.
- Works well with various collar types.
- Bow Tie:
- A classic choice for formal events like galas and weddings.
- Creates a charming, sophisticated look.
- Requires a bit more practice, but worth mastering!
- Pratt Knot:
- A symmetrical knot that's easy to tie.
- Good for both casual and formal occasions.
- Gives a neat, polished appearance.
Choosing the right knot can elevate your style and show that you pay attention to detail. Consider the occasion, your outfit, and personal preferences when selecting a knot. With practice, you’ll be able to tie your favorite knots with ease!
Also Read This: Merging Two Images in Paint for Creative Projects
3. Materials Needed for Tying a Tie
Before diving into the art of tying a tie, let’s gather everything you need to ensure a smooth and successful experience. Having the right materials can make all the difference. Here’s what you’ll need:
- A Tie: This might seem obvious, but choose a tie that suits the occasion. Whether it’s a classic silk tie for a wedding or a fun, patterned tie for a casual outing, the right choice sets the tone.
- A Mirror: A full-length mirror is ideal, but a handheld mirror can work too. You’ll want to see your tie from various angles to ensure it looks sharp!
- A Collared Shirt: You’ll be tying your tie over a collared shirt, so wear it! This helps in getting the right fit and hang of the tie.
- Optional Accessories: Consider a tie clip or tie bar for a polished look. These accessories not only add style but also keep your tie in place throughout the day.
Now that you have your materials ready, let’s move on to the fun part—learning how to tie those knots!
Also Read This: How to Optimize Imago Images for Social Media Engagement
4. Step-by-Step Instructions for Popular Tie Knots
There are several tie knots, but we'll focus on a few popular ones that are versatile and easy to master. Let’s break down the steps for three classic knots: the Four-in-Hand, the Half Windsor, and the Full Windsor.
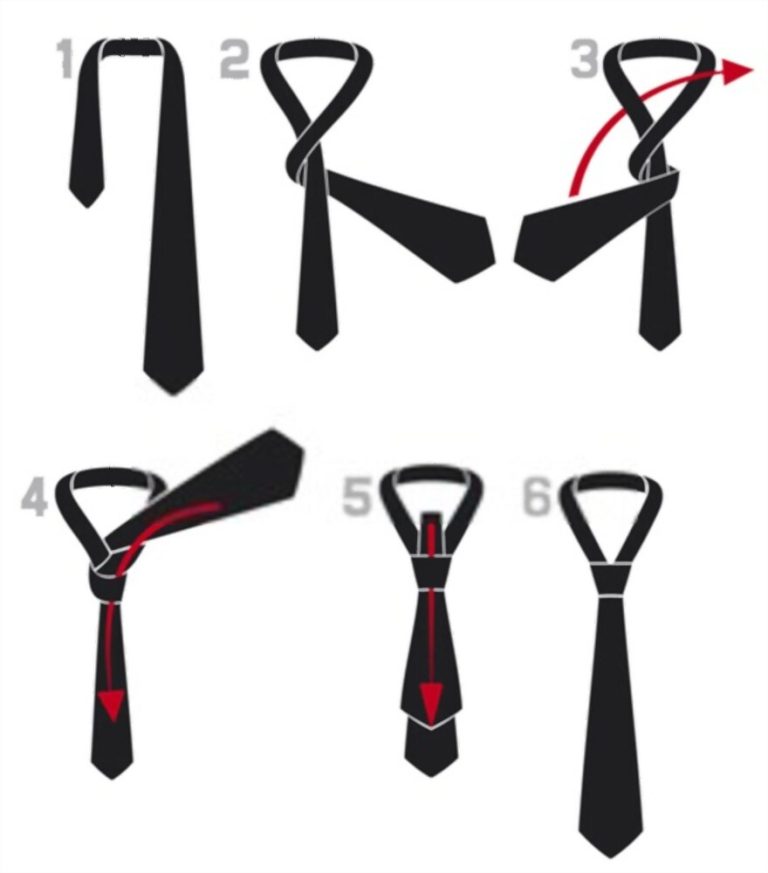
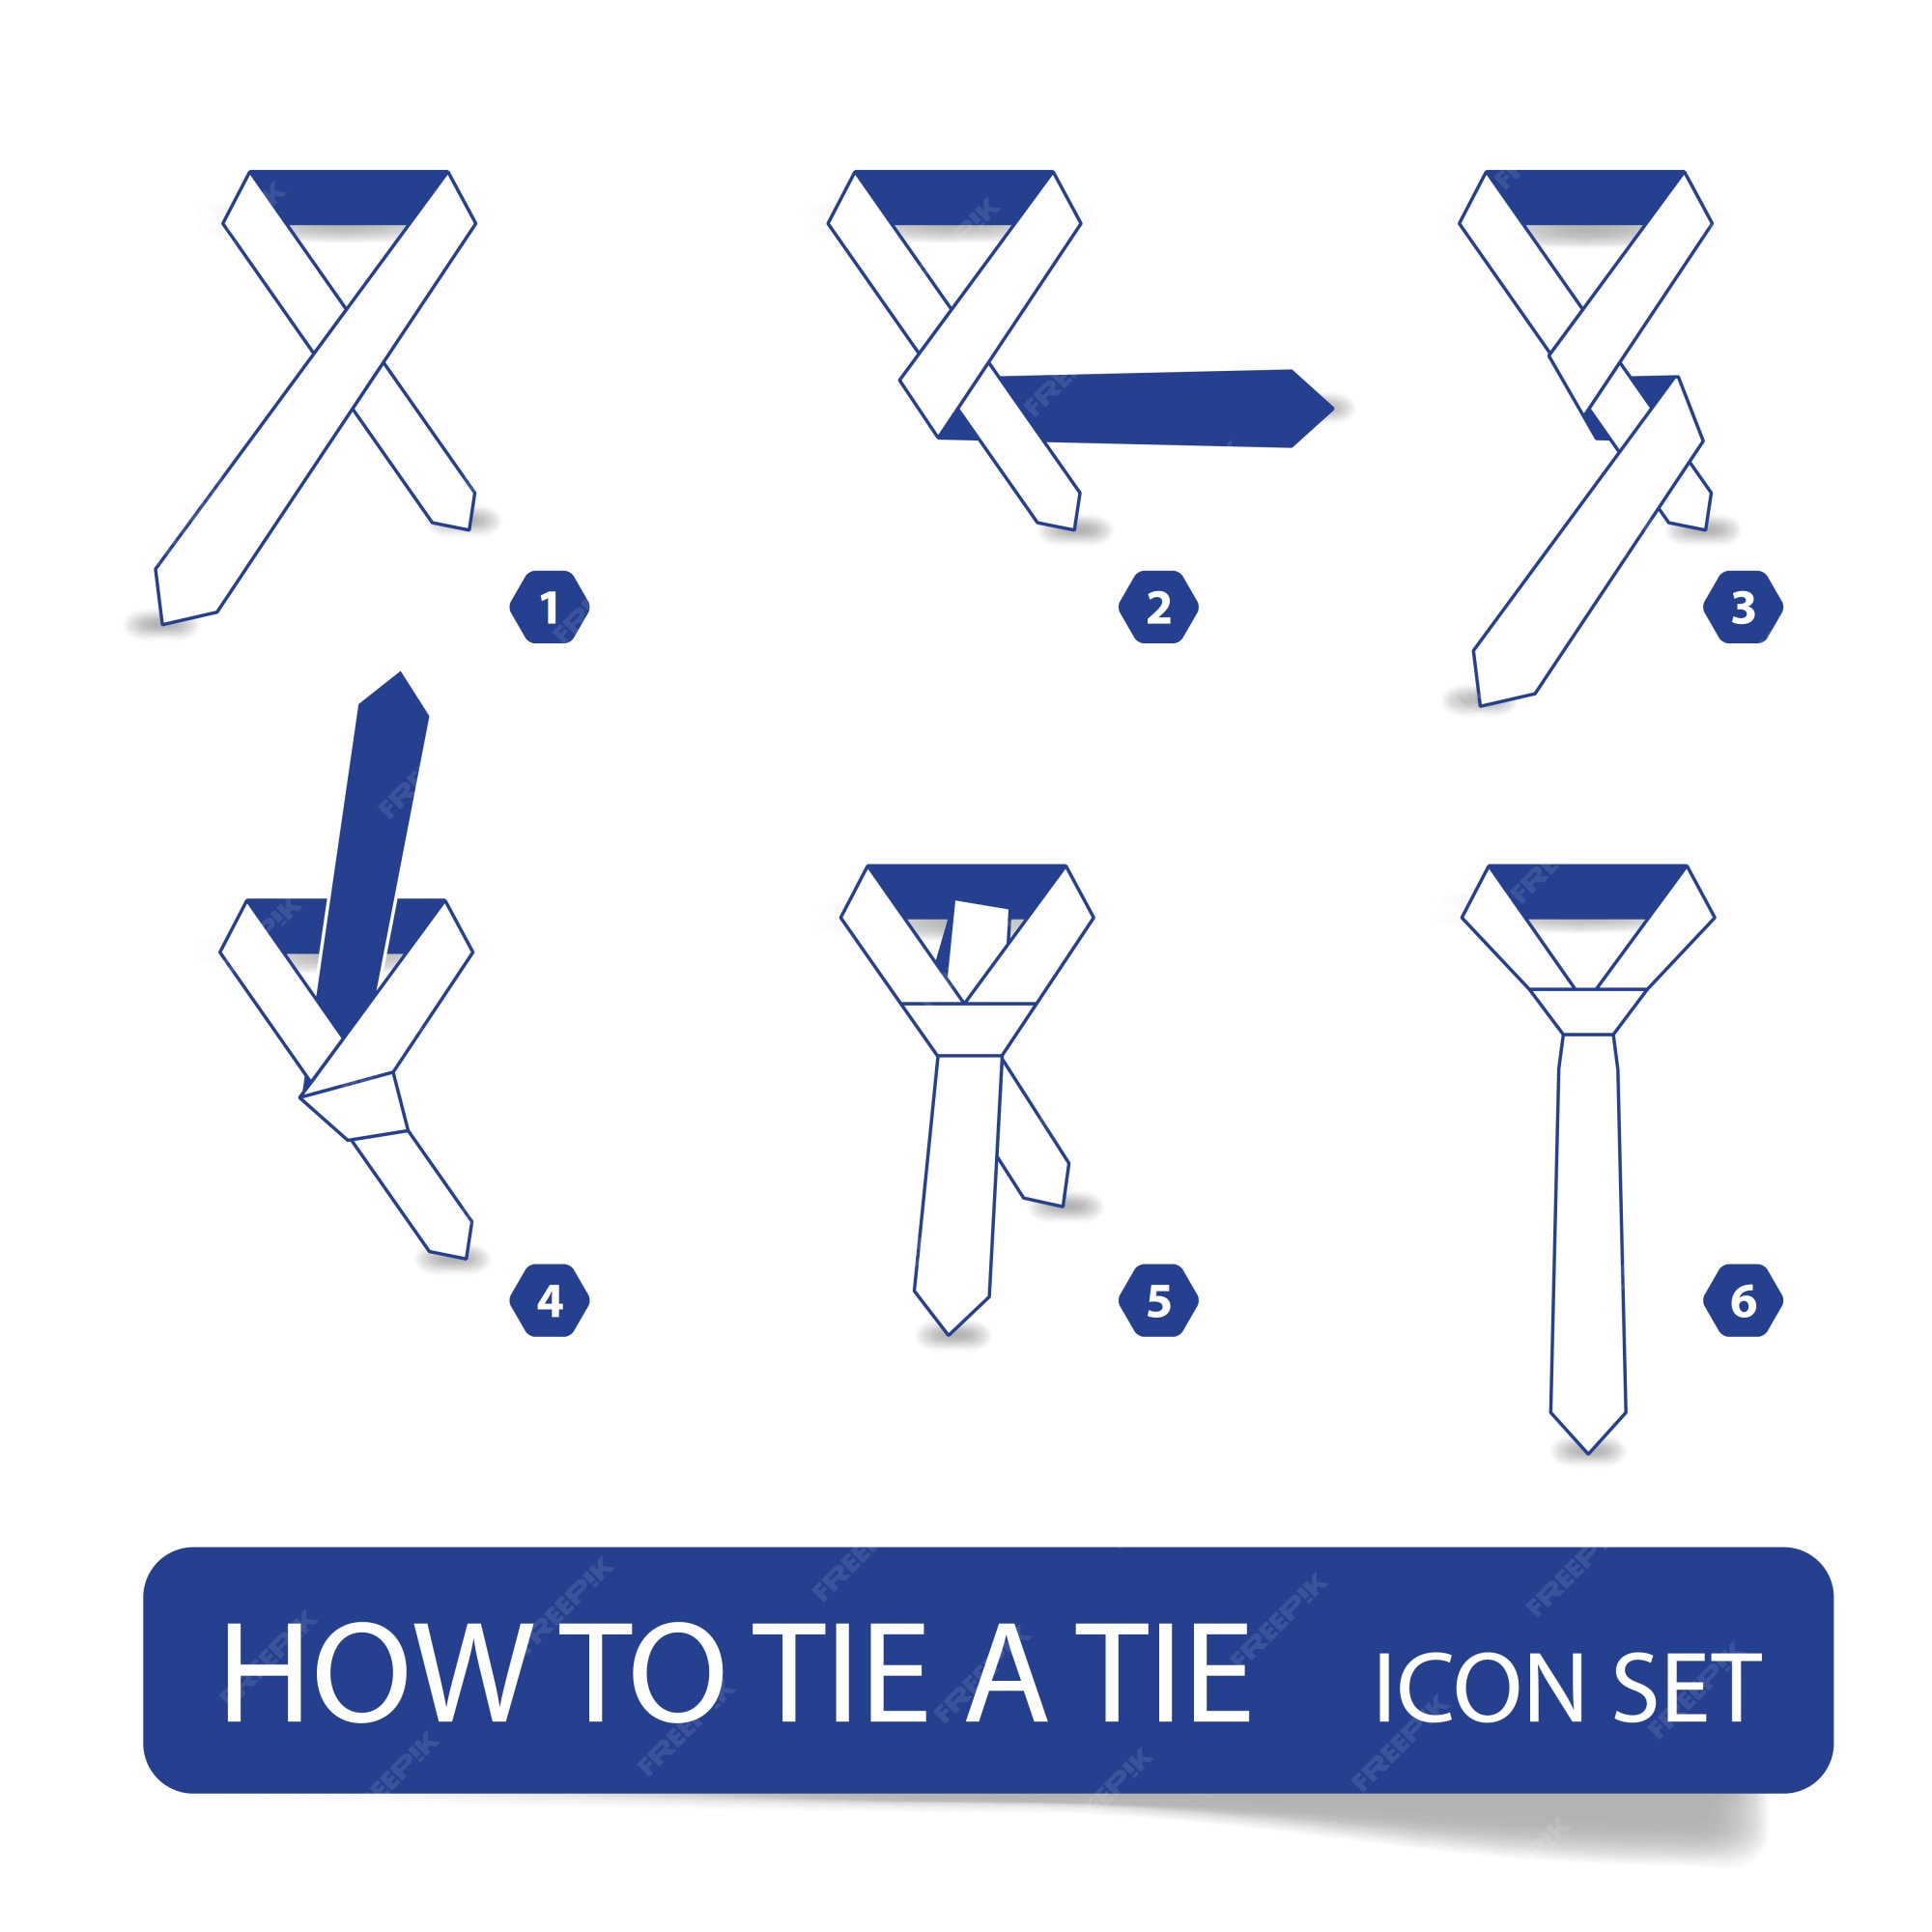
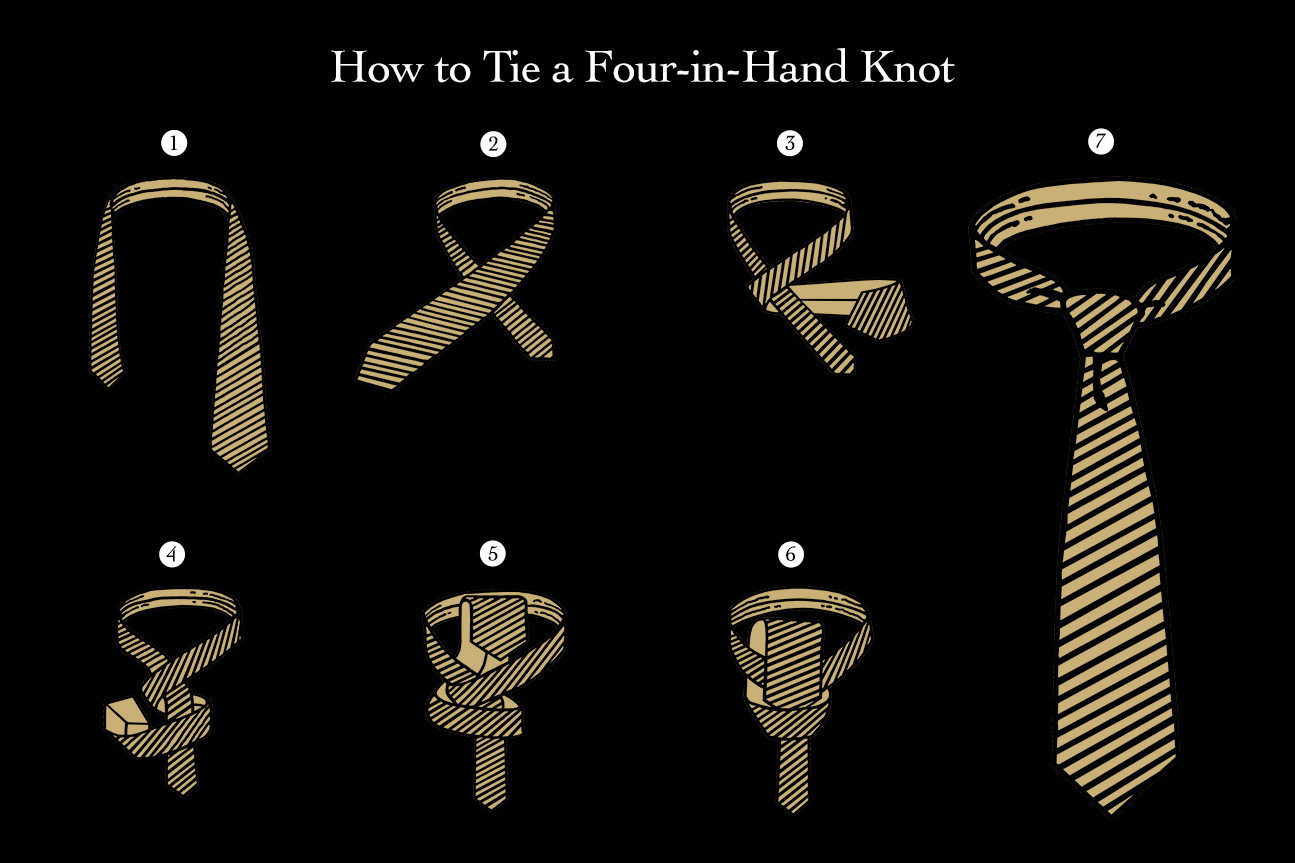
The Four-in-Hand Knot
This is the most common knot and is perfect for casual and formal occasions.
- Start with the wide end of the tie on your right side, hanging longer than the narrow end on your left.
- Cross the wide end over the narrow end.
- Wrap the wide end behind the narrow end.
- Bring the wide end back over the narrow end again.
- Pull the wide end up through the loop around your neck.
- Thread the wide end down through the knot you’ve created in front.
- Hold the narrow end and slide the knot up to your collar.
The Half Windsor Knot
This knot is slightly more sophisticated and works well with a spread collar.
- Start the same way as the Four-in-Hand, with the wide end on the right.
- Cross the wide end over the narrow end.
- Bring the wide end behind the narrow end, and then up through the neck loop.
- Wrap the wide end towards the left and around the back of the narrow end.
- Bring it back up through the neck loop again.
- Finally, pull the wide end down through the front knot, tightening as needed.
The Full Windsor Knot
This knot is formal and creates a wide, triangular shape, making it perfect for business or formal attire.
- Start with the wide end on the right and the narrow end on the left, similar to the previous knots.
- Cross the wide end over the narrow end.
- Bring the wide end behind the narrow end, then up through the neck loop.
- Now bring it down through the loop you’ve just created in front.
- Wrap the wide end around the back of the narrow end again.
- Bring it up through the neck loop one last time and down through the front knot, tightening as you go.
And there you have it! With these steps, you can confidently tie three of the most popular knots. Practice makes perfect, so don’t hesitate to try them out in front of the mirror until you get the hang of it!
Also Read This: How to Record Xbox One Gameplay for YouTube
5. Common Mistakes to Avoid When Tying a Tie
Tying a tie might seem straightforward, but many people fall into a few common pitfalls. Here are some mistakes to watch out for:
- Not Choosing the Right Knot: Different occasions call for different knots. For instance, a Windsor knot is perfect for formal events, while a simpler Four-in-Hand is great for casual outings. Always match the knot to the event!
- Wrong Length: The tip of your tie should ideally reach the middle of your belt buckle. If it’s too short or too long, it can throw off your entire look. If you’re unsure, practice adjusting until you find the right length.
- Ignoring Fabric and Tie Width: Ensure that the tie’s fabric complements your outfit. A thick tie paired with a thin lapel can look awkward. A good rule of thumb is to match the tie’s width to the lapel width.
- Neglecting to Adjust the Dimple: A dimple adds sophistication to your tie. After tying, pinch the fabric just below the knot to create that desirable dimple. It’s a small detail but can elevate your style significantly!
- Overlooking Maintenance: Wrinkled or stained ties can ruin your look. After wearing, hang your tie or roll it up to preserve its shape. Regularly clean it according to the fabric type to keep it looking fresh.
By avoiding these common mistakes, you’ll tie your tie like a pro and present yourself with confidence. Remember, practice makes perfect, so keep trying until you find what feels best for you!
6. Tips for Choosing the Right Tie for Your Outfit
Choosing the right tie can enhance your outfit and showcase your personal style. Here are some helpful tips to consider:
- Consider the Occasion: Is it a formal event, a business meeting, or a casual outing? For formal events, opt for classic colors like black or navy, while lighter shades or playful patterns can work for more casual settings.
- Match with Your Shirt: The tie should complement your shirt. If your shirt is patterned, choose a solid tie that includes one of the shirt’s colors. Conversely, if you wear a solid shirt, feel free to experiment with patterns!
- Color Coordination: Use the color wheel! Ties in complementary colors can create a striking look, while analogous colors (those next to each other on the wheel) offer a more harmonious vibe. For example, a blue tie can pair beautifully with a light blue shirt and gray suit.
- Fabric Matters: The fabric of your tie can affect your overall appearance. Silks are luxurious and perfect for formal occasions, while cotton ties are more casual and great for summer events.
- Know Your Body Type: Taller individuals might opt for wider ties, while those who are shorter may benefit from narrower ties. Always ensure the tie feels proportional to your frame.
By following these tips, you can confidently choose a tie that not only looks great but also fits the context of your outfit. Remember, a well-chosen tie can be the perfect finishing touch to elevate your overall look!
 admin
admin


