LinkedIn is a fantastic platform for networking, job searching, and professional growth. However, with all its benefits comes a flood of emails that can quickly become overwhelming. If you're finding your inbox cluttered with LinkedIn notifications, you're not alone! In this guide, we’ll explore how to stop receiving emails from
Understanding LinkedIn Email Notifications

LinkedIn offers a myriad of email notifications designed to keep you informed about various activities on the platform. Here’s a quick overview:
- Connection Requests: Notifications when someone wants to connect with you.
- Messages: Alerts about new messages in your LinkedIn inbox.
- Job Alerts: Updates on job postings that match your profile and interests.
- Group Activity: Insights and notifications about discussions and new posts in groups you're a part of.
- Profile Views: Notifies you about who has viewed your profile.
- Birthdays and Work Anniversaries: Reminders about your connections' special milestones.
While these notifications can be helpful, they can also become burdensome, especially if you're trying to keep your inbox organized. The frequency and type of notifications you receive can be managed through your LinkedIn account settings. It’s important to tailor these settings to your preferences, ensuring you only receive the notifications that matter most to you!
To better manage your notifications, LinkedIn allows you to customize the types of emails you receive and how frequently you're updated. This customization helps keep unnecessary emails at bay while ensuring you stay informed about essential activities. Let’s look at how you can tweak these settings for a cleaner inbox!
Steps to Adjust Email Preferences

If you're feeling overwhelmed by emails from LinkedIn, you're not alone. Thankfully, adjusting your email preferences is both simple and effective! Follow these straightforward steps to take back control of your inbox:
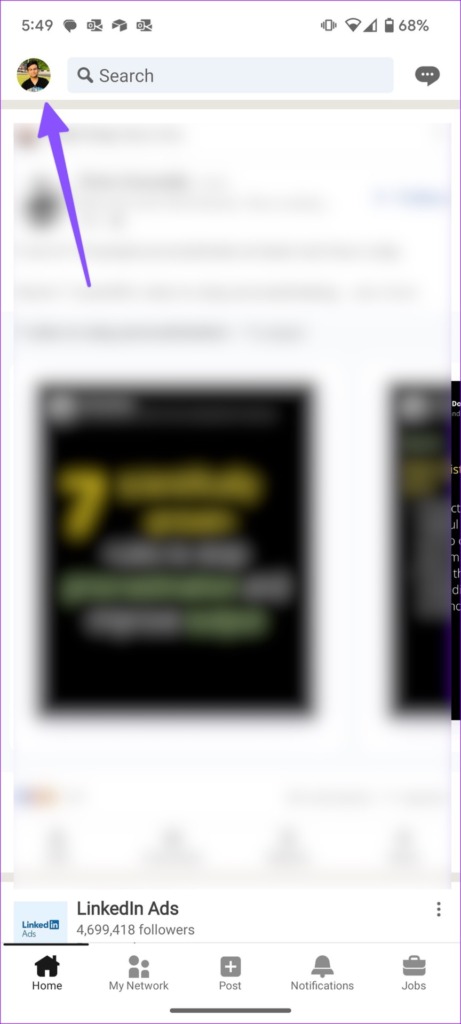
- Log in to Your LinkedIn Account: Start by signing in to your account on the LinkedIn website or app. This is where the magic begins!
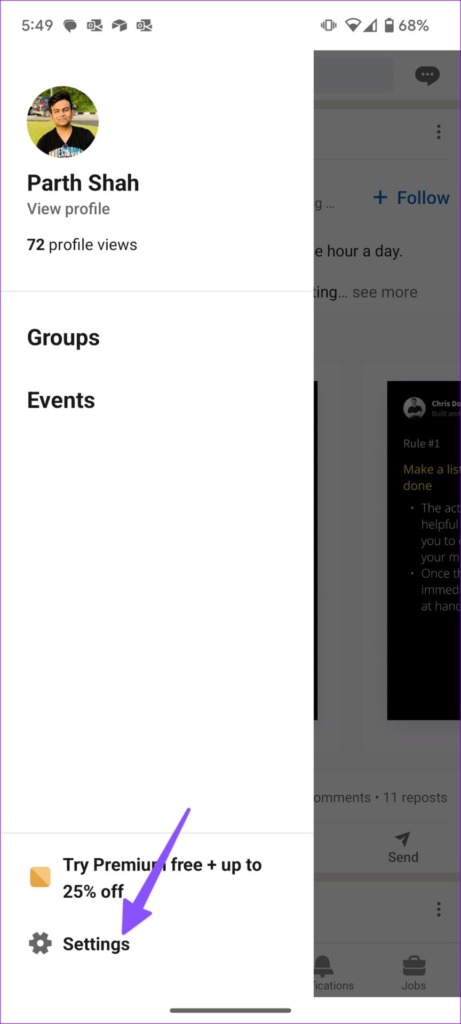
- Access Your Account Settings: Click on your profile picture in the top right corner. A dropdown menu will appear – select “Settings & Privacy.”
- Select the Communications Tab: On the left sidebar, you'll see various options. Click on "Communications." This is where you manage how LinkedIn communicates with you.
- Choose Email Preferences: Look for the "Email" section. Here, you can see all the types of emails LinkedIn sends, from updates about your network to job alerts.
- Uncheck Unwanted Options: Go through the list and uncheck the boxes for any email categories you no longer wish to receive. This could include things like “Daily Updates” or “Weekly Newsletters.”
- Save Your Changes: Make sure to save any adjustments you’ve made. This ensures you’re no longer bombarded with unwanted emails.
And voilà! You’ve successfully tuned your email preferences to your liking. Feel free to revisit these settings whenever you need to re-evaluate what communications are important to you.
Managing Notifications Through LinkedIn Settings
In addition to email preferences, managing notifications is key to staying on top of your LinkedIn experience without feeling overwhelmed. Here’s how to customize your notification settings:
- Go to the Settings Menu: Just like before, click on your profile picture and head back to “Settings & Privacy.”
- Find the Notifications Tab: On the left sidebar, select “Notifications.” This is where all your notification settings will be laid out for you.
- Adjust Your Preferences: You’ll see different categories such as “Connections,” “Posts,” “Mentions,” and more. Click on each category to customize which notifications you would like to receive:
- Turn Off or On Notifications: For each notification type, you can choose to turn it off or set it to the desired frequency. For example, you can select “Only show me notifications that matter” to limit these interruptions.
- Review Your Selection: Once you’ve made your choices, review them to make sure they suit your needs. Don’t hesitate to go back if something feels off!
| Notification Type | Options |
|---|---|
| Connections | Be alerted about new connections, who's viewed your profile, etc. |
| Posts | Get updates when someone comments on or reacts to your posts. |
| Messages | Receive alerts for new messages and messages from LinkedIn's Help team. |
With these adjustments, you’ll be well on your way to a more streamlined and manageable LinkedIn experience. Enjoy connecting without the noise!
5. Using Email Filters to Reduce Inbox Clutter
If you're overwhelmed by the number of emails you receive from LinkedIn, you're not alone. The good news is that you can reclaim your inbox with email filters! Here’s how you can set them up, making your life just a little bit easier.
Using filters allows you to automatically organize incoming emails based on specific criteria. This means that you can either redirect LinkedIn emails straight to a dedicated folder or even archive them, so they don’t clutter your main inbox. Here’s a quick guide on how to get started:
- Gmail:
- Open Gmail and click on the gear icon (⚙️) on the top right.
- Select "See all settings."
- Go to the "Filters and Blocked Addresses" tab.
- Click on "Create a new filter."
- In the “From” field, enter:
@linkedin.com - Choose what you want to do with these emails (e.g., archive, move to a folder).
- Hit "Create filter."
- Outlook:
- Open Outlook and go to the "Home" tab.
- Select "Rules" > "Manage Rules & Alerts."
- Click on “New Rule” and choose an option that suits you.
- Under "Apply rule on messages I receive," choose “from people or public group.”
- Enter
@linkedin.comand set your desired action, like moving the email to a specific folder. - Finish setting up rules and hit “OK.”
These filters can significantly declutter your inbox, allowing you to focus on what really matters. Just remember to check your filtered or archived emails from time to time to stay updated on LinkedIn notifications!
6. Conclusion
Managing your LinkedIn notifications and emails doesn't have to feel like a full-time job! By following the steps we’ve outlined, you can take control of the clutter in your inbox. Remember, it’s all about creating a system that works for you. Whether you decide to adjust your LinkedIn settings, temporarily pause your emails, or use email filters to manage the influx of messages, you have the power to curate your online experience.
Feel free to experiment with different settings until you find what works best. After all, your online network should enhance your professional life, not overwhelm it. So go ahead, make these changes! You’ll thank yourself later when your inbox is more organized and less chaotic. Remember, your time is valuable—spend it on connections and opportunities, not on sifting through unwanted emails!
 admin
admin


