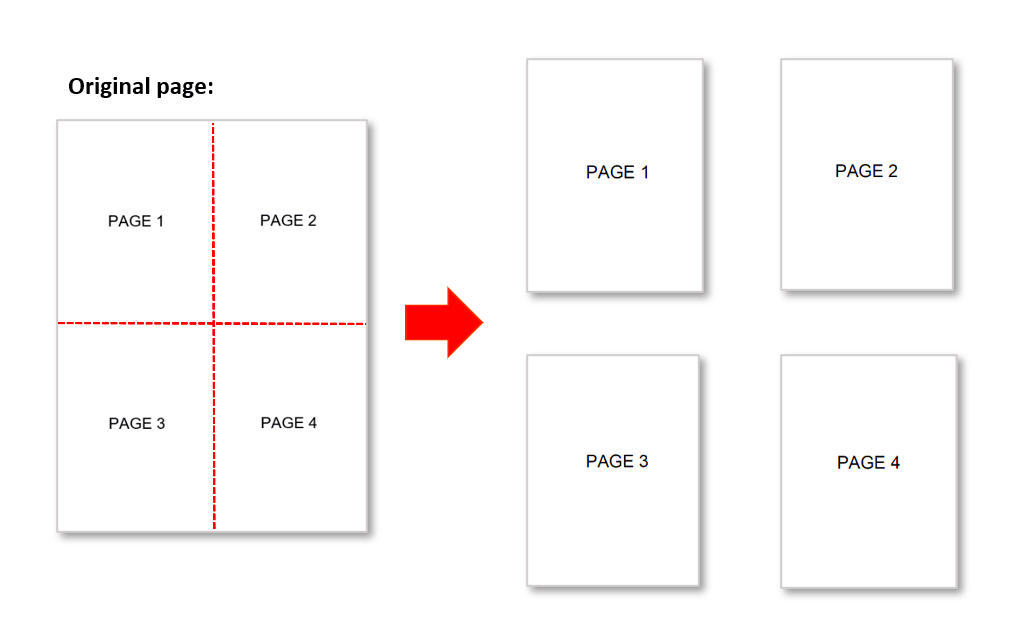
When preparing images for printing, you might notice that large files don’t fit well on standard paper sizes. This is where splitting images comes in handy. By dividing your images into smaller sections, you ensure that they can be printed without losing quality or detail. Additionally, this technique is beneficial for creating larger displays, such as posters or banners, where multiple sheets of paper come together to form one cohesive image.
Another reason to split images is to manage print settings better. Printing large images in one go can lead to issues like paper jams or incorrect color representation. Splitting allows you to adjust each part individually, enhancing the overall print quality.
Choosing the Right Image Editing Software
Picking the right software is crucial for effectively splitting your images. Here are some popular options:
- Adobe Photoshop: A professional tool with extensive features, perfect for detailed image editing.
- GIMP: A free, open-source alternative that offers a range of functionalities similar to Photoshop.
- Paint.NET: User-friendly software suitable for basic editing tasks.
Make sure to choose software that you’re comfortable using. Many of these tools offer tutorials, making it easier for beginners to get started. The right software will help you split images accurately and efficiently, ensuring high-quality prints.
Also Read This: Can You Use a Lumix G Camera to Upload Photos to Alamy
Steps to Split Images for Printing
Splitting images can seem daunting, but it’s quite simple once you know the steps. Here’s a straightforward guide:
- Open Your Image: Launch your chosen software and open the image you want to split.
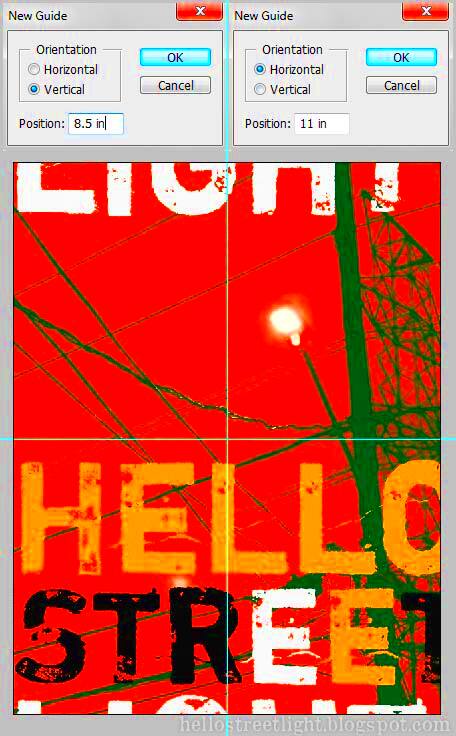
- Set Your Guidelines: Use guides to mark where you want to split the image. This ensures that each section is even and proportionate.
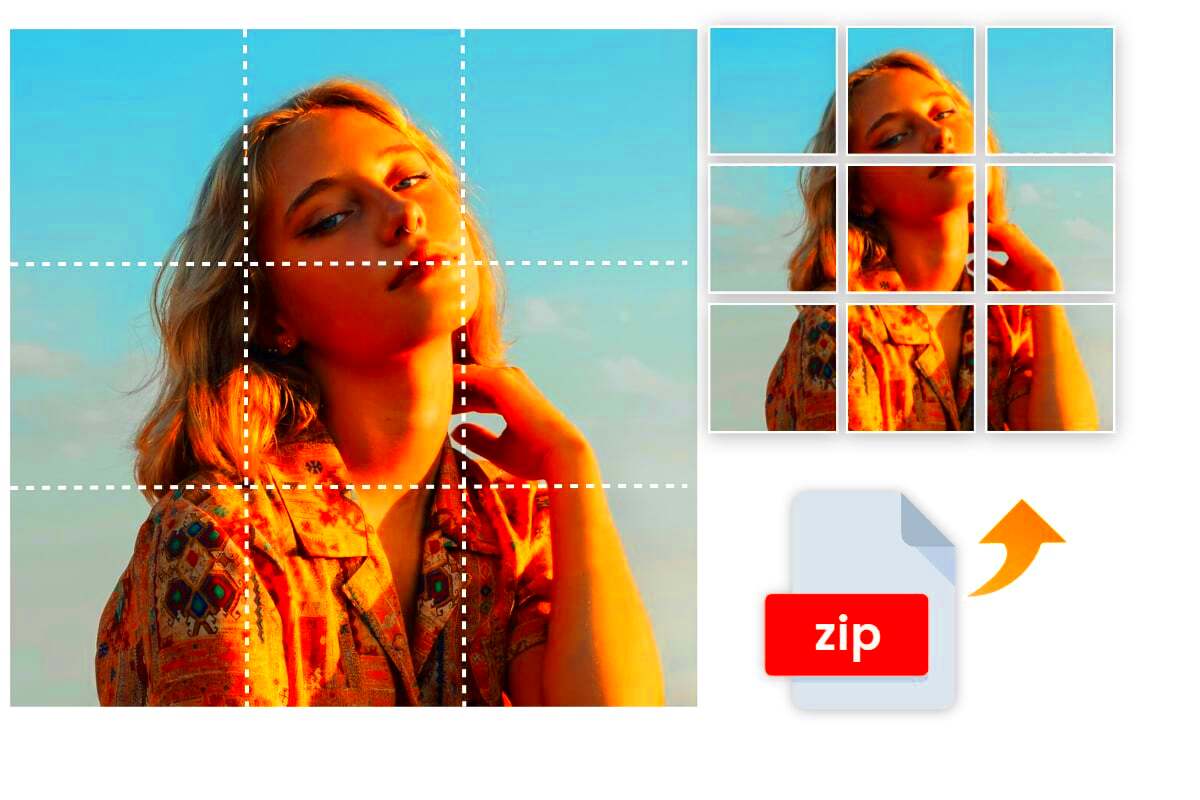
- Use the Slice Tool: Most editing software has a slice tool. Select this and click on the sections you want to create.
- Save Each Section: After slicing, save each section as a separate file. Ensure you maintain high resolution for the best print quality.
By following these steps, you’ll be able to split your images seamlessly and prepare them for printing.
Also Read This: Here’s The Easiest Way to Change Thumbnail Image on Vimeo
Adjusting Image Quality for Print
Getting your image ready for print is more than just splitting it into sections; you need to pay attention to quality as well. High-quality images ensure that your prints look sharp and vibrant. This is crucial, especially if you’re aiming for professional results. Here are some tips to help you adjust your image quality:
- Resolution Matters: Ensure your image has a resolution of at least 300 DPI (dots per inch). This is the standard for high-quality prints.
- File Format: Use formats like TIFF or PNG for better quality. Avoid JPEGs if possible, as they can lose quality during compression.
- Color Mode: Switch your image to CMYK color mode instead of RGB. CMYK is the standard for printing and provides a more accurate color representation.
Before printing, it's wise to preview your image at 100% zoom to check for any imperfections. Making these adjustments will significantly enhance the overall quality of your prints, ensuring they look professional and appealing.
Also Read This: Page Ownership Part II: Claiming an IMDb Page – Essential Steps for Ownership
Using the Right Paper Size and Printer Settings
Choosing the correct paper size and printer settings is vital for achieving the best results. Different projects require different paper types and sizes, so let’s break this down:
- Paper Size: Match your paper size to the final print dimensions. Common sizes include:
- Printer Settings: Adjust your printer settings to match your paper type and quality preferences. This includes selecting:
- Print Quality: Choose “High” or “Best” for optimal results.
- Paper Type: Select the type of paper you are using, such as glossy or matte.
| Size | Dimensions (inches) |
|---|---|
| Letter | 8.5 x 11 |
| Tabloid | 11 x 17 |
| Poster | 24 x 36 |
By ensuring your paper size and printer settings are correct, you will greatly improve the overall appearance of your prints.
Also Read This: Can You Earn Money on Rumble and What Monetization Options Are Available
Finalizing the Split Images for Printing
After splitting your images and adjusting the quality, it's time to finalize everything before hitting the print button. This stage is crucial to ensure that all your hard work pays off. Here’s how to go about it:
- Review Each Split Image: Go through each section carefully. Check for any cropping issues or alignment problems that might affect the final product.
- Save in the Correct Format: Make sure to save each image in a suitable format, like TIFF or PDF, which are great for printing.
- Create a Test Print: Before printing the entire project, do a test print of one section. This helps you catch any last-minute errors.
- Organize Files: Keep your split images organized. Name them sequentially to avoid confusion when printing.
Finalizing these details can make a significant difference in the outcome of your printed images. A little extra care goes a long way in ensuring you achieve stunning results.
Also Read This: How Much Do Contributors Make with Getty Images
Common Mistakes to Avoid When Splitting Images
When it comes to splitting images for printing, it’s easy to overlook some crucial details. Avoiding common mistakes can save you time, money, and frustration. Let’s explore some of these pitfalls and how to steer clear of them:
- Ignoring Resolution: One of the biggest mistakes is not checking the resolution of each split image. Remember, you want at least 300 DPI for high-quality prints. If the resolution is too low, your print will look pixelated.
- Not Using Guides: Failing to use guidelines can lead to uneven splits. Always create guidelines before slicing to ensure each section is proportional and balanced.
- Overlooking Color Mode: If you forget to switch to CMYK color mode, your prints might not match what you see on your screen. Always convert your images to CMYK before printing to achieve accurate colors.
- Skipping Test Prints: Never skip the test print stage! It’s essential to print one section first to check for quality, color accuracy, and alignment issues.
By being aware of these common mistakes, you can ensure your image-splitting process goes smoothly and results in high-quality prints.
Also Read This: How to Put Music on YouTube Videos Without Copyright Issues
Frequently Asked Questions
Here are some common questions people have when it comes to splitting images for printing:
- How do I know if my image is high enough quality? Check the resolution. For prints, aim for at least 300 DPI. You can usually find this information in the image properties.
- Can I split images using free software? Absolutely! Programs like GIMP or Paint.NET offer tools for splitting images without any cost.
- What if my printer doesn’t support large formats? If your printer can’t handle large formats, you can still split the image into smaller sections that fit your printer’s capabilities.
- Is it better to save as TIFF or JPEG? For printing, TIFF is preferable because it retains image quality better than JPEG, which compresses the image.
These FAQs should help clarify some common concerns and guide you through the image-splitting process.
Conclusion
Splitting images for printing may seem like a daunting task, but with the right knowledge and tools, it can be a straightforward process. By understanding the need to split images, choosing the appropriate software, and making the necessary adjustments, you can achieve stunning results. Avoid common mistakes, and don’t hesitate to refer to the FAQs for guidance. With practice, you’ll become more comfortable with this technique, allowing you to create professional-quality prints that capture the essence of your images. Happy printing!
 admin
admin