Have you ever wanted to create eye-catching designs but felt limited by the images you had? Enter image slicing in Canva! This nifty technique allows you to break down images into smaller, manageable pieces, giving you more flexibility and creativity in your designs. Whether you're crafting social media posts, presentations, or marketing materials, learning how to slice images can elevate your projects. Let's dive into the world of image slicing and uncover how it can transform your design workflow!
Why Slice Images?
Slicing images might sound like an advanced technique reserved for graphic designers, but it’s surprisingly accessible and beneficial for everyone. Here’s why you should consider incorporating image slicing into your Canva toolkit:
- Enhanced Creativity: Slicing an image allows you to use segments of it creatively. You can rearrange these slices to create unique layouts. For instance, instead of using a whole image of a sunset, you can slice it into sections to form a collage that draws the eye in various directions.
- Improved Composition: When you slice an image, you gain the ability to manipulate the composition. You can balance elements in your design better, ensuring that your focal point stands out. For example, you might slice a portrait to create an asymmetrical layout that feels more dynamic.
- Better Integration with Text: If you're incorporating text overlays, sliced images can work wonders. You can position text alongside or over slices, creating a harmonious design. This is especially useful for marketing materials where you want to convey a message alongside engaging visuals.
- Faster Loading Times: If you're using images for web design, sliced images can be optimized individually to reduce file sizes. This can lead to faster loading times, improving user experience. Each slice can be saved in the ideal format and size for its specific role.
- Customizable Sizes: Sometimes, you need a specific size for an image element. Slicing gives you the power to create just the right dimensions for your project. Whether it's for an Instagram story or a blog header, you can get exactly what you need without compromising the overall aesthetic.
In summary, slicing images in Canva opens up a world of possibilities. It allows for a more personalized design experience, making your projects not only visually appealing but also functional. So why not give it a try? You might just discover a new passion for design!
Also Read This: Enhancing Your Marketing Campaigns with Photos from Imago Images
3. Getting Started with Canva
Are you ready to dive into the world of graphic design with Canva? It’s super simple and user-friendly, making it the perfect choice for beginners and pros alike. First things first, you need to create an account. Head over to Canva.com and sign up. You can use your email, Google, or Facebook account.
Once you’re in, you’ll be greeted by a clean, vibrant dashboard that features all the tools you need. Here’s a little overview of what to look for:
- Templates: Choose from a myriad of pre-designed templates for everything from social media posts to presentations.
- Elements: Add shapes, icons, and illustrations to enhance your designs.
- Uploads: Bring your own images and assets into the mix.
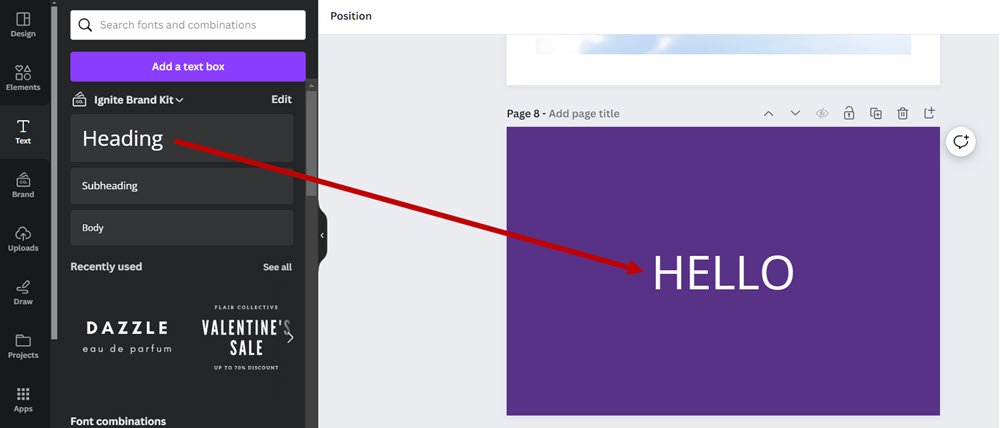
- Text: Play around with different fonts and styles to find the perfect fit.
Canva also offers a handy search bar to help you find images, elements, or templates quickly. Want to slice some images? Great! Let’s make sure you have everything set up for that.
Familiarize yourself with the layout. On the left side, you’ll find the main menu where you can access different features. The editor area is where the magic happens! You can click and drag elements, resize them, and layer them to your heart's content.
Another cool feature is the ability to collaborate with others. You can invite friends or colleagues to work on projects in real time. Just click the "Share" button, and you’re good to go!
Also Read This: Does 123RF Offer a Free Trial? Exploring Options to Access the Platform
4. Step-by-Step Guide to Slicing Images
Now that you’re comfortable with Canva, let’s get into the fun part: slicing images! This technique can help you create stunning visuals that stand out. Here’s how to do it step by step:
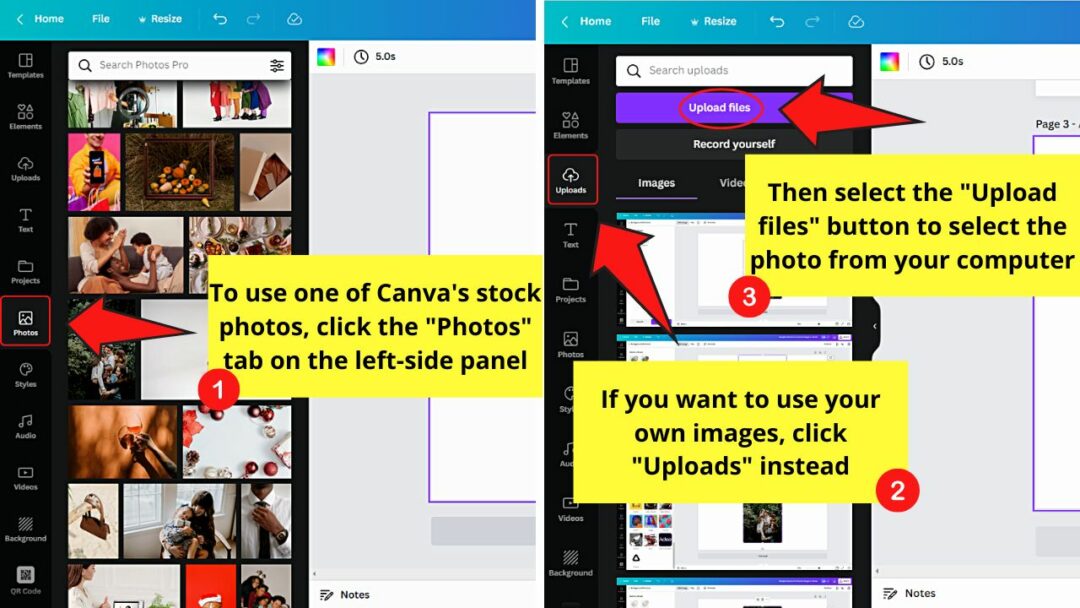
- Select Your Image: Start by choosing the image you want to slice. You can either upload your own image or select one from Canva’s extensive library. Just click on the image to add it to your canvas.
- Crop the Image: Click on the image, and you’ll see a toolbar appear at the top. Select the “Crop” option. Drag the corners or sides of the crop box to slice the image into your desired section. This is where you can get creative!
- Duplicate the Image: After cropping, you’ll want to duplicate the sliced image as many times as needed for your project. Simply right-click on the cropped image and select “Duplicate.” Now you can create multiple slices effortlessly!
- Rearrange Your Slices: Play around with the positioning of your slices. You can drag each one to create dynamic layouts. Try overlapping them or arranging them in a grid for a unique look!
- Add Backgrounds or Effects: To make your design pop, consider adding a background color or texture. You can find these options in the “Elements” section. Don’t be afraid to experiment with different effects!
- Export Your Design: Once you’re happy with your sliced image design, it’s time to share it with the world! Click on the “Download” button at the top right corner. You can choose from various formats like PNG, JPG, or PDF.
And voilà! You’ve successfully sliced an image in Canva. With these new skills, your designs will surely captivate and engage your audience. So, go ahead, unleash your creativity, and have fun with it!
Also Read This: Finding Getty Images for Your Projects and Personal Use
5. Tips for Effective Image Slicing
When it comes to slicing images in Canva, a few tricks can elevate your design game. Here are some pro tips to ensure your image slicing is effective and visually appealing:
- Use High-Quality Images: Always start with high-resolution images. Blurry or pixelated visuals can detract from the overall quality of your design.
- Plan Your Layout: Before slicing, take a moment to sketch or visualize how you want the final design to look. This can save time and effort in the long run!
- Utilize Grids: Canva offers grid options that can help you align your slices perfectly. This ensures that your cutouts are uniform and aligned, making your design look polished.
- Experiment with Different Shapes: Don’t just stick to rectangles! Explore circles, triangles, or custom shapes to add an artistic flair to your images.
- Keep Consistency: Maintain a consistent style across your slices. This could be through color palettes, fonts, or even the themes of the images you choose. Consistency helps in creating a cohesive look.
By incorporating these tips, you’ll enhance the overall impact of your designs and ensure that your image slicing is not just functional but also aesthetically pleasing. Happy designing!
Also Read This: how to know if an image is high res
6. Common Mistakes to Avoid
Even the most seasoned designers can fall into traps when slicing images in Canva. Here are some common pitfalls to watch out for:
- Neglecting Image Proportions: One of the biggest mistakes is not considering the proportions of your images. Stretching images can lead to distortion. Always aim to maintain the original aspect ratio when slicing.
- Overusing Slices: While it might be tempting to slice every image, sometimes less is more. Over-slicing can clutter your design and distract from the main message.
- Ignoring Backgrounds: Failing to consider the background when slicing can lead to awkward gaps or mismatched colors. Ensure that your sliced images harmonize with the overall background of your design.
- Forgetting to Use Layers: Canva allows you to layer images and text. Not utilizing layers properly can result in a flat design. Use layers to create depth and interest.
- Skipping the Preview: Always preview your design before finalizing it. This allows you to spot any inconsistencies or errors that might have slipped through during the slicing process.
Avoiding these common mistakes will help you create stunning designs that make a lasting impression. Keep practicing, and soon enough, slicing images in Canva will feel like second nature!
Also Read This: Exploring the Poorest YouTuber and YouTube’s Least Financially Successful Creators
7. Conclusion: Enhance Your Designs with Image Slicing
Now that you've journeyed through the world of image slicing in Canva, it’s time to embrace how this technique can elevate your design game! By slicing images, you’re not just breaking down a picture into smaller parts; you're creating a dynamic visual experience that captures attention.
Imagine this: you’re working on a social media post or a marketing flyer. Instead of using a full image, you slice it into sections that can be aligned in a grid or layered with text. This approach not only makes your designs more engaging but also allows you to play with negative space, colors, and layouts in a way that feels fresh and modern.
Here are a few quick tips for enhancing your designs:
- Be Creative with Layouts: Experiment with different arrangements of your sliced images to draw the viewer’s eye. Consider overlapping elements or creating asymmetrical designs for a modern look.
- Use Color Wisely: Make sure the colors in your sliced images complement your overall design. You can adjust the brightness and saturation in Canva to ensure harmony.
- Incorporate Text Effectively: Text overlays can add context or a call to action. Just make sure they don’t overshadow your images—balance is key!
So, why not give it a try? With practice, you’ll find that slicing images isn’t just a technique; it’s a creative tool that can transform the way you communicate visually. Get slicing, and watch your designs come to life!
8. FAQs About Image Slicing in Canva
Let’s tackle some of the most frequently asked questions about image slicing in Canva. Whether you’re a newbie or looking to refine your skills, these insights will help you navigate this powerful feature.
Q1: Can I slice any image in Canva?
Absolutely! You can slice any image you upload into Canva, as well as images available in the Canva library. Just keep in mind that the quality of your final design will depend on the resolution of the images you use.
Q2: Will slicing images affect their quality?
Not at all! Slicing images in Canva doesn’t compromise their quality. However, make sure you’re starting with high-resolution images for the best results. Always check the clarity of your sliced sections after you’ve arranged them in your design.
Q3: Can I animate sliced images?
Yes! Canva allows you to add animation effects to your images, including sliced ones. You can create engaging transitions and movements that will make your design pop on platforms like Instagram and Facebook.
Q4: Is there a limit to how many slices I can create?
There’s no strict limit, but keep in mind that too many slices can make your design cluttered. Aim for a clean look with well-spaced slices to maintain visual appeal.
Q5: How do I save my sliced images for later use?
Once you’re satisfied with your design, simply click on the “Download” button in the top right corner. Choose your preferred file format, and Canva will save your design—with all slices included!
With these FAQs in your toolkit, you’re set to dive deeper into the world of image slicing in Canva. Happy designing!
 admin
admin


