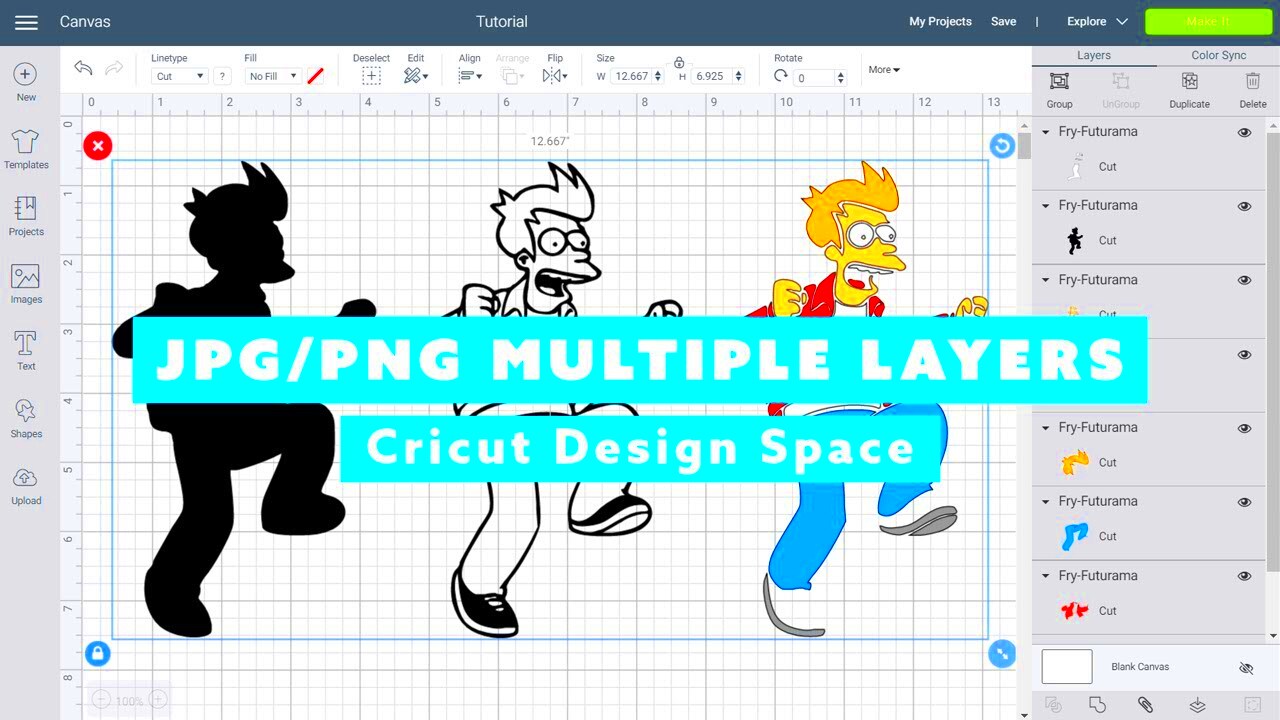
When working with images in Cricut Design Space, separating them into layers is a crucial skill. It allows you to manipulate individual parts of an image separately, giving you full control over your design. Whether you're creating a detailed cut file or just organizing your design for easier adjustments, understanding how to separate images into layers can save you time and help you achieve more professional-looking results.
In this post, we’ll walk you through the steps for separating images into layers and show you how to use the Cricut Design Space tools to their full potential.
Understanding the Cricut Design Space Interface
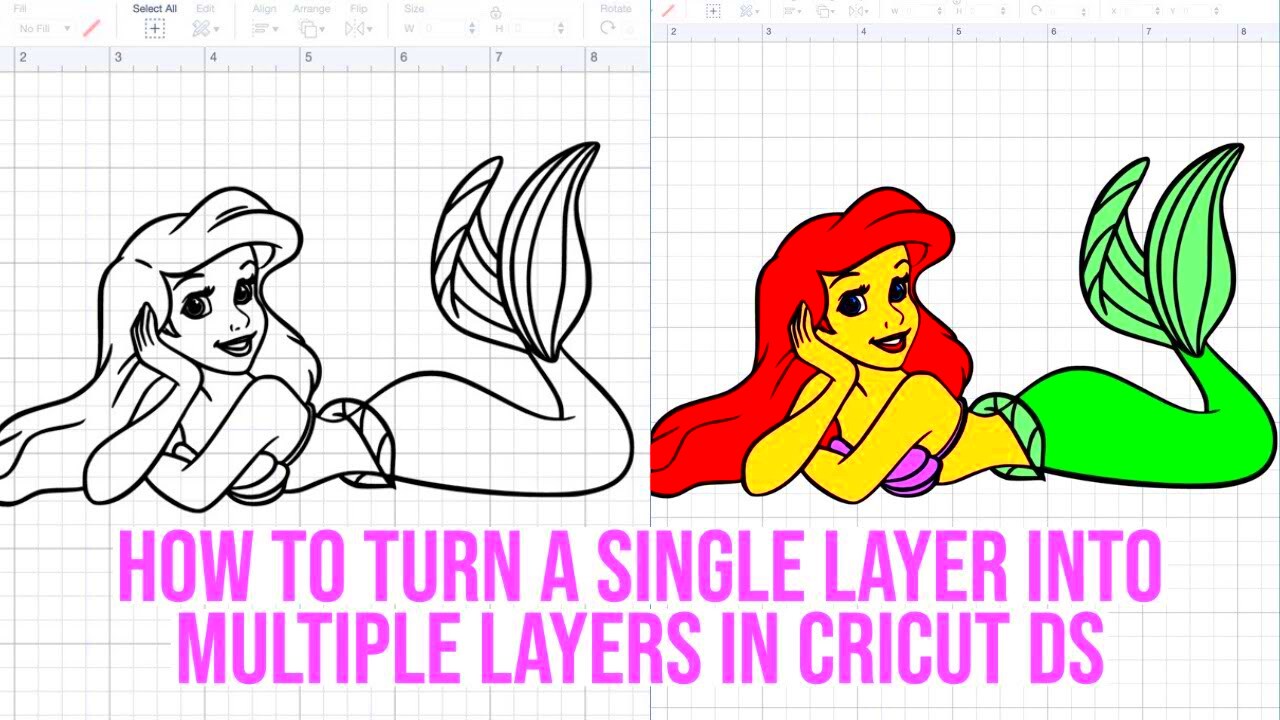
Cricut Design Space can seem overwhelming at first, but once you understand the layout and tools, it becomes easier to navigate. The main interface is divided into several sections:
- Canvas Area: This is where you’ll place and manipulate your designs.
- Toolbar: Located on the left, this is where you’ll find tools for inserting shapes, text, and other design elements.
- Layers Panel: Found on the right, this is where you can view and manage all the layers in your project.
- Menu Bar: Located at the top, this bar contains various options like saving, printing, and more.
Getting familiar with these sections will make it easier for you to separate your images into layers, as the Layers Panel is key to managing each part of your design. You’ll be able to see each layer and decide how to adjust or edit them without affecting the rest of the image.
Also Read This: How to Add an Outline to an Image in Canva for Emphasis
Why Separating Images into Layers is Important for Your Projects
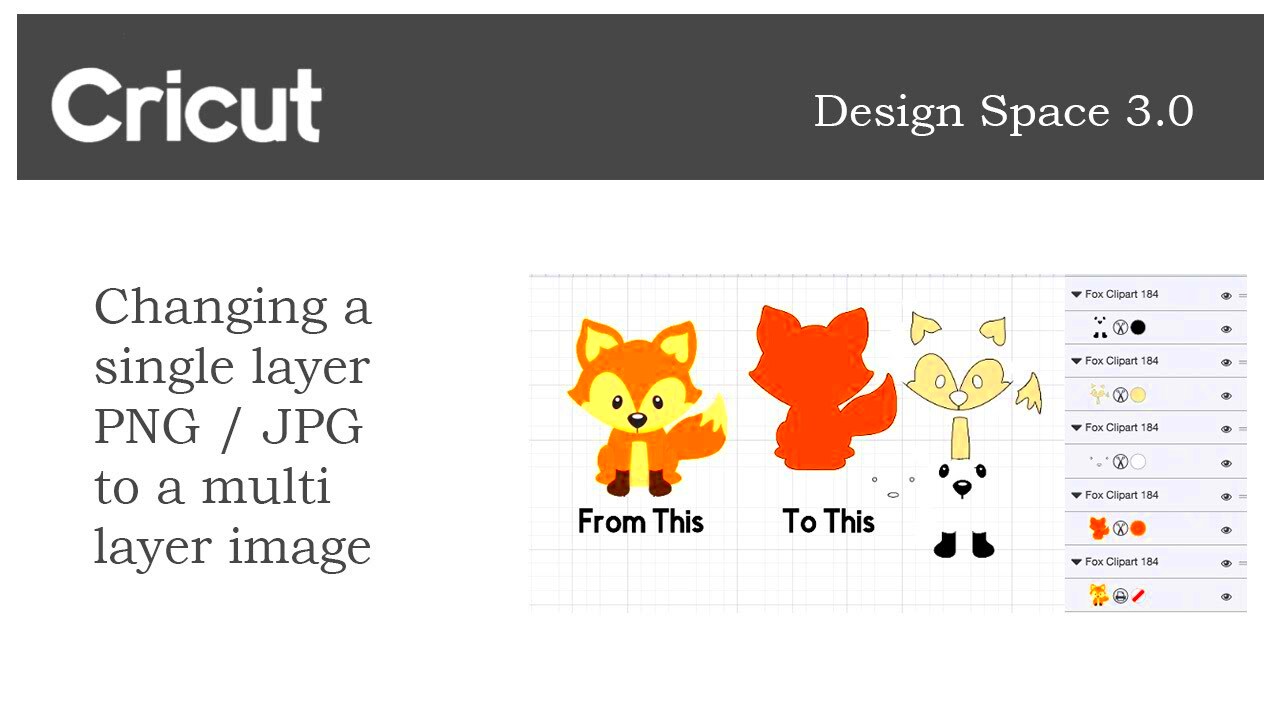
Separating images into layers might seem like an extra step, but it can significantly improve the quality and efficiency of your projects. Here are some reasons why it's important:
- Customization: By separating different elements, you can customize each one individually. For example, you can change colors, add textures, or resize individual parts without affecting the rest of the image.
- Better Control: Working with layers gives you more control over the design. You can hide or show specific elements, making it easier to adjust things as you go.
- Improved Cutting: Cricut machines cut designs based on layers, so having your image properly layered ensures that cuts are made accurately.
- Easy Edits: If you need to make changes to a particular part of your image, you can do so without needing to rework the entire design.
Ultimately, separating images into layers not only makes your designs more flexible but also helps you achieve cleaner, more detailed projects. Whether you’re creating intricate patterns or simply need to organize your work, layers are essential for success in Cricut Design Space.
Also Read This: Top 10 Latest Tips to Creating Instagram Stories
Step-by-Step Guide to Separating Images into Layers
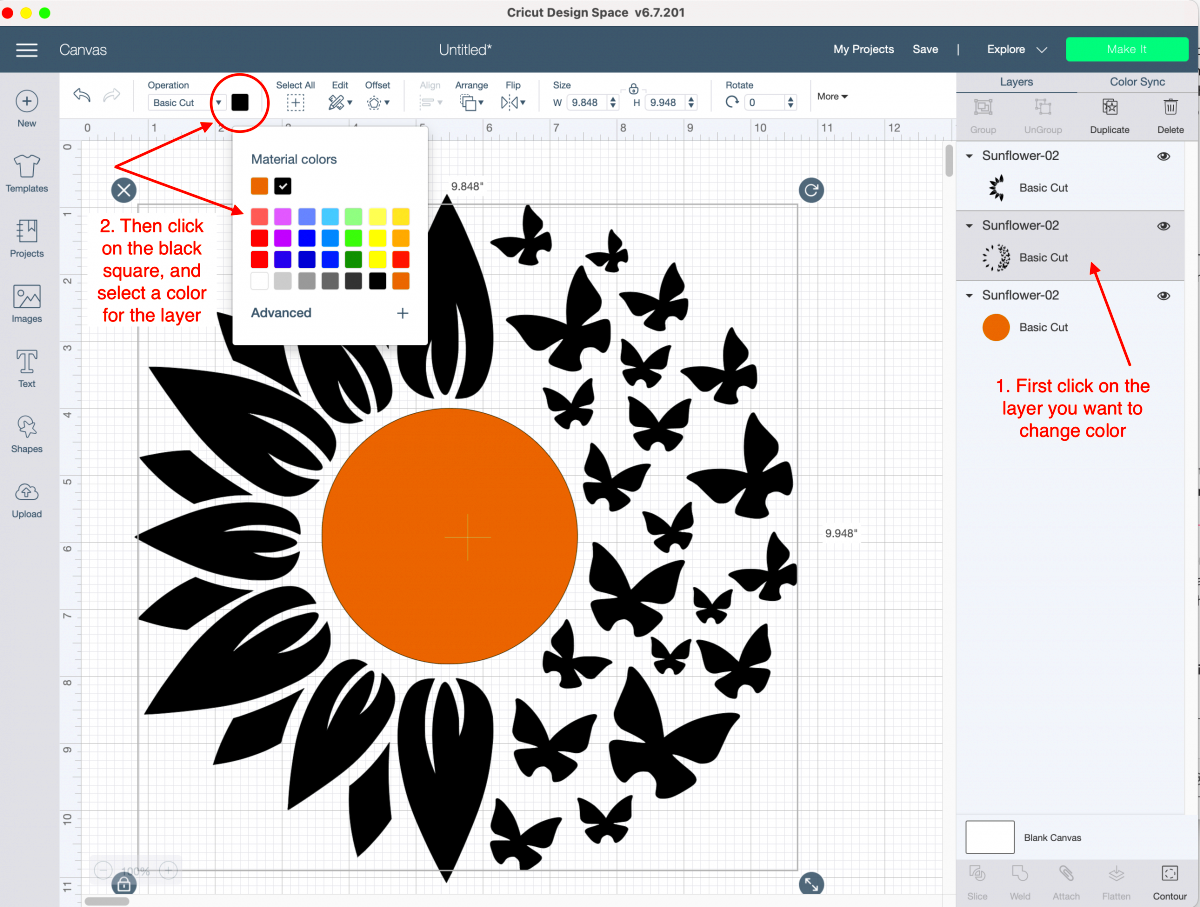
Separating images into layers is a simple process in Cricut Design Space, and once you get the hang of it, you'll be able to handle even the most complex designs with ease. Here's a step-by-step guide to help you get started:
- Upload Your Image: Begin by uploading your image to Cricut Design Space. You can either use the “Upload” button in the left toolbar or drag and drop the file into the canvas.
- Choose the Right Image Type: When uploading, Cricut will ask if your image is a “Print Then Cut” or a “Cut” image. Choose “Cut” if you want to separate elements in the image into layers for cutting.
- Use the “Ungroup” Option: If your image has multiple elements grouped together, click on it and use the “Ungroup” button to separate them. This will allow you to work on each element independently.
- Separate by Color: If your image consists of different colors, each color will automatically be assigned to a separate layer. You can adjust the colors later, but this step helps you organize the different parts of the image right away.
- Move Elements to Different Layers: To move an element to another layer, simply select the element, right-click, and choose “Move to Layer.” This helps in keeping your design organized.
Once your image is separated into layers, you can edit each one individually. Remember, the more organized your layers are, the easier it will be to create a clean, professional design!
Also Read This: Showcasing Products Designed and Assembled in the USA with Images
Using the Contour Tool to Separate Elements
The Contour tool in Cricut Design Space is one of the most powerful features for separating elements within an image. It allows you to hide certain parts of the design, helping you isolate elements or make more precise cuts. Here's how to use the Contour tool effectively:
- Select the Image: First, click on the image you want to work with. Make sure the image is in a single layer for best results.
- Click on the Contour Button: Once selected, you'll see the "Contour" button in the lower-right corner of the Layers Panel. Click on it to open the Contour window.
- Select the Elements to Hide: In the Contour window, you’ll see a list of all the parts of your image. Click on the parts you want to hide (these parts will be removed from the design). This allows you to separate individual elements, such as letters or shapes, from the rest of the image.
- Save Your Contoured Design: Once you’re happy with your adjustments, click "X" to close the Contour window. The hidden parts will remain invisible in your design but can be used later if needed.
The Contour tool is great for eliminating unwanted sections of your image, creating cleaner cuts, and focusing on specific parts of your design. It’s especially useful for complex or multi-colored images that need further refining.
Also Read This: How to Upload a Video to Rumble – A Complete Guide for Content Creators
Using Layers Panel for Organizing Your Design
The Layers Panel is your best friend when it comes to organizing and managing your design in Cricut Design Space. It gives you an overview of every element and layer in your project, making it easier to edit, hide, or move layers as needed. Here’s how to use the Layers Panel to your advantage:
- Open the Layers Panel: The Layers Panel is on the right side of your workspace. If you can’t see it, click the “Layers” button in the upper-right corner of Cricut Design Space to open it.
- View All Layers: Every element of your design, whether it’s text, shapes, or images, will appear as a separate layer in the panel. If you’ve separated elements using the Contour tool, each will appear here as well.
- Rename Layers: To keep things organized, you can rename layers. Right-click on the layer and choose "Rename." Giving layers meaningful names (like "Background" or "Text") makes it easier to find specific elements later.
- Group and Ungroup Layers: If you need to move multiple elements at once, group them together by selecting them in the Layers Panel and clicking “Group.” To separate them, simply click “Ungroup.” This gives you more control over the placement of elements.
- Hide or Lock Layers: You can hide a layer by clicking the eye icon next to it. This is useful when you want to focus on certain parts of your design. If you don’t want a layer to be moved accidentally, you can lock it by clicking the lock icon.
Using the Layers Panel efficiently will save you a lot of time and frustration. It’s an essential tool for making quick adjustments and keeping your design organized, especially when working with multiple layers and elements in Cricut Design Space.
Also Read This: How to Change Layout on Behance Portfolio Mobile Version
Common Issues When Separating Images and How to Fix Them
When separating images into layers in Cricut Design Space, you might run into some challenges. These issues can slow down your design process, but don't worry! Here are some common problems and how to fix them:
- Image Not Uploading Properly: Sometimes images may not upload correctly, especially if they’re too complex or in a non-supported file format. To fix this, make sure your image is in a compatible format (like PNG, JPG, or SVG) and try simplifying the image using an external editor before uploading it to Cricut Design Space.
- Ungrouping Doesn’t Work: If the "Ungroup" option isn’t available or doesn’t work, it could be because the image is still treated as one piece. Try using the “Contour” tool to isolate parts of the image, or check that the image is not locked or grouped incorrectly.
- Missing or Overlapping Layers: Sometimes, layers may disappear or overlap when separating parts of an image. To fix this, check the Layers Panel to make sure each element is placed on a separate layer. If they are overlapping, use the "Arrange" tool to layer elements properly.
- Unwanted Parts Showing After Contouring: After using the Contour tool, some parts of your image might still appear. To fix this, ensure you have clicked the correct areas to hide and make sure you didn’t accidentally leave any unhidden sections.
- Layers Not Cutting as Expected: If your layers aren’t cutting correctly, check to ensure that each element is assigned the correct cut type (e.g., Cut, Write, Score). Also, make sure you haven’t accidentally merged or grouped elements that should be separate for cutting.
By troubleshooting these common issues, you’ll be able to keep your designs on track and ensure your Cricut projects come out as expected.
Also Read This: Is the Greatest Royal Rumble Available for Streaming on Peacock?
Additional Tips for Working with Layers in Cricut Design Space
Working with layers in Cricut Design Space doesn’t have to be complicated. Here are some additional tips to help you work more efficiently and keep your designs organized:
- Use Color to Organize Layers: By assigning different colors to each layer, you can quickly identify different elements in your design. This makes it easier to edit and manage layers when you have a complex design.
- Group Similar Elements Together: If you have multiple elements that will be cut from the same material or color, group them together in the Layers Panel. This helps you stay organized and ensures that you can make changes to related elements at once.
- Lock Layers You’re Not Using: If you’re working with multiple layers and don’t want to accidentally move one, use the lock icon in the Layers Panel. Locking layers prevents them from being edited or moved until you unlock them again.
- Use the Align Tool: The Align tool helps you arrange layers in a neat and organized manner. Use it to center objects, space elements evenly, or align multiple layers on the canvas for a cleaner look.
- Duplicate Layers Before Making Changes: If you plan to make significant changes to a layer, it's a good idea to duplicate it first. This allows you to keep an original version of your design and make changes to a copy, giving you more flexibility.
- Layer Visibility: If your design has many layers, toggle the visibility of layers to work with only the ones you need at the moment. This will make it easier to focus on specific parts of the design and avoid distractions from other layers.
By following these tips, you’ll be able to work smarter, not harder, in Cricut Design Space and make your design process more efficient and enjoyable.
Also Read This: How to Apply Thick Mascara for Lush Voluminous Lashes on Dailymotion
FAQ
Q1: How do I know if my image has been properly separated into layers?
A1: You can check the Layers Panel to see if each element of your image is on its own layer. If they are grouped together, they will appear as a single item in the panel. Use the “Ungroup” or “Contour” tool to separate them into individual layers.
Q2: Can I work with images that are not vector files?
A2: Yes, Cricut Design Space can work with both raster (like JPG and PNG) and vector (like SVG) files. However, vector files are easier to separate into layers and edit. If you're working with a raster file, you may need to use the “Contour” tool or “Image Trace” in another program to simplify it.
Q3: What happens if I accidentally delete a layer?
A3: If you accidentally delete a layer, you can usually undo the action by clicking the “Undo” button at the top of the screen. If you can’t undo, you may need to re-upload the image and start the layering process again.
Q4: Can I change the color of individual layers?
A4: Yes! In the Layers Panel, you can select a layer and change its color by clicking on the color box next to it. This helps you distinguish different layers and ensures that your design is as colorful and accurate as you want.
Q5: How can I save a layered image for future use?
A5: After you’ve separated your image into layers and made your adjustments, you can save the file as a project in Cricut Design Space. You can also export it in formats like SVG or PNG if you want to use it in other software.
Conclusion
Separating images into layers in Cricut Design Space is a powerful skill that can take your projects to the next level. By understanding the interface, using the tools available, and organizing your design efficiently, you can create precise, professional-looking projects. Whether you're working with simple designs or more complex ones, following the steps outlined in this guide will help you overcome common challenges and get the most out of Cricut Design Space. With a little practice, you'll find that separating layers is not only easy but also essential for perfecting your Cricut projects!
