Screen recording YouTube TV can be a handy skill, especially if you want to capture those thrilling moments from live sports or binge-worthy shows. Whether you’re looking to save a memorable scene or just want to share content with friends, understanding how to do it correctly is essential. In this guide, we'll walk you through the process, ensuring you’re well-equipped to record your favorite live content without a hitch. Let’s dive into the nitty-gritty!
Understanding the Legality of Screen Recording
Before you hit that record button, it's crucial to understand the legal implications of screen recording content from YouTube TV. The legality can be a bit of a gray area, and it varies depending on a few factors:
- Copyright Laws: Most content on YouTube TV is protected under copyright laws. This means that recording and redistributing it without permission could lead to legal trouble.
- Personal Use: Generally, recording for personal use falls into a more lenient category. If you're capturing a show to watch later on your own time, you might be in the clear.
- Sharing Recorded Content: Sharing your recordings on platforms like social media or YouTube is where things can get tricky. If the original content creators or companies find out, they could issue copyright claims against you.
- YouTube TV’s Terms of Service: Always check the terms of service. YouTube TV has specific rules regarding recording content that you should adhere to. Violating these could lead to account suspensions or bans.
In summary, while screen recording for personal use can often be permissible, sharing or redistributing that content may infringe on copyright laws. Always err on the side of caution and consider the original creators’ rights. If in doubt, it’s wise to seek out legal advice or permissions where necessary.
Also Read This: Downloading Audio from YouTube Videos: Methods and Tips
Essential Tools for Screen Recording
When it comes to screen recording YouTube TV, having the right tools can make a world of difference. Here’s a quick rundown of essential tools that can help you capture your favorite live content effortlessly:
- Screen Recording Software: Choose a reliable screen recorder like OBS Studio, Camtasia, or Bandicam. These programs offer various features, such as customizable recording settings and editing capabilities.
- Quality Microphone: If you plan on adding commentary or capturing audio from your device, invest in a good microphone. A USB condenser mic can significantly improve your audio quality.
- Video Editing Software: After recording, you might want to edit your footage for a polished look. Programs like Adobe Premiere Pro or even simpler tools like iMovie can help you trim, cut, and refine your recordings.
- Sufficient Storage Space: Screen recordings can take up a lot of space, especially with high-quality settings. Ensure you have enough storage on your device or an external hard drive to avoid interruptions.
- Stable Internet Connection: A reliable internet connection is crucial for uninterrupted streaming and recording. Consider using a wired connection for better stability.
With these tools in hand, you’ll be ready to start capturing your favorite moments on YouTube TV without any hitches!
Also Read This: Why Can’t I See YouTube Comments? Understanding Comment Visibility Issues on YouTube
Step-by-Step Guide to Screen Recording YouTube TV
Ready to dive into capturing your favorite shows on YouTube TV? Follow this simple step-by-step guide to ensure you don’t miss a moment:
- Install Screen Recording Software: Download and install your chosen screen recording software. OBS Studio is a popular choice because it’s free and feature-rich.
- Open YouTube TV: Launch YouTube TV in your web browser or app. Make sure you’re logged in and have your desired content ready to play.
- Configure Recording Settings: Open your screen recorder and adjust settings such as resolution, frame rate, and audio input. For better results, set the resolution to match your screen.
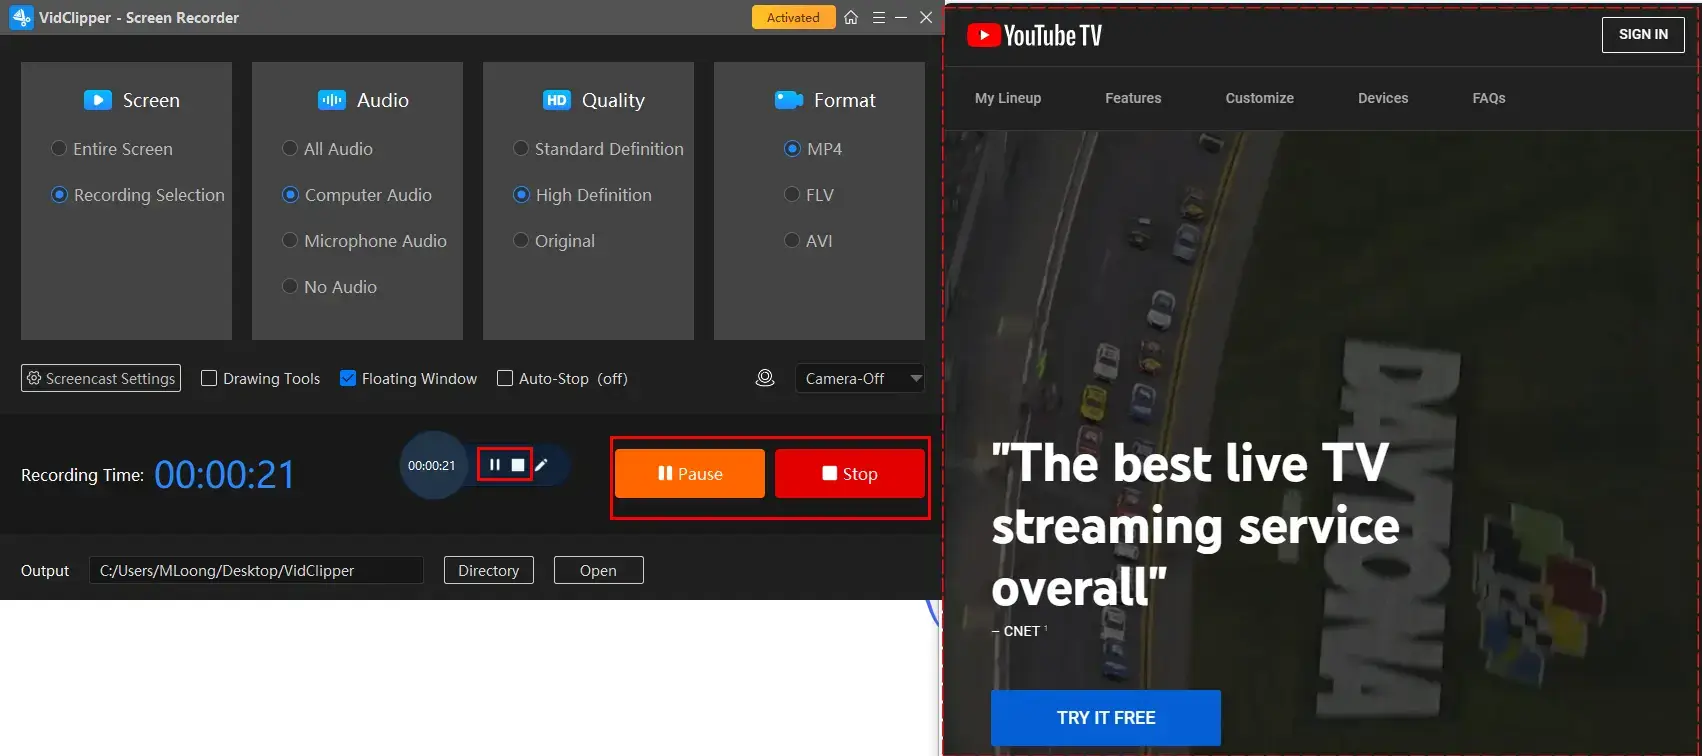
- Start Recording: Hit the record button on your software before starting your YouTube TV content. Ensure that it’s capturing the right window or screen area.
- Monitor Your Recording: Keep an eye on your recording software to ensure everything is running smoothly. You might want to have a timer or clock nearby to catch any time-sensitive content.
- Stop Recording: Once you’ve captured what you need, stop the recording. Most software will allow you to save the video file directly.
- Edit Your Recording (Optional): If you want to enhance your video, open it in your video editing software and make any necessary adjustments.
- Save and Share: Finally, save your edited video and share it with friends or upload it online!
By following these steps, you’ll successfully record YouTube TV content and enjoy it anytime you want! Happy recording!
Also Read This: How to Open and Play MOV Files from Depositphotos
Editing and Saving Your Recorded Videos
Once you've successfully recorded your YouTube TV content, the next step is editing and saving those videos. This is an exciting part where you can enhance the quality, cut out unnecessary segments, or even add fun effects. Here’s a simple guide to get you started:
- Select Your Editing Software: Depending on your comfort level, you can choose from free options like iMovie or Windows Movie Maker, or more advanced software like Adobe Premiere Pro or Final Cut Pro.
- Import Your Video: Open your editing software and import the recorded video file. Most programs allow you to drag and drop files directly into the project.
- Edit Your Video: Use the editing tools to trim any unnecessary footage, add titles, or insert music. You can also adjust the brightness and contrast to improve visual quality.
- Preview Your Edits: Always preview your edits to ensure everything flows smoothly. Look out for any abrupt cuts or awkward transitions.
- Export Your Video: Once you're happy with the edits, it's time to save your masterpiece. Choose the desired format (like MP4 for compatibility) and quality settings before exporting.
Saving your edited video properly is crucial. Make sure to keep a backup in case you want to revisit it later. You can also upload it to a platform like YouTube or Vimeo for sharing with friends!
Also Read This: How to Easily Record Audio from YouTube Videos
Troubleshooting Common Issues
When screen recording YouTube TV, you might encounter some hiccups. But don’t worry! Here are some common issues and how to solve them:
| Issue | Solution |
|---|---|
| Recording Fails to Start | Check your recording software settings or ensure that you have permission to capture the screen. |
| Video Quality is Poor | Adjust the recording resolution settings before starting a new recording. |
| Audio is Missing | Ensure that the audio capture option is enabled in your recording software settings. |
| Long Render Times | Try closing unnecessary applications to free up processing power or reduce the video quality during export. |
If you encounter any other issues, checking forums specific to your recording software can also provide helpful tips. Remember, patience is key, and often, a simple restart can resolve many technical difficulties!
How to Screen Record YouTube TV - A Guide to Capturing Live Content
Screen recording YouTube TV can be a great way to capture live events, shows, or clips that you want to save for later viewing. Whether you're interested in sports, news, or your favorite series, it’s essential to follow the right steps to ensure high-quality recordings. Below is a comprehensive guide to help you screen record YouTube TV effectively.
Before you begin, make sure you have:
- A device capable of screen recording (PC, Mac, smartphone, or tablet).
- A stable internet connection to avoid interruptions.
- Permissions to record the content if required by law.
Here’s a step-by-step process to screen record on various platforms:
| Device | Method |
|---|---|
| Windows PC | Use the built-in Xbox Game Bar (Windows + G) or third-party software like OBS Studio. |
| Mac | Use the built-in QuickTime Player (File > New Screen Recording). |
| iPhone/iPad | Enable Screen Recording in Settings > Control Center, then tap the record button. |
| Android | Use the built-in screen recorder or apps like AZ Screen Recorder. |
When recording, remember to:
- Adjust audio settings to capture both system and microphone audio.
- Test your recording setup before capturing important content.
- Check the storage space available on your device.
Once you finish recording, you can edit and share your clips as needed, but always keep in mind the copyright implications of sharing recorded content.
Conclusion: Screen recording YouTube TV is a straightforward process that can enhance your viewing experience, allowing you to save and share your favorite moments. Just follow the guidelines above, and you'll be all set to capture your live content seamlessly.
 admin
admin


