Downloading YouTube videos has become a common need for many users, whether for educational purposes, offline viewing, or simply to save a favorite clip. One of the most effective ways to store these videos is on a USB drive, allowing for easy transport and access across various devices. In this post, we'll guide you through the process, covering everything from understanding the downloading options to actually transferring the videos to your USB drive. Let’s dive in!
Understanding YouTube Video Downloading

Before we start downloading YouTube videos, it's crucial to understand the entire process and the legal implications involved. Here's what you need to know:
- Why Download Videos? Many people download videos for various reasons, such as:
- Offline viewing when there’s no internet connection
- Educational purposes, such as saving tutorials or lectures
- Archiving favorite content for future enjoyment
- Legal Considerations It's essential to be aware of YouTube's Terms of Service. Here’s a summary:
- Downloading videos without permission from the content owner is against YouTube's policies.
- Many content creators offer licenses for download; make sure to respect their rights.
- Downloading Methods There are various ways to download YouTube videos:
- Online Video Downloaders: Websites that allow you to input a YouTube URL and download directly.
- Desktop Software: Dedicated programs that can give you additional features like batch downloading.
- Browser Extensions: Adding a feature to your web browser to enable downloading with a click.
- Formats and Quality When downloading a video, you will often have the choice between different formats (like MP4, AVI, etc.) and various quality options (720p, 1080p, 4K).
- Saving to USB Once you download the video, transferring it to a USB drive is a straightforward process, which we’ll cover in the later sections.
Understanding these aspects will make the downloading process much smoother and more enjoyable. Let's move forward to explore how to actually download videos from YouTube!
3. Required Tools and Software

To save a YouTube video to a USB drive, you’ll need a few tools and software applications. Don't worry, they're usually pretty simple to get hold of! Let’s break it down:
- Video Downloader Software: You'll first need a reliable video downloader. There are plenty of options out there, both free and paid. Some popular choices include:
- 4K Video Downloader
- YTD Video Downloader
- Freemake Video Downloader
- USB Drive: Obviously, you need a USB drive with enough storage. Make sure to check the space available, as videos can range in size. A 16GB drive should suffice for multiple videos.
- Internet Connection: A stable internet connection is crucial, especially if you're downloading larger files or multiple videos.
- Compatible Device: The device you use to download videos or transfer them to the USB drive should have USB ports — whether it’s your laptop or desktop computer.
Once you've got these essentials ready, you're all set to start downloading videos and saving them onto your USB drive!
4. Step-by-Step Instructions to Download a YouTube Video
Now let’s dive into the nitty-gritty of actually downloading your favorite YouTube videos. Follow these easy steps, and you’ll have that video saved to your USB drive in no time!
- Choose a Video Downloader: Open your preferred video downloader software. If you haven’t installed one yet, go ahead and download it from the official website.
- Copy Video URL: Navigate to YouTube and find the video you’d like to save. Copy the URL from the address bar at the top of your web browser.
- Paste the URL: Go back to your video downloader, and you should see an option to paste the URL. Click on it and paste the copied link.
- Select Format and Quality: Most downloaders allow you to choose the format (MP4, MKV, etc.) and quality (720p, 1080p, etc.) you want. Pick what suits you best!
- Download the Video: Hit the Download button to start downloading the video. Wait patiently as it processes.
- Prepare the USB Drive: Once the video is downloaded, plug in your USB drive. (Make sure it’s formatted correctly for your device if needed.)
- Transfer the Video: Locate the downloaded video on your computer and then drag it to your USB drive folder. Release it and let it copy over.
- Safely Eject the USB Drive: After the transfer is complete, don’t forget to safely eject your USB drive to avoid any data loss.
And voila! You’ve successfully downloaded a YouTube video to your USB drive. Now you can enjoy your videos offline, anywhere you go!
Transferring the Video to a USB Drive
Alright, so you've downloaded your favorite YouTube video, and now it's time to transfer it to your USB drive. This step is pretty straightforward, and I promise you won’t need a degree in tech for this! Here’s how you can do it:
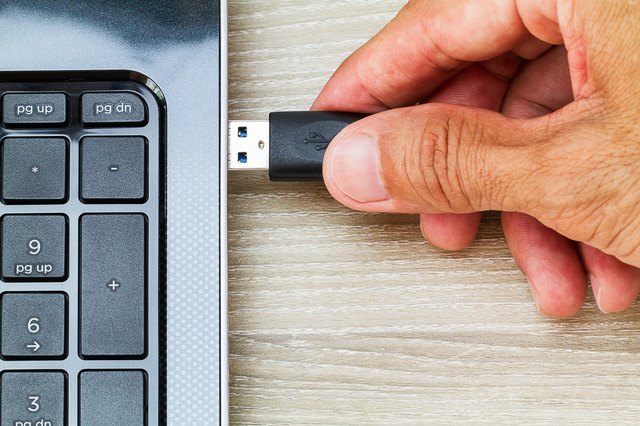
- Plug in Your USB Drive: First things first, take your USB drive and plug it into the USB port of your computer. You'll usually hear a beep, or see a notification that your computer recognizes it.
- Locate the Video File: Open the folder where you downloaded your YouTube video. Most likely, it's in your Downloads folder unless you've saved it somewhere else.
- Select the Video: Click on the video file to highlight it. If you want to transfer multiple files, hold down the Ctrl key (or Cmd on Mac) while clicking on each video.
- Copy the Video: Right-click on the highlighted file(s) and select Copy from the context menu.
- Access Your USB Drive: Open File Explorer (Windows) or Finder (Mac) and look for your USB drive. It’s usually listed under This PC or Devices.
- Paste the Video: Open the USB drive folder, right-click in an empty space, and select Paste. Voilà! Your video is now being transferred!
Once the transfer is complete, give it a moment for your computer to finish the process, and you're done! You can safely eject your USB drive and watch your videos on any compatible device.
Troubleshooting Common Issues
Even though transferring videos to a USB drive is generally smooth sailing, sometimes things can go a little haywire. Don’t stress; troubleshooting is usually just about a few simple checks. Here are some common issues and how to solve them:
- USB Drive Isn’t Recognized:
If your computer doesn't see your USB drive, try these steps:
- Ensure it's properly plugged in.
- Try another USB port.
- Check if the drive works on another computer.
- Insufficient Space on USB:
If you get an error saying there's not enough space, check the storage on your USB drive:
- Right-click on the USB drive in File Explorer/Finder.
- Select Properties and see how much space is left.
- You might need to delete some old files to free up space.
- File Format Issues:
If you can't play the video from your USB drive, it may be a format issue. Make sure your video files are in a format supported by the device you’re using to play them, like MP4 or AVI.
If you run into any other issues, try unplugging and replugging the drive, or restarting your computer. Most importantly, don't give up—you're doing great!
How to Save a YouTube Video to a USB Drive
Saving a YouTube video to a USB drive can be useful for offline viewing or sharing with friends. This process involves downloading the video from YouTube onto your computer and then transferring it to your USB drive. Here’s a step-by-step guide on how to do this efficiently:
Step 1: Downloading the YouTube Video
Before saving the video to your USB drive, you need to download it first. Here are some methods:
- Using a Video Downloader:
Several software applications and websites allow you to download YouTube videos. Popular options include:
- YTD Video Downloader
- 4K Video Downloader
- ClipGrab
- Browser Extensions:
Extensions like Video DownloadHelper can directly help you download videos as you watch them.
Step 2: Transferring to USB Drive
Once the video is downloaded, follow these steps to save it to your USB drive:
- Insert your USB drive into an available USB port on your computer.
- Open File Explorer (Windows) or Finder (Mac).
- Locate the downloaded video file.
- Drag and drop the video file to the USB drive folder or use the copy-paste method.
Step 3: Ejecting the USB Drive
After transferring the video, safely eject the USB drive:
- Windows: Right-click on the USB drive in File Explorer and select 'Eject.'
- Mac: Right-click on the USB drive in Finder and select 'Eject.'
By following these steps, you can easily save and carry your favorite YouTube videos on a USB drive for easy access anywhere. Just remember to respect copyright laws and only download videos when you have permission.
In conclusion, saving YouTube videos to a USB drive is a straightforward process that can enhance your viewing experience and provide portability options, making it easier to share content with others.


