The Snipping Tool is a simple yet powerful utility that comes pre-installed on Windows devices. It allows users to capture screenshots quickly, edit them, and save or share the files effortlessly. Whether you need to grab a full-screen shot or just a small portion, the Snipping Tool is a go-to tool for many users. Though it's mainly known for capturing images, you can also make minor edits like rotating, cropping, or annotating your snips.
Why Rotate Images in Snipping Tool?
Rotating an image might seem like a minor task, but it can make a big difference in how your image is presented. You may need to rotate images for several reasons:
- Correcting Orientation: Sometimes, an image is captured at an awkward angle or upside-down, and rotating it ensures it looks right.
- Better Composition: Rotating can improve the visual balance of an image, making it more appealing to the viewer.
- Fitting into Layouts: If you're inserting an image into a document or a presentation, rotating it can help it fit the layout better.
The Snipping Tool offers a quick and straightforward way to rotate images without needing to open them in another program. This can save time, especially for users who are not looking to make more advanced edits.
Also Read This: How to Sell Photos Through Getty Images and Start Earning Income
Step-by-Step Guide to Rotating Images
Rotating an image in the Snipping Tool is easy. Follow these steps to rotate your snip:
- Open the Snipping Tool: Search for "Snipping Tool" in the Start menu and launch the application.
- Capture Your Snip: Choose the type of snip you want—free-form, rectangular, window, or full-screen—and capture the desired area.
- Click on the "Edit" Option: After capturing the snip, click on the "Edit" option from the toolbar at the top of the window.
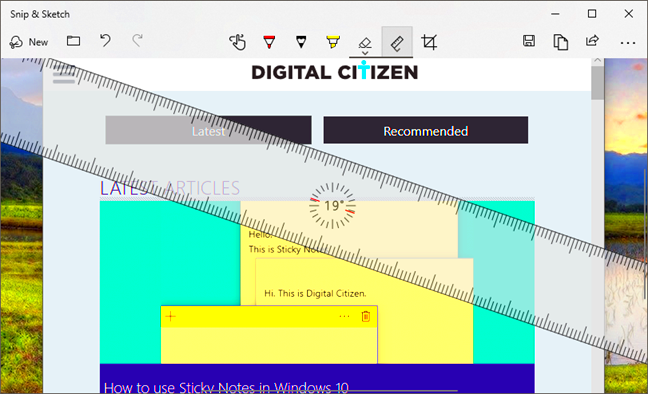
- Select Rotate: From the editing options, click on the rotate icon or option (usually represented by a circular arrow).
- Rotate the Image: You can rotate the image by 90 degrees clockwise or counterclockwise. Keep clicking until the image is in the desired orientation.
- Save the Snip: Once the image is correctly oriented, save it by clicking "File" and then selecting "Save As."
That's it! You’ve successfully rota
Also Read This: Saving a Freeform Shape as an Image
Tips for Perfect Image Rotation
Rotating an image seems simple, but to get the best results, it’s important to consider a few tips. Rotating an image can affect its appearance, so taking a little extra care ensures it looks great after the change. Here are some tips to achieve the best results:
- Check Image Quality: Make sure your image is high resolution before rotating. Rotating low-quality images can cause them to become blurry or pixelated.
- Use Small Rotations When Necessary: Instead of rotating by large degrees (like 90 or 180), sometimes a slight rotation (like 10-20 degrees) can make the image look more natural, especially for correcting minor tilts.
- Maintain the Aspect Ratio: When rotating, ensure the image's proportions remain balanced. Stretching or squeezing the image can distort the content.
- Preview Before Saving: Always preview your rotated image before finalizing the changes. Make sure it's oriented correctly and looks as you want it to.
- Save a Backup: Before rotating, it's a good idea to save a copy of the original image, just in case you need to revert the changes.
By following these simple tips, you'll have perfectly rotated images that look natural and fit your project.
Also Read This: How to Remove Getty Images Watermark Easily
Common Issues While Rotating Images
While rotating images seems straightforward, some common issues can arise that may affect the final result. Being aware of these problems can help you avoid frustration:
| Issue | Cause | Solution |
|---|---|---|
| Image Quality Loss | Rotating the image multiple times or on a low-resolution file | Start with a high-resolution image and avoid unnecessary rotations. |
| Cropping During Rotation | Rotation can lead to unwanted cropping of edges | Ensure the image has enough space around the subject to prevent losing important parts. |
| Distorted Aspect Ratio | Rotating and then resizing can cause the image to stretch or compress | After rotation, check the dimensions and avoid unnecessary scaling. |
| Incorrect Orientation | Rotating the image in the wrong direction | Preview the image after each rotation to ensure it's correct before saving. |
By understanding these common problems and their solutions, you can avoid mistakes and ensure your images come out just the way you want them.
Also Read This: Play YouTube Videos Backwards for a Fun New Experience
Alternative Tools for Rotating Images
While the Snipping Tool is convenient, it's not the only option available for rotating images. If you need more advanced features or are working with different formats, here are some alternatives to consider:
- Microsoft Paint: Another built-in Windows tool, Paint allows you to rotate images with more control. You can also resize, crop, and make additional edits all in one place.
- Photos App (Windows): The default Photos app offers quick and easy rotation, along with the ability to enhance and edit images without opening a separate program.
- GIMP: This free and open-source image editor provides professional-grade tools, including precise rotation, scaling, and transformation options. Ideal for users who need more control over their images.
- Online Image Editors (e.g., Pixlr, Fotor): If you don't want to download software, web-based editors like Pixlr and Fotor allow for easy rotation along with various other editing features.
- Adobe Photoshop: For advanced users, Photoshop offers the most comprehensive editing features, including precise rotation, but it may be overkill for simple tasks.
Each tool has its strengths, so depending on your needs, you may find these alternatives more suitable for certain projects. They offer more advanced options that go beyond the basic functions of the Snipping Tool.
Also Read This: Are iStock Video Previews Equal in Quality to Purchased Videos
Frequently Asked Questions
Here are some common questions users have when it comes to rotating images in the Snipping Tool:
- Can I rotate images at custom angles in the Snipping Tool?
- Does rotating an image in Snipping Tool reduce its quality?
- Can I rotate part of an image instead of the entire image?
- What image formats are supported by the Snipping Tool for rotation?
- Can I undo a rotation in the Snipping Tool?
Unfortunately, the Snipping Tool only allows rotations in increments of 90 degrees. For custom angle rotations, you’ll need to use other software like Microsoft Paint or an online editor.
Generally, rotating an image by 90 degrees doesn’t result in quality loss. However, repeatedly rotating an image or saving it in a compressed format can degrade its quality. To avoid this, work with a high-resolution
No, the Snipping Tool only allows you to rotate the entire image. If you want to rotate a specific section of the image, you’ll need to use more advanced tools like GIMP or Adobe Photoshop.
The Snipping Tool supports common image formats such as PNG, JPEG, and GIF. If you need to work with other formats, consider using a dedicated image editor like GIMP or Photoshop.
Yes, you can undo a rotation by using the "Undo" button (Ctrl+Z) right after you rotate the image. However, once you save and close the image, you cannot undo the changes.
Conclusion
The Snipping Tool is a simple, built-in solution for quick tasks like rotating images, but it does have its limitations. If you need more control or custom angles, other tools like Microsoft Paint or GIMP can be better options. Still, for everyday use, the Snipping Tool offers convenience and ease of use for basic edits.
 admin
admin


