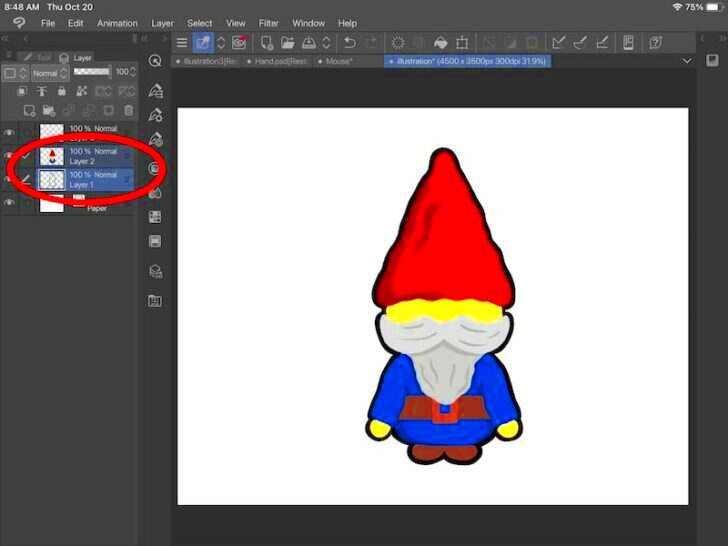
Resizing images is an essential skill for any digital artist or designer, especially when working with Clip Studio Paint. Whether you're adjusting your artwork to fit a specific canvas or optimizing it for print or web, resizing helps you get the exact dimensions needed without compromising on quality. Clip Studio Paint offers intuitive tools to resize images effectively, making it easy to tailor your project to the right size. In this guide, we'll walk through the basics and importance of resizing images in this powerful software.
Why Resizing Images is Important in Clip Studio Paint
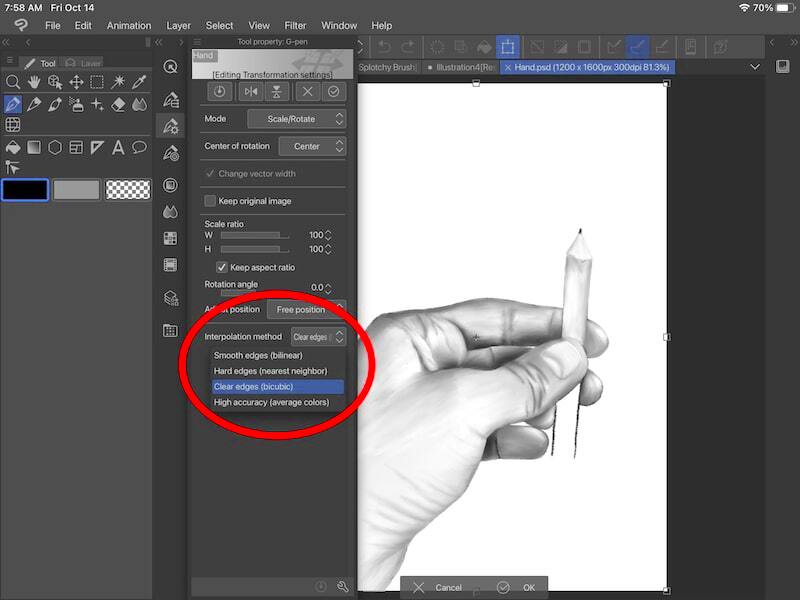
Resizing images in Clip Studio Paint isn’t just about changing the size of an image. It directly impacts the quality, resolution, and presentation of your work. Here's why it’s crucial:
- Maintaining Quality: Resizing allows you to keep the image sharp and clear without pixelation.
- Fitting to Canvas: Adjusting image dimensions ensures your artwork fits perfectly within a canvas of a specific size.
- Optimizing for Print and Web: Different platforms require different image resolutions. Resizing helps you optimize the artwork for print or digital formats.
- Faster Editing: Smaller images are easier to work with, and resizing can help streamline your workflow.
- Preparing for Different Devices: Resizing can also ensure that images look good on different screen sizes, whether it's for a mobile phone or a large display.
Also Read This: How to Create Beautiful Curls at Home with This DIY Hair Tutorial
Steps to Resize an Image in Clip Studio Paint
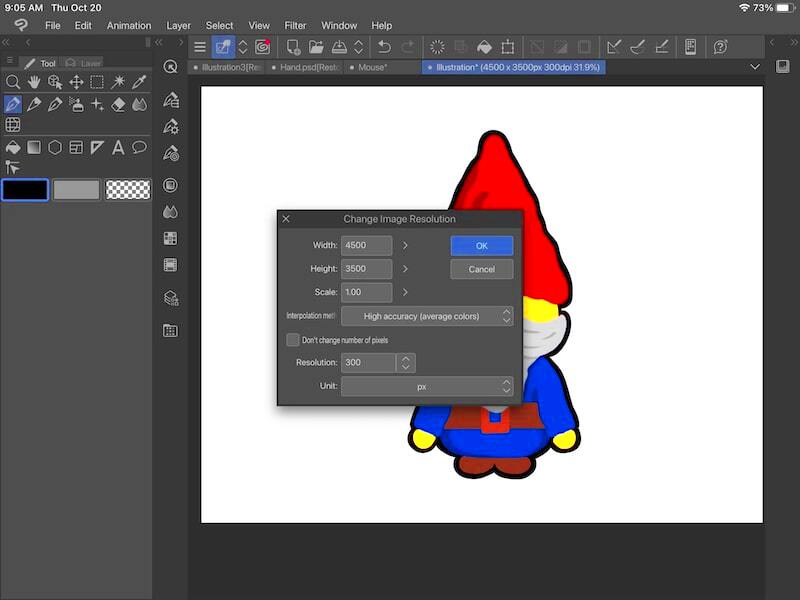
Resizing an image in Clip Studio Paint is straightforward. Follow these simple steps to adjust your image dimensions:
- Step 1: Open your image in Clip Studio Paint. If you’re starting a new project, create your canvas first.
- Step 2: Go to the Canvas menu located in the top toolbar.
- Step 3: Select Change Canvas Size from the dropdown menu. This opens a window where you can adjust the dimensions.
- Step 4: In the pop-up window, you can either enter new pixel values for width and height or adjust the percentage to resize.
- Step 5: Make sure to check Resample if you want to maintain the image quality while resizing. This will help prevent pixelation.
- Step 6: Once you’ve entered the desired dimensions, click OK to apply the changes.
Tip: If you need to maintain the aspect ratio, make sure the "Maintain Aspect Ratio" box is checked before resizing. This prevents the image from becoming distorted.
Also Read This: Slow Down Sounds: Decelerating Spotify Songs – Set Your Own Tempo
Understanding Image Resolution and Dimensions
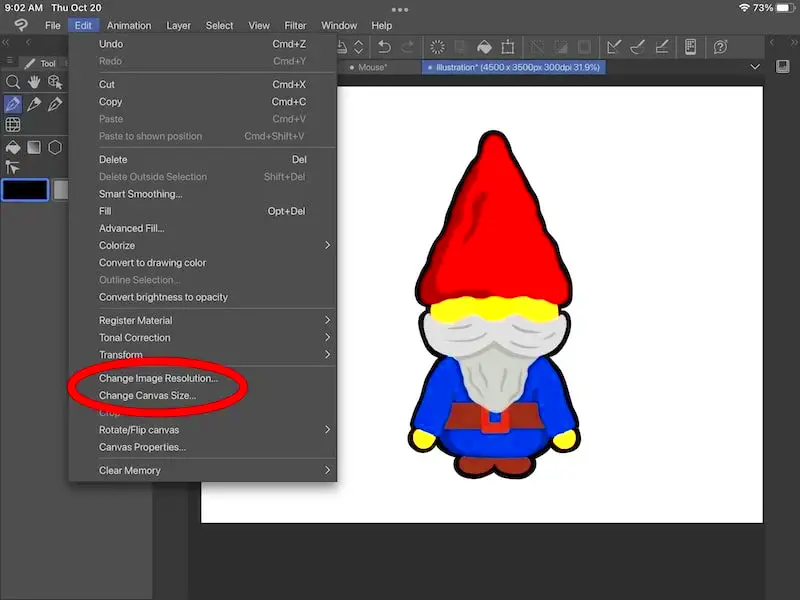
When it comes to resizing images in Clip Studio Paint, it’s essential to understand two key concepts: image resolution and dimensions. These terms play a huge role in how your artwork appears once resized. Let’s break them down:
- Resolution: This refers to the amount of detail in an image, typically measured in pixels per inch (PPI). Higher resolution means more detail, while lower resolution can lead to pixelation or blurriness.
- Dimensions: Dimensions refer to the width and height of your image, usually measured in pixels (px). Changing the dimensions alters how large or small the image appears.
When resizing images, it’s crucial to consider how these two factors interact. For example, if you reduce the dimensions of an image but don’t adjust the resolution, you might end up with a blurry image. On the other hand, increasing the resolution without adjusting the dimensions can result in a very large file size, which might not be suitable for web use.
Here’s a simple example:
| Dimension | Resolution |
|---|---|
| 3000 x 2000 px | 72 PPI (Web Use) |
| 3000 x 2000 px | 300 PPI (Print Use) |
In the table above, the dimensions stay the same, but the resolution changes depending on whether you’re working for web or print. This is why understanding resolution and dimensions is key when resizing images.
Also Read This: How Getty Images Makes Money
How to Maintain Image Quality While Resizing
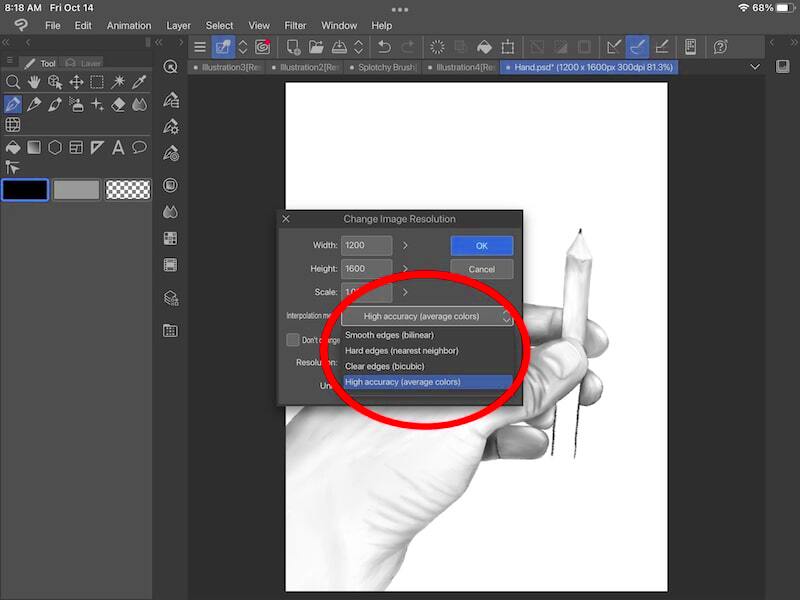
One of the biggest challenges when resizing images is maintaining their quality. If not done carefully, resizing can lead to pixelation, blurring, or other quality issues. Here are some tips to help you preserve your image’s integrity:
- Use the Resample Option: When resizing in Clip Studio Paint, always ensure the Resample option is enabled. This helps the software adjust the image’s pixels to fit the new dimensions without losing too much quality.
- Avoid Large Increases in Size: Increasing the size of an image too much can result in a loss of sharpness and clarity. It’s always better to start with a high-resolution image if you need to scale up.
- Use Smart Resizing: Clip Studio Paint has smart resizing algorithms that help maintain detail when resizing. Opt for algorithms like Bi-cubic or Lanczos for the best results.
- Check Your Image Before and After: Zoom in and inspect the image at different stages of resizing to ensure no quality is lost.
- Resize in Small Increments: If you need to reduce or enlarge the image, do it gradually. This can help reduce the chance of quality loss.
By following these tips, you can ensure that your resized images maintain their crispness, clarity, and overall visual quality.
Also Read This: Printing Large Images on Multiple Pages in Canva
Using the Canvas Size Tool for Precise Resizing
Clip Studio Paint offers several tools for resizing images, but the Canvas Size Tool is one of the most precise and effective methods. This tool allows you to adjust the canvas, which is especially useful if you want to resize your image without affecting the artwork itself. Here’s how you can use it:
- Step 1: Open your image in Clip Studio Paint and navigate to the Canvas menu in the top toolbar.
- Step 2: From the drop-down menu, select Change Canvas Size.
- Step 3: In the Canvas Size window, you can enter the exact width and height you want for your canvas.
- Step 4: Make sure to select the Maintain Aspect Ratio checkbox if you want to preserve the image proportions while adjusting the size.
- Step 5: Once you’ve set the desired dimensions, click OK to apply the changes.
This method is perfect when you need to adjust the working space around your image without directly affecting the image itself. The Canvas Size Tool ensures your artwork stays intact, while the surrounding space is resized to your specifications.
Keep in mind that this tool only changes the canvas area, so if you need to resize the actual image, you’ll need to use the Image Size or Resample tool in combination.
Also Read This: A Step-by-Step Guide on Tiktok Photo Download in HD
Common Resizing Mistakes and How to Avoid Them
Resizing images in Clip Studio Paint may seem straightforward, but there are several common mistakes that artists and designers make. These mistakes can affect the quality of your artwork, leading to unwanted distortion, pixelation, or even loss of important details. Let’s explore some of these errors and how you can avoid them:
- Not Maintaining Aspect Ratio: One of the most common mistakes is resizing an image without keeping the aspect ratio locked. This can stretch or squash your artwork, leading to distorted proportions. To avoid this, always make sure the Maintain Aspect Ratio option is checked.
- Resizing Too Much: Enlarging an image too much can lead to pixelation. If you need to increase the size of your image, do so in small increments. If you’re starting with a low-resolution image, it’s best to keep it at its original size or use a higher-quality version.
- Ignoring Image Resolution: When resizing, the resolution of your image matters. If you resize an image with a low resolution, it may appear blurry or pixelated. Ensure that the resolution is set appropriately for the final output, whether it’s for print or digital use.
- Not Checking Before and After: It’s easy to overlook the effects of resizing on image quality. Always zoom in to check the details of your image before and after resizing to ensure no unwanted blurring or pixelation has occurred.
By being mindful of these common mistakes and using the right tools, you can resize your images without losing quality or accuracy.
Also Read This: My Derma Dream MyoGlow Tips for Effective Usage on YouTube
Tips for Resizing Images Efficiently in Clip Studio Paint
Resizing images in Clip Studio Paint can be done quickly and efficiently with the right approach. Whether you’re resizing for a specific project or optimizing for web or print, these tips will help you work smarter and faster:
- Use the Right Resample Mode: Clip Studio Paint offers different resample modes such as Bi-cubic or Lanczos. These algorithms preserve image quality better than the default setting. Choose the best option based on the type of image you are resizing.
- Work in Small Increments: Instead of making drastic size changes all at once, try resizing in small steps. This method can help you avoid losing image details and maintain better quality.
- Always Check Resolution for Print: For print work, it’s essential to set the image resolution to 300 DPI. For web images, 72 DPI is typically sufficient. Make sure you adjust the resolution based on your project’s needs.
- Use the Canvas Size Tool for Flexible Resizing: If you need to adjust the space around your artwork without altering the image itself, use the Canvas Size Tool. This lets you increase or decrease the canvas size without affecting the artwork’s resolution.
- Preview Changes: Always preview the changes before confirming. Zoom in and out to check how the resized image will look at different sizes. This will ensure the final result meets your expectations.
By following these tips, you can save time, improve efficiency, and ensure your resized images maintain their quality in Clip Studio Paint.
Also Read This: Annotating Images for Clearer Explanations
FAQ
Q: What is the best resolution for images in Clip Studio Paint?
A: The best resolution depends on your project. For digital work, 72 PPI (pixels per inch) is generally sufficient, while for print work, you should aim for 300 PPI to ensure high-quality output.
Q: Can I resize my image without losing quality?
A: Yes! You can resize images without losing quality by using the Resample option and choosing the right resample algorithm (like Bi-cubic). However, it’s important to avoid enlarging low-resolution images too much, as that can lead to pixelation.
Q: How can I make sure my image doesn't get distorted when resizing?
A: To prevent distortion, always check the Maintain Aspect Ratio box when resizing your image. This ensures the width and height scale proportionally.
Q: How do I resize an image for print in Clip Studio Paint?
A: For print, set the resolution to 300 PPI and adjust the image dimensions based on the print size you want. Ensure that the image has enough detail to look sharp when printed.
Q: What does the Canvas Size Tool do in Clip Studio Paint?
A: The Canvas Size Tool allows you to adjust the workspace around your image without altering the image itself. It’s perfect for adding extra space or cropping the canvas to fit your composition.
Conclusion
Resizing images in Clip Studio Paint is an essential skill that every artist or designer should master. Understanding key concepts like resolution, dimensions, and how to use tools like the Canvas Size Tool can help you adjust your artwork with precision and maintain quality. Avoiding common resizing mistakes, like stretching an image or ignoring resolution, will ensure that your resized images look sharp and professional. By following the tips shared in this guide, you can work efficiently and effectively, whether you’re preparing images for web use, print, or simply adjusting the dimensions to fit your canvas. Remember, resizing is all about finding the right balance between size and quality, and Clip Studio Paint offers all the tools you need to do so with ease. Happy resizing!
