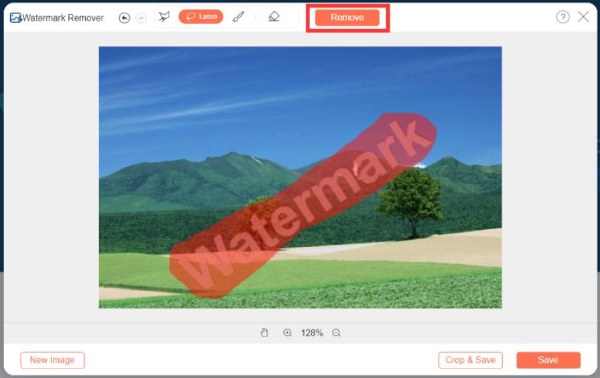
Are you working on a project in After Effects and stumbled upon a stock image or video from Adobe Stock that you'd love to use, but it has a watermark? You’re not alone! Many creatives face this same predicament. In this post, we’ll explore the ins and outs of Adobe Stock watermarks and how to effectively remove them (legally and ethically) while enhancing your workflow. Let's get started!
Understanding Adobe Stock Watermarks

Adobe Stock is a fantastic resource for high-quality images, videos, and graphics. However, when you browse their extensive library, you'll notice that many of their assets come with a watermark. So, what exactly is this watermark, and why is it there?
What Are Watermarks?
A watermark is a semi-transparent logo or text overlay that identifies the owner of a digital asset. In the case of Adobe Stock, these watermarks serve a dual purpose:
- Branding: They promote Adobe Stock's brand and protect their assets by making them less appealing for unauthorized use.
- Trial Limitation: They indicate that the asset is a trial version. It allows users to assess the quality and fit of the media before purchasing it.
Legal Aspects of Watermarked Assets
Using watermarked images or videos in your projects without proper licensing can lead to serious legal issues. Adobe Stock requires users to acquire a license to use their media without a watermark. This license ensures that the creator is compensated for their work, which is vital in supporting artists.
How to Legally Remove a Watermark:
The only ethical way to remove a watermark from an Adobe Stock asset is by purchasing a license for that specific asset. Once you have the license, you can easily download the version without the watermark. Here’s how:
- Search for the Desired Asset: Use the Adobe Stock search tool to find the media you want.
- Select and Purchase: Click on the asset and choose to buy or subscribe depending on your needs.
- Download the File: After purchasing, download the asset in your desired format, and voilà—you’ll receive the clean version without the watermark!
In conclusion, understanding the role of watermarks in Adobe Stock is crucial for any creator looking to utilize these resources. Always remember, respecting copyright and licensing agreements not only protects you legally but also supports the creative community. The next time you stumble upon a watermarked asset, consider it a bridge to inspiration, leading you toward high-quality materials available with just a few clicks!
Also Read This: The Cost of Adobe Stock Images Without a Subscription
3. Options for Removing Watermarks Legally
When you’re working with Adobe Stock footage or images, you might encounter a watermark. While it can be tempting to look for shortcuts, the best and most ethical approach is to remove these watermarks legally. Here’s how you can do it:
- Purchase a License: The most straightforward way to remove watermarks is by purchasing the appropriate license for the content. Adobe Stock offers various pricing options. Once you buy a license, you’ll get a high-resolution file without any watermark.
- Utilize Free Trials: Adobe often provides free trials for new users. By signing up for such a trial, you can access their stock library and download content without watermarks, within the limits of the trial period.
- Explore Subscription Plans: If you frequently use stock media, consider subscribing to Adobe Stock’s monthly plans. These plans often come with credits you can use to download files. Thus, you’ll always have easy access to watermark-free content.
- Seek Out Alternatives: If you find Adobe Stock's pricing a bit steep, consider other stock photo sites that offer more budget-friendly options. Websites like Unsplash, Pexels, and Pixabay provide high-quality images without watermarks, often even for commercial use.
- Contact the Creator: If the content you want happens to be from a smaller creator or independent stock provider, try reaching out to them directly. They might be open to licensing their work at a negotiable price.
Remember, using stock content without a license not only violates copyright laws but can also lead to hefty fines and legal issues down the road. Always opt for a legitimate route to keep your creative endeavors safe and above board!
Also Read This: how to make an image background transparent in google slides
4. Step-by-Step Guide to Remove Watermarks Using After Effects
If you’ve acquired your stock footage properly and just want to tidy it up for your project in After Effects, here’s a step-by-step guide on how to effectively remove watermarks from your content:
- Import Your Footage: Start by launching After Effects and importing your footage with the watermark. You can do this by dragging the file into the project panel or using
File > Import > File.... - Create a New Composition: Once your footage is in the project panel, drag it onto the “Create a New Composition” button at the bottom of the panel. This will create a composition that matches your footage’s settings.
- Duplicate the Layer: Select your footage layer in the timeline and duplicate it by pressing
Ctrl + D(Windows) orCmd + D(Mac). This allows you to work on a copy while keeping the original intact. - Add a Mask: With the duplicated layer selected, create a mask around the watermark. You can do this using the pen tool or the rectangle tool. Make sure to cover the watermark precisely.
- Feather the Mask: To blend the mask seamlessly, go to the mask properties and increase the feathering value. This softens the edges and makes the watermark area less noticeable.
- Use the Clone Stamp Tool: Select the clone stamp tool and set it to the masked layer. Carefully paint over the watermark by sampling from surrounding areas of the footage.
- Fine-Tune Your Edits: Play around with opacity and blending modes to ensure everything blends perfectly. Zoom in and out to check the changes from different distances.
- Render Your Video: Once you’re satisfied with your work, head to
Composition > Add to Render Queueto export your video without the watermark.
And there you have it! Just remember, these techniques should only be applied to content you have legally licensed. Happy editing!
Also Read This: Creating Engaging YouTube Shorts on Your iPad to Attract a New Audience
5. Optimizing Your After Effects Project for Quality
When working with After Effects, especially when you’re trying to create high-quality final outputs, optimization is key. Here are some tips to ensure that your project maintains the best possible quality while you’re working on it:
- Use High-Resolution Assets: Always start with the highest quality assets available. Whether it’s images, videos, or graphics, using high-resolution files will prevent pixelation and ensure sharpness in your final render.
- Set Correct Composition Settings: Before starting your project, set your composition settings to match your intended output. If you're targeting 1080p, 4K, or any other resolution, make sure your composition matches those specifications.
- Enable Multi-Frame Rendering: After Effects has an excellent feature that allows you to use multi-frame rendering. This can significantly speed up your render times and improve performance, especially for larger projects.
- Adjust Render Settings: Explore and adjust your render settings. Use formats like ProRes or DNxHD for high-quality outputs. This may increase file size, but it pays off in quality.
- Preview Using Real-Time Playback: Utilize the RAM preview and adjust the preview settings to get an accurate representation of how your final render will look. This allows you to catch potential issues before rendering.
Remember, while it might be tempting to rush through the project, taking the time to optimize will save you a lot of headaches later on. A well-optimized project means smoother editing, faster rendering times, and ultimately, a much better final product.
Also Read This: how to combine two images in one pdf
6. Common Mistakes to Avoid When Removing Watermarks
Removing watermarks from Adobe Stock images or any other content can be a tricky endeavor, and it’s easy to find yourself stumbling into common pitfalls. Here are some mistakes to watch out for to make your watermark-removal process smoother and more effective:
- Neglecting to Save a Copy: Always make a duplicate of your original file before starting to remove the watermark. This ensures that if something goes wrong, you don’t lose the original quality.
- Rushing the Process: It can be tempting to rush through the watermark removal, but taking your time will yield better results. Poorly executed removal can lead to noticeable flaws in your final product.
- Ignoring Surrounding Context: When removing a watermark, consider the surrounding area. It’s essential to recreate the background or context where the watermark was removed to maintain continuity and realism.
- Overusing Clone Stamp Tools: While the Clone Stamp tool is helpful, over-relying on it can create inconsistent results. Instead, mix it up with tools like the Healing Brush or Content-Aware Fill to create smoother results.
- Forgetting About Licensing: Always ensure that you have the right licenses to use images, even after watermark removal. Using stock images without the proper rights can lead to legal issues.
Avoiding these common mistakes will set you up for success when working on your After Effects projects. Taking the time to get things right will not only save you time in the long run but also enhance the overall quality of your work!
Conclusion and Best Practices for Using Stock Images
In conclusion, removing the Adobe Stock watermark from your footage should always be approached with caution and integrity. By following the proper guidelines, you can ensure that you are using stock images legally and ethically. Here are some best practices to keep in mind:
- Purchase Licenses: Always purchase a license for any stock footage or images you wish to use to avoid copyright infringement.
- Understand Licensing Types: Familiarize yourself with different licensing options (like standard vs. extended licenses) to choose the one that fits your project.
- Use High-Quality Assets: Opt for high-resolution images and videos that enhance your project’s visual appeal.
- Maintain Consistency: When using stock images, ensure they match the style and tone of your video for a coherent narrative.
- Attribution: If required, provide proper attribution in accordance with licensing terms, especially for free stock assets.
By adhering to these best practices, you can effectively leverage stock images while maintaining professional integrity and respecting copyright laws. Remember, utilizing properly licensed content not only builds your credibility but also supports the creative economy that brings these assets to life.
 admin
admin


