If you're exploring YouTube TV and its robust features, you might wonder about how to record live content. YouTube TV stands out with its user-friendly approach that brings flexibility and convenience to your viewing experience. Recording your favorite shows, movies, or sports events ensures you never miss a moment, even if you're tied up with other commitments. Let’s dive into the specifics of how you can make the most of these recording features!
Understanding Cloud DVR on YouTube TV

YouTube TV employs a cutting-edge Cloud DVR that revolutionizes how users record and store content. Unlike traditional DVRs that require physical hardware, Cloud DVR allows you to record your shows and movies seamlessly in the cloud. Here’s everything you need to know.
- Unlimited Storage: One of the standout features of YouTube TV’s Cloud DVR is that it offers unlimited storage for recordings. You can record as many shows as you want without worrying about running out of space.
- Recording Duration: Once you record a show, you can keep it for up to nine months. After that, the recording will automatically be deleted, which means you need to stay on top of your binge-watching!
- Easy Scheduling: You can easily schedule recordings in advance. Just find the show or event you want to record and select the “Record” button; it’s that simple.
- Simultaneous Recordings: YouTube TV permits multiple simultaneous recordings, allowing you to capture different shows airing at the same time. You don’t have to choose between your favorites anymore!
With functionalities like these, managing your viewing experience is effortless. So go ahead, explore YouTube TV and enjoy the ease of recording your desired content right from your living room!
Step-by-Step Guide to Recording Live Content

If you're eager to capture your favorite live shows on YouTube TV, you're in luck! Recording live content is pretty straightforward. Just follow these step-by-step instructions:
- Sign In to Your YouTube TV Account: First things first, open the YouTube TV app or website and log in with your credentials.
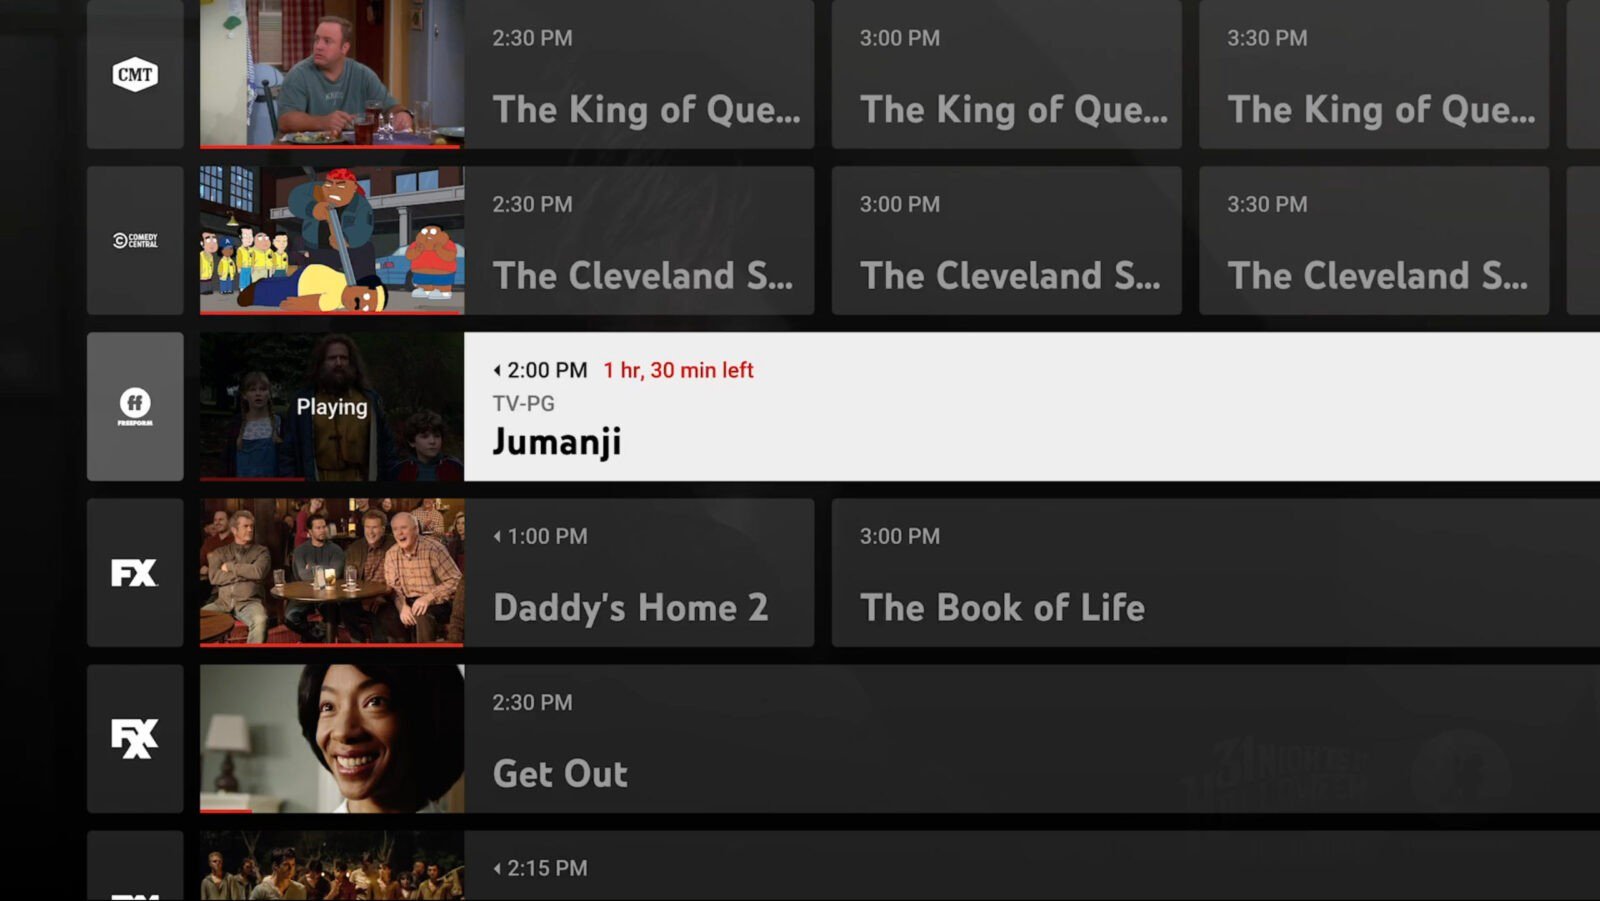
- Locate the Live Show: Browse through the channel guide or use the search function to find the live content you want to record.
- Select the Show: Click on the show to view its details. This will give you information like the air time, channel, and upcoming episodes.
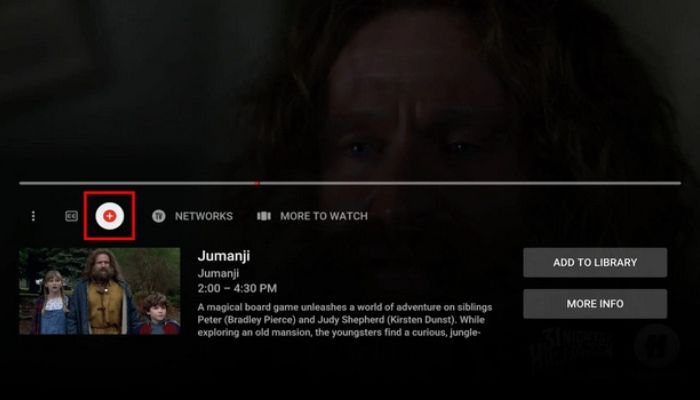
- Hit the Record Button: Most shows will have a red "Record" button. Click this button to initiate recording. If you're recording a series, you can often select to record all episodes or just the current one.
- Confirm Your Selection: A pop-up may appear asking you to confirm your recording choice. Verify the information and hit “Yes” or “Record” to finalize.
- Monitor Your Recordings: You can check your recordings under the “Library” section of YouTube TV to ensure everything is properly saved.
And voila! You’re all set to enjoy your recorded content whenever you want. Just remember to have enough storage space in your Cloud DVR to avoid missing out on future recordings!
How to Access and Manage Your Recorded Content
Now that you've successfully recorded live content on YouTube TV, it’s time to access and manage your recordings. Here’s how you can do just that:
- Open the YouTube TV App or Website: Start by logging back into your YouTube TV account.
- Navigate to Your Library: Look for the 'Library' section. This is where all your recorded shows are neatly organized.
- Access Your Recordings: In the Library, you’ll find a dedicated folder or list for your recordings. Click on it to see everything you have saved.
- Manage Your Recordings: From here, you can:
- Play: Watch any recorded show by simply clicking on it.
- Delete: Don’t want to keep a recording? Look for the options menu (usually three dots or a gear icon) next to the show and select 'Delete.'
- Check Recording Status: Ensure that your shows are still scheduled for recording. You can do this by revisiting the show’s page and adjusting settings if necessary.
Managing your recordings is a breeze! With just a few clicks, you can keep your library organized and ensure you don’t miss out on any of your favorite content!
5. Tips for Optimizing Your Recording Experience
Recording live content on YouTube TV can be a fantastic way to catch up on your favorite shows, sporting events, or news broadcasts. To ensure you make the most of your recording experience, consider these handy tips:
- Check Your Internet Connection: A stable and high-speed internet connection is essential for seamless recording. Use a wired connection for better reliability, or ensure your Wi-Fi signal is strong if you’re recording wirelessly.
- Schedule in Advance: Don't wait until the last minute to set up your recordings. You can schedule shows as far in advance as you want. Just navigate to the show’s page and hit “Record” to make sure you won't miss a moment.
- Manage Your Storage: YouTube TV provides unlimited storage, but it’s wise to keep track of what you have saved! Regularly check your library and delete shows you no longer wish to keep to ensure optimal performance.
- Use the "Keep Until" Option: If there's a particular recording you want to keep for an extended period, select the “Keep Until” option to ensure it doesn't get automatically deleted.
- Optimize Your Settings: Dive into your settings to customize your recording preferences, such as automatically recording all episodes of a series or just new ones. Tailor it to fit your viewing habits!
By implementing these strategies, you'll be well on your way to enjoying a smooth recording experience that captures every moment worth watching!
6. Troubleshooting Common Recording Issues
Even with the best plans, you may encounter some hiccups when recording live content on YouTube TV. Here are some common issues and how to tackle them:
| Issue | Possible Solution |
|---|---|
| No Recording Found | Double-check that the show was recorded by navigating to your library. Sometimes, shows aren’t saved if there was a connectivity issue. |
| Show Didn’t Record | Ensure that you properly scheduled the recording in advance. Also, verify if the show aired as planned without any changes to the broadcast schedule. |
| Recording Quality is Poor | Start by checking your internet speed. A connection issue might lead to poor video quality during recording. Consider upgrading your bandwidth if needed. |
| Auto-Record Settings Not Working | Make sure your settings are configured properly. Go to your settings and confirm that the automatic recording options are turned on for the specific shows. |
If problems persist, don’t hesitate to reach out to YouTube TV’s customer support for assistance. They can help you diagnose more complex issues, ensuring you can get back to enjoying your recorded content in no time!
How to Record Live Content on YouTube TV
YouTube TV, a popular streaming service, allows users to record live content seamlessly. With unlimited cloud DVR storage, recording your favorite shows and events becomes a breeze. Here’s a comprehensive guide on how to effectively record live content on YouTube TV.
Step-by-Step Guide to Recording
- Sign In to YouTube TV:
Start by signing into your YouTube TV account on a compatible device. Ensure you are connected to the internet.
- Browse Channels:
Navigate through available live channels using the 'Live' tab on the homepage.
- Select the Show:
Once you find a show you want to record, click on it to access the episode's details.
- Record the Content:
Click on the ‘+’ button or the 'Record' option. You can choose to record a single episode or the entire series.
- Check Your Library:
All recorded shows will be stored in your Library. Access it anytime to watch your saved content.
Key Features of YouTube TV Recording
| Feature | Description |
|---|---|
| Unlimited Storage | Record as much content as you want without worrying about running out of space. |
| 30-Day Retention | Recorded shows are stored for up to 30 days, giving you ample time to watch. |
| Series Recording | Automatically record every episode of a series with a single click. |
With these simple steps, recording live content on YouTube TV becomes an effortless task, ensuring you never miss out on your favorite programs.
Conclusion: Enjoying Your Favorite Shows Anytime
By utilizing the recording features on YouTube TV, you can enjoy your favorite shows anytime, transforming your viewing experience into one that's flexible and convenient.


