Adding images to parts in Roblox Studio can bring a creative and personalized touch to your game. It helps to make your game environment more engaging and visually appealing. Whether you’re designing realistic textures, unique patterns, or fun decals, knowing how to apply images effectively is an important skill for game developers.
In this guide, we’ll walk you through the process step by step, from preparing images to applying them on parts in Roblox Studio. It’s easier than you might think and can completely transform the way your game looks!
Steps to Prepare Images for Roblox Studio

Before uploading images to Roblox Studio, you need to ensure they meet the platform’s requirements and are optimized for your game. Here’s what you should do:
- Choose the right format: Roblox supports
.jpgand.pngformats. Make sure your image is saved in one of these formats. - Resize your image: Keep your image resolution within a reasonable size (e.g., 1024x1024 pixels) to avoid performance issues.
- Optimize file size: Compress your image to reduce its file size while maintaining quality. Tools like TinyPNG can help.
- Ensure proper content: Roblox has strict content guidelines. Avoid images with inappropriate or copyrighted material.
Taking these steps ensures that your images are ready for seamless integration into Roblox Studio without any issues.
How to Import Images into Roblox Studio
Once your image is ready, importing it into Roblox Studio is straightforward. Follow these steps:
- Open Roblox Studio: Launch your project where you want to use the image.
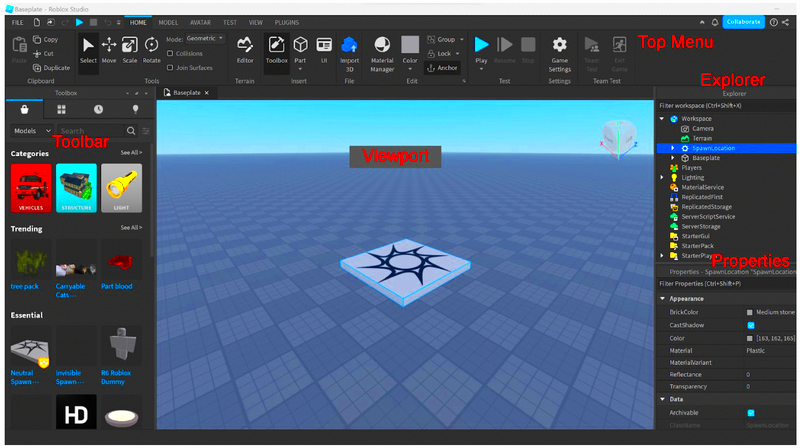
- Go to the Toolbox: Open the Toolbox panel (View > Toolbox) if it’s not already visible.
- Select the Image tab: In the Toolbox, click on the “Image” option to browse and upload your image.
- Upload your file: Click on the “Add Asset” button, select your image file, and upload it. Roblox will process the file and assign it a unique asset ID.
- Insert the image: Drag the uploaded image from the Toolbox onto the part you want to customize in your game.
By following these steps, your image will be successfully imported and ready to apply to any part in your game design!
Ways to Apply Images on Parts in Roblox Studio
Adding images to parts in Roblox Studio can give your game a unique look. There are several methods to apply images, depending on the style and effect you want to achieve. Let’s explore the options:
- Using Decals:
Decals are one of the easiest ways to apply images to parts. Here’s how:
- Right-click on the part you want to customize.
- Select Insert Object and choose Decal.
- Paste the Asset ID of your uploaded image into the Texture property of the decal.
- Using Textures:
For a tiled or repeated pattern, use a texture:
- Insert a Texture object onto your part.
- Set the Texture property with your image’s Asset ID.
- Adjust the StudsPerTile property to control the size and repetition of the texture.
- Using SurfaceGuis:
For more control, apply images using a SurfaceGui:
- Insert a SurfaceGui into the part.
- Add an ImageLabel inside the SurfaceGui.
- Set the Image property with your uploaded image’s Asset ID.
These methods let you creatively enhance the parts in your game, whether you want detailed decorations or seamless patterns.
Tips for Optimizing Images in Your Game
Optimizing images is crucial for ensuring smooth performance in Roblox games. Follow these tips to get the best results:
- Reduce file size: Compress images to decrease their load time and minimize memory usage.
- Stick to supported formats: Use
.jpgfor photographs and.pngfor transparent images. - Use appropriate resolutions: Avoid using extremely high-resolution images. For most cases, 512x512 or 1024x1024 pixels are sufficient.
- Optimize image placement: Apply images only where necessary to reduce resource strain on players’ devices.
- Test your game: Regularly test your game on different devices to ensure images load quickly and don’t cause lag.
By optimizing your images, you’ll create a game that looks great and runs smoothly for players.
Common Mistakes and How to Avoid Them
Even experienced developers can run into issues when using images in Roblox Studio. Here are some common mistakes and tips to avoid them:
- Using copyrighted images:
Make sure to use only royalty-free or original images to avoid legal problems. Websites like hdstockimages.com offer safe options.
- Ignoring file size:
Large image files can cause slow loading times. Always compress your files before uploading.
- Overloading the game with images:
Too many images can reduce performance. Use them sparingly and only where necessary.
- Incorrect image scaling:
Make sure to properly scale images to avoid distortion or poor-quality visuals.
- Forgetting to test:
Always test your game after applying images to ensure they appear correctly on all parts and devices.
Avoiding these mistakes will help you create a polished and professional game environment.
FAQs About Using Images in Roblox Studio
Here are some of the most commonly asked questions about using images in Roblox Studio, along with clear answers to help you get started:
| Question | Answer |
|---|---|
| What image formats are supported in Roblox Studio? | Roblox supports .jpg and .png formats for images. Choose the format based on your needs, such as transparency for .png. |
| How can I find the Asset ID of my uploaded image? | After uploading the image, go to the “My Creations” tab in the Roblox website. Click on the image to view its page and copy the Asset ID from the URL. |
| Can I resize an image directly in Roblox Studio? | No, you cannot resize images in Roblox Studio. You need to adjust the part's size or use external tools to resize the image before uploading. |
| What should I do if my image doesn't appear on the part? | Ensure the Asset ID is correctly applied to the Texture or Decal property. Also, check your internet connection as image loading depends on it. |
| Are there any restrictions on image usage in Roblox? | Yes, Roblox has strict content guidelines. Avoid using copyrighted or inappropriate images to prevent moderation issues. |
If you have further questions, Roblox's developer forums and tutorials can be excellent resources for additional help.
Conclusion on Using Images for Game Design
Incorporating images into your Roblox Studio creations can elevate your game’s visual appeal and create a more immersive experience for players. By following the steps to prepare, import, and apply images correctly, while avoiding common mistakes, you can design a polished and professional game. Keep experimenting and refining your techniques to achieve stunning results!


