Canva is an incredible graphic design tool that simplifies the creative process for everyone, from beginners to seasoned designers. With its intuitive drag-and-drop interface, users can easily create stunning visuals for social media, marketing materials, and more. What really sets Canva apart is its extensive library of templates, fonts, images, and illustrations, which allows you to customize your designs effortlessly. Whether you're crafting a flyer, a presentation, or an Instagram post, Canva's features make it easy to bring your ideas to life without needing advanced design skills.
Why Use Shapes for Images in Design?
Using shapes to frame images in your designs is a smart and trendy technique that can elevate your work significantly. Here are some reasons why incorporating shapes into your image designs is beneficial:
- Visual Interest: Shapes can add a unique twist to your images, making them more engaging. Instead of just using standard rectangles, try using circles, hexagons, or stars to make your images pop.
- Brand Identity: Using specific shapes can help reinforce your brand’s identity. For instance, certain brands might prefer rounded shapes to convey softness or approachability, while others might opt for sharp angles to project modernity and professionalism.
- Consistency: Utilizing shapes for all images within a project gives a cohesive look to your designs. This consistency enhances the overall aesthetic and makes your visuals more recognizable.
- Focus: Shapes can guide the viewer’s attention to specific parts of your design. For example, a circular frame around a focal image can draw the eye directly to it, helping to convey your message more effectively.
- Creative Expression: Shapes allow you to express your creativity. You can combine shapes in various ways, creating intriguing layouts that stand out and resonate with your audience.
To sum it up, shapes in design aren’t just for decoration; they serve practical purposes that enhance functionality and aesthetics. By incorporating them into your image placements, you can create stunning visuals that tell a story while maintaining a professional appearance. Using Canva, the process of placing images within shapes is straightforward, making it an enjoyable experience for any designer!
Also Read This: Changing Image Transparency in Google Slides
3. Step-by-Step Guide to Placing Images in Shapes
So, you’re ready to give your design a little flair by placing images into shapes in Canva? Perfect! It’s easier than you might think. Let’s break it down step by step:
- Open Canva: Start by heading over to Canva and logging into your account. If you don’t have one yet, signing up is a breeze!
- Create or Choose Your Design: You can either create a new design or open an existing project. Click on “Create a design” at the top right corner and select your preferred format.
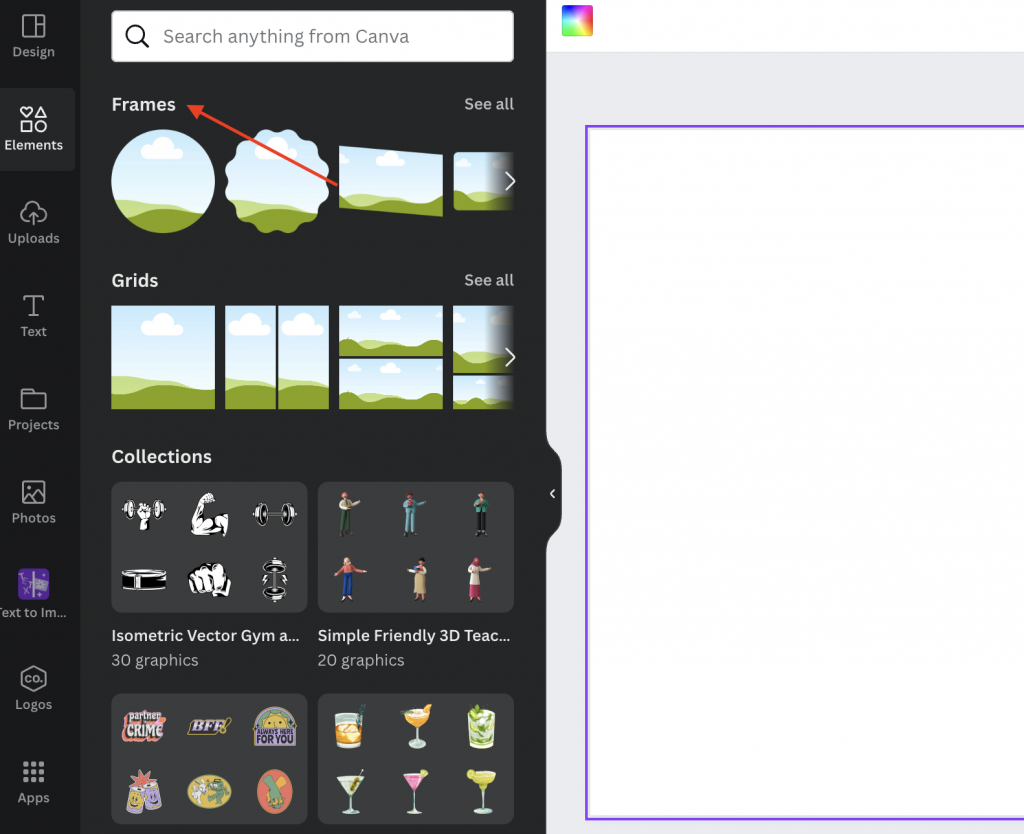
- Access the Elements Tool: On the left sidebar, look for the “Elements” tab. Click on it to explore various shapes you can use.
- Select a Shape: Scroll through the options or use the search bar to find the shape you want to use. You can pick from circles, squares, triangles, or even more complex designs. Simply click on the shape to add it to your canvas.
- Resize and Position the Shape: Drag the corners of the shape to resize it and place it where you want it on the canvas. Make sure it’s the right size for your image!
- Upload Your Image: Click on the “Uploads” tab in the sidebar, then hit the “Upload an image or video” button. Choose the image you want from your computer. Once uploaded, your image will appear in the uploads section.
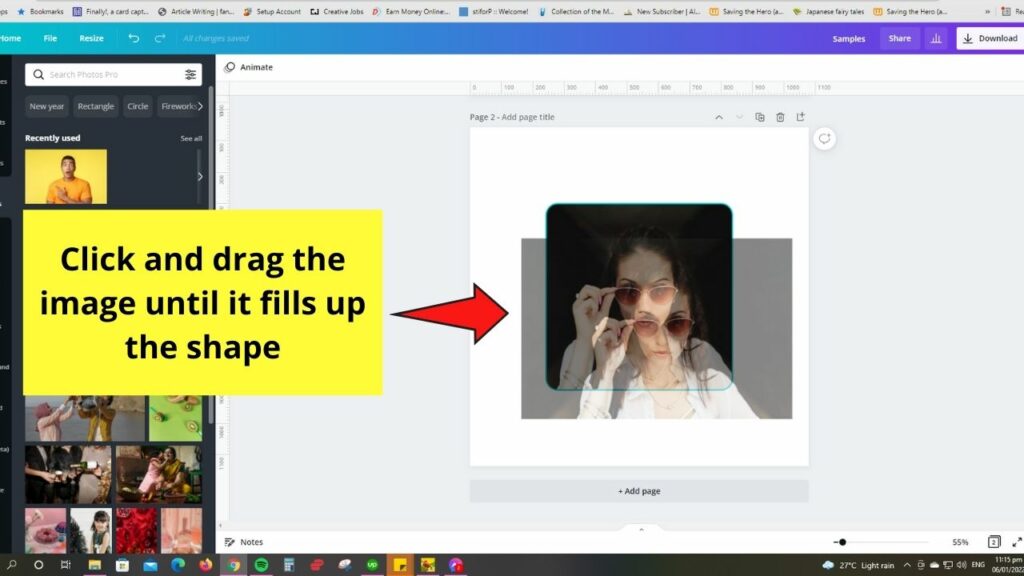
- Drag Your Image Into the Shape: Click and drag your uploaded image over the shape you’ve placed on the canvas. As you hover over the shape, you’ll see it highlight, indicating that it’s ready to take your image!
- Fit Your Image: Once the image is inside the shape, you can double-click it to adjust its position within the shape. This is where you can zoom in or out to focus on specific details. Use the drag icons to reposition the image until it looks just right.
- Add Finishing Touches: After you're satisfied with how it looks, you can add text, filters, or other elements to enhance your design. Canva also allows you to adjust the transparency and coloring of shapes, giving you even more creative control!
And there you have it! You’ve successfully placed an image in a shape using Canva. This process opens up a world of design possibilities, making your creations look professional and eye-catching!
Also Read This: Is Rumble a Good Platform for Content Creation and Growth
4. Creative Tips for Using Shapes with Images
Now that you know the basics of placing images into shapes, let’s dive into some creative tips to maximize your design potential in Canva!
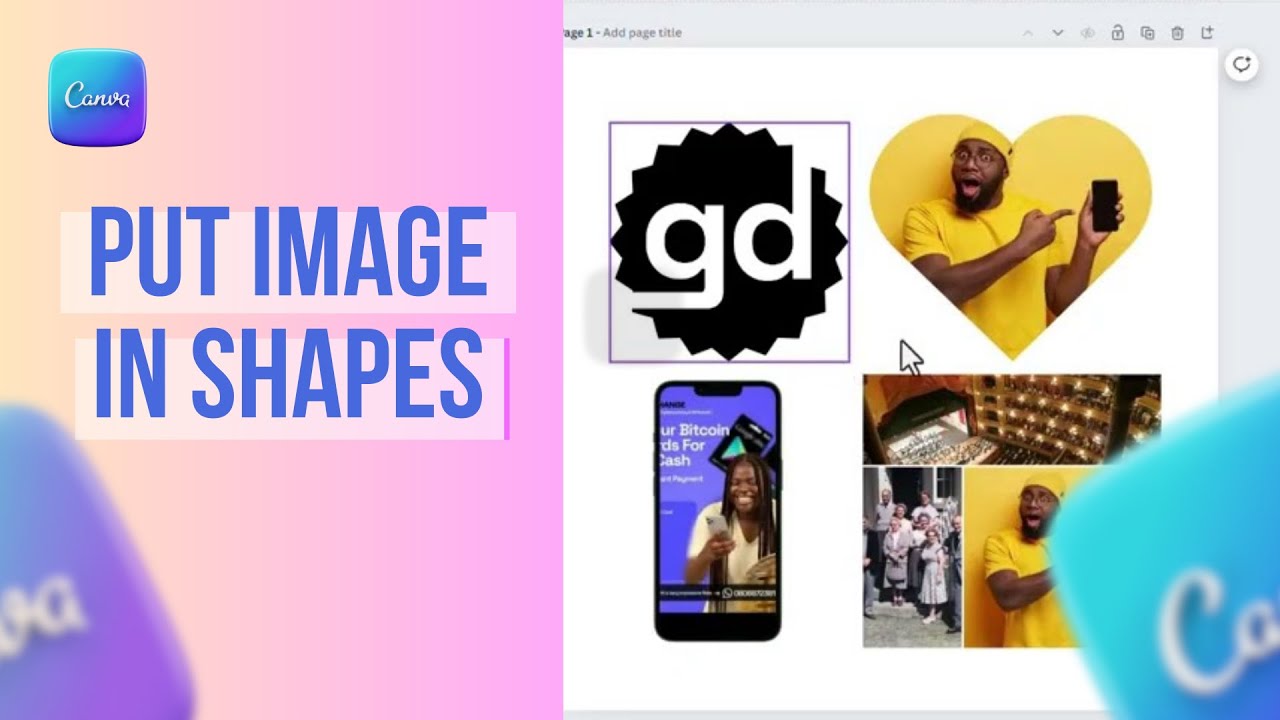
- Mix and Match Shapes: Don’t feel restricted to just one shape. Try layering different shapes with images inside them for a unique collage effect. Use overlapping circles for a dynamic look or rectangles for a more structured design.
- Play with Colors: Canva offers a vast array of colors for your shapes. Use bold or contrasting colors to enhance your images or use softer shades to create a more cohesive look. Experiment with gradients as well!
- Combine Text and Shapes: Use shapes as backgrounds for text. For instance, placing text inside rounded rectangles or speech bubbles can add character to your design. This will make your message stand out!
- Create Frames: Canvas has pre-made frames that already have shapes integrated. Use these frames to add even more intrigue to your designs. They can be perfect for profiles, quotes, or product images.
- Experiment with Transparency: Adjust the transparency of your shapes to let some of the background show through. This layering effect can add depth and interest to your overall design.
- Incorporate Patterns and Textures: Canva allows you to add patterns to shapes. You can also upload a custom texture image and use it in the same process, creating a unique visual experience that draws the eye.
- Utilize Shapes for Guides: Before finalizing your design, use shapes as guides. This means placing them in areas to help align texts and images for a clean, professional look.
- Seek Inspiration: Check out Canva’s template library or design communities online for inspiration. Seeing how others use shapes and images can spark creative ideas for your own projects!
By incorporating these creative tips, you can elevate your designs in Canva, making them not just visually appealing but also distinctive. Let your imagination run wild, and have fun experimenting!
Also Read This: A Simple Guide to Reversing Images in PDFs
5. Common Issues and Troubleshooting
Creating beautiful designs in Canva is usually a breeze, but sometimes you might hit a snag. Don’t worry! Here are some common issues you might encounter when placing images into shapes, and tips on how to troubleshoot them:
- Image Not Filling the Shape: If your image doesn't seem to fill the shape properly, check the image's size. Make sure it's large enough for the shape you're using. You can also try adjusting the image within the shape by double-clicking it and repositioning it.
- Shape Not Recognizing the Image: Sometimes, after placing an image, it doesn't appear in the shape you selected. This often happens if the shape is not selected properly. Click on the shape again, right-click and select 'set image' to correct this.
- Layering Issues: If the shape seems to be behind other elements, make sure to adjust the layering. Right-click the shape and choose 'Bring to front' to ensure it's visible.
- Quality Loss in Images: If you notice that your image appears pixelated, it could be due to using a low-resolution image. Always try to upload high-resolution images for the best quality.
- Images Not Uploading: If you're having trouble uploading images to Canva, ensure that your internet connection is stable. Additionally, check the file format; Canva supports most standard formats like JPG, PNG, and GIF.
In most cases, these issues can be resolved quickly. Don't hesitate to experiment with the controls or seek help from Canva’s help center if you're stuck. Community forums are also great for finding solutions as other users may have experienced similar issues.
And remember, practice makes perfect! The more you manipulate images and shapes, the more comfortable you'll become with the tool.
Also Read This: Tips for Enjoying Unedited Videos on YouTube
6. Conclusion and Final Thoughts
Congratulations! You’ve now learned how to effectively place images into shapes using Canva. This powerful design tip opens up a world of creative possibilities for your projects, from social media posts to presentations and beyond. Here’s a quick recap of what we covered:
- How to select and customize shapes
- Steps for placing and adjusting images within those shapes
- Creative ideas for using images in shapes to enhance visual appeal
- Common issues you might face and how to troubleshoot them
By mastering these skills, you're not just enhancing your own designs, but you’re also setting yourself apart in a crowded creative space. Remember: the key to great design is a balance of creativity and technical know-how. Don’t shy away from experimenting with different shapes and images!
As you dive deeper into your design journey with Canva, consider exploring other features like animations, text effects, and templates to elevate your designs even further. Happy designing! And feel free to share your creations with the Canva community for feedback and inspiration. Remember, every designer has a unique style, so embrace yours and let your creativity shine!
Additional Resources for Canva Users
If you’re looking to enhance your Canva experience and expand your design skills, there are plenty of resources available. Here are some valuable tools and links that can assist you in mastering Canva:
- Canva Design School: This is an invaluable resource, offering a variety of free courses and tutorials for users of all levels. Whether you’re a beginner or a pro, you can learn new tips and tricks.
- YouTube Tutorials: Channels like YouTube feature countless video tutorials that explore specific features of Canva, helping you visualize the process of creating unique designs.
- Canva Community: Join the Canva Community on Facebook or the official Canva forums. Here, you can share ideas, ask questions, and get feedback from other users.
- Instagram and Pinterest: Scour platforms like Instagram and Pinterest for design inspiration. Search for hashtags such as
#CanvaDesignsor#CanvaTemplatesto view incredible works created by other users.
By utilizing these resources, you can elevate your design skills and discover new ways to utilize Canva for various projects. Don’t hesitate to dive into these platforms and learn from the vast array of available materials.
In conclusion, enhancing your Canva skills is just a resource away; explore these tools and start creating stunning designs today!
 admin
admin


