Sending an email with images can make your message stand out and engage the reader better. Whether you're sharing a promotional offer, a family photo, or a product image, knowing how to add images properly is essential. But don't worry, it's not complicated. In this section, we'll go over how you can easily include images in your emails, no matter the email service you're using. We'll cover both attaching and embedding images, and provide tips for ensuring that your images look great in the inbox.
Why Adding Images to Emails is Important

Adding images to emails is more than just a way to make your email look attractive. Images serve several important purposes, such as:
- Visual appeal: A well-placed image can grab the reader's attention and make your email visually appealing.
- Increased engagement: Emails with images typically have higher open and click-through rates, meaning they’re more likely to be read and acted upon.
- Clarifying your message: Sometimes, an image speaks louder than words. It can help convey your message clearly and quickly, without needing to write a lot of text.
- Branding: Consistent use of images that align with your brand identity can make your emails more recognizable and help build a connection with your audience.
With all these benefits, adding images to emails is an easy way to make your communication more effective. So, let’s dive into how to do it right!
Different Ways to Add an Image in an Email

There are several methods to add images to emails, depending on how you want the image to appear. Here's a breakdown of the most common options:
- Attaching an Image: This is the simplest method, where you attach the image file to your email as an attachment. The recipient can open the image by clicking on the attachment link. However, attachments can sometimes get lost in spam filters, and the recipient needs to open them separately.
- Embedding Images Inline: This method places the image directly in the body of your email. It allows the reader to view the image as soon as they open the email, making it more engaging. To do this, you'll need to use an email client that supports inline images, like Gmail or Outlook.
- Using Image Hosting: If you don't want to attach or embed large files, you can upload your images to an external image hosting service (like Imgur or Dropbox) and include a link to the image in your email. This method is less common but can be useful for sharing larger files or when you want to make sure the images load properly on any device.
Each method has its advantages and disadvantages, so choose the one that best suits your needs and ensures the best experience for your recipients.
Step-by-Step Guide for Adding Images in Gmail

Gmail makes it easy to add images to your emails, whether you want to attach them or include them inline. Let’s walk through the process step-by-step so you can add your images quickly and without any hassle. Whether you're sending a personal message or a business email, the steps are simple and straightforward.
Attaching an Image in Gmail
- Open your Gmail account and click on the Compose button to create a new email.
- Click on the paperclip icon at the bottom of the compose window to attach your image.
- Browse your computer to find the image you want to attach and click Open.
- Once the image is uploaded, it will appear as an attachment in the email. You can add a subject, body text, and recipient, then hit Send.
Embedding an Image Inline in Gmail
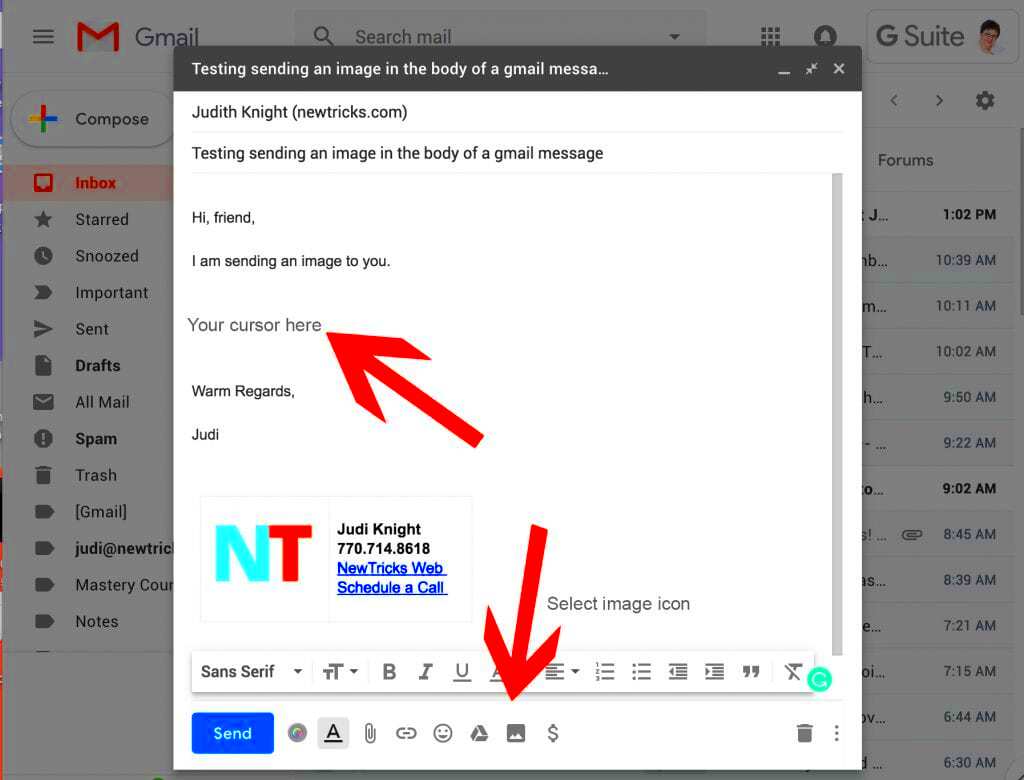
- In the compose window, click on the Insert photo icon (a small square with mountains) located at the bottom of the email.
- You’ll be given the option to either upload a new photo or insert an image from your Google Drive or URL.
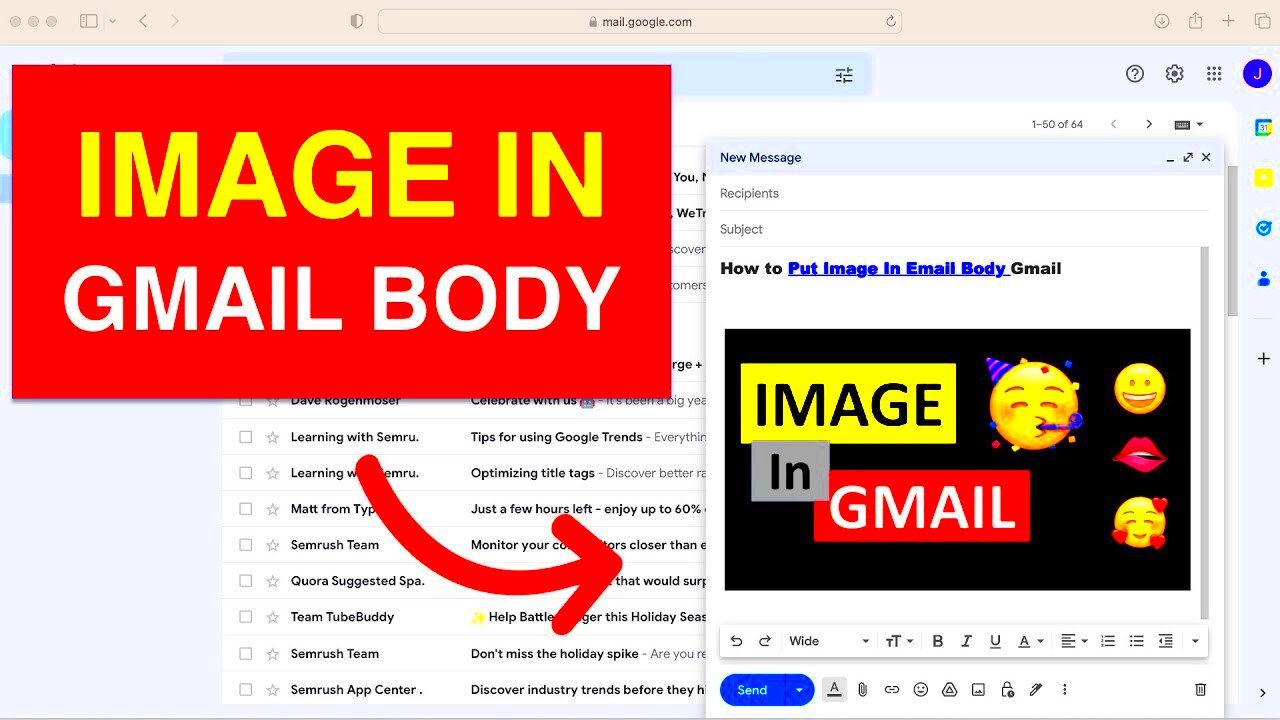
- Once the image is uploaded, it will appear directly in the body of your email. You can resize it by clicking on the image and dragging the corners.
- Once everything looks good, add your text and click Send.
And that’s it! Your email is now ready with an image that’s either attached or embedded.
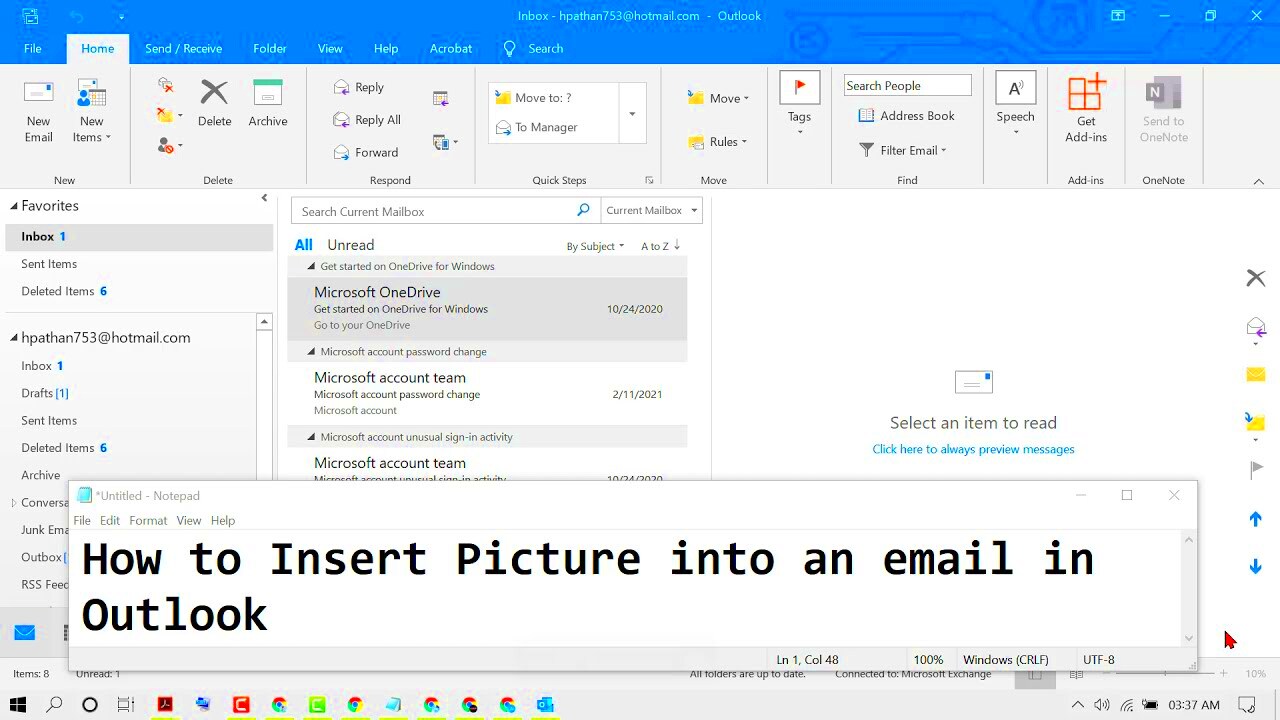
How to Insert Images in Outlook Emails
Outlook provides a simple way to add images, whether you're using the desktop version or Outlook on the web. Let’s look at how you can do this step by step.
Attaching an Image in Outlook
- Open Outlook and click on New Message to start composing your email.
- Click on the Attach File icon, which looks like a paperclip.
- Browse your computer to find the image file you want to attach and click Open.
- The image will appear as an attachment. You can add your email content and recipient, then hit Send.
Embedding an Image Inline in Outlook
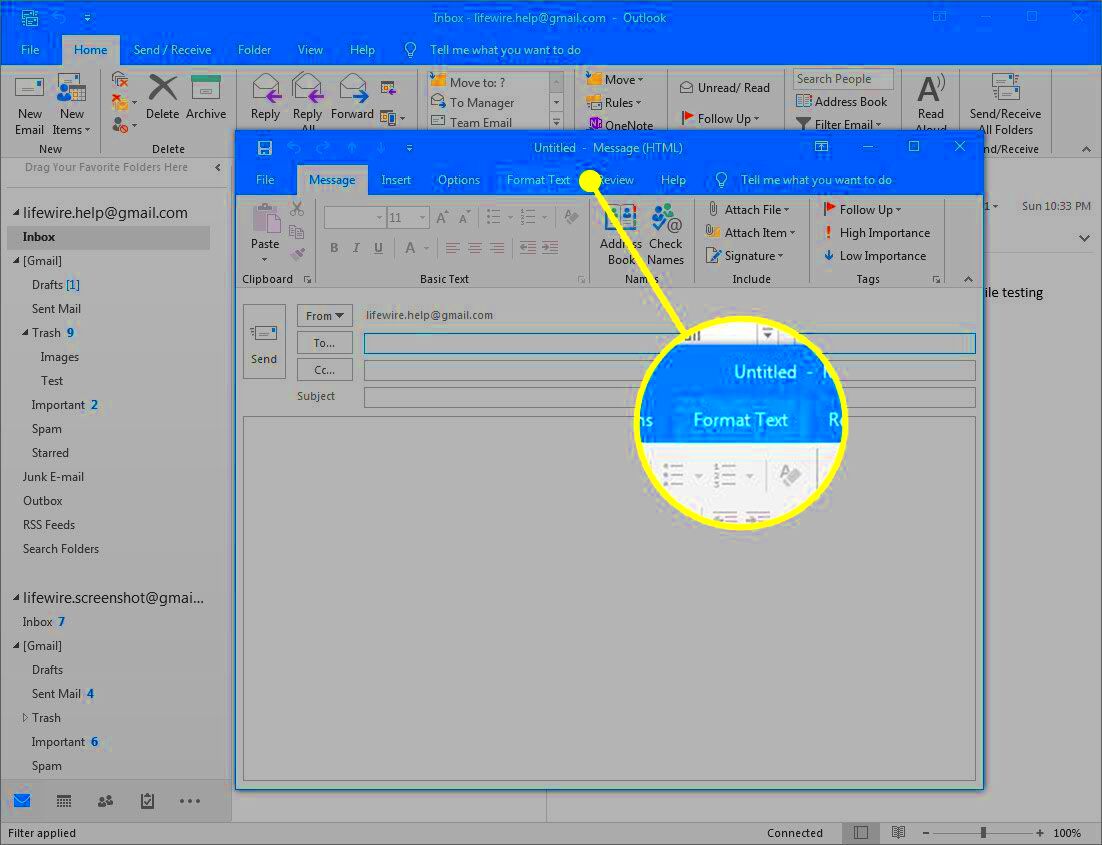
- In the email composition window, click on the Insert tab at the top of the screen.
- From the toolbar, select Pictures and choose This Device to upload an image from your computer.
- The image will be placed directly in the body of your email. You can resize it by clicking on the corners of the image.
- Add any necessary text and click Send when you're ready.
Whether you're attaching or embedding an image, Outlook gives you great flexibility for email customization.
Adding Images in Yahoo and Other Email Providers
Adding images in Yahoo and other email platforms like Apple Mail or Thunderbird is similar to Gmail and Outlook. While the steps might vary slightly, the general process remains easy to follow. Let’s take a look at how to do it in Yahoo Mail, and then we’ll discuss tips for other providers.
Attaching an Image in Yahoo Mail
- Open your Yahoo Mail account and click on the Compose button to create a new email.
- Click on the paperclip icon at the bottom of the message window.
- Choose the image file from your computer and click Open to attach it to your email.
- The attached image will appear at the bottom of the email. You can add your message and recipient and click Send to finish.
Embedding an Image Inline in Yahoo Mail
- Click the Insert Image button (an image icon) at the bottom of the compose window.
- Select whether to upload an image from your computer or a URL.
- Once the image is uploaded, it will appear directly in the email body. You can resize it or adjust placement if needed.
- Write your message and hit Send.
For Other Email Providers
While the steps for adding images in other email services like Apple Mail or Thunderbird might differ slightly, they generally follow the same principles. Look for an option to either attach or insert an image from your device or online. If you're unsure, most email clients have a help section or tutorial for inserting images.
In all cases, it's important to check how the image appears after sending it. You can always send a test email to yourself to make sure everything looks great before sending it to others.
Best Practices for Using Images in Emails
When adding images to emails, it’s important to make sure they enhance your message rather than detract from it. Using images correctly can help engage your audience and make your emails more effective. However, there are a few best practices you should follow to ensure your emails look professional and work across all devices.
1. Optimize Image Size
Large image files can slow down the loading time of your email, which might annoy the recipient. To prevent this, make sure your images are optimized. You can do this by:
- Compressing image files without sacrificing quality (use tools like TinyPNG or ImageOptim).
- Resizing images to fit the dimensions of your email design.
- Saving images in web-friendly formats, like JPEG, PNG, or GIF.
2. Use Responsive Design
Since people read emails on various devices, from smartphones to desktops, it's essential to ensure your images are responsive. This means they should automatically adjust to fit different screen sizes. Most email platforms and services have responsive email templates that adjust image sizes for different devices.
3. Provide Alt Text for Images
Not all email clients display images by default. If your recipient's email client blocks images or they are unable to view them, providing alt text ensures they understand what the image represents. Make sure the alt text is descriptive and gives context to the image.
4. Avoid Using Too Many Images
While images make emails more engaging, using too many can overwhelm the recipient and slow down the loading time. Aim for a balanced email with both text and images, ensuring the images support and enhance your message.
5. Test Before Sending
Always test your emails with images to see how they appear across different email clients and devices. This can help you catch any potential issues before your recipients see them.
Common Issues When Adding Images and How to Fix Them
While adding images to emails is straightforward, there are common issues that can arise. Here’s a look at some of the most frequent problems and how to fix them:
1. Images Not Displaying
If the images don’t show up in the recipient's inbox, it could be due to the email client’s settings or file type. To resolve this:
- Ensure your images are in widely accepted formats (JPEG, PNG, GIF).
- Use inline embedding for images rather than relying solely on attachments.
- Encourage recipients to enable images in their email settings.
2. Slow Loading Times
Large image files can slow down the email loading process, leading to a poor user experience. To avoid this issue:
- Resize and compress your images before inserting them.
- Use a content delivery network (CDN) for better image loading speed if using hosted images.
3. Image Alignment and Size Issues
Sometimes images may appear distorted, or they may not align correctly within the email. To avoid this:
- Ensure that you are using the correct image dimensions for your email template.
- Use HTML or CSS to control the image alignment and size if necessary.
4. Emails Getting Marked as Spam
Emails with a lot of images or poorly optimized content may get flagged as spam. To prevent this:
- Keep a healthy balance between text and images.
- Make sure your images are well-optimized and not too large.
- Ensure your subject line is clear and relevant to avoid triggering spam filters.
5. Missing Alt Text
If an image doesn't display, it can confuse the recipient if there’s no alt text. Always include alt text that describes what the image is about, so the recipient still understands the content of the email.
FAQ
Here are some answers to frequently asked questions about adding images in emails:
1. Can I send images as attachments in email?
Yes, you can attach images in email, but be aware that they will appear as separate files that the recipient must open. For better presentation, it's often better to embed the image directly into the email body.
2. Why do my images not show up in the email?
If your images don’t display, it could be because the recipient’s email client blocks them by default, or the image file is too large. You can resolve this by using inline embedding and optimizing image sizes before sending.
3. How do I add images in Gmail?
To add images in Gmail, you can either attach them using the paperclip icon or embed them inline using the "Insert Photo" button. Inline images are placed directly in the body of the email, while attachments appear as separate files.
4. Is it better to use images or text in emails?
It’s best to use a mix of both. Text allows you to provide detailed information, while images can help grab attention and make your email more engaging. However, avoid overloading the email with too many images, as this can lead to slower loading times and a cluttered appearance.
5. How do I make sure my images are responsive in emails?
To ensure your images are responsive, use email templates that automatically adjust for different screen sizes. Most modern email marketing platforms, like Mailchimp and Constant Contact, provide mobile-friendly templates that resize images according to the device being used.
Conclusion
Adding images to your emails is a great way to make them more engaging and visually appealing. By following best practices such as optimizing image size, using alt text, and ensuring responsiveness, you can enhance the overall effectiveness of your email communication. Additionally, understanding how to overcome common issues like slow loading times or images not displaying will ensure your emails are professional and reach your audience effectively. Whether you're using Gmail, Outlook, Yahoo, or another provider, mastering image insertion will improve your email campaigns and make your messages stand out. So, test your emails, balance your images with text, and always keep your audience in mind for the best results!


