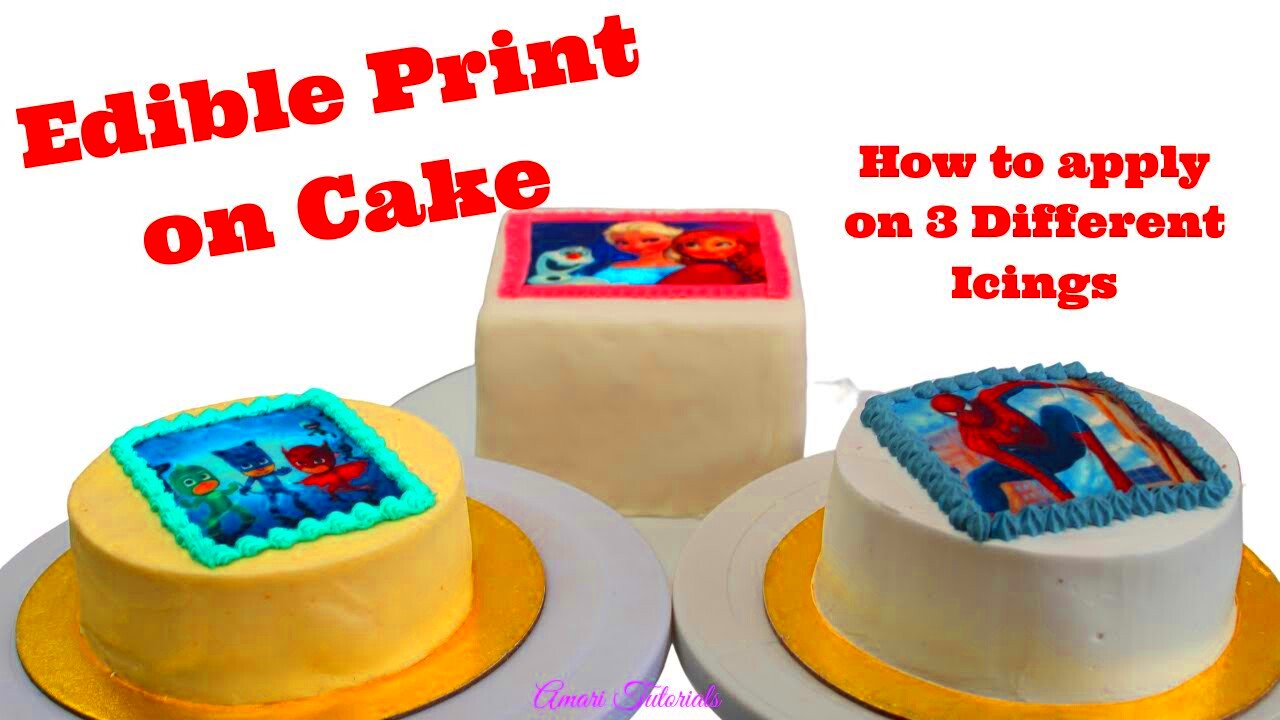
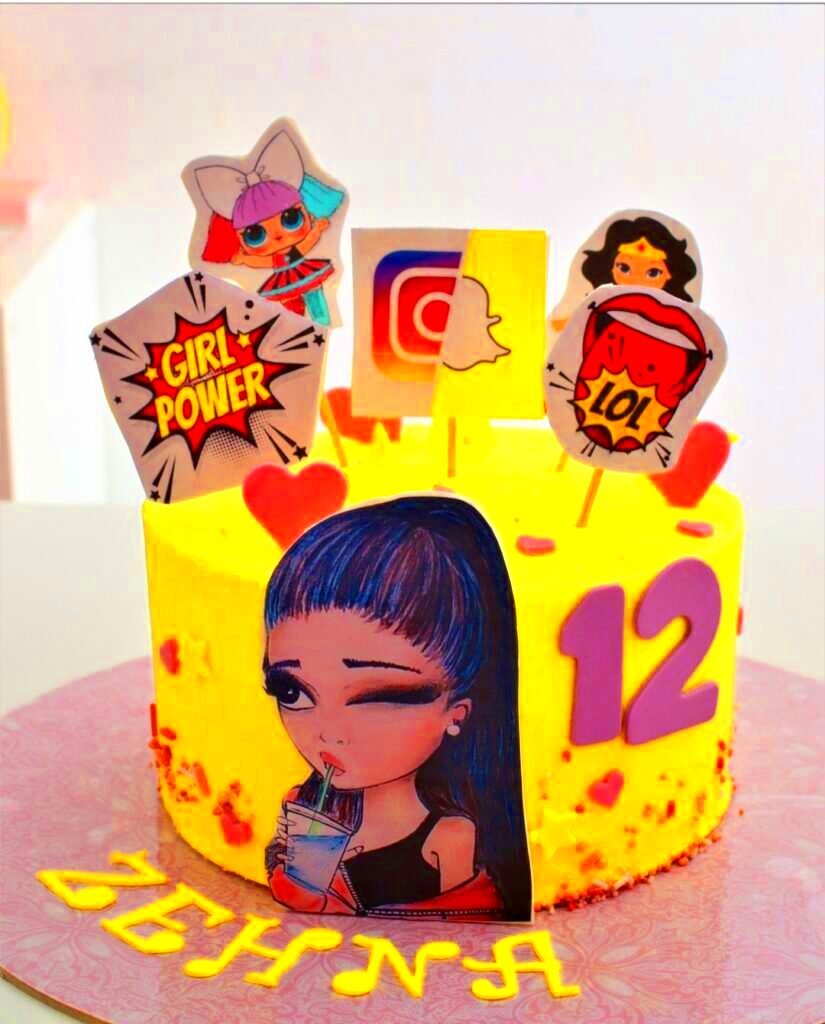
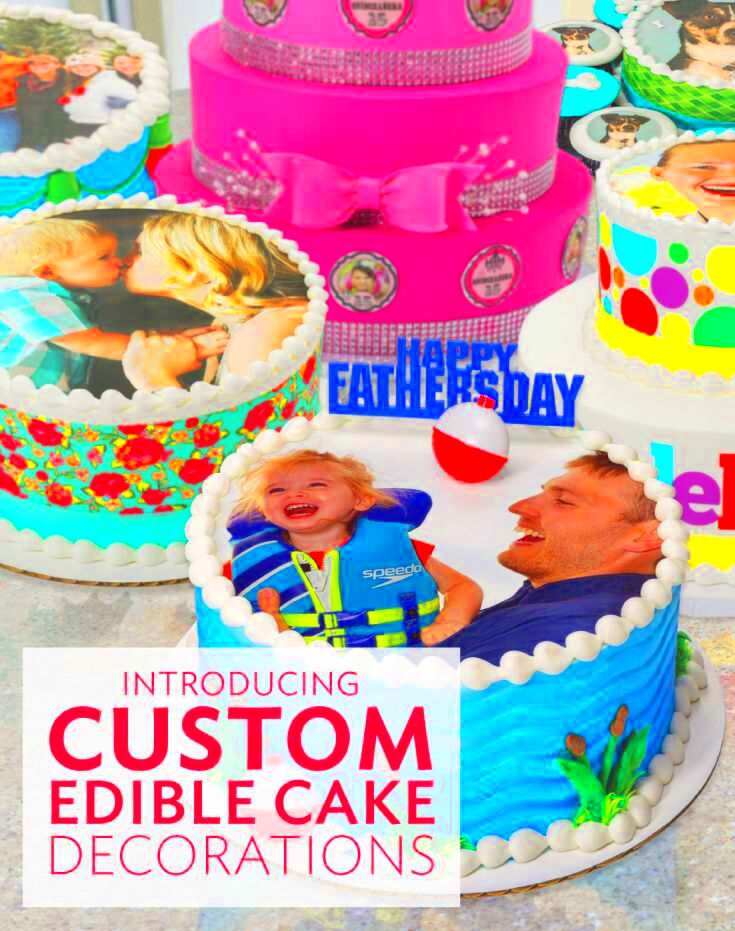
Edible images are a fun and creative way to personalize cakes for any occasion. These images are printed on special edible paper using food-safe ink, making them completely safe to eat. Whether you're celebrating a birthday, anniversary, or any other special event, adding an edible image to your cake can bring your design ideas to life in a simple and impactful way.
What's great about edible images is their versatility. You can print anything, from a photo of the birthday person to themed designs like logos or cartoon characters. This makes edible images an excellent option for custom cakes that need to look both beautiful and professional. The best part? It's not as difficult as it may sound. With a few basic tools and the right techniques, you can easily decorate your cake with a high-quality edible image at home.
Choosing the Right Edible Image for Your Cake

When selecting an edible image for your cake, it's important to choose one that complements both the theme of the event and the overall design of the cake. Here are a few tips to guide you in making the right choice:
- Consider the Occasion: Think about the event or celebration. For a birthday cake, a photo of the birthday person or a favorite character might work best. For a wedding, a simple and elegant design could be more fitting.
- Image Quality: Ensure the image is clear and high-resolution. Blurry or pixelated images won’t look great on your cake, so try to choose images with at least 300 DPI (dots per inch) for the best result.
- Color Contrast: Opt for images with good contrast, so they stand out against the cake's background. This will help the image look vibrant and clear.
- Size and Shape: Consider the size and shape of the image in relation to the size of your cake. Choose an image that fits nicely without overwhelming the design.
When you're clear on the image that suits your cake, it’s time to print it. If you're ordering from a supplier, they can usually help with sizing, and if you’re doing it yourself, ensure your printer is set to the correct dimensions for your cake’s size.
Also Read This: Understanding YouTube Video Ratio and Tips for Optimization
Materials Needed to Put an Edible Image on a Cake

Before you start putting the edible image on your cake, it's important to have the right materials on hand. Here’s a list of everything you'll need:
- Edible Paper: The most common types are wafer paper and icing sheets. Wafer paper is thinner and works well for delicate designs, while icing sheets have a thicker texture and are more suitable for vibrant images and intricate details.
- Edible Ink Printer: To print your images, you’ll need an edible ink printer. These printers use food-safe ink that is designed for printing directly onto edible paper.
- Food-Safe Ink: This ink is specially formulated for printing edible images and is safe to consume. Make sure to use only food-grade ink to avoid any safety issues.
- Rolling Pin or Fondant Smoother: If you're using fondant or other cake coverings, these tools help to create a smooth surface, making it easier to apply the edible image.
- Scissors: You’ll need these to cut the edible image to fit your cake perfectly. Be sure to trim carefully to avoid damaging the design.
- Food-Grade Glue or Water: Some people use edible glue to attach the image, while others prefer a small amount of water. Both work well to help the image stick to the cake without smudging the colors.
With these materials, you'll be ready to create a beautifully decorated cake. Whether you're a beginner or an experienced baker, gathering the right supplies makes the process smoother and ensures better results.
Also Read This: Stretching an Image Without Distortion
Steps to Prepare Your Cake for an Edible Image
Before you can apply an edible image to your cake, it’s essential to prepare the cake properly. A little bit of preparation can go a long way in ensuring that the image goes on smoothly and looks flawless. Follow these simple steps to get your cake ready:
- Step 1: Choose the Right Cake Base: Make sure your cake is fully baked and cooled before applying the edible image. It’s important to let the cake cool completely to avoid any melting or warping of the image.
- Step 2: Smooth the Cake Surface: Use a fondant smoother or a rolling pin to smooth out the surface of your cake. If you’re covering the cake with fondant or buttercream, make sure it’s applied evenly. A smooth surface will ensure the image adheres well and looks flawless.
- Step 3: Apply a Thin Layer of Icing: If you're using buttercream or any other type of icing, apply a thin layer over the cake. This acts as an adhesive for the edible image. Make sure it’s not too thick to prevent the image from getting soggy.
- Step 4: Let the Cake Set: Allow the icing or fondant to set for a few minutes. This helps prevent the image from sliding around once it’s placed on the cake.
- Step 5: Trim the Cake to Fit the Image: If the image needs to fit a specific area of the cake, make sure to trim the edges carefully. You can use a knife to carve the cake to suit the design.
These simple steps will help you prepare your cake for the perfect edible image application.
Also Read This: How to Flip an Image in PowerPoint
How to Transfer the Edible Image onto the Cake
Once your cake is prepped and ready, it’s time to transfer the edible image. This is the most exciting part of the process, and it’s easier than you might think. Follow these steps for a seamless transfer:
- Step 1: Remove the Edible Image from the Paper: Carefully peel the edible image from the backing sheet. If you’re using icing sheets, you may need to use a small knife to lift the edges gently. Be careful not to tear the image.
- Step 2: Wet the Cake Surface: Lightly dampen the surface of your cake where you plan to place the image. You can use a damp sponge or a small brush dipped in water. This helps the image stick without bubbling or wrinkling.
- Step 3: Position the Image on the Cake: Gently place the edible image onto the dampened area. Use your fingers or a fondant smoother to press it down gently. Be careful not to stretch the image.
- Step 4: Smooth Out Any Bubbles: If you notice any air bubbles or wrinkles, gently smooth them out with your fingers or a fondant smoother. Work from the center outwards to avoid damaging the image.
- Step 5: Let the Image Set: Allow the image to settle for at least 10-15 minutes before decorating further. This ensures the image sticks properly and that it won’t move when you add other cake decorations.
By following these steps, your edible image will be applied perfectly, giving your cake a professional look. It’s all about patience and gentle handling to make sure your design stays intact.
Also Read This: How to Upload Video to Canva from YouTube
Common Mistakes to Avoid When Using Edible Images
Using edible images on cakes is a fun and creative way to decorate, but there are a few common mistakes that people often make. Avoiding these will help ensure that your cake turns out beautifully. Here’s what to watch out for:
- 1. Using the Wrong Type of Edible Paper: Not all edible papers are the same. Wafer paper is thin and fragile, while icing sheets are thicker and more durable. Using the wrong paper can result in poor image quality or difficulty applying the image to your cake.
- 2. Applying the Image to a Wet or Sticky Surface: If your cake’s surface is too wet or sticky, the edible image may become soggy or stick in unwanted places. Always make sure the surface is just lightly damp, not soaked, before applying the image.
- 3. Printing Low-Resolution Images: Low-quality images will look blurry or pixelated when printed. Always choose high-resolution images (300 DPI or higher) for the best results. A blurry image can ruin the overall look of your cake.
- 4. Not Trimming the Image Properly: Sometimes people forget to trim the edges of the edible image before placing it on the cake. Make sure to carefully cut the image to fit the design of your cake. Sharp scissors work best for clean edges.
- 5. Applying the Image Too Early: If you place the edible image on the cake too soon, it can become difficult to handle or even get damaged. Wait for the icing or fondant to set before applying the image to ensure that it sticks properly.
- 6. Storing the Cake Improperly: After applying the edible image, avoid putting the cake in a humid environment. Humidity can cause the image to dissolve or run. Keep your cake in a cool, dry place and avoid refrigerating it if possible.
Avoiding these common mistakes will help you get the best results when using edible images. With a little attention to detail, your cake will look professional and stunning!
Also Read This: Adding Images in Hunger Games Simulator
Creative Ideas for Using Edible Images on Cakes
Edible images are a fantastic way to add a personal touch to your cakes. Whether it's a special event or a simple treat, you can get as creative as you want with the images. Here are some fun and creative ideas for using edible images on cakes:
- Photo Cakes: A great idea for birthdays, weddings, or anniversaries is to use a high-quality photo of the person or couple the celebration is for. You can have their favorite picture printed on the cake to make it extra special.
- Logo Cakes: Perfect for corporate events or birthdays, printing a company logo or a favorite brand image onto the cake adds a unique touch. This is also a popular choice for sports events or team-themed parties.
- Children’s Themed Cakes: Edible images of cartoons, superheroes, or favorite animated characters are a big hit with kids. Whether it’s a Disney princess or a superhero logo, these images make the cake stand out.
- Seasonal and Holiday Themes: For holidays like Christmas, Halloween, or Easter, you can print festive images such as snowflakes, pumpkins, or Easter eggs. These are easy to apply and instantly bring the holiday spirit to your cake.
- Creative Borders or Patterns: Instead of printing a large image, consider using edible images to create a border or pattern around the edges of the cake. This could be a floral pattern, geometric shapes, or a lace effect to complement the cake design.
- Interactive Cakes: If you're feeling extra creative, print a "hidden" message or design under a layer of icing. The image will be revealed as guests cut into the cake!
With endless possibilities, you can customize your cakes with edible images to fit any theme or occasion. The creative options are only limited by your imagination!
Also Read This: Mastering Image Cropping with AI Tools
Maintaining the Quality of Edible Images on Cakes
Edible images are a great way to decorate cakes, but it’s important to take proper care of them to maintain their quality. Here's how you can ensure that your edible images stay vibrant and fresh:
- Proper Storage: After applying an edible image, avoid putting the cake in a very humid environment. Excessive moisture can cause the image to run or dissolve. Store your cake in a cool, dry place, away from direct sunlight.
- Avoid Refrigeration: Refrigerating a cake with an edible image can cause the image to fade or become soggy. If possible, keep your cake at room temperature. If refrigeration is necessary, try to keep the cake in an airtight container.
- Cover the Image: If you're preparing the cake in advance, consider covering the edible image with a light layer of clear, non-stick plastic wrap. This helps protect the image from dust or accidental contact while preserving its appearance.
- Use Fresh Images: Edible images tend to lose their vibrancy the longer they are stored, especially if they are exposed to air for a long time. It's best to print the image as close to the cake-decorating time as possible.
- Keep the Cake's Surface Dry: Before applying the image, ensure the cake surface is not too moist. A dry, smooth surface helps the edible image adhere better and prevents it from becoming soggy.
- Trim Images Right Before Use: If you need to cut the image to fit a specific size, do it just before applying it to the cake. This ensures that the edges stay crisp and won’t deteriorate before being placed on the cake.
By following these simple maintenance tips, you can keep your edible images looking fresh and beautiful for longer, ensuring your cake turns out picture-perfect every time.
Also Read This: An Easy Guide to Making AI Art for Free
Frequently Asked Questions
Here are some common questions that people have when using edible images for cakes:
- Can I print any image on edible paper? Yes, you can print almost any image, but ensure it’s high-resolution to avoid pixelation. It’s best to use a 300 DPI image for the best quality.
- How do I store a cake with an edible image? To maintain the quality, store the cake in a cool, dry place. Avoid refrigerating the cake, as this can cause the edible image to degrade.
- Can I eat the edible paper? Yes, the edible paper is made from food-safe ingredients like rice or starch, and it is completely safe to eat along with the ink that is used to print the image.
- Do I need special equipment to print edible images? Yes, you need an edible ink printer and edible ink. These printers are designed to print on special edible papers like icing sheets or wafer paper.
- How long does the edible image last on the cake? Edible images last as long as the cake itself, as long as they’re kept in proper conditions. Exposure to humidity and direct sunlight can cause the image to fade or dissolve.
- Can I use edible images on all types of cakes? Yes, edible images can be used on cakes covered with fondant, buttercream, or any smooth surface. Just make sure the surface is dry and smooth for the best results.
If you have any other questions, feel free to reach out or check with your edible image supplier for more detailed guidance!
Conclusion and Tips for Perfect Cakes
Creating a cake with an edible image can elevate your dessert game, making it look professional, personalized, and incredibly fun. Whether you're celebrating a special occasion or just want to experiment with cake decorating, edible images provide a creative way to customize your cakes easily and beautifully. By following the steps mentioned above, you can ensure that your edible images are applied flawlessly, giving your cake that extra wow factor.
Here are a few final tips to ensure your cake turns out perfectly:
- Use High-Quality Images: Always opt for high-resolution images to ensure a crisp, clear print. Avoid using low-quality images, as they can appear blurry or pixelated when printed.
- Prepare Your Cake Surface Well: Ensure that the surface of your cake is smooth and even before applying the edible image. This helps the image adhere better and prevents it from wrinkling or bubbling.
- Apply the Image at the Right Time: Timing is crucial. Don't apply the edible image too early—let your icing or fondant set for a while so the image sticks properly and doesn’t slide.
- Keep the Cake in a Cool, Dry Place: To prevent your edible image from fading or becoming soggy, always store your cake in a cool, dry environment. Avoid refrigerating it unless absolutely necessary.
- Practice Patience: Don’t rush the process. Take your time when transferring the image to avoid smudging or damaging it. Patience will ensure the best results.
With these tips in mind, you’re all set to create stunning, personalized cakes that will impress your guests and make your celebrations memorable!


