It doesn’t matter if you are making beautiful wall art, teaching aids, and lively posters; printing huge images for your projects can completely change their outlook. Most of the people might think that the process of printing large images takes lots of energy but it is easier than what they think. Through this article, we will take you through steps on how to print large images over multiple papers without frustrating yourself each time you face one.
Understanding the Requirements for Multi-Page Printing

Is it time to print? Well, it is very important to know the things you need when planning to print multi-page documents. The following are some of the main considerations you should keep in mind:
- High-Resolution Images: Start with a high-resolution image. The higher the resolution, the clearer your print will be. Aim for at least 300 DPI (dots per inch) for the best quality.
- Printer Capability: Ensure your printer can handle the size of the pages you’ll be printing. Most home printers can print standard letter or A4 sizes, but larger printers can accommodate bigger formats.
- Paper Type: Choose a quality paper that suits your project. Glossy paper works well for photos, while matte paper is great for graphics or text-heavy prints.
- Scissors or Trimmer: Have tools ready to trim and align your printed pages perfectly. A paper cutter can provide cleaner edges than scissors.
Creating a stunning multi-page print that appears unified and professional is achievable by comprehending these necessities.
Also Read This: Understanding Commentary YouTube and Its Unique Content Style
Choosing the Right Software for Printing Large Images
In order to divide your large image into manageable bits, selecting the appropriate software is vital. Here are a few widely-used alternatives that you may take into account:
| Software | Features | Cost |
|---|---|---|
| Adobe Acrobat | Split images, set page size, professional results | Paid |
| Microsoft Paint | Basic editing, user-friendly, available on Windows | Free |
| Free Range Stock Image Downloader | Specialized for downloading and splitting images | Free |
| GIMP | Advanced editing features, supports various formats | Free |
When software is chosen, the following are important to consider:
- User Interface: Select software with a user-friendly interface, especially if you are new to image editing.
- Functionality: Look for features that allow you to easily split and arrange images.
- Cost: While some options are free, investing in quality software may provide better results.
Using appropriate software for large prints becomes a cakewalk hence focusing on your imagination and artwork will be easy!
Also Read This: How to Add an Image to a Green Screen in CapCut
Step-by-Step Guide to Print Large Images Across Multiple Pages
Printing huge images over several pages would just take too long to do. However, by taking it step by step you would be surprised at what you can achieve. Below are the steps on who to start:
- Select Your Image: Choose the image you want to print. Make sure it’s high-resolution to ensure clarity.
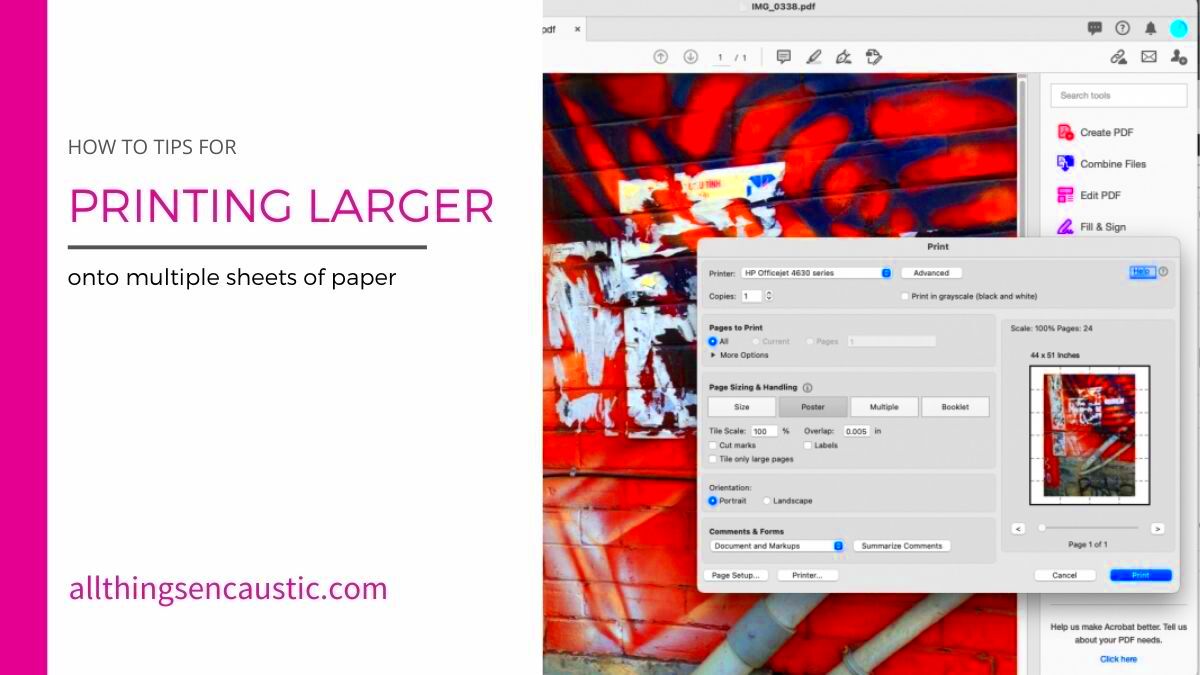
- Open Your Software: Launch your chosen software for printing. Options like Adobe Acrobat or Free Range Stock Image Downloader work well.
- Import the Image: Upload the image into the software. Make sure it loads properly without any distortion.
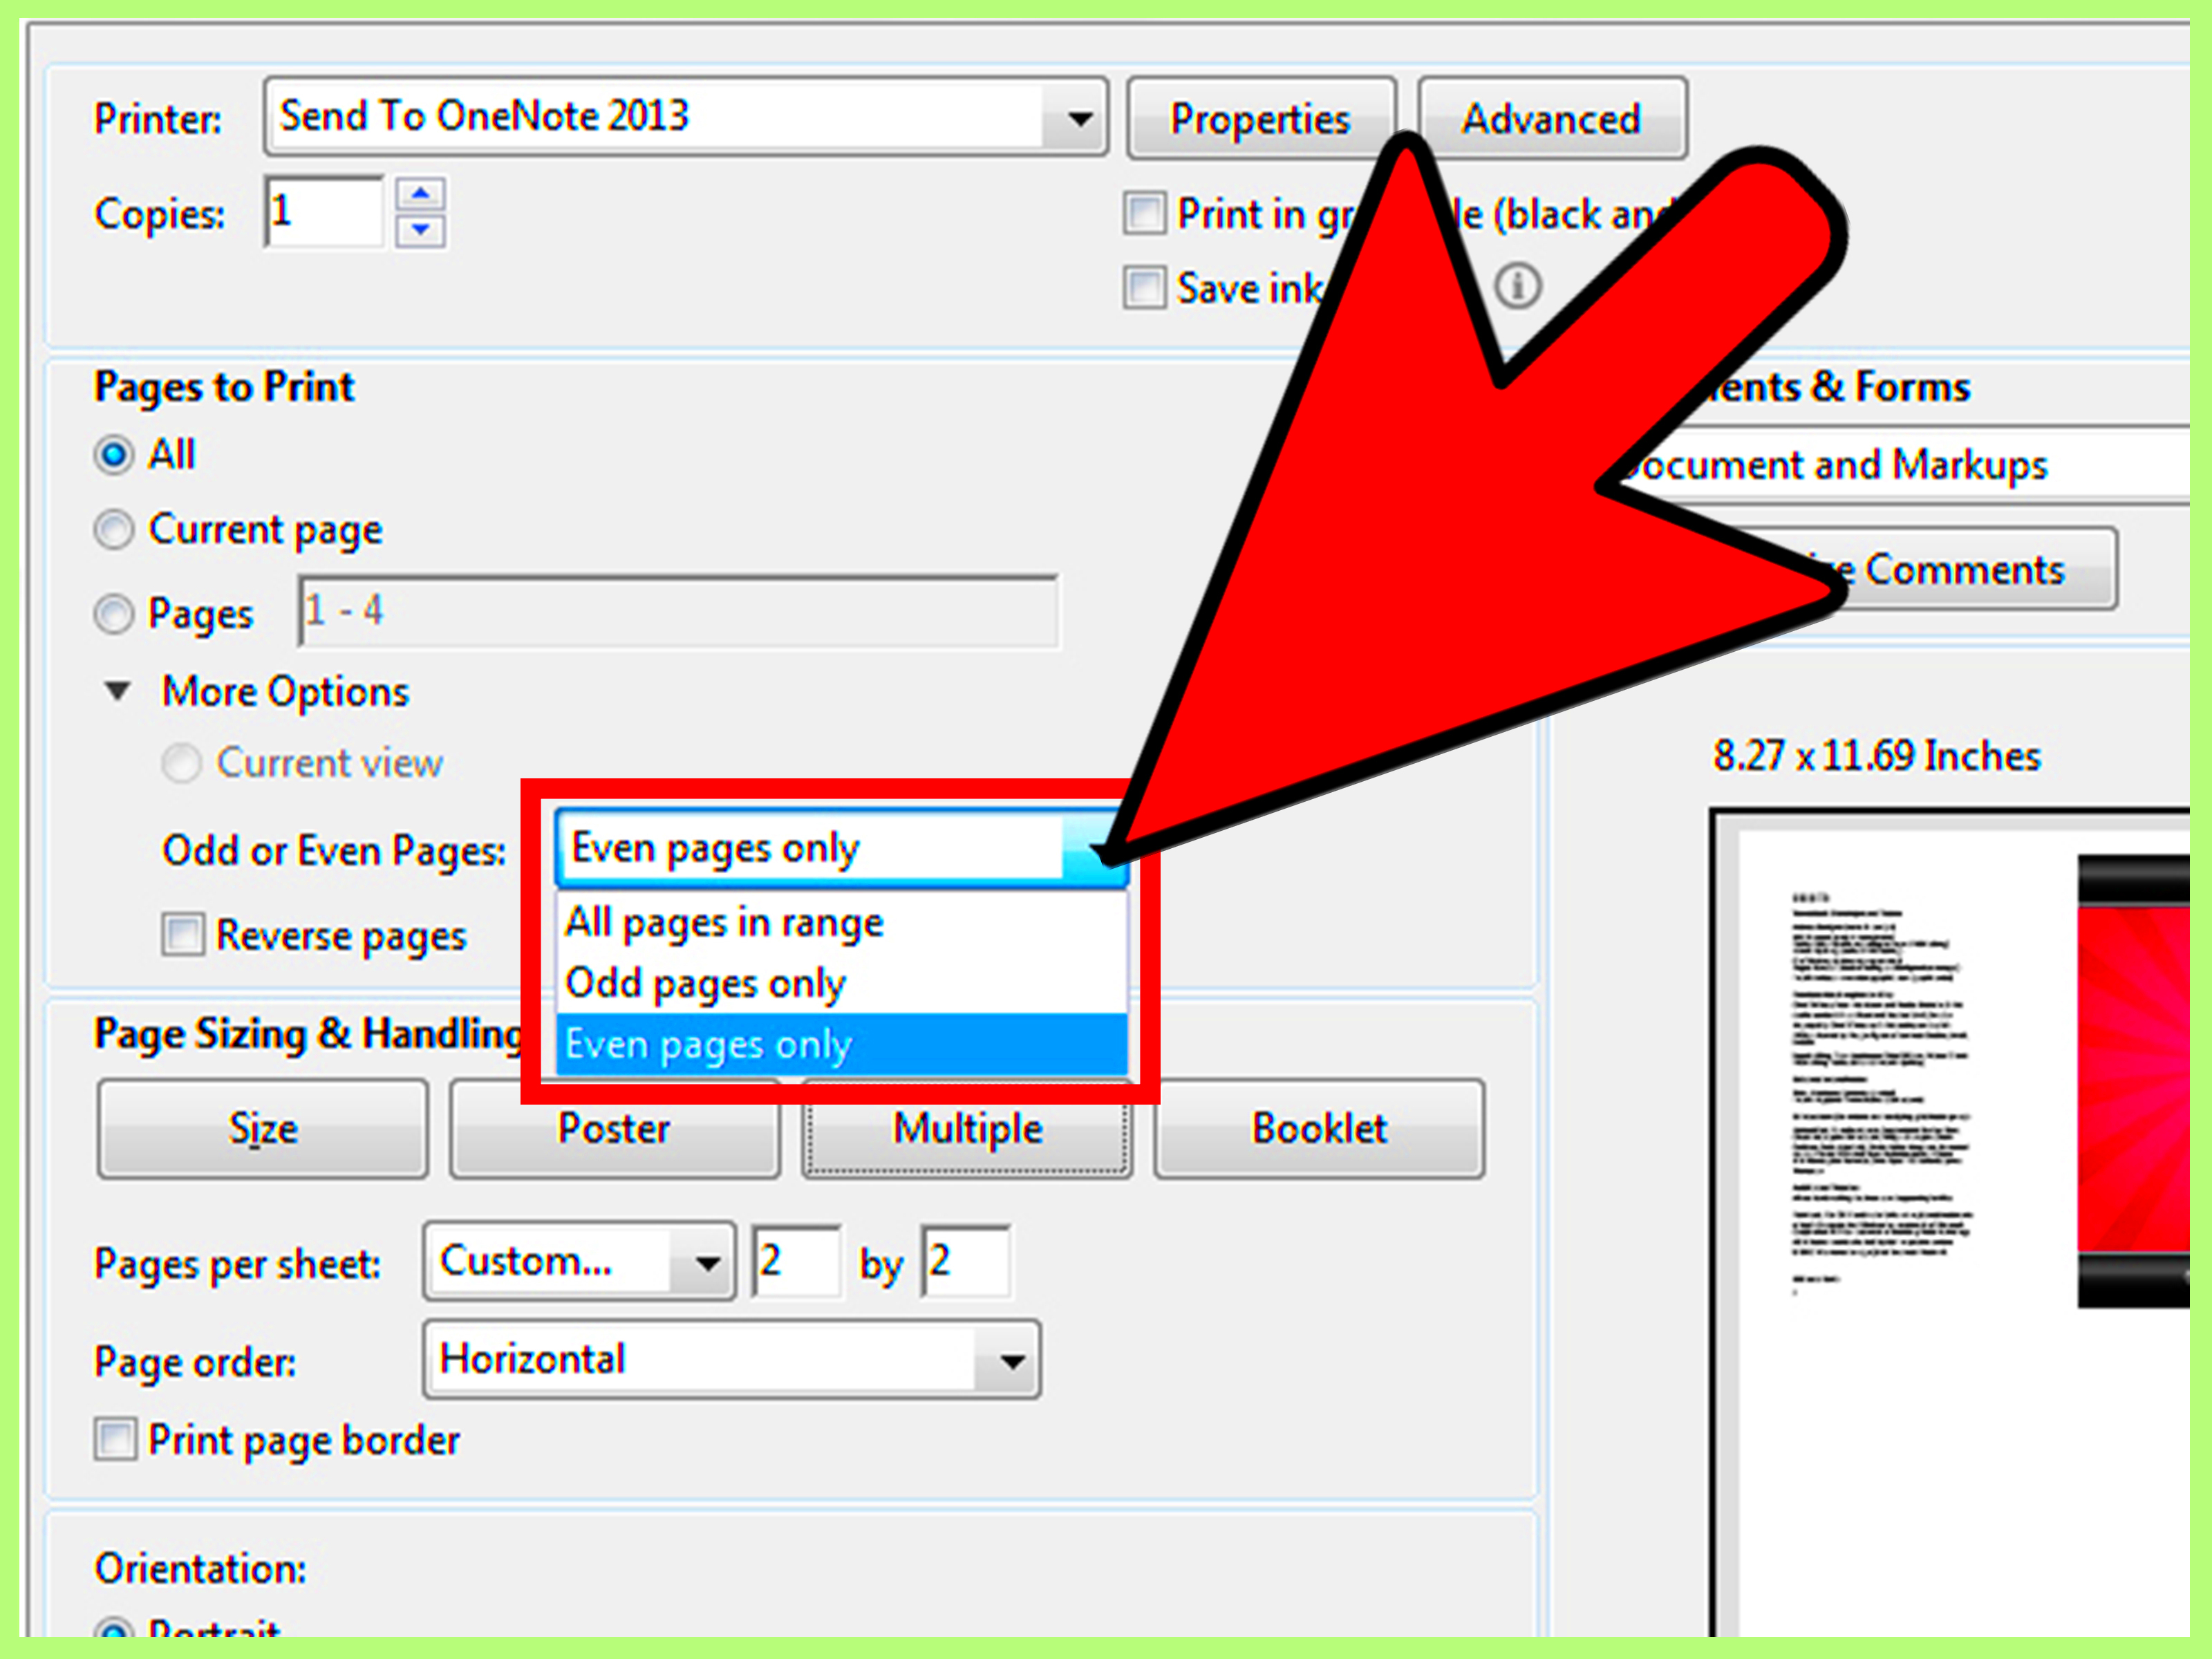
- Set Page Size: Adjust the page size according to your printer’s specifications. Common sizes include letter (8.5” x 11”) or A4 (8.27” x 11.69”).
- Split the Image: Use the software’s features to divide the image into multiple pages. Most tools offer an option to split automatically.
- Check Print Settings: Before printing, check your settings. Make sure you have selected the correct paper type and size.
- Print a Test Page: It’s always a good idea to print a test page first. This helps ensure that everything looks right before you print the entire image.
- Print the Final Image: Once satisfied, print the final image across multiple pages. Keep an eye on ink levels to avoid interruptions!
This would make the procedure less complicated and you will have a beautiful big picture that can be displayed!
Also Read This: Understanding YouTube Video Processing Time and Its Variability
How to Adjust Image Resolution for Multi-Page Printing
Maintaining the quality of printing large images, image resolution is very important. To make sure that your image is properly adjusted, follow these guidelines:
- Understand DPI: DPI stands for dots per inch and indicates the image’s resolution. For printing, aim for a minimum of 300 DPI. This ensures crisp and clear prints.
- Check Current Resolution: Use your software to check the image’s current resolution. If it’s lower than 300 DPI, consider increasing it.
- Resample the Image: Resampling involves changing the DPI without altering the pixel dimensions. In programs like Adobe Photoshop, you can easily resample images.
There is a rapid instruction manual regarding how one can render again in Photoshop:
- Open your image in Photoshop.
- Go to Image > Image Size.
- Uncheck Resample and set the resolution to 300 DPI.
- Recheck Resample, then adjust the dimensions as needed.
To maintain the vibrancy and detail of your images, print them at a suitable resolution so they appear like they have been taken right out of a magazine.
Also Read This: Cost Considerations: How Much Does Photobucket Cost?
Tips for Aligning and Assembling Printed Pages
After having printed your large picture across several pages, the next thing you need to do is put the pieces together. The following tips can be of assistance on how to align and fit them:
- Trim Edges Carefully: Use a paper cutter or scissors to trim the edges of each printed page. This will help eliminate any white borders and ensure a cleaner look.
- Lay Out the Pages: Before taping, lay all printed pages on a flat surface in the correct order. This gives you a visual preview of how they will look once assembled.
- Use a Reference Point: Identify a reference point, like a specific color or line, to help align the images accurately as you piece them together.
- Secure with Tape: Use clear tape to attach the pages. You can tape them on the back for a neater appearance. Be careful not to tape over important image areas.
- Final Check: Once assembled, step back and review the entire image. Look for any misalignments and make adjustments as needed.
Sure! You will likely have an easy time displaying large images perfectly. After this treasurable piece of art is ready, it can be hung on your wall for display – all you need is some time and care.
Also Read This: A Quick Guide to Capturing an Image from a Video for Still Shots
Common Issues and How to Fix Them When Printing Large Images
In case you encounter them, you need not be worried because they are common issues with photos and therefore have simple solutions. For instance loose belts or worn out rollers can cause prints not to come out as per the expectations; hence it is important to check these parts regularly.
- Blurry Images: If your printed image looks blurry, it might be due to low resolution. Always ensure your image is at least 300 DPI for sharp results. If it’s too late, consider resampling the image in software like Photoshop.
- Misalignment: Pages may not line up perfectly when printed. To fix this, use a reference point on the image, such as a specific color or line, to align pages as you tape them together.
- Ink Smudging: If the ink smudges, your printer may be using too much ink, or you might be printing on the wrong paper type. Use quality paper designed for your printer type and check the ink settings.
- Paper Jams: Paper jams can occur, especially with thicker paper. Make sure the paper is loaded correctly in the tray and that there are no obstructions in the printer.
- Incorrect Page Size: If your pages aren’t the correct size, double-check your print settings. Make sure you’ve set the page size in both your software and printer settings.
In case you know these problems often occurring and they can be rectified then it's possible for one to attain great results in printing by not facing any challenges or hindrances.
Also Read This: How to Use VectorStock Graphics for Twitch Emotes Legally
Frequently Asked Questions (FAQ)
Have any queries concerning the printing of huge pictures? You are not the only one! Here are some common questions asked alongside their answers:
Q: What is the best paper to use for printing large images?
You do not want to use the same paper for your project that would be used in a different area; therefore, it is wise to choose depending on what exactly you are working on. If it is photos that one intends to print then glossy should be the way to go, whereas for graphics and written text matte would serve better. Regardless of your choice always make sure the quality remains above board otherwise low quality may lead to poor final output.
Q: Can I print large images at home?
A: Indeed! You can make large prints in the comfort of your home, as long as you have a printer and software that are compatible. Just check if your printer can manage with the paper sizes you intend to work with.
Q: How do I know if my image is high resolution?
A: In order to ascertain whether your image can be used for printing, look at its properties in your editing software. If the DPI stands at 300 or more, then you could print it comfortably.
Q: Is it necessary to use special software for printing large images?
If you have a basic program such as Microsoft Paint, you could use it; however, using specialized software will simplify the procedure, and it will be possible to obtain more satisfying outcomes.
Conclusion
Multiple-pages large-printing of images that ravishingly transforms confirmation of talented creativity can take your thoughts to flights. By knowing what is required, selecting suitable software as well as going through an outlined procedure in steps; beautiful prints are easy to create. Always be aware about frequent problems and their solutions so that a seamless printing process is experienced. Eventually, after showing some patience, you will have acquired skills on how to print large pictures perfectly and amaze people with your mind-blowing designs!

 admin
admin


