In fact, knowledge of tags is necessary since HTML consists of interconnected nodes which are referred to as ‘tags’. It’s crucial to know that HTML documents have their specific architecture, just like other documents do. Understanding these elements will help a designer put textual elements next to images on a webpage.HTML constitutes web artefact’s foundation. A web designer needs to understand the primary anatomy of HTML so he or she can manage text placement against images. This requires comprehension of tags and their interrelations.
At its core, HTML consists of elements enclosed in tags. For images, the <img> tag is used, while text is typically placed within <p> (paragraph) tags. Here’s a simple example:
<p>This is a paragraph.</p>
<img src="image.jpg" alt="Description">
You need to consider the arrangement of these elements in the document structure if you want to have the text effectively positioned next to an image. A solid comprehension will enable you to come up with content that is not only visually attractive but also easy to read.
Exploring Different Methods to Position Text Next to Images
In order to layout text alongside images in HTML, several methods can be employed; every method has its own pros and cons. Below are some of the well-known techniques:
- Inline Elements: By placing an image within a paragraph, text flows around it.
- Floating Elements: The CSS
floatproperty allows you to push an image to the left or right, letting text wrap around it. - Flexbox: This modern layout technique enables flexible positioning of elements, making it easier to align images and text.
On the basis of this information, you will choose the appropriate technique according to your design requirements. To identify which technique works best for a certain project you have to experiment with them.
Using CSS for Better Control Over Text and Image Placement
CSS, 무엇인가? – 간단히 말해, ‘Cascading Style Sheets’의 약자로 강력한 툴을 제공합니다. CSS는 HTML 요소의 스타일과 위치를 조정하는 데 유용합니다. 이를 통해 텍스트와 이미지의 배치를 수월하게 할 수 있습니다. 몇 가지 CSS 속성은 다음과 같은 것들입니다.
- Float: Use
float: left;orfloat: right;on images to allow text to wrap around them. - Margin: Add space between text and images using
marginproperties. - Padding: Control the spacing inside elements to enhance readability.
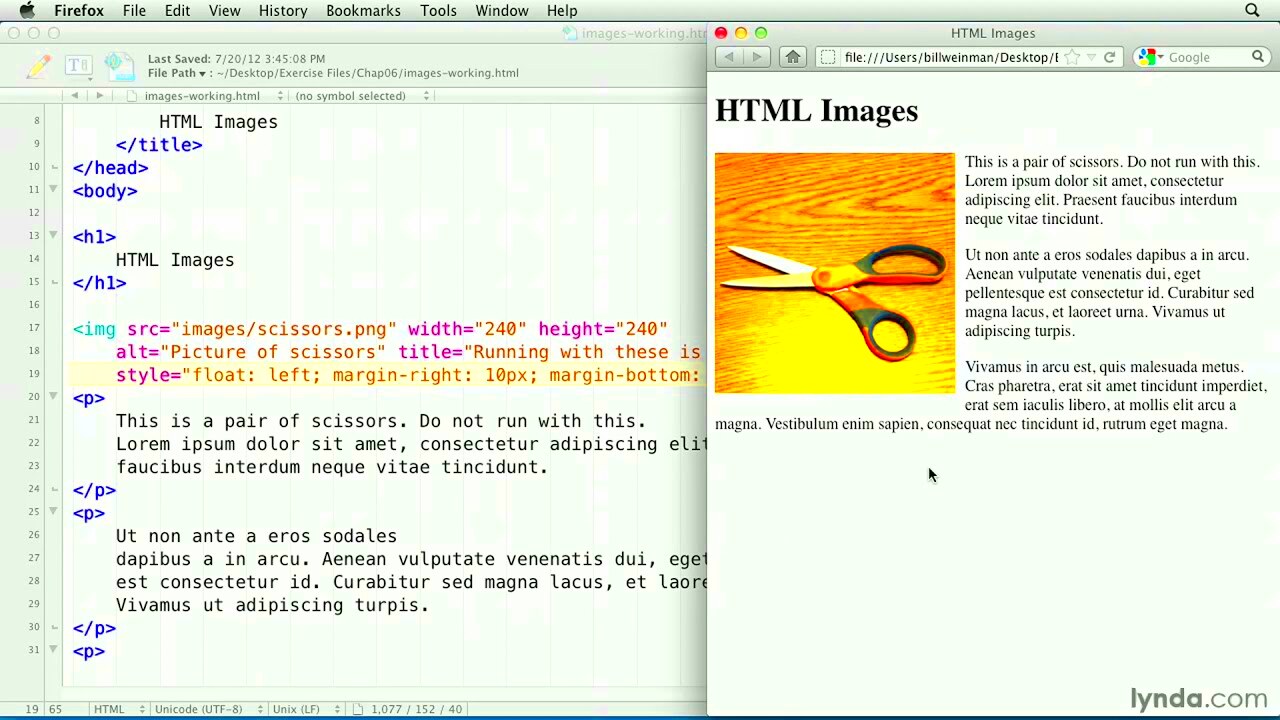
This is just one swift sample of how to use CSS in making an image float.
img {
    float: left;
    margin-right: 15px;
}
In addition to making the layout better, CSS makes it more flexible. Text and pictures are going to be beautiful on every appliance assuming appropriate stylings.
Applying the Float Property for Text Beside Images
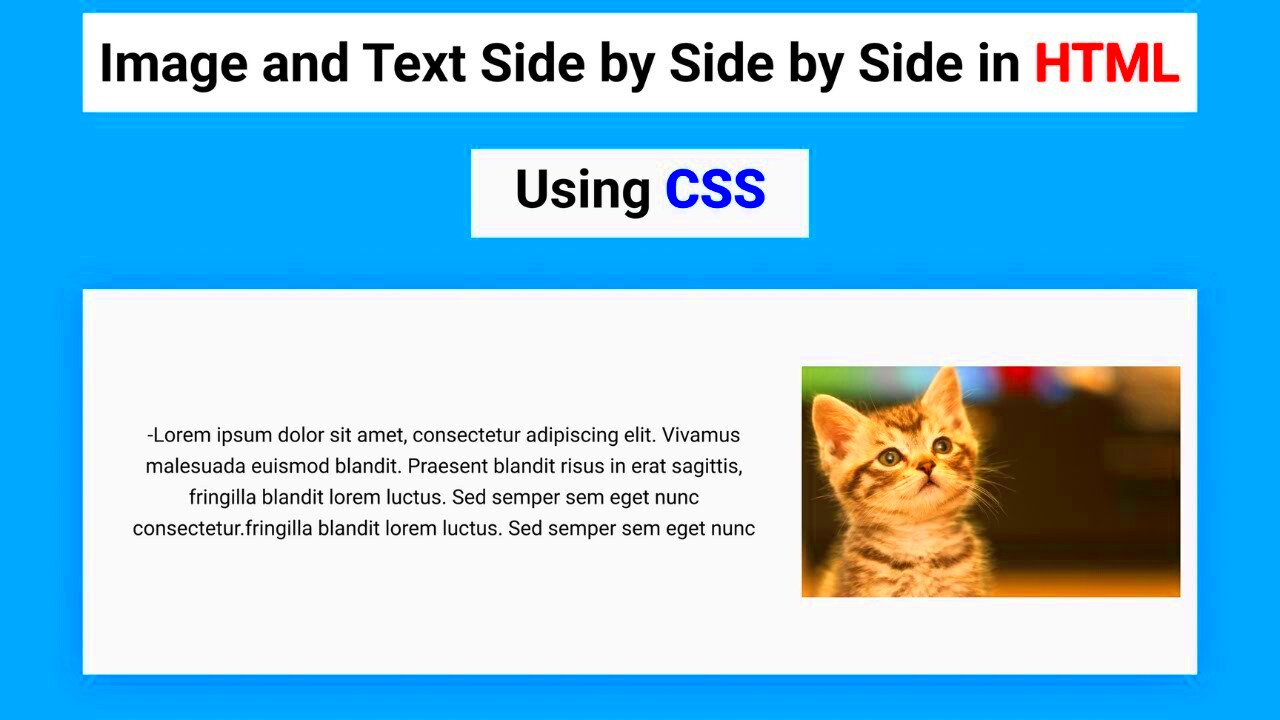
The use of CSS float property is very effective in placing the text and images next to each other. By allowing an image to “float” either to the right side or the left of its container, it makes possible for the text to appear around it. It is advantageous especially when developing sophisticated designs with little complication.
What follows are a few easy steps to effectively utilize the float property:
- Select Your Image: Use the
<img>tag for your image. - Apply CSS Float: In your CSS file, add
float: left;orfloat: right;to the image selector. - Add Margin: Use margin to create space between the text and the image, ensuring readability.
In CSS, a fundamental illustration of how this appears is shown below:
img {
    float: left;
    margin-right: 10px;
}
Hence why with this straightforward arrangement that I did, it makes a great difference in how text wraps itself around images providing a neat orientation. All you need to do is clear the float for every image used on your page so as to avoid any possible layout problems.
Utilizing Flexbox for Responsive Layouts with Text and Images
Flexbox is a revolutionary CSS grid pattern that makes it easier to design intricate layouts that are easy to create. For instance, when prioritizing responsiveness doing this helps fit texts beside images very well. With Flexbox, aligning items horizontally or vertically has never been simpler.
For your layout with Flexbox, simply do these things:
- Set the Container: Define a parent container and set its display property to
display: flex;. - Align Items: Use properties like
align-itemsandjustify-contentto control the alignment of text and images. - Control Flexibility: You can set
flex: 1;on your text or image to allow it to grow or shrink based on available space.
Below is an introductory example:
.container {
    display: flex;
    align-items: center;
}
img {
    margin-right: 15px;
}
In this way, the configuration makes sure that your arrangement is responsive. The text and image will resize depending on the size of the screen, thereby keeping it looking good.
Implementing Grid Layouts for Advanced Text and Image Placement
The CSS Grid layout is an advanced tool for handling complicated designs that include text and images. You can make a grid structure with it and thus help in the arrangement of elements both horizontally and vertically.
The procedures for establishing a grid design are as follows:
- Define the Grid: Set the parent container to
display: grid;and specify the number of columns and rows usinggrid-template-columnsandgrid-template-rows. - Place Your Items: Use the
grid-columnandgrid-rowproperties to position your text and images exactly where you want them. - Control Gaps: Utilize
gapto manage space between grid items, enhancing the overall look.
Here’s a brief illustration:
.container {
    display: grid;
    grid-template-columns: 1fr 2fr;
    gap: 20px;
}
This will yield a two-column arrangement that provides an area for an image on the first column and text on the second column. When it comes to complex designs, the grid layout is particularly advantageous since it allows one to manage how things are arranged while ensuring responsiveness.
Common Challenges When Placing Text Next to Images
Putting text next to pictures may seem easy but in reality has various authoritative hurdles. The aesthetic quality and legibility of your work can suffer from this problems prompting the need for effective means of addressing them.
Here are a few frequently faced challenges:
- Text Overlapping with Images: If images are too large or margins are not set correctly, text can overlap with images, making it hard to read.
- Alignment Issues: Different browsers can render layouts differently, leading to misaligned text and images. Testing across multiple browsers is essential.
- Responsive Design Problems: On smaller screens, images might push text out of view or cause unwanted stacking. It's crucial to ensure your layout adjusts properly.
- Accessibility Concerns: Ensure that images have appropriate alt text for users who rely on screen readers, as this improves accessibility.
By employing CSS for spacing, alignment and responsive design, you can pay off these challenges. You can also test your layout on different devices to determine if there are any potential problems that need to be fixed in order to provide a smooth user experience.
Frequently Asked Questions
When it gets to position writing next to pictures there are several queries that most individuals have. The following is an attempt to respond to some of the regularly asked questions in order to eliminate confusion.
- How can I make sure my text is always readable next to images? Use contrasting colors and adequate spacing. Setting a minimum width for text can also help.
- What is the best method for responsive design? Flexbox and Grid are both excellent choices for creating responsive layouts that adapt to different screen sizes.
- Should I use images in PNG or JPEG format? It depends on the image type. JPEG is generally better for photographs, while PNG is ideal for images with transparency or sharp edges.
- How do I clear floats after using the float property? You can use the clearfix method, which involves adding a class to the parent element that forces it to clear floated children.
When designing your layouts it is important to have these FAQs so that you will not experience any difficulties while working with text and images.
Wrapping Up the Guide on Text and Image Placement
In this guide, we have covered quite a number of issues regarding the placing of text adjacent to images in HTML. By covering basics, using CSS effectively and solving frequent problems, these will help you in improving your website design skills.
Here are some significant conclusions:
- Choose the Right Method: Whether it's float, Flexbox, or Grid, each method has its strengths. Choose based on your layout needs.
- Prioritize Readability: Always ensure your text is readable and accessible. Use adequate spacing, color contrast, and alt text for images.
- Test Across Devices: Make sure your design looks good on different screen sizes. Responsive design is crucial in today’s web environment.
If you put into practice the information acquired during your training, it is possible for you to achieve designs that are both attractive and usable at the same time increasing satisfaction of the users. It is also important that you keep on trying out and practicing in order to determine which method posses a higher level of efficiency when it comes to your projects!
 admin
admin


