Using edible images is an exciting approach to customize your pastry for several events. The use of edible materials such as rice paper or frosting sheets serves as the primary base for printing these imageries. They are safe to consume and contribute a distinct flavor to your cakes. Whether it’s for a birthday celebration, wedding or any other special occasion, edible images can actually enhance the appearance of your cake and make it more personalized.
These pictures have different styles – from plain designs to complicated pictures. The primary advantage of edible images is their flexibility. They can easily be customized according to the theme, and with technological advancement, printing edible images have been made easier enabling anyone to produce stunningly beautiful as well as professionally looking cakes from home.
Choosing the Right Edible Image
Therefore, you ought to take into account these things while picking an edible picture so that it goes well with your cake:
- Theme: Match the image to the occasion. For birthdays, you might choose a favorite character or hobby, while weddings often feature elegant designs.
- Size: Make sure the image fits the cake size. Measure your cake and choose an image that covers the desired area.
- Quality: Opt for high-resolution images to avoid pixelation. A clear image will enhance the cake's overall appearance.
- Material: Choose between rice paper and frosting sheets based on your cake type. Rice paper works well with whipped cream, while frosting sheets are great for buttercream.
So that you choose an edible picture that will go with your cake perfectly and make it a center of attraction.
Also Read This: The Best Universities for Computer Engineering Studies in the USA
Preparing Your Cake for the Edible Image
It is important to prepare the surface properly before applying an edible image to your cake. Here are some steps that guarantee smooth application:
- Cool the Cake: Make sure your cake is completely cooled. This prevents the image from melting or sliding off.
- Choose the Right Frosting: Apply a thin layer of frosting that complements the image. For rice paper, a whipped frosting works best, while frosting sheets pair well with thicker buttercream.
- Smooth the Surface: Use a spatula to create an even, smooth layer of frosting. This helps the image adhere better.
- Trim the Edible Image: If necessary, trim the edges of the edible image to fit your cake perfectly.
- Transfer the Image: Gently peel the backing off the image. Use a spatula to help lift it from the paper if it’s sticking.
When you follow the steps outlined above, your cake will be properly prepared for its edible image application, resulting in a stunning finish.
Also Read This: Wondering How to Download Photos From Flickr Without an Account? Here’s the Solution
How to Print an Edible Image
Although printing edible images may seem daunting, it is actually very easy once you understand the process. If you are aiming for a personalized cake design, gathering all necessary equipment such as tools and ingredients is essential. Below are some simple instructions on how to print edible images:
You'll need an edible ink printer as the first thing. These are printers meant to work with edible inks that are safe for different types of foods. They can be found online or in cake shops. Then, gather your edible paper such as frosting sheets or rice paper depending on the type of cake you have. We can now talk you through the process:
- Prepare Your Design: Use image editing software to create or modify your design. Ensure it’s high resolution and fits the size of your cake.
- Load the Printer: Insert the edible paper into your printer, following the manufacturer’s instructions to ensure it prints correctly.
- Print the Image: Hit print and watch as your design comes to life! Allow the printed image to dry for a few minutes.
- Store the Image: If you're not using it immediately, store the printed image in a cool, dry place, away from direct sunlight.
At some point in time, your training dataset will no longer be updated and that is what will happen by October 2023. By following these steps one is able to create an edible vibrant image for their cake. One should consider experimenting with different designs since printing edible images is a way of unleashing boundless creativity.
Also Read This: Mastering Image Flipping in CapCut
Applying the Edible Image on the Cake
Applying an edible image on a cake can feel intimidating sometimes. However, when done right, it turns out to be beautiful! Steps for applying an edible image on a cake:-
To begin with, make sure your cake has been appropriately made as discussed earlier. Once the frosting is on top and the cake is all set for serving, do the following:
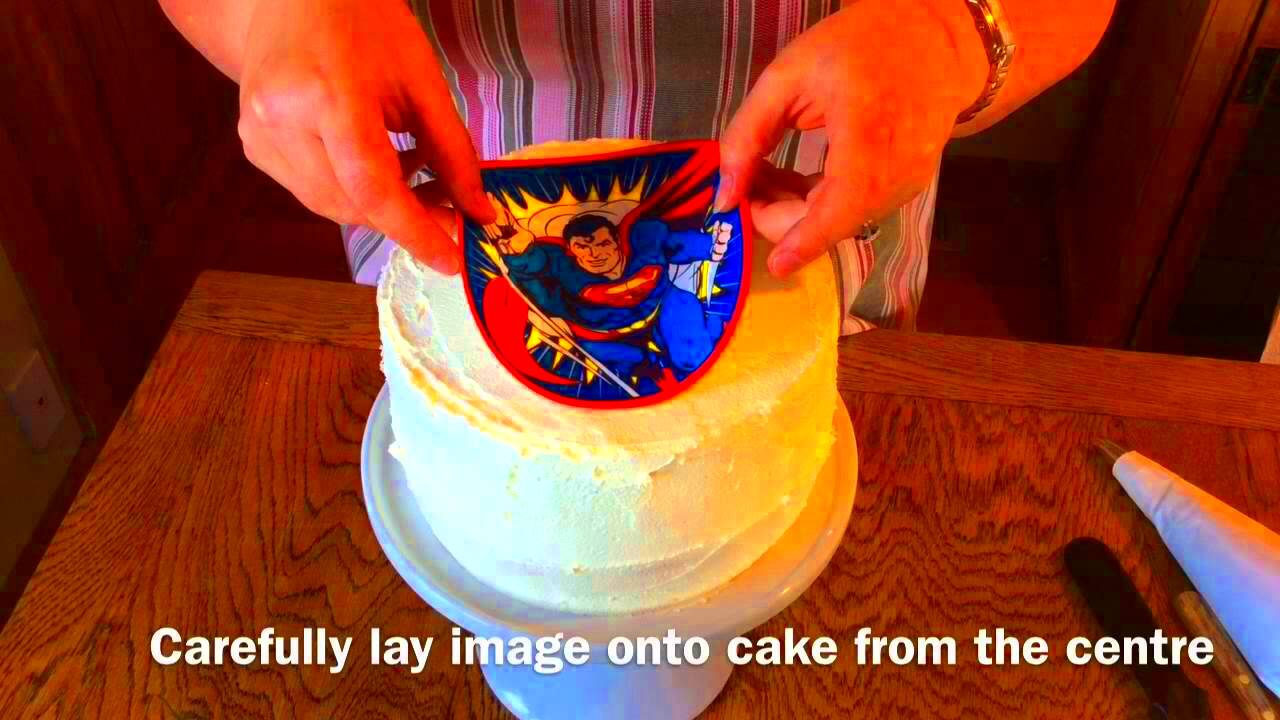
- Position the Image: Carefully align the edible image over the frosted area where you want it to go.
- Apply the Image: Gently place the image on the cake. Start at one end and slowly press it down, smoothing out any air bubbles with your fingers or a spatula.
- Seal the Edible Image: To ensure the image adheres well, you can lightly brush the edges with a bit of water or additional frosting. This will help seal it.
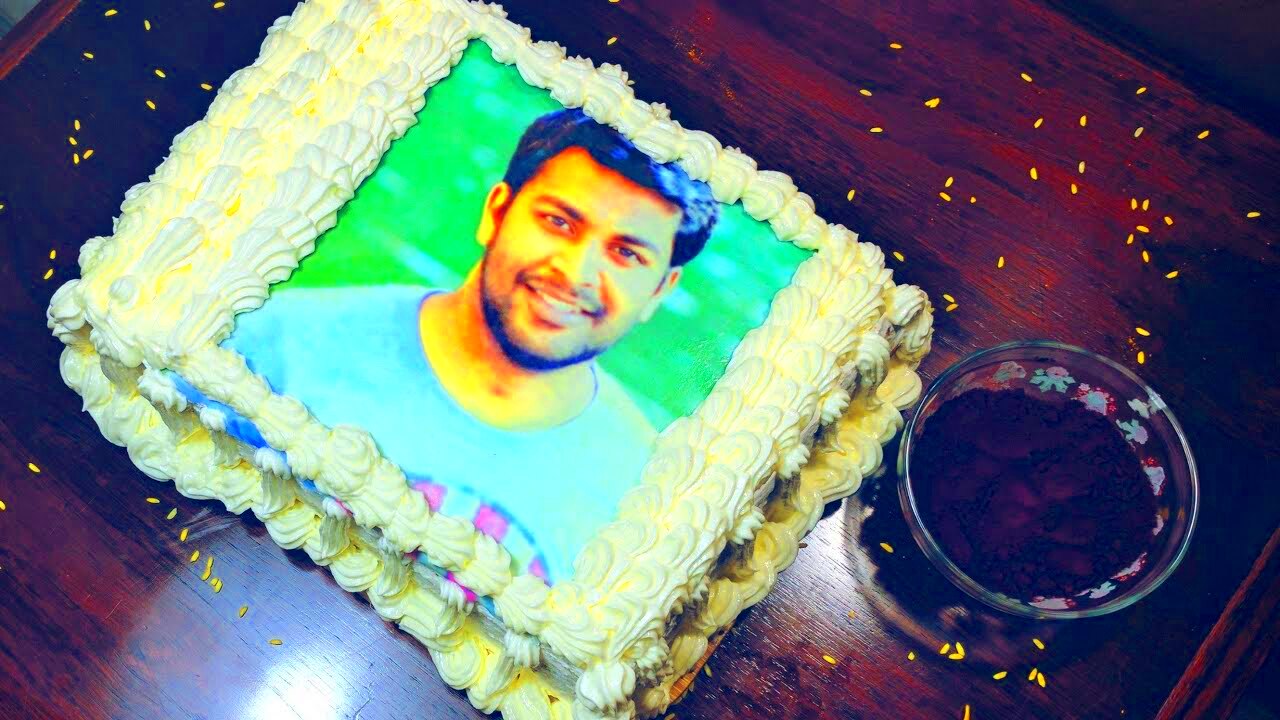
- Finishing Touches: After the image is applied, you might want to add decorations around it. This can include piping, sprinkles, or fresh flowers to make it pop!
When applying for something, just like with any other process, it's good to take your time. A normal cake is made special by an edible image that has been so well placed on it.
Also Read This: Step by Step Guide to Uploading an Illustrator File to Behance
Tips for Making the Edible Image Last
When you have used your edible picture, you want it to remain appealing as long as it can. Thus, here are some tips on how to keep your cake fresh and beautiful:
- Keep it Cool: Store your cake in a cool place, away from heat sources. Excessive heat can cause the image to melt or discolor.
- Avoid Moisture: Moisture can affect the integrity of the edible image. Keep the cake in a dry environment to prevent sogginess.
- Use Proper Storage: If you're not serving the cake immediately, cover it loosely with plastic wrap to protect it while allowing some airflow.
- Limit Sun Exposure: Direct sunlight can fade the colors of the edible image, so place your cake in a shaded area.
- Serve at Room Temperature: If the cake has been refrigerated, let it sit at room temperature for about 30 minutes before serving. This helps maintain the texture and flavor.
If you wish to make your cake more unforgettable, you can follow these tips that will enable you to eat your cake with its beautiful edible image for several days!
Also Read This: How to Download Fonts from Behance for Your Projects
Common Mistakes to Avoid When Using Edible Images
An improvement of the cake’s looks can be achieved by incorporating edible pictures, though blunders which can ruin the whole effect are easily committed. Below are some common mistakes, as well as their avoidance measures:
- Not Using the Right Printer: Make sure you use a printer specifically designed for edible images. Regular printers can use harmful inks that aren’t safe for consumption.
- Ignoring the Quality of Images: Always choose high-resolution images. Low-quality images can appear blurry or pixelated when printed.
- Forgetting to Let the Cake Cool: Placing an edible image on a warm cake can cause it to melt or slide off. Always ensure the cake is completely cooled.
- Not Preparing the Cake Surface: A well-frosted and smooth cake surface is crucial for a perfect application. Skipping this step can lead to a messy look.
- Applying Too Much Frosting: Excess frosting under the image can cause it to bubble or shift. Use a thin, even layer to create a smooth base.
- Neglecting Storage Conditions: Store your cake in a cool, dry place to keep the edible image looking fresh. Avoid direct sunlight to prevent fading.
Heed these usual blunders to make certain that your cake stands out with its magnificent feature of edible image. All it would take is some small details and your cake will turn into an eye candy in everyone’s party!
FAQs About Edible Images
To assist you, below are a few of the popularly asked queries relating to edible images that will be useful in your beginning:
- What are edible images made of?
- Edible images are typically printed on rice paper or frosting sheets using food-safe inks.
- How long do edible images last?
- Edible images can last up to a week when stored properly, depending on the type of frosting used.
- Can I freeze a cake with an edible image?
- It’s not recommended to freeze cakes with edible images, as freezing can cause the image to become soggy or lose its quality.
- How do I make my own edible images?
- You can create your own edible images using an edible ink printer and edible paper. Design your image using graphic software and print it directly onto the edible sheets.
- Can I use regular food coloring for edible images?
- No, you must use food-safe inks specifically designed for edible printing.
These Frequently Asked Questions aim at elucidating some of the common queries regarding edible images. They are an excellent method to improve your cake and realize your imaginative ideas!
 admin
admin


