If you're a Mac user and want to create visually appealing compositions by overlaying two images, you're in the right place. Mac's Preview app, often underutilized, offers a simple yet effective way to combine images without the need for complex photo editing software. Overlaying images can be useful for a variety of purposes, such as creating collages, comparing photos, or even adding text or logos over images. In this guide, we’ll show you how to easily overlay two images using the built-in Preview app.
The best part? You don’t need to install anything extra, and you don't need to be an expert in graphic design. With just a few simple steps, you can overlay images in no time!
What You Need to Get Started with Image Overlay

Before you begin overlaying images in Preview, there are a few things you'll need to gather:
- A Mac computer with macOS and the Preview app (this comes pre-installed on all Macs).
- Two images that you want to overlay. Make sure the images are saved in a format Preview supports (like JPG, PNG, TIFF, etc.).
- The Preview app already opened or ready to be accessed.
Once you have these essentials, you’re all set to start. There’s no need for additional software, making it a quick and efficient solution for simple image editing tasks.
Also Read This: How to Print an Image at a Specific Size
Opening the First Image in Preview

To begin the overlay process, you need to open the first image in Preview. This is a straightforward step, and here’s how you do it:
- Double-click the image file: When you double-click on an image, Preview should automatically open it. If Preview isn’t your default image viewer, you can right-click the image, select “Open With,” and choose “Preview.”
- Drag and drop: Alternatively, you can drag the image file directly into the Preview icon in your Dock, or onto the Preview window if it’s already open.
- File Menu: Open Preview, then go to the “File” menu in the top left corner and select “Open.” Find your image file and click “Open” to view it in Preview.
Once your first image is opened, you’ll be ready to move on to the next step, which involves opening the second image that you want to overlay on top of the first one.
Also Read This: Best Ways to Upload YouTube Videos to Instagram for Maximum Exposure
Opening the Second Image in Preview

Now that you’ve got your first image open, it’s time to bring in the second image that you’ll overlay. This step is as easy as opening the first one, and here’s how to do it:
- Drag and Drop: One of the quickest ways to open the second image is by simply dragging it from Finder and dropping it onto the Preview window with the first image open. This will automatically open the second image in a new Preview window.
- Use the “Open With” Option: If you prefer, right-click the second image, select “Open With,” and choose Preview from the list of available apps. This will open it in Preview alongside your first image.
- Open from the File Menu: Alternatively, go to Preview’s “File” menu, select “Open,” and choose the second image from your files. It will then appear in a new Preview window.
Once both images are open in separate Preview windows, you're ready to start overlaying them. The next step is to use the tools within Preview to position one image over the other, creating that perfect overlay effect.
Also Read This: Adobe Stock vs Alamy: Choosing the Best Stock Photography Platform
Using the Markup Toolbar to Overlay Images
Now that both images are open, you can start using Preview’s Markup Toolbar to overlay one image on top of the other. The Markup Toolbar provides simple tools for editing and arranging your images. Here’s how to use it:
- Activate the Markup Toolbar: To begin, click the "Show Markup Toolbar" button, located at the top of the Preview window (it looks like a little pencil icon). This will display a range of editing tools.
- Select the Second Image: In the window with your second image, use the selection tool (rectangular or freehand) to select the part of the image you want to overlay. Once selected, copy it by pressing Command + C or right-clicking and selecting “Copy.”
- Paste the Second Image onto the First: Switch to the window with your first image and paste the second image by pressing Command + V. The second image will appear as a new layer over the first one.
- Resize and Position: Use the selection handles around the second image to resize it as needed. Drag it to the desired position over the first image, aligning it however you like.
At this point, both images should be positioned on top of one another. The next step is to fine-tune the overlay effect by adjusting the transparency of one of the images for a more natural blend.
Also Read This: Understanding the Cost of Adobe Stock Music
Adjusting Transparency for Better Overlay Effect
To make your overlay effect more seamless, adjusting the transparency of one of the images is key. This gives you the ability to blend the two images together, creating a more cohesive final result. Here's how to do it:
- Select the Second Image: Make sure the second image, which will be made transparent, is selected. Click on it to ensure it’s active in the Preview window.
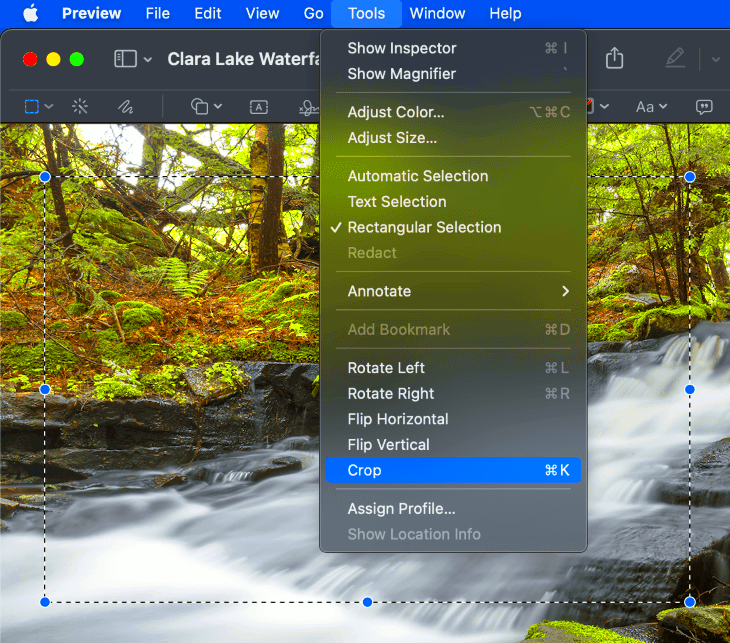
- Open the Adjust Color Tool: With the second image selected, go to the “Tools” menu in Preview and select “Adjust Color.” This will bring up a new set of sliders for adjusting the image’s appearance.
- Adjust the Opacity: Look for the “Opacity” slider in the Adjust Color panel. By dragging this slider to the left, you’ll reduce the opacity of the second image, making it more transparent. Adjust the opacity until you get the desired level of transparency for a smooth overlay effect.
- Fine-Tune Transparency: If you want the overlay effect to look even better, you can also tweak other settings like brightness or contrast to make the image blend more naturally with the background.
Once you're satisfied with the transparency and overall appearance, you’re almost done! The images should now be beautifully layered, creating a clear and attractive overlay effect.
Also Read This: Understanding Vector Images – A Complete Guide to What They Are
Saving the Overlaid Image
Now that you've successfully overlayed your images, the next important step is saving your work. After spending time adjusting the transparency and positioning, you’ll want to preserve the final image. Here's how to save your newly created overlay:
- Save the Image Directly: Once you're satisfied with how the images look, go to the “File” menu at the top of your screen. From the dropdown, select “Save” to overwrite the original image or “Save As” to create a new file with your overlayed image. If you choose “Save As,” you’ll be prompted to give the image a new name and choose a destination.
- Export the Image: For more control over the file format, choose “Export” from the “File” menu. This allows you to select different file types like JPEG, PNG, or TIFF, and you can also adjust the quality and resolution. PNG is a good choice if you want to maintain transparency.
- Choosing the Right File Format: Depending on what you plan to do with the overlay, you might prefer certain formats:
- JPEG: Ideal for general use with a balanced file size and image quality.
- PNG: Best for retaining transparency in the overlay.
- TIFF: Great for high-quality images that require detailed editing.
- Final Check: Before saving, double-check the final positioning and transparency of your images. Once saved, you won’t be able to easily make changes unless you reopen the files.
With your overlay saved, you can now share or use the image as needed, knowing you've created a unique composition with minimal effort.
Also Read This: How Much Are Getty Images on Squarespace Pricing and Licensing Information for Squarespace Users
Frequently Asked Questions
Here are some commonly asked questions about overlaying images in Preview on Mac, along with helpful answers:
- Can I overlay more than two images in Preview? Yes, you can overlay multiple images, but each one must be pasted individually and adjusted in size. Keep in mind that Preview is not a professional image editor, so it can get a bit tricky with too many layers.
- Why is my second image not appearing after pasting it? This could be due to the image being pasted off the visible area of the screen. Try zooming out or dragging the pasted image back into view.
- Can I adjust the opacity for both images? Unfortunately, Preview only allows you to adjust opacity on one image at a time. However, you can experiment with other tools or apps if you need advanced blending features.
- Is there a way to undo changes in Preview? Yes, Preview supports the “Undo” function. Simply press Command + Z to undo your last action if you make a mistake.
- Can I use Preview for professional image editing? While Preview is excellent for basic editing and overlays, it's not designed for high-end professional editing. For more advanced tasks, consider using apps like Adobe Photoshop or Affinity Photo.
If you still have questions, feel free to experiment with Preview or search online for additional tips specific to your needs.
Conclusion on Overlaying Two Images in Preview
Overlaying images in Preview on Mac is a simple yet powerful technique for creating unique visual compositions. Whether you’re a beginner or someone who needs a quick solution, Preview offers a straightforward way to combine images without installing any extra software. With the steps we've covered—opening images, using the Markup Toolbar, adjusting transparency, and saving your final work—you can easily create beautiful layered images for your personal or professional projects.
While Preview might not have all the advanced tools of professional image editing software, it’s more than enough for basic overlays and quick edits. The best part is that it’s already available on your Mac, making it a convenient choice whenever you need it.
So next time you want to overlay two images, remember that Preview is a simple and effective tool to get the job done with minimal fuss!


