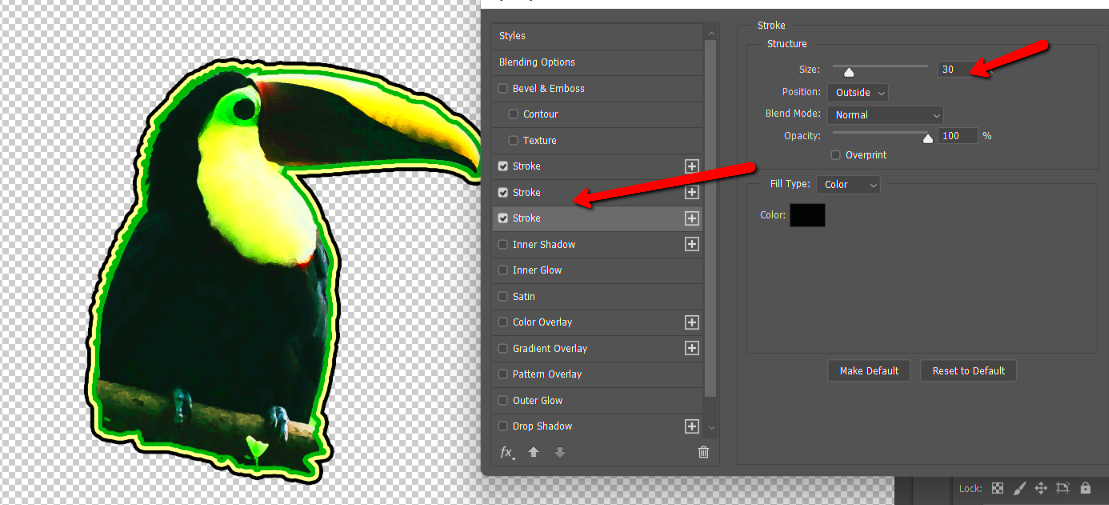
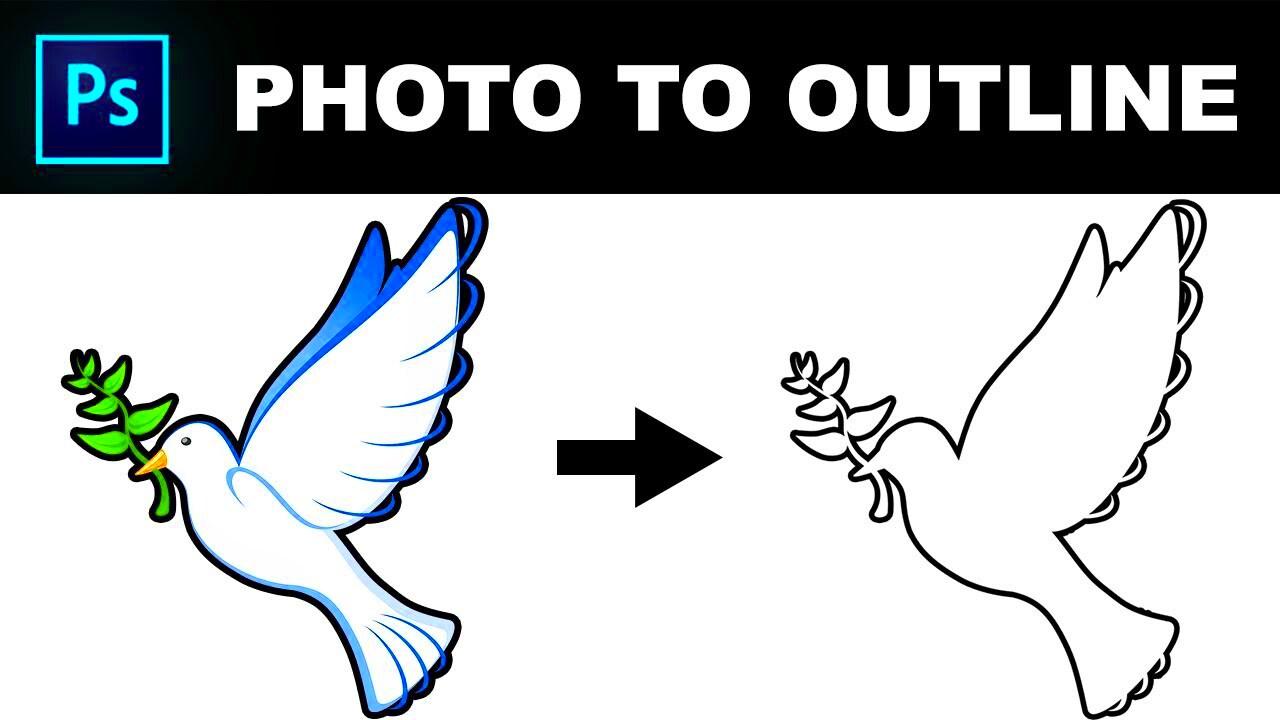
Image outlining in Photoshop involves creating a defined border or edge around an object in a photo or graphic. It’s a technique often used to highlight a specific part of an image, separate elements for editing, or make designs stand out. This process helps enhance visual focus and adds a professional touch to creative projects.
Using tools like the Pen Tool, Quick Selection Tool, or the Lasso Tool, Photoshop allows users to outline objects with precision. Whether you're working on logos, product designs, or creative artwork, mastering this skill can elevate the quality of your visuals.
Outlining is more than just tracing; it requires attention to detail and understanding of the image’s depth and dimensions. With Photoshop’s powerful features, you can create clean, smooth edges that make your work look polished and professional.
Why Outlining Images is Important

Outlining images is essential for a variety of reasons, especially in design and photography. It’s not just about creating borders; it’s a tool for enhancing visuals and delivering clear, impactful messages through your work.
- Highlight Key Elements: Outlining helps draw attention to specific parts of an image, making them stand out.
- Professional Presentation: Clean outlines give images a refined and polished appearance, perfect for portfolios or marketing materials.
- Flexible Editing: Once outlined, elements can be easily separated, moved, or modified without affecting the rest of the image.
- Improved Clarity: Clear outlines help differentiate objects, especially in cluttered or busy backgrounds.
Whether for branding, advertisements, or personal projects, outlining ensures your visuals are not only attractive but also effective in delivering your message.
Also Read This: eBay Excellence: Attaching Photobucket Images Made Easy
Steps to Prepare Before Outlining

Before you begin outlining an image in Photoshop, a little preparation can go a long way in ensuring the best results. Here are some key steps to get started:
- Select the Right Image: Choose a high-resolution image for better clarity and smoother edges.
- Set Up Your Workspace: Open Photoshop and organize your tools. Enable panels like Layers, Properties, and Tools for easy access.
- Duplicate the Layer: Always work on a duplicate layer to preserve the original image.
- Zoom In: Use the zoom tool to focus on the details for precise outlining.
- Choose the Right Tool: Decide whether you’ll use the Pen Tool, Quick Selection Tool, or another option depending on the complexity of the image.
By preparing well, you set the stage for a smooth and efficient outlining process. This also minimizes errors and makes your work look professional from the start.
Also Read This: How to Download Images from Behance Saving Your Favorite Graphics and Photos
How to Outline an Image in Photoshop

Outlining an image in Photoshop is a straightforward process once you get the hang of the tools and techniques. Let’s break it down into simple, manageable steps:
- Open the Image: Launch Photoshop and load the image you want to work on.
- Duplicate the Layer: Right-click on the image layer and select “Duplicate Layer.” This ensures your original file remains untouched.
- Select the Object: Use tools like the Quick Selection Tool, Pen Tool, or Magnetic Lasso Tool to outline the object. Adjust the tool size and settings for better precision.
- Refine the Edges: Go to Select > Modify > Expand or Feather to smooth out rough edges and create a more natural outline.
- Create the Outline: With the selection active, go to Edit > Stroke. Choose the outline width, color, and position (inside, center, or outside) to customize the look.
- Save Your Work: Save the file in your desired format, such as PNG for transparency or JPEG for regular images.
Experimenting with these steps helps you adapt to different project requirements. With practice, you’ll master outlining even the most complex shapes.
Also Read This: How to Use Estockphoto to Get High-Converting Images for Your Website
Tips for a Professional Finish
Creating a polished outline requires more than just following the basic steps. Here are some expert tips to give your outlined images a professional touch:
- Use High-Quality Images: Always start with high-resolution images for smoother and more detailed outlines.
- Experiment with Colors: Choose outline colors that complement or contrast with the image for better visibility.
- Adjust Opacity: For subtle effects, reduce the opacity of the outline layer to blend it with the image.
- Layer Effects: Add layer styles like shadows or glows to enhance the outlined object and give it depth.
- Keep It Consistent: Use the same stroke width and color scheme across multiple images in a project to maintain uniformity.
Paying attention to these details ensures your final output looks clean, professional, and visually appealing.
Also Read This: Reducing Wave Noise in Images: A How-To Guide
Common Mistakes to Avoid
Even experienced designers sometimes make mistakes when outlining images. Here’s a list of common pitfalls and how you can avoid them:
- Skipping the Duplicate Layer: Always duplicate the layer before making edits to avoid losing your original work.
- Using Low-Resolution Images: Working with low-quality images can lead to pixelated or jagged outlines.
- Ignoring Edge Refinements: Forgetting to refine edges can make the outline look rough and unprofessional.
- Overcomplicating the Outline: Using excessively thick or detailed outlines can overwhelm the image. Aim for simplicity.
- Forgetting to Save Properly: Always save in the correct format, like PNG for transparency or PSD for future edits.
Avoiding these mistakes will save you time and ensure your outlined images look sharp and polished.
Also Read This: Choosing the Perfect Camera for 123RF: Selecting the Ideal Equipment for Stock Photography
Frequently Asked Questions
Here are answers to some common questions about outlining images in Photoshop. Whether you’re a beginner or an experienced user, these tips can help clarify your doubts:
- Which tool is best for outlining in Photoshop?
The Pen Tool is ideal for precision outlining, while the Quick Selection Tool works best for quicker tasks. For images with complex edges, try the Magnetic Lasso Tool.
- Can I change the outline color after creating it?
Yes! Select the outline layer, go to Layer Styles, and use the Color Overlay option to adjust the color.
- How do I outline only a part of the image?
Use a selection tool to highlight the specific area you want to outline, then follow the outlining steps. This keeps the rest of the image untouched.
- What file format is best for saving outlined images?
Save in PNG format for images with transparent backgrounds or PSD if you want to keep editing later. Use JPEG for general purposes.
- How can I make the outline smoother?
Use the Feather or Smooth Edges options in the Select menu to reduce harsh lines and achieve a more professional finish.
If you have further questions, don’t hesitate to explore Photoshop’s help section or experiment with the tools to find what works best for your project.
Conclusion
Outlining images in Photoshop is a powerful skill that enhances your creative projects, whether for professional or personal use. With the right tools, techniques, and tips, you can create clean and eye-catching designs. Remember to practice regularly, refine your edges, and keep your workflow organized for the best results. Happy designing!


